4.8/5 — (37 votes)
Hello everyone, well, I continue the topic of knitting. In the last post we made cute and funny dogs, if you don’t remember, take a look here. Since now it’s winter outside, I again wanted to please you with something unusual, for example, a warm and beautiful scarf, under such an interesting name as snood.
I think not, or rather I am sure that many are already familiar with it. Indeed, recently it has filled absolutely all the stores in our city, even now you can find this decoration not only on women, but also on children and men.
And all because, after all, in winter you can’t go anywhere without such a luxurious item, otherwise you can get seriously ill. A snood, or otherwise called a collar, will easily fit on your neck and shoulders, and perhaps even cover your head, depending on which one you prefer.
I remind everyone that all materials in this article are taken from free sources on the Internet. Therefore, if you have any suggestions, write your comments, I will be happy to answer them. And also, I promise you that after a while I will present you with crochet models, so I recommend adding the sat to your bookmarks and looking through it sometimes so as not to miss something new and interesting.
Historical reference
The very idea of wearing a scarf around the neck for warmth dates back several thousand years. Thin women's head scarves were worn back in Ancient Rome. The famous terracotta warriors from a Chinese burial over two thousand years old wore scarves around their necks.
In the Middle Ages, women used a ring headband to style and decorate their hair (in some cultures to cover their hair). The economical snood headdress gained popularity during the Second World War.
The progenitor of the modern voluminous snood can be considered a knitted tube - a hat-scarf, which was extremely popular in the 80s of the twentieth century.
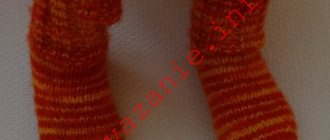
Making your own snood cord
Often when working with thick yarn, you may encounter that the fabric comes out too dense, stiff and heavy. In addition, a skein usually contains 100 grams, and there are very few meters (no more than 70-100 m), so you have to buy much more material than would be required when using thin yarn.
There is a great solution for thrifty knitters: knit a thick thread (actually, a cord) with your own hands. The following video offers a very sensible and understandable master class that allows you to complete the job in just a matter of minutes (or hours, if there are several skeins).
The sequence of actions and knitting on fingers is extremely simple:
- Weave the thread twice around several fingers on your left hand. Depending on the desired width of the finished cord, the loops are thrown on two, three or four fingers;
- Remove the loop that is closer to the palm by threading it through the second (which wraps around the finger closer to the upper phalanx);
- There is only one loop left on the fingers;
- Braid your fingers with thread a second time, now the new loops are close to the edge;
- Remove the loops that previously remained on the hand (repeat step 2).
Using this method you can get a cord of any length. Now all that remains is to weave or knit the desired scarf according to the instructions outlined in the previous paragraph.
Warm partner
A traditional snood is knitted with large decorative knitting from thick wool yarn. Even novice craftswomen are quite capable of knitting a snood on thick knitting needles with coarse knitting.
The diameter of the pipe should be large enough to be wrapped twice around the neck and, if necessary, cover the head like a hood. A snood usually covers not only the neck and head, but also the shoulders - those parts of the body through which the most heat is lost.
General recommendations for knitting
Recommendations:
- To knit a short snood, you can use circular knitting needles to make it seamless. A long snood is easier to knit like a regular scarf, and then sew it.
- Particular attention should be paid to the density of knitting. It should not be different, otherwise the width of the finished product will be uneven, which can spoil the appearance.
- The main difficulties arise with knitting in stockinette stitch, as the edges of the product curl. Therefore, scarves are usually not knitted with this pattern, but you can try the following techniques:
- To avoid such a nuisance, you can make stripes of 3-5 loops with a pearl pattern along the edges of the product.
- Another option from folding is to crochet the finished product around the edges. To do this, you can choose simple single crochet stitches, or a “cross stitch”.
The main thing is to correctly calculate the crochet density so that the fabric does not tighten, but also does not create unnecessary waves. Usually, along the width, one stitch is knitted in each loop, and along the long side, two stitches are knitted in a loop, or alternated with one stitch or two as needed.
- The finished product can be thoroughly steamed, or wet and stretched on the base. But here you need to take into account what yarn the scarf is knitted from and whether such processing is acceptable.
- For winter scarves, you can make a two-layer version by sewing two fabrics knitted with stockinette stitch together.
- It is most convenient to calculate the required snood length using the table.
Universal addition
The value of the snood is not only in its functionality. This is a large universal item of clothing that can be combined with clothing in various styles - sports, casual, classic, minimalism, youth, unisex, romantic.
A large scarf serves as either a bright accent or a neutral addition to a catchy, stylish outfit.
Snood braids with knitting needles for beginners
The trend for the coming year is braids, and all kinds of them. For those who know how to knit them, you can take any option as a basis and knit them in the form of an unusual scarf or collar.
Choose any pattern and experiment.
The complex diagram was published in Vesta magazine, I still have this note.
The Celtic braid looks very impressive.
This selection of diagrams and drawings may still be useful to someone.
Well, another simple option in a unisex style is suitable for girls and women of any age.
Stylish decoration
A large ring scarf is not always worn for warmth. Thin openwork items will replace a shawl or stole and will be useful on warm spring days or as decoration for a dress. Thin silk models can protect delicate skin from the scorching rays of the sun in the heat.
If an elegant snood is crocheted, it will serve as a decoration for an evening dress, and for brave girls it will replace a blouse or dress. A warm large tube scarf will successfully replace a bolero, cape, hood, cape.
Note!
- Knitted raglan - step-by-step instructions, patterns, recommendations. Photo review of the best works and new products from craftswomen
- Knitting a shawl - step-by-step instructions for making a shawl with your own hands. Tips for beginners on knitting + photo reviews
Amigurumi ring ⭕: features of the amigurumi technique. Step-by-step DIY master class with simple knitting patterns + 180 photos
A lush snood to a certain extent replaces fur collars on traditional outerwear - it simultaneously decorates and insulates coats and jackets.
Video: DIY scarf
In this way, you can make various scarves, snoods, and collars without knitting needles. These are voluminous warm things that can be knitted, even without knitting needles, literally within 30-40 minutes. Original, fashionable and unusual things will make their owners stand out from the crowd. And connecting them, as is clear from the video, will not be difficult. Even if you have to interrupt your work (for example, you urgently need to go somewhere), this hand knitting allows you to transfer the fabric from your hand, for example, to a plastic bottle, and when you return, continue again.
Modern trends in snood styles
Any wardrobe items change over time and under the influence of omnipresent fashion. Current trends in snood styles and patterns:
- voluminous models of coarse simple knitting from thick wool yarn (or its imitation);
- thinner models with complex convex patterns of braids, cones, etc.;
- openwork products made of fine and superfine wool, knitted and crocheted;
- elegant openwork items made of silk and shiny viscose, with a beautiful pattern or even imitating lace. Crochet is becoming more and more fashionable, but circular stoles knitted on knitting needles are not losing their positions.
The hit of the season is the two-turn snood clamp
I suggest knitting a seamless option in two turns using this regular pattern.
You can even knit in three turns if your yarn is light and airy.
Or use garter stitch.
Fashionable colors and texture
The color scheme changes. Scarves in neutral colors or matching the color of a coat or sweater are still popular. A stole scarf in natural colors - white, gray, sand, brown, beige, straw - will suit almost any look. Interest in black color is supported by its achromatic nature - it can be combined with clothes of any color and style.
The modern trend is to use a model of rich colors, usually in contrast to a coat or jacket. Wine, red, burgundy, terracotta, chocolate colors will suit the look in a classic or casual style.
Dark green and muted blue shades are suitable for casual style. Red, orange, blue, green, blue, yellow - for youth clothing. You can knit a snood for a girl from threads of any color - both bright and delicate pastel shades.
Sectional coloring is often used - it forms small stripes of contrasting colors or shades of the same range.
Note!
- Knitted braids: simple patterns and the best master class for creating patterns with knitting needles. How to knit braids with your own hands + photo reviews
- Knitting booties for newborns: detailed patterns for knitting booties for beginners + 150 photo reviews of the best products
Mittens - TOP 100 photos of the best creation ideas. Description of the technique + instructions for knitting mitts with your own hands for beginners
The peak of popularity is the use of bouclé and fancy yarn, ribbon, melange, yarn with cones, pendants and pompoms. This yarn can be used to knit the entire product or combine it with smooth yarn. Fringe, embroidery, rhinestones and buttons are used for decoration.
In numerous photos of knitted snood you can see all the variety of modern models.
Knitting patterns for new items 2020-2021 with knitting needles
I want to present to you the models that I liked the most, I hope that from this number you will be able to choose the appropriate option for yourself, the one that you like.
I used to knit, but now, to be honest, less and less often, because I don’t have enough time, I have slightly different interests, but of course I still have savings, these are clippings from newspapers and magazines, and publications from the Internet.
My favorite subjects and motifs are presented in these photos, if you are interested in them, then write me a comment at the bottom of the article and I will share with you the diagrams of these new products completely free of charge. I absolutely don’t mind sharing with you and giving you a piece of warmth, because in principle you can find all this yourself, but I think that if you save time, it will be great. So here's what I have.
On one site I found a delightful selection from which I myself knitted a single snood; there are also video materials there.
And these are the knitting decors that you will certainly also like, I give them right away with descriptions.
It’s this blue or you can knit a snood with cones in any other color, you can also make a hat for it as a set. A fashionable and cool combination will result:
This gray-green one is a little simpler:
By the way, now even men prefer such collars rather than scarves:
This classic version can be made in any color scheme you choose, suitable for autumn or winter, and by the way for your husband:
Here is such a rather interesting and voluminous scarf and wristbands.
Can be knitted in one large braid and satin stitch.
This bright pink-delicate shade will go well with a black coat.
It’s so white, like snow covering your head.
I can also recommend the pearl pattern, I remember often knitting it on blouses.
Basic principles of selection
First you need to determine the period for wearing the future scarf - for winter, spring, summer. It depends on this whether it will be a thick collar, a thin elegant stole or a decorative holey model made of rope yarn, which can only be worn in early autumn or spring.
Then you need to decide on its size. A one-turn snood usually has a length from 45 cm (children) to 50-60 cm for women and 60-70 cm for men. The snood, which is wrapped around the neck and head or shoulders, should have a length of up to 140 cm for adults and 100-130 cm for children and adolescents.
The height of the collar is from 20 cm for a scarf collar to 50-60 cm for a large snood, which is thrown over the head or worn instead of a poncho.
Scarf with French motifs
Using the example of one of the simple models, even a beginner will figure out how to tie a collar. Beautiful motifs will give the product a special charm. You can also always complement the set by knitting a hat or beret.
Materials for a two-color snood you will need:
- - acrylic yarn of two colors, per 100 g - 100 m. The first color - seven skeins, the second - eight;
- - knitting needles No. 4
- - a needle with a large eye for stitching
Work process:
1. Each skein is divided into two balls. 132 loops are cast on the knitting needles. The first 12 rows are cast on in stocking stitch. This principle is based on the alternation of front rows with back rows.
2. Row 13 begins by tying a thread of the second selected color. To do this, knit six loops with the first thread. Next you need to tie a different color and make 2 more loops. Then follow 10 loops in the first color, 10 in the second. Continue like this until the end of the row, the last 4 should be a thread of the main first color.
3. From 14 to 19 rows - stocking stitch with a given alternation of two colors.
4. From the 20th row, the colors change places. The knitting principle is the same as in the second stage. The pattern is repeated 7 more times. For continuous knitting without gaps during color changes, the threads need to be intertwined with each other.
5. Starting from the 28th row and 40th row, the fabric of the original main color is knitted. The remaining ends are hidden, the fabric itself is stitched with a needle.
To make the knitted item soft, it should be steamed.
Crochet or knitting needles
Snoods crocheted using any technique are popular - crocheted, knitted, by hand, with a fork. For beginners, before knitting or crocheting a snood, you need to evaluate your skills, knit samples, determine how much time it takes to knit, and only then choose a knitting tool.
A collar made of thick yarn on knitting needles can be knitted very quickly, and openwork lace made of thin thread can be crocheted only by an experienced knitter.
From bouclé yarn
To make this beautiful women's collar, you need bouclé yarn, and the simplest pattern is used - purl stitch.
Dimensions: 60 by 80 cm. Materials: — Pela yarn (69% polyacrylic, 17% wool, 14% polyamide, 105 met/150 g) — 2 skeins; - circular knitting needles No. 10. Density: 6.5 p. = 10 cm. Description of work: cast on 52 p., combine into a ring and purl (all sts are purl). After knitting 60 cm from the beginning, bind off the loops. Eliza Landre The next pattern for knitting a cowl scarf is called Landre Eliza. This stitch is used to knit hats, scarves and collars. There was already an article on the site with a detailed description of knitting. Follow the link under the photo.
Read more
Beginning of work
Before knitting a snood with knitting needles, you must complete the sample. The dimensions of the sample should be more than 10x10 cm, and in width for a large pattern - at least one repeat. The sample is washed in warm water, dried on a towel and steamed through a damp cloth with an iron.
This operation is performed because many of the threads shrink after washing or seem to lengthen. Now the sample is ready to calculate the loops - we measure the sample, calculate the number of loops and rows, calculate how many loops and rows are in the 10x10 cm sample. Then we calculate the number of loops that need to be cast on for the snood.
The number of rows can be adjusted during the knitting process - and if the number of loops is incorrectly calculated, the scarf will have to be unraveled and re-tied.
Openwork scarf-collar knitted
It seems that on this model the pattern is not openwork, but looks openwork, so I took it here.
You can also knit such a gentle and pleasant soft scarf from angora or other yarn.
If you are looking for a delicate and very soft option, then you will love this new product, which is seamless and looks cool!
Simple models
The simplest but most effective patterns are knitted on ring needles. The number of loops is calculated based on the fact that the snood is knitted crosswise in one piece. The length of the panel must be divided by 10 and multiplied by the number of loops in a 10 cm sample.
There is no need to add edge loops - they will not be needed. Before tying a snood, read the description carefully.
The simplest and most universal patterns are elastic bands: 1x1; 2x2; 3x1. Rapport (length of one pattern) – respectively 2; 4; 4 loops.
With cones and leaves
The next knitting is for a collar with a pattern of cones and leaves.
A chic model that will immediately attract attention. But the work will only take a couple of evenings. Dimensions: 38 by 94 cm. Calculation provided for yarn with parameters 80m/50g (for example, Lana Grissa Bingo Melange) and knitting needles No. 4.5. Consumption 450 g. Density: 19.5 p. = 10 cm. Knit the leaves pattern according to pattern B (in Fig. A there is a long highlighted rectangle). On the wrong side of the loop and yarn over, knit purlwise. Start with one p. and in the 1st r. Using yarn overs, add 2 stitches (= 3 stitches). Repeat the same in the third and fifth rows. (=7p.). From the ninth day Decrease 1 stitch on each side according to the pattern until 1 stitch remains.
Bump pattern: knit according to pattern A. Start with stitches in front of the arrow, then repeat repeat stitches constantly, ending with an edge stitch. Repeat in height first from the 1st to the 46th row, then from the 3rd to the 46th row.
Pattern for knitting a headband with knitting needles. Cast on 152 stitches and knit 2.5 cm (= 6 rubles) with a shawl pattern (all stitches knit) and 2 rows. knits.stitch (knits.r. - knits.st.; purl.r. - purl). At the same time in the first person.r. after the third loop and 29 times after the fifth stitch, add one crossed loop each (= 182 stitches). Then continue with the main pattern of cones and leaves (= 6 repeats). After you tie 90 rubles. (=33cm) from the beginning of knitting the pattern, finish with two r. knits.stitch stitch and six r. shawl pattern. In the first r. In knit stitch, decrease 30 stitches in the same rhythm as at the beginning (= 152 stitches). Sew the collar along the short sides.
We knit snood ourselves
Master class - how to knit a snood:
- it is necessary to cast on the number of loops as close as possible to the calculated number of loops and a multiple of the repeat length;
- pull out one of the knitting needles from the cast-on stitches;;
- then start knitting in the round. To do this, the first loop of the second row is knitted over the first cast-on loop;
- then knit to the calculated pipe height (calculated number of loops). The good thing about ring knitting needles is that the knitted product is very easy to try on. As a result of fitting, you can adjust the length of the future snood - tie it a little higher or lower than the planned size;
- The last row must be knitted completely;
- close the loops like this: knit two loops together, throw the wrong knitting needle over; two together, throw them over, etc. At the same time, adjust the length of the loops so that the edge approximately coincides in length with the cast-on edge;
- when the last loop remains, the thread is cut, the tip of the thread is pulled into the loop and the loop is tightened;
- The ends of the threads on both sides are moistened and carefully wrapped around the outer row so that the tip is not visible. This work can be easily done with crochet.
We knit a collar for a girl with knitting needles
For young fashionistas, it is better to knit a hat and scarf in sets. I liked two of these children's options, this one in pink and a hat with ears in the shape of a kitten in blue.
You can knit it a little differently, use the same pattern on the hat. If you want me to share this description with you, write, I will definitely answer, by the way, there is a video.
Or you will prefer this set.
I’ll post its diagram and descriptions here right away. Yarn Silkhair Lana Grossa (70% superkid mohair, 30% silk).
This concludes this post, good luck and good mood to everyone! Come visit more often. Bye!
Sincerely, Ekaterina Mantsurova
Making the task more difficult
Several of the most popular knitted snood models with descriptions are given below.
For snoods, it is better to choose double-sided patterns - then you will not have to constantly monitor the correct placement of the front side of the scarf.
“Putanka”, “rice”, “checkerboard” and other double-sided patterns look impressive in large scarves. Patent and semi-patent elastic with removed loops give the snood volume.
If Irish patterns (a combination of several types of braids) are chosen for the snood, then you should keep in mind that the braids have the effect of an elastic band and narrow the fabric. Therefore, it is necessary to make the canvas wider than calculated from the steamed sample.
The edges of the knitted pipe can be crocheted with scallops. This simple decoration will protect the edges from rubbing and at the same time decorate the snood. Crocheted fringe looks elegant.
Schemes and descriptions of new products 2020-2021
By the way, you can take absolutely any patterns and knit snoods, look how such a wonderful pattern in the form of a chain will look, just imagine.
It looks fun, doesn't it, the pattern on this crimson clamp is a little different.
Here is another variety of novelty pine cones.
And one more simple and very elegant snood.
By the way, I saw such scarves with ears, but they were all crocheted, so expect a new article soon, I will definitely share))). The kids will definitely love this idea.
In shades of gray you can create such a miracle.
Or anyone who loves openwork designs can use this description.
Photo tips on how to knit a snood
Peruvian knitting broomstick
Hand knitting, based on removing loops from a template (ruler, strip of thick cardboard) and then interlacing them with a hook, without using knitting needles, is called “broomstick”, or, in other words, Peruvian knitting. This technique will require some crochet skills.
Read also: How many governors are there in Russia?
ReadKnitting different models of long vests
A chain of air loops is assembled, and with the help of a hook, loops are formed on this chain, elongated around a ruler or template, which are subsequently intertwined and knitted in various ways. Brumstick workshops teach you how to knit various patterns, but it depends on the skill. If, for now, you can only crochet a chain of air loops and half-columns, then there are master classes on crocheting scarves on a ruler with simplified techniques. For example, such as in the following videos, which show the entire process in great detail.
Idea No. 2
https://youtu.be/https://youtu.be/Aryqzi4A16s
_
A fashionable and incredibly cozy scarf is obtained due to the voluminous pattern. It can be done in a fluffy braid without using a seam. Experienced needlewomen recommend knitting such a collar step by step in one turn.
- Cast on 60 loops in the classic way and turn them into a single ring.
- This is followed by five turns in stockinette stitch.
- Now it’s time to complete the main pattern. To begin, place 10 loops on the helper pin and place them in front. Work 10 stitches in knit stitch, start knitting an additional pin and knit 10 more stitches.
- Work in stockinette stitch for the next 5 rows.
- Make the next 10 knit stitches, transfer the next 10 to a pin, leave them at the back of the product. Knit another 10 stitches and start stitching with a pin. Before doing this, you need to remember to turn the braid over in the opposite direction.
- Now it’s the turn of the next five front rows.
- That's the whole principle of knitting such a product. The main thing is not to forget about the overlap of the braids in the main pattern. Good luck!
Idea #1
Even for novice needlewomen, it will not be difficult to make a product based on the “double rice” pattern. This motif looks unusual and voluminous, and at the same time pleases with its elementary execution. Let's get started?
- The first step is to cast on loops so that their number is even. Focus on the girth of the neck and the planned product.
- Close the ring of loops.
- The first row is made with a simple elastic band according to the principle of alternating purl and knit stitches.
- Now it would be useful to mark the last loop with a marker - this simple technique will allow you not to get lost at the beginning and end of all rows and not get lost in executing the pattern.
- The second row is performed similarly to the initial one.
- From the next row the purl and knit stitches change places. In this way, two revolutions are performed.
- The diagram shown in the photo below will help you complete the remaining rows to the desired height.
Interesting: Anti-trends in clothing 2020
Contrast of white and green
How beautiful a white snood, knitted with a completely simple pattern, looks against the background of a green sweater.
If you are just starting to learn how to knit, start with this pattern. It is made in garter stitch on two needles. To knit this easy pattern you need to know how to knit stitches. That's all! You will need: - 300 g of thread (50% wool, 50% acrylic, 100 met/100 g); - knitting needles No. 9. Since thick threads are used, you can knit a snood easily and quickly. Density: 10 p. = 10 cm. Knitting pattern: cast on 35 p. and knit 152 rows in garter stitch (all knit stitches), bind off the loops. Sew the first and last rows with an invisible seam.
Idea No. 4
The main advantage of such a scarf is its versatility. It can be worn not only around the neck - with a slight movement of the hand, the collar can turn into an elegant hood and eliminate the need to wear a hat. Don't be confused by the voluminous ornament on the product - it is extremely simple to do.
To create such beauty you will need 5 skeins of yarn, circular knitting needles sizes 5 and 5.5, markers and a curved knitting needle. Begin!
- Take size 5 knitting needles and cast on 152 stitches. The beginning of knitting should be marked with a special marker.
- Connect the loops into a single ring.
- This is followed by 9 cm of elastic. This pattern should be done this way: knit 1 knit stitch behind the back wall, and then knit 1 purl stitch.
- Transfer all knitting to size 5.5 needles.
- Carry out the rest of the work according to the diagram. It features a repeat of 38 loops, which should be repeated in width 4 times.
- Left just a little bit! Duplicate knitting points in rows 20.
- To create a 4x4 braid, slip 4 stitches onto an extra needle and place them behind the piece. Then you need to go through 4 knits on the left side and 4 on the additional one. Next time the extra knitting needle should be positioned in front of the work.
- Switch back to size 5 needles and finish with nine rows of rib.
- Cast off all the loops and pull the working thread tight.
Interesting: Fashionable long down jackets for women 2019-2020
Volume snood with braid
A voluminous snood with a braid looks picturesque and romantic. The braid imitates the weave of a scarf, creates volume, but does not overload the entire toilet.
Options for braid patterns for snood:
- One braid 1/3 the width of the scarf from the edge
- Braid in the middle of the scarf
- Two braids at the edges of the scarf
Advice. In any case, it will be harmonious if the braid takes up about a third of the width of the scarf - this way the pattern will look bright, but will not get lost.
Knitting pattern for a snood with braids step by step:
- Measure the required knitting density. Cast on 25 cm of stitches and knit the first row with knit stitches.
- Knit a row according to the following pattern: 3 cm purl stitches, 7 cm knit stitches, 10-15 cm ribbed pattern.
- Next, knit 5 cm in this way. After this, make a cross of loops from the braid, namely 7 cm of knit stitches, and then knit another 5 cm of the pattern. Repeat this until the end of the scarf.
- The scarf must be finished in the middle of the braid pattern.
- Close the last row and sew a scarf.
Snood is ready.