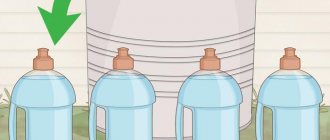
Whatever pipeline you are laying, most often you have to use taps into it for more comfortable use. In this case, a tee (fitting) made of polymer or metal helps, capable of correctly designing the junction of its branches. The article will be devoted specifically to this element, without which it is difficult to imagine the supply or drainage of water.
Tee for polypropylene pipes for water supply
What kind of music is a bass reflex suitable for?
The bass reflex is distinguished by a powerful and voluminous bass , and the frequency response in the region of the tuning frequency has a hump (a significant increase in sound volume).
Example of bass reflex frequency response
Therefore, FI is suitable for music in which there is a lot of slow bass, where low frequencies are the basis of the compositions . Choose a bass reflex if you like dubstep, triphop, other slow electronic music, rap, R&B, etc.
Note: the bass reflex setting is the frequency at which the frequency response peaks, and is regulated by changing the length and area of the port, as well as the ratio of the port volume to the body volume.
How does a deflector work?
Let's look at the operating principle of the described structure using a simple example. This deflector has an outer (upper) cylinder and an umbrella.
The simplest deflector consists of a body (deflector) and an umbrella
During its operation the following processes occur:
- The wind carries air masses. They hit the outer cylinder.
- Then the flows swirl along its surface.
- Some of them, rising after swirling above the outer cylinder, pick up smoke from the stove. Traction increases.
- The umbrella, in turn, prevents precipitation and dirt from penetrating the heat generator.
Which speaker is suitable for a bass reflex
To choose a subwoofer for a bass reflex, you need to start from the Thiel-Small parameters (Fs, Qts, Vas). Usually this data is in the documents, but if you don’t have it, the parameters can be found on the Internet.
In order to understand whether the speaker is suitable for FI, carry out some simple calculations. Divide the Fs by the Qts and if the answer is between 60 and 100, then such a sub will be optimal for a bass reflex.
For example, the SUNDOWN AUDIO E-12 V3 speaker has Fs = 32.4 Hz, and Qts = 0.37.
Fs / Qts = 32.4 / 0.37 = 87.6 - such a subwoofer is quite suitable for FI.
If the value for your speaker is outside the 60-100 range, it may be worth finding a different design for it using this very useful plate. Please note that the table above does not prohibit the use of speaker enclosures that do not meet the Fs / Qts value. She shows options that will definitely work well.
Make a welded tee, marking an oblique equal tee
Making a reamer (pattern) for marking the elements of an oblique equal tee
Tees are used for arranging branches and connections of pipelines. To make tees, tee elements are cut out of a pipe (electric cutting machine, “grinder”) and then welded. An oblique equal tee is welded from pipes of the same diameter.
Marking of tee elements for subsequent cutting and welding is done using patterns (reamers) applied to the pipe, along which a cutting line is drawn with chalk on the pipe.
The proposed Excel table allows you to obtain dimensions for constructing patterns (reamers) of the process and holes in the barrel for the manufacture of oblique equal tees of any diameter, with any angle of inclination of the process. Enter the outer diameter of the pipe and the angle of inclination of the branch into the yellow cells of the table and you will instantly receive the ordinates and abscissas of the points for marking the branch and trunk.
Transfer these points to paronite or cardboard and smoothly connect them together. The pattern (scan) of the process is ready.
When marking a pipe, the pattern must be applied so that the generatrix of the pipe is perpendicular to the x-axis of the pattern.
We build the barrel pattern in the same way.
We place the template on the pipe so that the red line (zero value axis) is perpendicular to the longitudinal axis of the pipe, and point 10 coincides with the axis of the process.
To automatically construct life-size scans, we use a table containing a macro.
A life-size model of the appendage.
A life-size pattern of the hole in the trunk. Print, cut and use.
Based on materials from the book “Marking of welded shaped parts of pipelines”, I.Kh. Brodyansky 1963
Download trial version of the table
Upon successful payment, you will immediately receive a link to download the worksheet.
I guarantee decency!
Good luck in job!
Types of bass reflexes
The bass reflex port is the main element of the body; it can be round (pipe) or rectangular (slit).
Round port (pipe)
It is impossible to say for sure which of these ports is better. They do what is more convenient or what they like best. The only point is that in sports (sound pressure competitions) pipes are used more often , since their use makes it easier to change the bass reflex setting by changing the length of the port.
Separately, it is worth noting this type as a passive radiator. A passive radiator (more correctly, a passive reflector) is the same bass reflex and the principle of its operation is the same. It is used in cases where the desired port for the FI does not suit the dimensions. A passive radiator uses a speaker without a magnetic system instead of a port .
Operating principle of a passive radiator
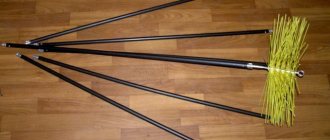
Two types of rotary bends in plumbing, which can be used to make any angle in a couple of seconds. No tool
A fairly reliable, but also very rare option is a ball swivel bend.
This is a rotary bend with a ball. Diameter 110 mm. Photo by the author This is a rotary bend with a ball. Diameter 110 mm. Photo by the author
To meet him in an ordinary plumbing store is out of the realm of fantasy. Rotation occurs due to the ball joint. Very convenient and at the same time reliable. Available in diameters of 50 mm and 110 mm. I have never seen the 40 mm size, although this is also sometimes needed in work.
This is another type of rotary elbow - with a union nut. Such a tap performs similar tasks, but its device is different. In its design, the main element is a plastic cap nut; to change the angle, you need to loosen it, make an adjustment and tighten it again. This is also a good option for your tasks. With such a 50 mm outlet you can, for example, connect a shower tray. Auger is a good option for your tasks. With such a 50 mm outlet you can, for example, connect a shower tray.
Photo by the author Photo by the author
Also a good option for your tasks. With such a 50 mm outlet you can, for example, connect a shower tray.
Photo by the author Photo by the author Photo by the author Photo by the author
And a 110 mm outlet connects the toilet.
They look very brutal))) Photo by the author They look very brutal))) Photo by the author
The rotary outlet is designed simply. Just like “American” (that’s what a detachable connection is called in plumbing, after the place where it was invented). When disassembled it looks like this.
Photo by the author Photo by the author Photo by the author Photo by the author
How not to do it. Or rather, it is not recommended. But, of course, they do and will continue to do so.
If such a universal solution is not at hand, then installers usually get out of the situation by connecting two ordinary angles by 90 degrees to each other, obtaining the desired non-standard angle. But this is a bad decision, because the more angles, the worse, the higher the risk of blockages in the pipes. The more connections, the higher the risk of leakage. And so on. I'm not even talking about the aesthetic component, when the toilet is connected using two corners with a diameter of 110 mm - it looks really scary))) And this is often visible, it is not sewn up, but remains open.
Some installers, without further ado, use plastic corrugated pipes to make their work easier; they bend in any way, and there are no problems with them during installation, even if an unusual angle is needed. But the corrugation has one big drawback - it clogs well, I don’t recommend installing it on the sewer, except perhaps for your worst enemy, but certainly not for yourself or your dear clients. It’s better to get by with two corners than with corrugation.
Watch a video about how rotary bends with a ball and a union nut are constructed here:
If you liked the article, like and subscribe so as not to miss new publications.
Peculiarities
Materials
Requirements for materials and assembly are standard. The bass reflex box must be strong, sealed and not vibrate. Material - plywood or MDF from 18 mm. and thicker.
Please note that all wire entry channels, terminal blocks, etc. must be reliably sealed , internal partitions (port walls) must not have any gaps .
Rounding of the bass reflex port
If the slot port is long and has turns, then stagnation zones may appear in the corners; to avoid this, the bends are smoothed out - as a result, efficiency increases, since the resistance to air movement decreases . It is quite difficult to determine the improvement in quality by ear, but for the fight for a high result in sound pressure, this solution works.
Port smoothing options
The ends of the ports can open up, which can eliminate parasitic noise from air friction at the outlet, but this problem is not common. Also, due to the openings at both ends, the tuning of the port (bass reflex) is lowered, or its length is reduced. That is, for the same setup, a port with extensions at the ends will be shorter than a straight one and will take up less volume.
Flange manufacturing technology. or how to open the bass reflex pipes
Share the technology for making flanges, who does it how, what pipes they use, different diameters, any methods. I myself managed to stretch a 100mm pipe only to 140mm, then it breaks, I used a pipe with both 2.2mm walls and 3.2mm, everything is smooth, but I would like 180-200mm as in the photo.
Attached images
Digi S
Try putting 12 tires on a 14 rim. What will happen? It will probably break.
And so - 140 is a normal flange. Why more?
Take 100mm and stretch it to 140, then take 140 and stretch it to 180, then cut off the required piece from the second and connect it to the first.
Another option is to tear (or better yet, carefully cut and pull until 180, after which carefully heal the cuts.
It’s easier then to sculpt any size and shape from the field of ether. You just need to make a matrix.
I have thermoplastic plastic that can be given any shape, about 1.5 m2, if anyone is interested, please contact me, the thickness is somewhere around 3 or 5 mm, I don’t remember exactly
a must-have item for sound engineers
I stretched it to 160-170mm without problems, the main thing is to cut the pipe straight, I ordered a blank from a turner
Gens
In the meantime, TS is not interested. I would like to answer at least once.
engineer You're wrong, interesting. Work, not enough time, finished the excrement, so I decided to write back. Thanks everyone for the advice. After reading the topics on the bass club and your advice, we managed to stretch it to 155mm, but the shape is not the same, it turned out to be a cone. pulled it onto the lampshade. It was decided to use a pipe with a wall thickness of 2.2mm because... showed the best result 155mm. I decided to make a blank of the correct shape, the target was 170mm, today I cut circles with a diameter of 180mm from 16mm plywood, coated them with PVA and clamped them in a vice. In the morning I’ll go to Kulatov to look for a turner who can turn out a blank for me. As soon as I finish, I’ll post what happened along with the photo Gens Could you tell me where you turned it?
Why take PVC pipe as a basis?
Until recently, wood or metal was mainly used to make a greenhouse frame. Both of these materials have significant disadvantages.
Tree:
- short service life;
- low strength.
Metal:
- heavy weight;
- high cost;
- complexity of the work (welding is required, you cannot do without an assistant).
Wooden structures do not tolerate high humidity that is created in a greenhouse. The metal profile is expensive, it rusts over time. Both wooden and metal structures need to be painted periodically.
Plastic water pipes turned out to be an almost ideal material for construction. Anyone can make a PVC greenhouse with their own hands. They are durable, not afraid of the sun and precipitation, do not require painting, are elastic and retain their shape well. In addition, they are much cheaper than metal. Most private greenhouses are made from them.
Do-it-yourself greenhouse. How to make a greenhouse in the garden for cucumbers
To work with metal and wood, qualifications are required. Metal structures are connected by welding, they have to be cut with a grinder. To bend along a radius, special devices are needed. Due to the severity, it is impossible to do without at least one assistant. Not everyone can handle welding on their own.
Wood also requires at least minimal experience. It must be treated to protect it from rot, fungus, and insects. It is difficult to make a greenhouse with an arched vault from boards. Just like with metal, installation without an assistant is difficult.
But making a greenhouse yourself from plastic pipes is easy for one person in a very short period of time. Such rods bend easily without breaking.
It is enough to anchor one end to the ground so that it maintains a perfect dome shape. Fittings such as double and tee are suitable for connection. To do this you will need a pipe soldering iron or PVC glue. It is also possible to connect using clamps and self-tapping screws.
Photo gallery: ready-made options for awnings made of profile pipes
A gable carport is also suitable for a car.
A lean-to shed with trusses is the simplest option.
A canopy made from a profile pipe is also suitable for firewood
A flat canopy should be at an angle
The arched canopy over the terrace has an original look
A lightweight arched carport will be an excellent decoration for your garden plot
The canopy for rest areas can be made mobile
A canopy made from a profile pipe is multifunctional. It can be a good replacement for a garage. Its production is accessible even to non-professional welders. Also, such a canopy does not require large financial investments. Owners of country houses and full-fledged country houses should pay attention to this.
Making and installing a deflector with your own hands
Let us take Grigorovich's classical construction as an example. The technology for its creation is simple.
Drawing the deflector details
First, let's make a drawing.
The sketch of the deflector can be drawn with a pencil, but it is important to transfer all the dimensions of the device onto it
Dimensions are assigned in proportion to the diameter of the chimney D:
- We take the height of the entire product to be approximately 1.7 x D;
- The diameter of the cap at the base is considered equal to 2 x D;
- make the height of the cap about 5 - 7 cm;
- the larger diameter of the diffuser is also taken to be 2 x D;
- We consider the smaller diameter to be equal to the diameter of the chimney;
- We take the height of the diffuser equal to 1.3 x D.
We assign other sizes at our own discretion - as is more convenient.
Required Tools
To work we will need the following tools:
- metal scissors;
- hammer;
- pliers;
- rivet gun;
- roulette;
- pencil;
- cardboard;
- compass.
The material used is galvanized sheet 0.8 mm thick.
Step-by-step guide to assembling the deflector
The instructions for making the Grigorovich deflector are as follows:
- On cardboard we draw in full size all the developments of the three elements of the product. To do this, take the drawing and mentally unfold the diffuser, pipe and cap on a plane. How to do it? With the pipe, everything is clear - you get a rectangle in which one of the sides is equal to the circumference. But with cones it’s more difficult. For them, take the value of the base radius R and the length of the inclined side L. Then the sweep angle is equal to 180 x (R/L).
The sweep angle is calculated using a fairly simple formula
In order to check the correctness of cutting, first the model can be assembled from cardboard
Using metal scissors, you can carefully cut a galvanized sheet according to the markings.
By folding the blanks, we give them the intended shape. We fasten the closed edges using tapes and rivets or bolts and nuts. We simply overlap the closed edges of the pipe. Next, we fix the resulting assembly with the selected fasteners.
Finished parts are fastened with rivets or bolts
Required Tools
To work you will need:
- hammer,
- a screwdriver or screwdriver for working with self-tapping screws;
- tools for cutting PVC pipes: special scissors, a hand hacksaw for metal, a jigsaw;
- if fittings are used to connect PVC pipes, you will need either a pipe soldering iron or plastic glue.
To tighten the screws, it is best to use an electric screwdriver. Either battery-powered or wired, if there is somewhere to extend the carrier from. Screwing screws with a screwdriver is very inconvenient and time consuming - it will take a lot of time. A screwdriver allows you to tighten fasteners with one hand while holding the structural elements with the other. This allows you to work independently.