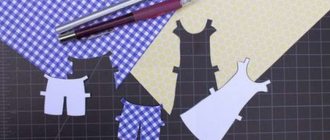
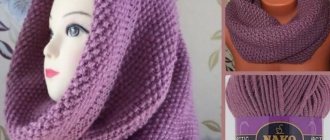
Flowy fabric dress
Prepare the fabric. Its size depends on your height and build. Therefore, it is necessary to measure the desired height. It is measured from the armpit to wherever you want (above, below the knee). And the width should be such that you can wrap the fabric 2 times.
The fabric for this product is selected to be light, flowing, it is better that it stretches. You should not use cotton fabric.
Thus, it turns out to quickly sew a dress without a pattern. Finish all edges of the product and, if desired, overlay with a seam. Thin straps are sewn onto 2 corners.
The whole dress is ready, all you have to do is wrap it around it and you can go to the beach.
First, the first strap is put on, then the dress is wrapped around the body and the second strap is put on. If desired, you can add a beautiful belt.
Sweatshirt pattern
The “Metamorphoses” sweatshirt fits perfectly with the trousers I mentioned above. The pattern is given for sizes from 36 to 60, for 4 heights.
Sewing such a sweatshirt will not seem difficult for a beginner if you follow the instructions, which, moreover, will help you find out the fabric consumption.
Choose fabrics such as thick knitted fabrics, fleece, polartek.
Knitted dress
Knitwear is perfect for this option. In order to make the top blank, you can use a comfortable loose T-shirt. The skirt is taken to the bottom.
Thus, carefully place the T-shirt on the folded fabric and combine it with the skirt. Make notes. Don't forget to leave 0.5-1 cm for allowances.
Now you need to cut and sweep the blank, sew all the seams (shoulders and sides) and a simple dress without a pattern is ready.
Note!
Knitted raglan - step-by-step instructions, patterns, recommendations. Photo review of the best works and new products from craftswomen
- Knitting a shawl - step-by-step instructions for making a shawl with your own hands. Tips for beginners on knitting + photo reviews
- Amigurumi ring ⭕: features of the amigurumi technique. Step-by-step DIY master class with simple knitting patterns + 180 photos
Fabrics for hoodie dress
For beginners, sewing a dress with your own hands will be simple from materials that do not require special skills. The canvas should not crumble, stretch, or deform. Experienced seamstresses can choose more demanding options.
What fabrics can you sew from easily and simply, without patterns:
- calico;
- linen;
- cotton;
- knitwear;
- atlas;
- crepe;
- satin;
- Jersey;
- openwork;
- viscose.
- Niagara.
For a hoodie, dense, breathable fabrics that have almost no stretch are more suitable. Fabrics that drape well are not needed here either. It is better for the dress to hold a baggy shape than to fit your figure.
It is important to pay attention to the transparency of the fabric. It should not be see-through, otherwise you will have to add a lining, which is undesirable for summer dresses.
It is acceptable if the hoodie dress wrinkles a little when worn. The piece of fabric is large, so there may be small creases. It is better to choose natural fabrics for the summer that allow air and moisture to pass through well than to wear a synthetic bag without a single crease or unironed area.
Canopy dress
This is the so-called canopy dress. Stretch fabric works great.
The dimensions of the canvas are approximately 130-150 cm.
Fold the fabric four times. Measure your hips. Measure from the side where the fold is 1⁄4 of the measurement and add a couple of centimeters for a loose fit.
Then you need to mark the vertical to a height of 0.5 m. Open the folded fabric and stitch on the resulting segment. The corners should be drawn with a semicircular line.
Excess fabric should be cut off. Mark the neckline 5*30 centimeters. Finish all seams. The dress without a pattern is ready. For summer clothes, light, breathable fabrics are suitable.
Tunic
This option can be used as a tunic or as a separate item. First you need to decide on the choice of fabric. Fold it in half (right side to right side) and iron it.
Note!
- Knitted braids: simple patterns and the best master class for creating patterns with knitting needles. How to knit braids with your own hands + photo reviews
- Knitting booties for newborns: detailed patterns for knitting booties for beginners + 150 photo reviews of the best products
Mittens - TOP 100 photos of the best creation ideas. Description of the technique + instructions for knitting mitts with your own hands for beginners
Mark: set aside the length of the product (100 cm), width (1/2 of the hip volume - 27 cm), 1⁄2 of the chest volume (25 cm), length from shoulders to waist (55 cm), neckline (28 cm down) and 11 cm to the left, connect the neckline with a smooth line), shoulder (step back 5 cm from the top edge and draw a shoulder line).
You need to cut out 2 such parts. Sew all seams and finish the neckline. Sew an elastic band or thread a beautiful ribbon onto the waist line.
Pareo pattern
People usually start sewing with an apron; this is exactly how it was in home economics classes at school. We'll start with the transformable pareo.
The pareo pattern is very simple, it consists of two pieces of panels and a belt. The only difficulty that may await you is the correct choice of fabric. Be careful, choose light, thin, translucent fabrics, natural or mixed in composition.
Pay special attention to ease of processing; it is better if the fabric does not slip and crumble. This will make it easier for you to deal with it. The instructions will help you with sewing technology.
Fee for plus size ladies
This dress is for plus size people without a pattern; it will help hide all imperfections and highlight beautiful shapes.
For the upper part of the product you will need a piece of 1.5 m, leave 10 cm for the length from the shoulders to the waist. Fold the fabric in half and cut it.
Leave 30 centimeters for the width of the sleeves. Set aside 50 cm from the bottom contour of the product.
The distance between the two sleeves is 1⁄2 the size of the hips + 10-13 centimeters. Finish the sleeves with double stitching and make a drawstring. Make a beautiful satin ribbon.
Finish processing the skirt. Sew and finish all seams. Create beautiful and even folds on the waist line.
Sew two parts of the dress. Sew the hem with a double seam. Overlog all seams.
The dress with a chic floor-length skirt is ready.
How to take measurements correctly?
The measurements are easy to take, the main thing is to get used to it. How to do this, our expert Yuri Podayko (Giorgio Gio) tells us:
First measurements: from the extreme point of one shoulder to the extreme point of the other shoulder. Add 13 cm to them on each side. Then a rectangle is cut out, which will be the back of the dress.
Second measurements: sleeves. Measure your arm at its widest point, just above the biceps. Usually this is a standard size of 25 cm. Another 15 cm is added to it.
Third measurements: front. It is cut out in separate pieces. 33 cm is the distance from the center to the shoulder, plus 14 cm at the waist line is added for overlap. This measurement is taken from the shoulder. With a standard height of 170 cm, the result is 42 cm.
Total: 2 m 40 cm - these are two lengths of the dress; 3 cm are added to the side and shoulder seams; 10-15 cm on the lower part; For the seam at the bottom of the sleeve, leave 5 cm, and for stitching and sewing in - 3 cm each.
Shirt dress
Prepare a shirt (preferably 2-3 sizes larger). A master class on how to make a dress without a pattern will help you update and diversify your wardrobe.
Let's consider as many as 2 options for making simple dresses from an ordinary men's shirt. These options are distinguished by their ease of manufacture.
Doesn't require much effort. No patterns are used. All you need is patience and maximum imagination.
Choose products made from cotton or linen fabric.
In order not to do unnecessary manipulations, it is better to purchase shirts made of dense and non-transparent material.
Dresses can be decorated to suit every taste. For example, sew on beads or rhinestones, or maybe you decide to hang a beautiful new brooch; embroidery elements will also look beautiful.
What fabric to choose for the dress?
Suitable fabrics for the dress: wool, twill, satin weaves, thick viscose, knitwear.
Wool is used to sew warm products, and viscose will be needed when creating dresses for warm weather.
The stores have a large assortment, so feel, touch, look at the composition and choose the fabric that you like best.
Buy fabrics at wholesale stores, because they cost half as much there as in stores.
If you want, you can safely experiment with different fabrics and purchase several at once, for example, thick and light. Make two dresses for different seasons or give the second one to a friend!
Decatting - washing and steaming the fabric before sewing - is important as the fabric can shrink by 20%. Therefore, wash it first so that the finished dress does not unexpectedly turn from a midi into a mini.
First option
- The most suitable fabric option is linen.
- Take waist measurements.
- The neckline of the dress will be V-shaped.
- Determine the highest point of the cutout, where the straps will be located.
- Now you need to find the lowest point. It will define your cleavage.
- If the shirt has a pocket, it should be cut off.
Where to begin:
From the top button on the shirt, measure down to the lowest point of the neckline. Approximately 19 centimeters. Decide on the waist width. To do this, you need to take 1⁄2 of your waist size + 2-3 centimeters. From the waist up, draw 18 centimeters. This is where the armhole will come from.
Measure 11-12 cm from the buttons. The straps will be located here. Connect all the marks together. It begins, an outline emerges. From all marked lines, retreat 1-2 cm to the seams.
Now you need to cut: along the waist line, along all marked lines. Now start processing the back. Draw a line 18 cm from the waist.
Cut along the line, leaving 1-2 cm for seam allowances. You should have 2 pieces for the top. Place them right side together and sew.
Make undercuts. This is done to ensure that the top fits your figure.
Draw a line at the level of the straps. Divide in half. Draw a line. You should get a triangle. The resulting line needs to be stitched. Now all the edges of the top need to be folded 2 times and stitched on a sewing machine.
Now you need to make the straps. They can be made from a sleeve. The width of the strap is approximately 2-3 cm. Fold the edges of the strip towards the center and bend it in half again. Run a line along the edge. Try on the top. And at the highest point of the top, mark the location of the straps and then sew.
All that remains is to sew on the skirt. To begin, unfasten all the buttons. Use a wide seam to sew the entire length. Using one thread, gather the fabric into folds. Distribute evenly over the entire length.
Attach the bottom to the top. First, connect everything using auxiliary pins. Sew two parts. There you go!
Top pattern
We practiced on the apron, now it’s time to sew something a little more complicated - a basic top. A very successful model. The pattern for it is simple. Given for Russian sizes from 36 to 60, for 4 heights.
You can sew such a top from cotton jersey, then it will be a T-shirt for every day, and if you sew it from silk, it will be a more elegant, even evening top.
Difficulty in sewing may arise when processing the neckline. But the instructions will help you here too.
But, and that’s not all, for those who want to show their creativity to the fullest, we have a Master Class on painting this very top.
Second option
A vertical striped shirt works well for this option.
From this option we sew a dress without a pattern.
- If there are grooves on the back, they should be cut out.
- Iron the shirt.
- Cut out the area of fabric up to the sleeves.
- Remove the pocket, it will get in our way.
- Remove the sleeves for now, but they will still be needed.
Let's get started:
Fold one part of the shirt in half and draw a line 12 cm long. From this line, draw down 25 cm. Draw a straight line.
Draw a diagonal line from the armpit area to the bottom edge of the product.
Place a 7 cm mark for the armpit opening. Connect 2 dots together. Cut with seam allowances of 2-3 cm.
Now you should start processing the back. Place the 2 pieces right sides together and stitch where the line with the buttons is. Fold the piece in half. Find the mark for the armhole and at this point fold the first piece and draw a line to the second. Cut out.
Place the pieces right sides together and sew along the sides using a sewing machine and fold in all open edges. Now let's start making the straps. They are cut from the sleeve.
The straps are made according to the same principle as in option 1. Sew on front and back.
You can sew ruffles along the hem line. The dress turned out to be summery and very comfortable.
Patterns of beautiful summer dresses
Tailoring of products has recently been done from plain fabrics. Designers emphasize the figure thanks to interesting modeling techniques in the form of tucks, seams, draperies, drawstrings, undercuts, etc. This can emphasize shapes and hide imperfections.
Dress with draped waist
Draped dresses have a twisted structure at the waist. This type of clothing gives your figure an hourglass shape.
Cut out:
- DP - 60cm;
- Back;
- Before;
- Sleeves;
- Before.
Form a twisted knot in the center, in the form of a reserve of fabric between the bodice and the skirt. Sew the cut parts together, overlay and iron the internal seams.
Drawing of a draped dress
Important! To prevent the fabric from slipping when sewing, you need to cover it with a sponge on both sides.
For pregnant women with high waist
For dresses, it would be preferable to use cotton fabrics with an elastic structure.
Cut out:
- Top - 1 piece;
- Skirt - 1 piece;
- Back - 2 parts;
- Sleeves - 2 pcs.;
- Seam allowance - 1 cm;
- For the hem - 2 cm.
Description:
- Finish the upper halves of the back with an allowance;
- Align the back parts in the middle;
- Sweep and stitch the side lines;
- Process and tuck the neckline;
- Connect the upper tiers of the backs on the sides and sew;
- Lower the bottom of the sleeves, stitch them and place them in the armholes;
- Sew the skirt fabric and finish along the side seams;
- Baste the skirts to the chest and back of the dress;
- In the waist area, make a connecting stitch, leaving up to 1 cm for the drawstring.
Insert a ribbon or elastic band into the resulting tunnel and trim the ends.
Detailed pattern of parts
Boho style: dress pattern for plus size
It is recommended to sew the dress from viscose, staple or linen. Suitable for overweight and older women, and not only. Ready-made patterns are available on the page of Irina and Olga Paukshte.
Cut out:
- Back - 2;
- Sleeves - 2;
- Shelf - 2;
- Skirt - 4;
- Front neck - 2;
- Back neck - 2;
- Cuff (width 7 cm, length according to OZ) - 2.
Description:
- Sew darts on the front and back, middle seam on the front of the dress and on the sides;
- Connect and sew all parts of the skirt;
- Connect the top and bottom of the dress at the waist line;
- Sew a lock on the back in a hidden seam;
- Trim the neckline with a facing;
- Gather folds on the sleeves, make cuffs and sew to the dress;
- On the chest, make a row with loops and buttons;
- Fold and stitch the hem of the boho dress.
This is a new, fashionable and versatile style that suits any figure.
Schematic representation of the pattern parts
Beach dress pattern
For work you need fabric measuring 140x120 cm. In a one-piece style, increasing and decreasing the length depends on the measurement.
You may be interested in: Rules for sewing pillows for a pregnant woman yourself
Cut out:
- Back - 2;
- Sleeves - 2;
- Skirt - 1;
- Straps - 2 pcs. 40 cm each;
- Bias facing - 1.
The result of following step-by-step instructions when sewing
Description:
- Sew the backs along the midline;
- Adjust the required length of the straps and attach;
- Baste the seams to the dress and stitch.
Edge the seam allowance of the dress with a continuous stitch.
Note! For easy passage of the foot through thick fabric, you need to place cardboard under the back.
Simple DIY knitted dress
You can sew a beautiful dress for a girl or woman from knitted fabric in a couple of hours. The simple process will not affect its beauty, comfort and effectiveness. For sewing you need 1.5 meters of knitted fabric.
Cut out:
- Bodice;
- Sleeves;
- Skirt (half-sun).
Description:
- Sew the bodice with sleeves;
- Stitch the resulting detail to the skirt.
Cut the neckline into an oval, fold it over and finish it with a facing.
Before starting work, fold the fabric and fasten it at the edges. This will prevent curling. Sew the parts together, iron the seams and overcast them.
Step-by-step layout of material
Long dresses with sun skirt
Sewing the dress itself involves taking precise measurements and calculating the footage of the material. For the bodice you will need 1 length of 1.5 meter cut. Measure it from the shoulder to the waist line +5 cm to spare.
For large breasts, measurements are taken from the front. The skirt is measured in 2 hem lengths, plus the waist for a short style. For a long one, the size is doubled. Based on the pattern, cut and connect the parts in order. Master classes by Olga Nikishicheva with detailed video lessons will help you understand the nuances.
DIY chiffon dress
Chiffon fabric is suitable for lightweight products, loose fit with drapery. For tailoring you need the following sizes: OG, OT, OB, dress length and shoulder measurements. Children's measurements are taken according to the same principle.
Description:
- Cut out the parts according to the finished pattern, place them on the fabric and trim along the contour;
- Sew the skirt onto the cliff;
- Connect the shoulders to the sides of the bodice.
Sew the lining to the inside of the dress.
A red belt under the bust will add charm and zest.
Silk dress
These clothes can be used as home or weekend wear. To create it you need to do the following:
- Iron the upper parts of the dress, sweep and pin together;
- Sew side seams, press seams and overlay;
- Baste the tops and sew the side seams;
- Process allowances behind the sewing seam;
- Connect the upper and lower parts and sew with a line at the waist;
- Attach the binding to the armhole and sew with a machine;
- When stitching sections, retreat 5 mm from the edge for the drawstring.
Sew a strip 1.2 meters long along the drawstring, trim the edges and iron.
How to sew a simple dress for the summer
These clothes are the easiest to sew. The length can be from maxi to mini.
Description:
- Fold viscose fabric, size 150x150cm, and mark OB and OG;
- At the bottom of the fabric, mark the half-circumference of a large measurement;
- Draw a line from it to the top, not reaching 20 cm, place a dot;
- Sew the dress along the line, creating a drawstring;
- Thread the tape into the opening.
Join and sew shoulder seams.
It is better to use light-colored fabrics when sewing
Pattern for a dress with a stand-up collar
To make it, cut out all the necessary parts according to the finished pattern, select threads of the desired colors, tools, as well as a satin ribbon.
When sewing, lay out all the patterns in the direction of the grain thread and sew along the contours. Place seams over and iron from the inside.
You might be interested in: Making simple patterns for wraparound robes
Dress with peplum pattern
Elegant and feminine clothes. Flounces cover up waist imperfections, and hips become slimmer. To make it you will need 1.5 meters of jacquard, 125x35 cm of lace braid, 1 zipper, satin trim and hooks.
Description:
- Print the pattern and cut out the parts using paper samples;
- Process, stitch and iron the darts;
- Sew lace to the front and back of the bodice;
- Sew the edge to the fastener;
- Fold back the lace and peplum and stitch them from the inside out to the waistline;
- Sew the side seams of the dress and press on the inside;
- Sew on a zipper and hook and loop;
- Fold the hem of the dress and stitch;
- Edge the neckline with satin trim.
Pattern for a dress with a peplum
Finish the seams of the trim as inconspicuously as possible.
Additional Information! To save yourself the trouble of searching for scissors in the middle of your work process, you need to hang them on the attached plastic hook on your sewing machine.
Long loose dress made from a scarf
For sewing you will need 2 silk scarves, 1x1 m each, bias tape and elastic. As well as additional accessories needed in the process. The dress is suitable for plump and slender girls.
Description:
- Connect the scarves facing inward, determining the location of the pattern;
- Baste the sides, departing from the front - 15cm, from the back - 17cm, sew and iron;
- Mark the seam line on the back with a dotted line on the fabric;
- Fold the binding in half and stitch;
- Sew the straps in a crossed manner to the corners.
For the fitting area, mark a line under the bust and sew on an elastic band.
An example of a combination of brown tones
Loose fit wrap
For tailoring, flowing fabric in the form of viscose and crepe, measuring 1.5x3 m, is used.
Description:
- Reinforce the bodice details with trim along the sleeves and armholes;
- Turn the straps out, sweep and iron;
- Fold the parts of the bodice right sides together and stitch along the armhole lines;
- Cut off excess allowance;
- Place the straps between the bodice parts and join the shoulders, stitch, cut off the excess and iron;
- Duplicate the facings and stitch them to the skirt;
- Baste the bodice and skirt, adjusting the length of the straps;
- Fold in seam allowances, stitch and iron;
- Cut out the drawstring and sew the bindings, threading them into it;
- Sew the second trim to the front side seam of the bodice;
- Tie or trim the ends.
For the wrap, make a loop on the inside of the bodice and sew on a button.
Wrap dress
DIY chintz dress: patterns
Stylish, practical and budget option. The emphasis falls on simplicity of cut and original design. To work you need fabric measuring 3x1.5 m and a finished pattern.
Description:
- Cut 60 cm from the total cut;
- Fold into 4 layers with the pattern facing inward;
- Measure VG and VP from the top;
- From the waist line down, measure OB and OG;
- Draw the neck randomly;
- Draw a center line on the back;
- Cut out the sleeve and sew to the shoulder seams;
- Sew the skirt with a side seam and sew it to the top of the dress.
Treat the neckline with tape and carry out a test fitting.
This is what a simple chintz dress looks like
The arrival of summer brings with it a lot of wardrobe ideas. Despite the large selection of clothes in stores, many things can be sewn with your own hands. These can be dresses, sundresses, blouses, trousers, shirts, skirts and other original things. Sewing can take anywhere from a few minutes to several days. Suitable for slender and plump ladies. They will fit your figure, hiding flaws and emphasizing advantages.
Dress with a scarf
For this style, you need to take two scarves measuring 1.5 * 1.5 m. During the work, you will need additional elements for decoration. This cut of a dress without a pattern is suitable for girls with curvy figures.
Stages of work:
The two were made to be connected with the front side, to distribute the correct arrangement of the pattern. Baste the seams, departing 20 centimeters from the front edge, measure 23 cm from the back side. Sew all parts and iron them.
Using a pencil, mark the line of the back. Use tape to trim the free edge.
The straps are sewn to the edge at chest level and cross at the back. An elastic band is sewn under the bust.
The dress is ready, you can put it on and go for a walk around the beautiful evening city.
Pattern
If a novice needlewoman has a ready-made dress pattern, consider that half the work is already done. There are a large number of instructional videos on the Internet that explain in detail how to sew a dress using ready-made patterns, and also include photos of the finished dress.
If you don’t want to take the easy way and the desire to learn how to draw your own patterns is so great, you can learn how to model patterns yourself and sew dresses using your own blanks.
Shift dress
This product uses a loose sleeveless dress pattern. It takes a little time and effort to make. Does not require skills to build or model a product.
Prepare:
- Textile;
- Car;
- Sewing supplies.
Progress:
Before you begin, you need to take measurements:
- Product length (di);
- Length to waist (lt);
- Chest circumference (g);
- Hip circumference (about).
- Cut two rectangles for the future product; they must correspond to the width (about) size.
- For length add 4 cm.
- It is very important that the grain thread runs along the length of the product.
- Fold the fabric right sides in half.
- To prevent the fabric from creasing while drawing lines, you can pin it with auxiliary pins.
- Measure from the left side DT+2 cm.
- Draw a line to waist level.
- From the same point, draw a segment equal to 1/4OB + 2 cm.
- Mark the shoulder line and connect them using a pattern.
- Draw a line to the waist using a pattern.
- You should end up with 2 identical parts, front and back.
- Mark the rollout size. This is done at will.
- Along the bottom border of the product, mark a line equal to 1/4OB.
- Prepare a ribbon for the belt. 8*75 cm.
- Fold all the blanks in half. Seal the edges with a double stitch. The stitching should extend 0.5 mm from the edge.
- Iron all parts.
- Fold the pieces inside out, sew all seams (shoulder and side) and press the seams with an iron.
- Decorate the neckline by folding the fabric in 2 layers.
- Make decorative seams throughout the product, departing 1-1.5 cm from the main seam, thereby stitching the ends of the fold.
- At waist level, sew on parts of the belt
- Finish the bottom edge of the dress.
- Iron the product.
- Can be decorated with decorative elements.
The dress turns out to be light, you can wear it at home as a robe or go to the beach in it.
Sewing without using a pattern
To solve the problem you need a little imagination. Thanks to this, you can get a masterpiece in a single copy. To sew a dress without a pattern quickly, simply and stylishly, you will need a standard seamstress’ kit and any accessories. The article will be useful for beginners and experienced craftswomen.
Necessary tools used in the process
How to quickly and easily sew a home dress without a pattern
You will need a T-shirt and a meter-long piece of fabric. The dress is suitable for women with sizes 46-54.
Description:
- Fold the fabric in half, apply a T-shirt, circle and step back from the waist to the required length;
- Cut out the outline and sew along the sides and shoulders;
- Cut the neck in any shape.
To sew sleeves, 2 rectangular cuts with the size of the arm circumference are applied to the shelves, cut along the armhole line and sewn.
Beautiful home dress in 30 minutes
Dress with drapery without pattern
For sewing, it is better to use flowing fabric: silk, muslin or satin.
Description:
- Fabric measuring 2x3 meters is laid out on a flat surface;
- Make a cut at a right angle, creating the width and depth of the neckline;
- Sew 2 lines, creating a drawstring;
- Make a stitch on the back;
- Thread the ribbon into the drawstring and bring the ends out to the front;
- Tie a ribbon at the waist or under the bust.
The dress is suitable for going to a restaurant or office.
Drawstring dress without pattern
This type of clothing will highlight the hips and hide imperfections at the waist.
Description:
- Fold a square piece of fabric in half;
- Make markings as in the figure;
- Sew side seams.
At the waist area, place a drawstring and insert an elastic band or ribbon into it.
Detailed diagram of the dress with a drawstring
How to sew a long floor-length dress with your own hands without a pattern
In the process, stretch fabric measuring 1.4 x 1.6 m is recommended.
Description:
- Fold the material into quarters;
- Measure your hips;
- Set aside ¼ from the fold line;
- Draw a vertical line 0.6 m high;
- Unfold the cut by 2 positions and sew the side seams to the specified height, cutting off excess fabric.
Draw the neckline at a length of 40 cm and a width of 4 cm, cut and overlay.
Step-by-step fabric layout
Dress for plus size: dress diagram without pattern and seams
To work you will need an old T-shirt and 2x2 meters of fabric. The length can be adjusted.
Description:
- Rinse the fabric, dry and iron;
- Fold in half along the grain and trace the outline of the T-shirt with chalk;
- Extend the length arbitrarily;
- In the hip area, measure your own size and leave 1.5 cm for allowances;
- Cut out the details and make the neckline of the desired shape;
- Trace and cut out the bevels for the sleeves according to the T-shirt template;
- The facing for the neck should have a width of 5 cm in 2 copies (front and back);
- Apply a facing to the dress in the neck area and stitch 1 cm from the edge;
- Sew shoulder and side seams;
- Pin the sleeves to the dress and stitch;
- The hem and sleeves must be folded and hemmed.
You might be interested in this. Sewing sweaters and simple blouses with and without patterns. An elegant dress for plus-size women.
The review provided information on how to sew a summer dress with your own hands quickly and without a pattern. Next we will talk about models with patterns.