Good day to all! Agree that an integral element of the kitchen is the countertop. On it we cook, cut, lay out dishes, place tabletop household appliances, and so on. There are many manufacturing options. But today we have a concrete countertop.
In fact, it is an artificial stone. More precisely, one of the varieties. No one bothers you to buy a product from the manufacturer for your kitchen or bathroom, taking into account your wishes, needs, and preferences. But that's not interesting. I won’t talk about the nuances of choice.
In many ways, these topics have already been discussed when it comes to moisture-resistant countertops, or wood-look countertops.
What you need to know about kitchen concrete countertops
We are used to the fact that concrete can be used to make a staircase or a foundation. But it turned out to be a universal material from which you can make garden furniture, a bar counter, and a tabletop.
If you follow the recommendations during the manufacture of the structure, you will get a reliable and durable product.
There are undoubted advantages to working with concrete material:
- Diluted concrete takes any shape. It is plastic, easy to correct and mold. Your possibilities are practically unlimited.
- Concrete can be painted, polished, sanded, and decorated with additional elements. Any processing changes its appearance. A concrete countertop can fit into the interior of any style, from classicism to loft.
- Concrete has heat-resistant properties. It tolerates temperature changes and mechanical pressure well.
- You will not find such a durable and reliable tabletop anywhere.
- Concrete is an environmentally friendly material that does not emit harmful fumes or other substances hazardous to humans.
- The cost of a concrete table is comparatively lower than that of wood or marble.
- You can combine concrete with other materials, such as glass or wood.
Concrete is a material that is practically not affected by external negative influences.
Among the disadvantages of a concrete countertop, several points should be noted:
- The surface should be protected from water and dirt. The porous concrete structure quickly absorbs moisture and dirt. It won't be easy to wash off.
- You cannot cut food or cut fabric on such a table. Scratches easily remain here and the attractive appearance is lost.
- If the structure is installed incorrectly, cracks or chips may appear.
- Not every cleaner is suitable for concrete. The composition of the washing liquid should not contain abrasive particles or aggressive components. Choose a product that is neutral in composition.
- Hot objects can leave marks on the surface that are difficult to remove. Use special racks for hot dishes.
Financial costs are small. Externally, the product is similar to a marble countertop.
Advantages and disadvantages
Making a homemade concrete countertop is far from the most difficult task. Even for a novice builder.
When purchasing, the price per square meter is quite high. You can make a similar stove yourself for the kitchen, for the street, or for the bathroom with a sink. The custom option has its advantages. But it will still be interesting to understand the nuances of self-production.
The advantages of using concrete countertops in the interior are as follows:
- the material is warmer compared to natural stone;
- fits into different interior styles;
- not afraid of high temperatures;
- the surface is resistant to chips and scratches;
- wide choice of textures;
- high functionality;
- you can create a slab of non-standard shape;
- a wide range of colors, including marble imitation.
Let's stop there.
The material also has its drawbacks. They are like this here:
- If installation is carried out incorrectly, cracks may appear;
- additional protective impregnation is needed;
- the finishing layer can be damaged by hot objects.
Before you do it yourself, I advise you to study all the nuances and become familiar with the technology in detail. A thematic forum with tips from other builders, visual videos, etc. will also help you here.
If you choose the right composition and follow the instructions, your concrete countertop will exceed your expectations.
At work I have already encountered such decisions. But there are also imitations of concrete slabs. What I liked most was the concrete-look countertop, made of laminated chipboard, from Egger. This is Chicago Concrete Gray. Moreover, it can be both light and dark.
What tools and materials will you need to make it yourself?
A concrete table is made with your own hands using standard construction technology. Here it is important to be accurate in calculations, careful when mixing the composition and patience to watch several training videos on this topic. To prepare for work, you need to purchase:
- concrete class not lower than M400;
- river sand, but any other will do;
- gravel, crushed stone or marble chips;
- color, if you are planning to paint it like granite or other “noble” material;
- reinforcing mesh with cells 25*25 mm made of metal or fiberglass;
- Chipboard or laminated plywood;
- timber 30*50 mm
- self-tapping screws;
- metal corners;
- construction polyethylene in roll;
- concrete mixer or construction mixer;
- bucket;
- pencil, note paper;
- yardstick;
- building level;
- mallet;
- shovel;
- ladle for solution;
- putty knife;
- angle grinders and wheels;
- silicone sealant;
- liquid Nails;
- screwdriver;
- jigsaw
This is the minimum set of tools you will need to create a concrete countertop. Once you have purchased everything you need, it's time to start creating the project on paper.
Tools
In order to make a coffee table with a rectangular concrete top, we will need:
- Wooden boards.
- Wire mesh for strengthening concrete.
- A piece of 1/2-inch chipboard or plywood to make the desired shape.
- Drywall.
- Screws.
- Pneumatic nailer to attach the sides to the bottom panel.
- Large plastic container for mixing cement.
Creating drawings and diagrams
To avoid possible mistakes in the early stages, take the most accurate measurements possible. Measure all parameters, including the location of the sink, outlets and other nuances available in the countertop area.
Creating a drawing will be required; this step will help to accurately manufacture the structure.
If you plan to make a hole for the sink, check the numbers several times. This is a case where every millimeter is critical. If the tabletop is of impressive size, it makes sense to first divide it into fragments and cast it in parts. It is more convenient to make the joining points at right angles. It is not recommended to make the tabletop thicker than 5 cm.
It is important to carefully measure the space where you plan to install the product with the countertop.
As tough as it is durable
Every thing has its own positive and negative features, and only you have the right to decide which positive qualities will impress you, and which negative aspects will not frighten you.
Regarding this idea, everything is exactly the same - despite the fact that this dark gray hulk has wheels, it will not be so easy to move it.
Therefore, our advice is to immediately find him a better place and then he will only make you happy. The design of this option was developed by Patrick Dogignies, he made it from rough cement.
Preparing the formwork
To give the future tabletop a certain shape, formwork is made. To do this, take a plywood sheet and lay it on a flat, flat surface. Make sure that the plywood does not bend or warp anywhere. Install and secure a 50 mm high beam around the perimeter. This is the optimal value so that the finished tabletop is strong enough and does not collapse under its own weight. All joints are fastened on the outside of the beams with corners or self-tapping screws. Do not try to fit them tightly together at this stage. All cracks and unnecessary holes are then filled with sealant.
You need to install a sheet of plywood on a horizontal surface, which must be level. Place the boards on edge along the edges.
Then place plastic film in the formwork so that there are no creases or folds. Any unevenness will be reflected in the future concrete surface. You can lubricate the inside of the polyethylene with technical oil to make the concrete structure easier to remove.
How to make a sculpture frame
For a concrete sculpture, the frame is 80% of the work. It sets its general appearance and proportions, gives the sculpture strength, and holds the concrete in place during the sculpting process.
We start with the main frame. → We weld (the link tells about welding with an inverter) from durable elements - pipes, rolled steel, thick reinforcement. While the concrete hardens, this frame has to bear its weight, that is, practically the weight of the entire sculpture.
The “primary” skeleton serves as a support for the “secondary” frame, which:
- holds concrete during the molding process, transferring the load from its weight to the main frame;
- serves as the basis of a mesh holding concrete;
- defines the main elements of the sculpture, excluding the smallest details;
We bend the secondary frame from 6-8 mm smooth reinforcement and connect it by welding and twisting wire. A-II “corrugated tape” is also suitable; A-III. It is more difficult to bend, but for relatively straight parts it is even better.
Finally, we close the large gaps between the rods of the secondary frame with mesh or wrap it with wire, securing it with twists. Leave the distance between the turns or mesh cells at approximately 2.5-3 cm.
As a result, we get a wire sculpture, 2-6 cm in size “thinner” than the future concrete one.
The components of the frame are visible in the example of a sculpture of a dolphin for a fountain (Fig. 3).
Components of the sculpture frame
Making a hole for the sink
If a sink crashes into the table, you need to prepare a hole for it in advance. Accuracy of measurements and accuracy in preparing the formwork are important here. Test yourself several times to be sure of the finished result.
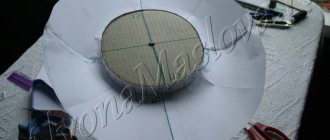
If this is an overhead option, then you should take the sink and lay it upside down on a sheet and trace it along the side.
Manufacturing features for overhead models
If you plan to install an overhead model, make a preliminary drawing of it on paper. Trace it around the perimeter and transfer the outline to the plywood. Then measure the height and width of the sides so that the sink will fit into the finished hole after the concrete has dried.
How to do it for embedded
If the sink is built-in, make a preliminary drawing along its edge. Lay 50*50 mm beams along these lines. They are fastened together and fixed to the plywood using self-tapping screws. The beams inside the structure can be taken much higher than the outer edge. This is done to prevent concrete from accidentally flowing onto the sink hole.
For a built-in model, an outline should be drawn along the edge. Along the resulting lines, bars are installed, subsequently secured with self-tapping screws.
Decorative wooden figurines for the garden
It is quite appropriate to start the new summer season with decorative decoration of your own plot.
In this case, the help of specialists may not be required. In order to save money and express your individuality, you can independently make interesting figures of wood and concrete that will decorate your garden. Perhaps wood is the most popular and inexpensive material for creating garden sculptures. It will be enough to select a suitable log, driftwood or stump of an unusual shape, process them and get an original decorative figurine. For example, if you want to make a figurine of a bunny, you need to stock up on a jigsaw, nails, sandpaper, paint, varnish, plywood and an ordinary log. All this can be easily found in the garden.
Start by sawing off part of the log at a 45 degree angle. Thoroughly sand the surface of the workpiece and let it dry. After that, cover it with paint or varnish. The ears and muzzle must be cut out using a stencil using a specially selected jigsaw. Now draw eyes and a mouth on the muzzle, and color the rest of the details as you wish. The ears and nose will have to be attached with nails. You can also add any additional details if you wish. That's all. All that remains is to install a wooden bunny in your garden.
Reinforcing frame and installation of supporting structure
The reinforcing mesh or cut wire is laid so that there is a distance of at least 25 mm from the edge of the formwork. It is unacceptable for pieces of the reinforcing frame to stick out from the finished product. Make sure that the height of the frame does not exceed the beams and does not rest against the bottom of the plywood. Otherwise, fragments of wire may remain on the surface of the finished product.
It has the form of a mesh, the cells of which have a size of 25x25 mm. You need to retreat 25 mm from the sheet and from the edges.
How to transfer model dimensions
To mark and transfer dimensions from the model to the original, we will make a simple device.
It represents two rectangular “gazebos” made of rods, with a roof in the form of a mesh, with stretched threads or thin wire, or welded mesh. This device is called a copy frame. A small one is placed above the model, and a proportionally enlarged one is placed at the place where the sculpture is made. Using a plumb line, measure the size on the model with a tape measure and transfer it. First on the frame, then on the sculpture. How to do this is clear from Fig. 2.
Using a plumb line, measure the size on the model using a tape measure and transfer it to the sculpture.
The main thing is not to move the marking machines during the marking process, and if necessary, return them to exactly the same place.
Processing joints
When you have the formwork ready, it’s time to process the joints, remove all the irregularities and gaps. It is convenient to do this with silicone sealant. It hardens quickly and penetrates into small cracks and cracks. The dried sealant can be further polished to give it the desired shape and smoothness.
DIY concrete furniture with rounded edges looks especially good in the interior. It is convenient and less traumatic in everyday life. The rounding of the edge is done at the stages of formwork and joint processing.
Carefully process everything so that the cracks and gaps are filled.
There are two ways to do this:
- A curved metal sheet is attached to the area where the boards join. Silicone is poured between the corner of the beams and the rounding of the metal tab.
- If there is no suitable template, you can take a piece of pipe or glass of the required diameter. Place it in the corner of the formwork, fill the resulting space with sealant and wait until it dries. Then remove the object and sand the silicone to the desired shape.
Laying concrete on the frame
To lay the mixture you will need a pair of spatulas, a trowel, and a plaster ladle. To protect the concrete from drying out, we stock up on opaque plastic film.
A sculpture 1.5 m high and higher cannot be made without a → trestle, or at least → a stepladder (the links tell you how to make a trestle or a stepladder with your own hands).
The pedestal of the sculpture, if necessary, is cast from ordinary concrete in formwork, and three to four days before the start of work on the sculpture, so that it has time to set.
I recommend: How to make a topiary, green sculpture for a garden or cottage
We prepare the mixture for the body of the sculpture (see section “Concrete for sculpting”) and begin laying it on the frame from the simplest places.
We lay the mixture by throwing or spreading it onto the frame using a trowel. For large portions we use a ladle.
In one go, you need to try to complete any element of the sculpture that stands out due to its relief or some other boundaries. We will outline such areas on the model in advance.
Having filled a certain area, we smooth the mixture, shape its surface with spatulas, templates or simply with our fingers.
If you have to make a lot of repeating parts, you should cut out a suitable stamp from wood in advance.
In addition, templates and stamps sometimes accommodate a wide variety of items. For example, a texture that imitates short hair can be created with a short, hard brush, the furrows “under the bark” can be pressed with a fine-toothed comb, and the animal’s fur can be made with a metal comb.
Interesting patterns are obtained by knurling with textured rollers.
Repeating relief can be made with a textured roller
Advice.
Concrete thicker than 2-2.5 cm does not hold on vertical and “reverse” surfaces. The desired array is obtained by laying the mixture in several layers. Take your time though. After half an hour or an hour, the mixture may seem quite “sticky” (especially with the addition of gypsum), and when laying a new portion, it will fall off in a whole layer.
Concreting process
To prepare the concrete mixture you need to take:
- cement, 2 parts;
- sifted sand, 3 parts;
- plasticizer;
- water.
If you add color pigment to the composition, do it at the dry mix stage to ensure a uniform color. Dissolving the paint in water, add the composition to the concrete mixture. This is how you get beautiful “marble” stains.
There are several methods for pouring concrete mixture. In the first case, the formwork is completely covered. With the second method, concreting occurs in layers.
There is another recipe for creating a tabletop with your own hands:
- cement, 1 part;
- sifted sand, 2 parts;
- marble chips, 4 parts;
- water, 0.5 parts.
The formwork can be filled with concrete at one time or poured in layers. In the first case, the countertop has a single concrete structure. In the case of layer-by-layer pouring, expanded clay is added instead of crushed stone. It makes the entire structure lighter and more convenient for further installation.
Pouring and uniform distribution of concrete over the entire area of the formwork.
Advantages of cement crafts
- One of the most important advantages of this substance is its relative cheapness.
- Durability and strength of finished structures, resistance to weather conditions.
- Concrete can be painted in a variety of colors. Decorating also does not bring any problems.
- Ease of use of concrete. The main difficulty is creating a stencil design for pouring.
Decorative design
Before pouring the face layer, you can beautifully arrange decorative elements at the bottom of the formwork. Here, various beads, pieces of glass, horseshoes and even memorable souvenirs can be used as decorative elements. Try laying out a wire ornament as decoration. After pouring the concrete, wire fragments, glass or metal texture will appear on the surface of the countertop.
If no decor was used, then the front side is sanded.
When you place the decor on the surface of the plywood sheet, make sure that it does not move. To do this, glue each piece to the chosen place. This will ensure that you end up with the pattern you planned.
Ideas and photos of countertops and tables made of concrete
With a flowerbed in the middle
For a dacha, a great option is to leave a trench when pouring concrete where you can plant flowers. Looks very amazing.
How to lighten the design
- The ideal option and a great idea is to leave a hole in the middle and make a glass tab . To do this, you need to cut out a trench for the glass tab.
- Also put the concrete tabletop on legs with wheels - this is especially appropriate for coffee tables that often have to be moved.
Facing solution
For the face layer solution, mix cement with water. Then crushed stone, sand or marble chips are added, depending on the recipe. Stir thoroughly to avoid lumps. The peculiarity of the composition is that they use finer grinding of sand or gravel, without large fragments or sharp edges. Add a little less water than indicated in the recipe. This will help you avoid small holes on the surface of the finished product. For the front layer, the solution is poured to a level of no more than half of the formwork.
When laying the cement mortar, compact and shape it using a spatula. Do not allow air voids to form.
Making crafts
One of the original crafts is intended for warm and cozy evenings. We will provide one option for you, and then improvise yourself and create more unique and individual figures.
Craft lamp
- To create such an interesting craft, you will need a ball. We advise you to find several right away.
- The balloons are inflated to different sizes, do not inflate too much, keep in mind that the cement layer will be small and the structure will be fragile.
- Cement is applied to the inflated balloon. It is important to completely cover the ball but leave some space at the top.
- After complete hardening, all the balls burst and are taken out of the finished craft.
- In honor of the last step, candles are lit and placed directly into the craft. These balls look unusual and beautiful.
This method can be used with rope soaked in cement mortar. All steps are completely identical, but rope is used instead of cement. It looks even more unusual and specific. Guests will probably think that this is a purchased decor and will be surprised that you can create this yourself.
There are not only beautiful crafts for the garden. But also extremely useful in everyday life.
For example, for the next craft you will need only two brushes and all the materials from the previous craft.
Pour cement into a plastic basin and place the brushes at an equal distance from each other. After hardening, the main purpose of creating such a useful element immediately becomes clear.
The craft is necessary for cleaning shoes. Moreover, it is easy to do, but has a lot of benefits.
It is worth paying close attention to safety precautions when working with cement. There have been cases of the mixture getting into the eyes. There's nothing wrong with it if you quickly rinse with water and get rid of every bit of it. But the feelings are unpleasant.
When working in creative mode, remember to put in maximum effort and lots of love. We assure you that everyone around you will notice the love put into the craft.
There are such cement masters that it is simply difficult to call their finished figures a craft. They look like works of art and are great for any garden or backyard.
One day, pictures of concrete gargoyles on a fence appeared on the Internet. This is amazing. We believe in your endeavors and hope to see a few more gargoyles on the fence.
Fill the base layer
The main layer is poured approximately 30 minutes after the front layer. This time is enough for the concrete to set and harden a little. Here the solution is created according to the classic recipe with consistent proportions of all components. After pouring, wait until the new layer sets. Then cover the countertop with film for a day. After the time has expired, the polyethylene can be removed and the concrete can be covered with a damp cloth.
A tabletop made from concrete mortar can look very original.
Crafts in the form of palms
The sculptures in the form of crossed palms look original. To create a composition:
- take rubber gloves;
- place the glove in a container;
- pull the edges of the glove over the edges of the container (this will facilitate the process of filling it with cement-sand mortar);
- pour the prepared solution inside;
- to give the fingers rigidity, a metal wire is inserted into them;
- after filling, remove the glove from the container, tie it, place it in a bowl and give it the desired shape;
- carry out similar actions with the 2nd glove;
- to connect the palms, make small cuts on the gloves at the junction and secure with a small amount of cement;
- With another bowl, press your palms on top to form a depression in the center of the composition;
- wait a few days, then cut the gloves with a knife and remove them;
- polish the gloves with sandpaper;
- apply a layer of primer.
Whether or not to paint the resulting sculpture is a matter of taste. You can pour soil extract into the center of your palms and plant succulents, pour water, and turn it into a birdbath.
Final stage and decoration
Dismantling formwork requires care. Disassemble the entire structure, remove the sides. Turn the formwork over and tap the entire surface with a rubber hammer. This will allow the hardened concrete mixture to easily separate from the plywood sheet.
This table cover is suitable not only for the kitchen, but also for the dining room, living room or terrace.
After the concrete has completely dried and you have dismantled the formwork, you need to sand the surface. This will smooth out all the unevenness, remove glue and air pores, and prepare the tabletop for further painting or varnishing. The grinding process also reveals the decor embedded in the concrete texture. All small stones, glass and beads will not “sparkle” if they are not polished first. You can also cover the countertop with decorative tiles or make it look like natural stone.
After sanding, allow the tabletop to dry thoroughly.
Then the surface is leveled and smoothed using an acrylic-cement composition. Mix the mixture to a semi-thick mass and apply to the surface of hardened and polished concrete. This will fill all the cracks and microcracks. The mixture must be applied at least three times, allowing each layer to dry thoroughly. Between stages, sand the surface to avoid the formation of “waves” and unevenness. The last, third layer is not sanded, but left overnight until completely dry. Finally, the tabletop is processed with a grinding machine. Critically evaluate the finished work. Are there any cracks or pores left?
You can also process a concrete countertop manually using sandpaper. But this will require a lot of effort and time.
The polishing step adds attractiveness and smoothness to the countertop. Please note here that the polishing pad must be wet. Then apply primer varnish in one or more layers. Remember that each application of varnish must dry thoroughly. All that remains is to polish the tabletop with wax and, after hardening, clean it with a soft towel. Your tabletop is almost ready.
If you follow the consistency and rules of working with interior concrete, making a tabletop from it will not be at all difficult.
Elementary and simple - everything you need for minimalism
This design is not just a concrete structure, since this particular model is made from marble, granite, stone, etc. As a result of this choice of raw materials, its price starts from $450.
However, it is precisely the love for such raw materials that creates a more natural texture (more details on cb2)
Examples of ready-made concrete countertops with your own hands
Once the tabletop is ready, completely dry and processed, it is time to assemble the furniture. To do this, assemble a frame from wooden or metal structures. Run electrical wires if this is a kitchen table and appliances will be installed on it. Install the sink and other necessary elements.
It not only has an attractive appearance, but is also easy to use, as it is resistant to most negative factors to which the kitchen is exposed.
Who said cement can't be gentle?
This beauty (natural colors) is not large in size - length 130, height 30, width 70 cm, weight 93 kg. But it’s not the numbers that make it such an interesting piece of furniture.
It is its simplicity and conciseness that delights others. This idea is suitable for both indoor and outdoor use, and you can decorate the table without an elegant floral design.
Tips and recommendations from experienced craftsmen
What do craftsmen and designers advise so that homemade figures decorate and not spoil the territory:
When decorating a site, use one style - do not combine characters from folk tales with classical-style sculptures or angels. Balance the size of the figures with the size of the plot - in small dachas large products look ridiculous. Don't chase quantity
An excess of figures distracts attention from the main thing - greenery, flowers, for which they go to the country. Select figures in the general style of the house, garden, and territory. They will enhance the overall impression. If you lack experience and imagination, start with the simplest figures, master one technique
Install the product and make sure it makes the area better, not worse.
Use common sense and moderation. When making figures from cheap materials (bottles, old tires), carefully process and paint the products with good paint, otherwise they will look cheap and will only spoil the overall impression of the site.
