“Who” is Tilda, and where did she come from? The Tilda doll is very popular today, and this is not the name given to a specific toy girl, but to a style, a whole line of toys sewn together in one concept. That is, the Tilda doll is a doll completely sewn from fabric. It was invented by a certain Tony Finager (Norway) back in the 90s of the last century.
According to the author's idea, she wanted to come up with some kind of “home” toy to guard the hearth from the simplest materials using a simple technique. And the name of the doll was not chosen by chance. The secret lies in the fact that their family traditionally chooses short names that certainly begin with the letter “T.” And then, the author of the world-famous doll simply wrote down all the names she knew starting with the letter “T” and chose the most pleasant one for herself.
It is interesting to note that later “Tilda” became nothing more than a trademark. And Toni Finanger even had her own small store, on the shelves of which were the dolls themselves, as well as instruction books with patterns for making them. But nevertheless, over time, in the world of needlework, this name nevertheless became a household name - this is what all textile dolls of this style began to be called.
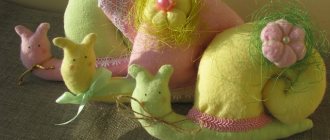
As already mentioned above, tildes can be very different: these are animals, girls, fairies, Snow Maidens or Santa Clauses, and also stars, snails and even plants and much, much more. The author of this direction of applied art, T. Finager, when creating his “wards”, prefers delicate bed colors - lavender shades, soft pink, turquoise, cream and powder. Today, these colors have become in demand, gaining great popularity in the fashion world.
In general, it’s absolutely true that Tilda’s style can be described as simple, and perhaps naive or even rustic. But at the same time, the products turn out to be somehow very cozy and homely. The minimalism of the product is clearly visible in the design of the face - it is indicated by only two button eyes and slightly toasted cheeks. Maybe this is what creates the doll’s unique character.
At the same time, the facial expression becomes so charming that it can captivate both children (despite the fact that the toy is still more decorative than functional) and adults. Yes, perhaps the main idea of creating a tilde is a return to a carefree childhood, filled with kindness and magic, smiles and gifts from fairy fairies.
Distinctive features of the Tilda doll
A small tilde doll with its subtle presence will certainly make the house more comfortable and romantic. Why not sew it yourself. Further in this article, the technique of making this toy is described in detail with a list of materials and tools necessary for its creation and ways to decorate it and make it even more interesting.
Before starting the master class, I would like to briefly emphasize the distinctive features of the Tilda doll, which together are its calling card.
Firstly, to create a toy, you should choose exclusively natural canvases, decorated with rustic motifs or country style prints (flowers, stripes, checks). By the way, needlewomen often take ordinary cotton and give it a cozy creamy shade using tea or coffee solutions.
Secondly, when choosing a material for a doll’s hair, choose regular knitting yarn or decorative “Ivy” type - it will look impressive.
Thirdly, when working on the face of an almost finished doll, do not forget about its characteristic features: black dotted small eyes and a light blush. All.
To apply it, you can use either regular blush or a pencil - sharpen the pencil directly over the place where the blush will be applied and slightly blend the resulting pink dust.
Well, the main thing is that you can sew a doll as you like - either by hand or by machine; The main thing is that the work is fun.
See also:
- How to sew an interior doll?
Tilda and patterns
Tilds and patterns ilonion
March 25th, 2015
The Tilda doll is a wonderful example of how you can sew different cute fairies and home helpers from one pattern that will decorate our lives and homes.
https://www.liveinternet.ru/users/5314163/post333722709/
Pattern Tilda the witch
- Tilda Pattern Autumn Angel
- Pattern The Princess and the Pea
- Pattern Tilda fruit angel
- Pattern Tilda in a robe
PatternTilda. Vintage angel.
- Pattern Tilda flower angel
- Pattern Tilda bath angel and Tilda boho
- Master class here
- Pattern Tilda little bear
- Pattern Tilda Christmas long-legged elk
- Master class here
- Pattern Tilda fairy princess
- GUIRLANDA TILDA Santa garlands
- Master class here
Source: https://ilonion.livejournal.com/130232.html
Necessary materials
In order to sew a classic tilde doll at home you will need the following:
- a set of tailor's needles;
- textile;
- threads in the color of the fabric;
- a simple pencil and tracing paper (for patterns);
- tailor's scissors;
- material for stuffing (at your discretion, holofiber, cotton wool, padding polyester or something else);
- separate fabric, as well as beads for sewing an outfit for the doll;
- yarn for hair (you can use wool).
That's probably the whole arsenal. But let's talk a little more about the fabric. The fabric must be natural: cotton, linen, wool, knitwear, fleece. When choosing fabric, pay attention to the following features:
- density. If the material is sparse and loose, the product may simply fall apart;
- structure. It should be uniform, without inclusions of threads of higher density. Otherwise, the doll will look sloppy in the end;
- rigidity. Do not opt for hard fabric, it will be very inconvenient to work with, it will be difficult to turn inside out, creases will appear, and, in general, the doll will look rough;
- elasticity. Elastic fabric irons well, and this is important in tailoring.
Working with the French knot
The easiest way to draw eyes is using a black pencil or acrylic paint. But this approach is short-lived and generally irrational when there are a lot of threads at hand. Therefore, the “French knot” quickly gained popularity among everyone who likes a Tilda doll with their own hands. This knot is tied sequentially:
- Piercing a needle and thread in the area of future hair with subsequent withdrawal of the thread in the area of the future eye;
- Making one or two turns of thread around the needle, followed by lightly touching the tip of the area adjacent to the starting point of the eye;
- Holding the end of the needle near the eye and then leading the turns to the starting point;
- Piercing the first eye with a needle to remove the point from the other side of the face;
- Removing the needle and tightening the thread;
- Creating a second peephole based on the same principle as creating the first.
After this, you need to withdraw the needle through the crown and secure the seam with a knot. The conclusion suggests itself, the “French knot” is created in those models that by default end with hair or a hat.
Sewing a trouser suit for a doll
In order to make the top part of the costume, cut out a small piece of fabric, 10 by 20 cm (don’t forget about the plus allowances). Next, you need to fold this blank in half lengthwise and stitch the open long edge. Now turn the piece right side out, make a couple of stitches across it with your hands and gather the fabric by pulling the thread. We've got the top. Secure it to the doll's body with tailor's pins and then sew it on.
See also:
- How to make a motanka doll?
Vest with lining
This method is a little more complicated, but in this case there is no need to process the edges, since they will be hidden between the front and lining sides of the product.
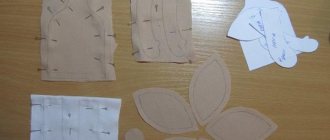
In addition to the fur blanks, we cut out similar parts from other fabric.
In this master class, white knitwear was used. Sew the shoulder edges of the outer and lining sides.
Then we connect them with the right sides facing inward.
We sew down the shelves at the fastener and neck areas. We are not in a hurry to turn the product inside out just yet.
Next, we sew together the “sides” of the front and lining parts of the vest.
But now you can turn the product right side out through the unfinished bottom of the back.
This place, as well as the armholes, remain unstitched. We sew them together with a hidden seam. At your discretion, we decorate the vest for the doll, sew on buttons, hooks, buttons or ribbons.
Other master classes by Natalie on how to sew doll clothes:
Did you like the product and want to order the same from the author? Write to us here.
In order not to forget the page address and share with friends, add to your social networks:
—Categories
- knitting (1706)
- Crochet (810)
- hats (333)
- crochet for women (228)
- crochet patterns MK schemes (180)
- Dresses, tunics (170)
- knitted flowers (141)
- crochet tops (78)
- scarves mittens (70)
- Knitted toys, amigurumi (69)
- Knitting (68)
- crochet for girls (64)
- for home (54)
- Napkins (50)
- berets (48)
- butterfly bugs (48)
- ideas without descriptions (41)
- Knitting for women (38)
- berets (37)
- crochet border (37)
- IRELAND (36)
- Magazines (31)
- Crochet appliques (30)
- Combination (30)
- knitting patterns diagrams (28)
- skirts (23)
- Knitted toys (21)
- vests (21)
- swimwear (16)
- sleeveless vests, vests (15)
- Bolero (14)
- harness (13)
- Knitted shoes, socks, knee socks (13)
- Crochet hearts (12)
- Crochet and knitting skirts (12)
- knitting for girls (10)
- booties (7)
- Tablecloths (5)
- fillet knitting (5)
- headbands (4)
- Clothes for dolls (2)
- stacked edge (2)
- Freeform (1)
- men (1)
- sewing (932)
- Decor, alterations (170)
- Hand made ideas (152)
- fabric flowers (101)
- Tildochki (98)
- girls (88)
- women (85)
- MK dolls, animals (73)
- Bags (62)
- Patterns of dolls and animals (59)
- Textile toys, dolls (55)
- Author's doll (52)
- Clothes for dolls (45)
- Embroidery, decorative trim (37)
- for home (37)
- Shoes, slippers (28)
- Textile crafts (20)
- doll stuff (17)
- Teddy bears, etc. (15)
- decor pillows (9)
- men (1)
- I sew myself (1)
- CRAFT WITH YOUR OWN HANDS (218)
- Ideas for the New Year (55)
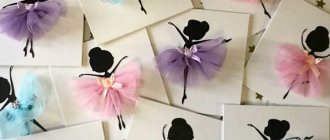
- Postcards (33)
- Decoupage on fabric (7)
- kinusaiga (3)
- For yourself beloved (218)
- BOHO, VINTAGE (202)
- YUMMYS (185)
- baked goods (78)
- Cakes, rolls, pastries (21)
- Main courses (18)
- Salads (16)
- Canning (16)
- First courses (3)
- We treat everything (129)
- CRAFTS (98)
- Papier mache (12)
- New Year (11)
- wooden (10)
- GARDEN (32)
- Country ideas (11)
- LET'S STUDY AT SCHOOL (23)
- Russian language (6)
- prayers (20)
- WISE THOUGHTS (13)
- CLEAN-BLIST (10)
- WEDDING (2)
Sew wings
First, we transfer the outline of the wings to the fabric folded in half (the right side of the fabric inward). We sweep away the parts, cut them out taking into account the allowances, turn the resulting wings inside out, and iron them. For beauty and to designate the feathers, you can lay several stitches on the front side. And then we stuff the parts using a thin wooden stick. We sew up the holes that were left to stuff these parts of the doll, and, in fact, we sew them to it.
Well, it's time for a hairstyle for the tilde doll. For a wig, you must first sew the yarn-hair crosswise - you will get a parting. Then sew this wig to the head and arrange the hair in the desired hairstyle. You can also sew some cute hat.
Step-by-step instruction
The following is a master class and basic recommendations for those who are just starting the exciting making of a Tilda doll. If you don’t know how to sew a Tilda doll, stock up on materials, ideas - and start creating!
How to sew Tilda's torso
The bodies of some Tildoches are cut out along with part of the dress. First of all, two weasels are sewn together - the body of the toy and the clothes (the seam is carefully ironed). Then the part is outlined, aligning the fabric seam line with the contour indicated on the Tilda doll pattern. Be sure to check that all cut components are present. The part is not cut out!
Parts of Tilda's body are quite small, the seam allowances are also narrow - about 0.5 cm, and sometimes less. During stitching, sections may fall off, which will reduce the quality of work. Therefore, first sew the parts of the toy along the outlined contours in the canvas, without cutting. Be sure to leave the turning hole unstitched. Before sewing on the machine, remove the pins, and then remove the basting thread. Iron the stitched parts. Now you can cut - the cuts will be neat.
Another secret is to turn out the narrow parts of the body and at the same time fill them with synthetic batting. Use a disposable sushi chopstick. This will ensure that the legs and arms are filled evenly.
If the limbs must bend at the elbows or knees, then these parts should be filled with synthetic padding or other material up to the point of bending. Sew this area right through and fill further.
Some dolls will sit. Therefore, do not fill the legs tightly in the hip area - after sewing they will bend better.
If the future toy must stand or sit confidently, its base must be filled with a heavy bulk component:
- peas;
- wheat;
- coarse salt.
After filling the part (arms, legs), sew the unsewn part with a hidden seam. Beginning needlewomen who have not taken into account the recommendations for the color of fabric for Tilda's body can easily paint an already sewn white doll with their own hands using natural means - strong tea leaves or coffee.
50 g of inexpensive coffee (it is the cheap product that gives the most stable color) and 1 tbsp. l salt per 1 l water. Keep the doll in the solution for 15-20 minutes, then rinse a little in cold water, wring out and dry. We get a very delicate attractive shade.
The tea solution is made more saturated - 5 spoons of cheap tea per ½ cup of boiling water, a couple of drops of PVA glue to fix the color. Further according to the previous description.
How to do Tilda's hair
The hair of a typical Tilda lady is voluminous, so for a loose hairstyle it is better to take plush yarn. But for some hairstyles it is permissible to choose any thread of the desired color, even floss.
Stretch a thin soft wire through the doll’s head, which will allow you to later braid the hair with threads.
Or you can do it much simpler - sew measured and cut strands of thread to the head of the toy, starting from the parting. To make the hair fit, attach the strands again at ear level. Next, shape your hair as you wish. For example, you can make lush braids.
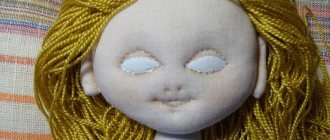
How to design Tilda's face
All Tildochkas are characterized by eyes in the form of small black dots. Embroider them with any thread, French knots or satin stitch.
The traditional blush for young ladies is applied with cotton swabs. Use dry blush, acrylic paint or red pencil. The mouths of these dolls are not embroidered.
Clothes and shoes for Tilda
Clothes for Tilda are made from any material - silk, tulle, organza, calico, fleece, denim, knitwear, chintz and the like. It is recommended to choose fabric with a very small pattern - stripes, checks, polka dots, flowers or plants, abstraction.
For decoration, select beads, lace, ribbons, braid, and small buttons.
Shoes for Tilda can be high-heeled shoes made of cork, cardboard or wood. The felt option also looks harmonious. But the most acceptable are shoes with flat soles, for example, ballet shoes according to the proposed life-size pattern. Sew a ribbon or flower to the shoes, glue beads or rhinestones.
Textile gift dolls are often scented. There are different ways to give Tilda a pleasant smell - adding mint, lavender, basil, jasmine, cinnamon, vanillin to the filler. You can put a ready-made sachet bag into the souvenir toy or simply rub the wet body with spices.
Another method is to drop a little aromatic oil (lavender, lemon, orange) onto plain coarse sea salt. The prepared salt is added to the filler. The toy will smell for quite a long time - about a month at a distance.
When making a life-size Tilda as a gift for a loved one, you can sew a heart-shaped button to her body or insert a small Valentine’s card with good wishes into the finished doll.
Knitted hat for Tilda
Choose hook No. 2 and yarn that matches it in thickness. The hat is knitted in the round using single crochets (let's call them sc) and double crochets (dc). So, cast on 24 air loops (let’s shorten this designation to ch) and close them into a ring with a half-column.
- 1st row: 1 ch, 23 sc in the ring, close the row with a half-column.
- 2nd row: 2 ch of lifting, then 1 dc in the first loop of lifting, then 23 dc in a circle in each lower sc, close with a half-stitch in the second ch of lifting.
- Row 3: repeats the second row.
- 4th row: start, as in the two previous ones, before dc in the first lifting loop, then cyclically perform 1 dc, skip one, then perform 2 dc and skip one.
When finishing knitting, pull the cut thread through several knitted posts - this way you will hide it and secure the knitting.
Before sewing on the hat, don’t forget to put a few strands of the doll’s hair in it so that the fabric of the head does not show through the headdress. The hairstyle can be done in the form of two large buns of hair, symmetrically placed on both sides of the knitted hat.
Make a face.
Centipede doll hair, how to fix hair
Attaching hair to the head of a centipede doll is one of the most difficult processes. We present you with step-by-step instructions on how to do this quickly and beautifully:
- First, we prepare all the tools for work that you see in the photo:
- We also prepare 1 bundle of wool and 1 m of tress (everything should be the same color), because it is from this that we will make the hair for the doll:
- We glue wool to the doll’s head, which will make sure that no bald spots on the head are visible after we glue the tresses:
- Use needles to mark places on the head where you can glue the tresses:
- Step back literally 2 mm and attach the following tress:
- We sew the blanks, and coat the places where the knots will be with glue:
- We sew the tresses around the doll's head until there is a small hole left for the top of the head:
- To make the crown, you need to take a 6 cm long tress, twist it into a tube and sew it:
- Then carefully glue the crown to the head:
- Straighten your hair with your hands very carefully so that your hair looks beautiful:
Knitting legs
Using the color that we chose for the shoes of the future doll, we cast on 4 air loops and connect them into a ring with a half-column.
- 1st row: 8 sc in the ring.
- 2nd row: 8 sc.
- 3rd row: perform 6 sc, and then knit 2 hdc (they indicate the heel).
- 4th row: repeat the third row.
- Next, change the color of the working thread to flesh-colored.
- We knit the same rows 5 and 6: 8 sc.
- 7th, 8th and 9th rows: 9 sc.
- 10 – 12th rows: 10 sc.
- Then we change the flesh color to the one in which the pantaloons will be made, and knit 10 sc up to the 14th row inclusive.
- Row 15: 11 sc.
- Then do a constant addition like this:
- Row 18: 12 sc.
- 21 row: 13 sc.
- 24 row: 14 sc.
- Row 30: 15 sc.
- Then from the 36th to the 41st rows knit 16 sc.
Finish knitting. The legs are ready.
Secrets
In my opinion, these toys have their own character, they are individual and original. Tilda's secrets and features help you maintain your style, and these are:
- certain facial features, if you look at many photos and videos of Tildas, you will notice that all Tildas have small black eyes and rosy cheeks;
- natural fabrics are used for production, rustic motifs and country-style fabrics are also used - small flowers, stripes or checks;
- you can stuff the toy with almost any soft materials;
- You can sew either by hand or by machine;
- for hair, threads or ordinary yarn are used, yarn called “Ivy” is also used - you get a beautiful disheveled hairstyle;
- very often, to make Tildochkas, they take ordinary white cotton fabric, and to give it the desired color, they simply dye it with tea or coffee;
- blush is painted either with regular blush or with pencil dust - you need to sharpen the pencil a little, remove the sawdust, leaving only the pigment, and gently rub it into the cheeks.
We knit the head and body
The doll's head and body are knitted together, representing one piece.
- Take the threads that will be used to dye the tilde pantaloons and cast on 33 air loops. Close them in a circle with a half-column.
- From the first to the fifth rows, knit 33 sc in a circle, without adding or subtracting.
- In the 6th row, decrease one stitch every nine stitches, you will get 30 sc at the end of the row.
- Save 30 sc up to the 9th row inclusive.
- In the tenth row, decrease one stitch every 8 sbn, you get a total of 27 sbn.
- 11th and 12th rows: 27 sc.
- Change the color of the threads to flesh-colored and continue knitting:
- Row 13: 27 sc.
- In the 14th row we decrease one stitch after seven knitted stitches, we get 24 stitches.
- We knit 24 stitches for 2 rows.
- 17th row: we decrease after 4 sc, in total we get 20 columns in a row.
- Four rows of 20 columns.
- In the 22nd row we perform a cycle: two sc on one base loop, 9 sc. At the end of the row we already have 22 sc.
- From 22 to 24 rows: 22 sc.
- Change the flesh color to the color of the clothes (dress).
- Row 25: add one stitch every 10, getting 24 sc.
- We do not add or subtract two rows.
- We return to changing to flesh-colored threads and knit the 28th row without changing the number of loops.
- Row 29: Decrease 4 times after every fourth sc, reaching 20 stitches.
- Row 30: decrease, knit three sc and repeat this cycle until the end of the row (control – 16 sc).
- 31st row: cycle of the previous row, but every 6 sbn (total 14 sbn).
- 32nd row: reduce the number of sc to 12, making a decrease after every 5th column.
- Row 33: 12 sc.
- Row 34: one increase, three sc and so on until the end of the row (15 sc).
- Two rows of 15 sc.
- Row 37: add one stitch at a time after knitting 4 sbn (18 sbn in total).
- Five rows of 18 sc.
- Row 43: decrease through one column, 12 sc in total.
- Row 44: knit 2 sc together 6 times.
We finish knitting.
Sewing technique
For sewing, you need to choose natural fabric. Remember that the colors should be harmoniously combined with each other . Traditionally, Tilda sews outfits from fabric in soft pastel shades, plain or with floral prints. For sewing you will need:
- textile;
- patterns;
- ribbons or lace for decorating the product;
- threads to match the fabric;
- scissors.
You can make patterns yourself, but novice craftswomen are better off using ready-made ones.
Experienced needlewomen can sew more complex outfits.
Pattern for sewing a jacket and trousers
Sewing nuances:
- To create a simple pattern, the doll must be outlined with an allowance of 1 cm.
- It is advisable to cover the inside of the dress with non-woven material: since the doll is very soft, the clothes will fit better on it this way.
- You can use lace or ruffles to decorate the dress. If you took ruffles, then place the seam on the back side. Place the ruffles on a thread, first secure them with pins and carefully sew them onto the dress.
- Iron the folds well.
Pajamas, overalls, panties, or even entire suits are usually sewn for a hare. To sew an outfit for such a tilde, you need a pattern that was used to sew a hare.
Pattern for sewing a sundress for a hare
We knit wings
The wings of a tilde angel are not knitted in a circular manner, but in the next row: we finish one row, turn the knitting over and continue working in the other direction.
We cast on 16 air loops.
1st row: 4 sc, one increase of sc, one addition of hdc, 4 hdc, 5 dc. In total we get 17 columns.
2nd row: air loop for lifting, 10 sc, increase, 6 sc.
3rd row: we knit only behind the back wall of the columns, this is important. 5 sc, one increase, 3 hdc, one increase hdc, 2 hdc, 5 hdc, two double crochets (work in the penultimate loop). For control, we mean that our row already has 20 columns.
4th row: after 12 sc, add one and knit another 7 sc.
Row 5: knit again behind the back wall. 5 sc, increase one single crochet, 3 hdc, increase one hdc, 9 dc, finish, as in the previous row, 2 double crochets in one loop.
And now, let’s explain why we knitted the columns on the back walls in the 3rd and 5th rows - in order to knit them in the second wing, clinging to the front walls.
For beauty, you can tie the upper edges of the wings and rows of half-loops with a “crawfish step” pattern, of course, choosing a contrasting color (for example, the one you used to knit the dress for this doll).
When tilde changes her dress
Over time, a permanent outfit will fade, become dirty and require replacement. If the pantaloons under the skirt are not striking, then a blouse that has lost its appearance spoils the whole impression. You can carefully tear off the handles and sew new ones. If you want, this is the best option. But there is another way. These are options for clothing patterns for tilde dolls that do not require complex construction (based on rectangles and stripes).
Such dresses can be sewn by measuring the fabric directly on the doll. The principle here is simple: the volume of the arm determines the volume of the sleeve, the volume of the hips determines the width of the skirt. For very wide ones, choose a ratio of 2:1, that is, two hip volumes, for medium ones - 1.5, for very small expansions - 1.2. Folds are placed directly on the doll using pins and stitched by hand.
You don’t have to rip off the doll’s arms or alter them, but sew her a dress that will cover the white fabric of the arms and corset. To prevent it from showing through the dress, choose a dark fabric. This dress is sewn using a base pattern.
Knitting a heart bag
Our doll will carefully hold the heart-bag in her hands.
Take brightly colored threads and cast on 6 chain stitches. Connect them into a ring.
1st row: 12 sc in the ring.
2nd and 3rd rows: 12 sc.
Break the thread, we have knitted one side of the future heart. Using a separate thread, tie the second side in the same way. Then connect these halves and continue knitting in the round. Make decreases where the sides of the heart were connected. Specifically, each row involves 2 decreases. And in order to give the handbag a “tilde” style, lengthen it - do not add in every fourth row.
Vest without lining
This option is suitable for material that does not have a reverse side. This is exactly what velsoft is (it has a pile on both sides, the edges do not crumble). We transfer the pattern to the material, cut out three parts - two shelves and a back.
We connect the shoulder sides and sew them.
Then we grind down the sides. The vest is almost ready, all that remains is to process the edges.
When sewing doll clothes, thick and rough seams should be avoided.
Therefore, when making this fur vest, the edges were trimmed in a circle with knitted braid.
Types of dolls
It was already said above that a tilde doll is considered only nominally, but in general a tilde can be a hare, an apple, or a snail. With such a variety, which product should you choose? Our recommendation is to create themed dolls for each holiday. And why not, because this is an excellent way to surprise your guests. In addition, tildes presuppose the presence of decorations for themselves, so you can finally show your friends and relatives original little things that would escape attention in a simple everyday setting.
So, you can sew a whole garland of tilde hearts or even show a whole celebration scene. Let's say, sew a whole family of dolls, and with their help create a scene for celebrating some family celebration.
A huge number of modern mothers create dolls for babies with their own hands. Tilda makes children very happy and is fun to play with. And besides this, which is important for both mother and child, the tilde is not at all dangerous and is made of natural, non-toxic materials.
Mothers with a rich imagination will probably come up with an interesting game for their daughters and sons with such dolls. For example, you can sew different animals and thus create a cute menagerie. Fill them with cereal, and then the toy will also work to develop the child’s fine motor skills.
See also:
- How to beautifully photograph your work?
Interesting solutions
But what if you want to make unique dolls? What other Tilda dolls are there?
They make themed dolls for every holiday. This is a great way to add some zest to your interior - if you allocate a certain shelf or wide window sill for tildos, you can arrange a real dollhouse there. A variety of miniature objects, miscellaneous objects and other charming items like miniature bouquets will come in handy.
Tilde is used to bring some scenes to life. For example, there are patterns for recreating a classic Christmas scene using dolls.
Many mothers make tildos for children - children like these dolls, and they are absolutely not traumatic, and since only natural materials are used for production, they are also non-toxic.
And here is the Tilda Snail with a template:
You can make a cute menagerie - for example, a hare, a fox, a bear cub and other inhabitants of the forest. But it’s better to fill the animals not with cotton wool, but with small balls - for example, cereal.
Useful tips
To make the product even more interesting, you can add functionality to it. Drop aroma oil inside the Tilda doll during its manufacture, and you will receive an original exclusive sachet.
If you put a bag of aromatic herbs wrapped in several layers inside the tilde, you will get an anti-stress doll; it can also be used as a sleepy pillow.
In general, tilde dolls are wonderful in everything: from the work on them to their appearance and the mood that they will create for their owners if the latter get a little creative with the use of the toy.
It is also very important that the doll will always look wonderful, even if you made any mistakes during its manufacture. After all, the whole charm of these products lies in some awkwardness and slight negligence, which, by the way, only emphasize that the dolls are handmade items. Or maybe someone will be so inspired by working on tildes that they will make it a tradition to give them to loved ones, emphasizing their love and reverent attitude towards them.
Tips for creating Tilda for beginners
The simplicity of the work allows everyone to start creating primitive toys: experienced craftswomen, beginners, and even those who have no sewing experience at all. The main thing is desire and a little imagination, which will make each craft unique. Having decided to sew your first doll, you should not immediately run to the store for special fabrics and tools. It is better to first “comb through” the household bins that every woman has. From old children's things it is quite possible to make original and beautiful clothes for tildes. All sorts of interesting buttons, ribbons, and appliqués will come in handy. The main requirement for materials is that they be natural, because naturalness and environmental friendliness are the distinctive features of tilde toys.
Tags
tilda style All tilda patterns tilda fairies Tilda dolls Tilda hares Animals tilda Birds tilda Bugs tilda New Year's tilda Tilda dolls Patterns tilda patterns tilda patterns. tilda patterns. Patterns Patterns Doll patterns Doll pattern Pattern 1 Doll pattern Tilda dolls Tilda dollsTilda dollcute doll TonyDoll patterns looks doll sew a doll Tildadoll Tilda doll patternTilda doll patternDoll pattern in
knitted hares paper article new tony material self-made cute hare post
And a girl, and a boy, and an animal...
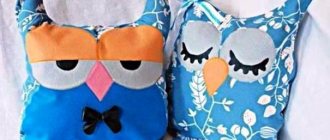
Tilda is not only a petite young lady. This brand produces animals, snowmen, snails and bugs. They also began to produce male Tildok - the Nutcracker, Pinocchio, and the Steadfast Tin Soldier.
Lately, cute animals, the so-called Scops Owls, have become popular. Yawning and sleeping bunnies, cats and bear cubs in cute pajamas will not leave you indifferent. You will definitely want to place them in your bedroom or children's room.
As you can see, sewing Tildy dolls if you have ready-made patterns is not at all a difficult task, even for beginners.
Patchwork - technique and master class for sewing stylish and beautiful sewing with your own hands (80 photos)How to make a car out of paper: step-by-step description of how to quickly and easily build a high-quality car (75 photos + video)
- Paper toys - diagrams, ideas and options for making various toys with your own hands (110 photos)
But when you wake up in the morning, the first thing you will see is cute doll faces illuminated by the sun. Funny handmade toys will cheer you up even on a cloudy day.
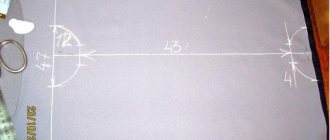
How to take tilde measurements
Over its 20-year history, the appearance of the tilde has changed greatly. Previously, these were graceful and very thin dolls, approximately the same size and with similar outlines. Now tilde is a ballerina girl, a fat girl, a hare. Its size varies from very miniature to simply gigantic.
Tilda hare
For reference! You can even purchase a human-sized doll to order.
The measurements for each will naturally be different. To sew clothes for a tilde yourself, you need to follow these steps:
- The main indicators are determined. To do this, two laces are tied around the doll's neck and around the waist.
- Bust circumference (Cg) is measured along the neckline from one side seam to the other.
- The waist measurement (St) is taken from one side seam to the other. In sewing, it is customary to use half waist circumference. Or half of the previously tied lace is measured.
- Shoulder width (Shw) is the distance between the sewing point of the right hand and the left.
- Back length (Dst) is the measurement between the lace at the neck and the lace at the waist.
- Arm length (Dr). The starting point is the point where the arm is sewn in and the distance to the hand is measured.
- The thickness of the arm is measured exclusively in the armpit area, that is, the largest one is taken (Op).
- The neck circumference is measured completely (Osh). To do this, just measure the length of the lace previously tied around the neck of the tilde.
- Chest height (Br) is measured from the armpit to the waist.
You might be interested in this Toy bee for a child in kindergarten, we make it ourselves
Rules for taking measurements from the tilde
History of the toy
The first news about the Tilda doll came to the world from Norway. Designer Tone Finnanger came up with it in 1999. The unusual proportions of the doll gave it another name. The bigfoot is distinguished by characteristic features that combine frivolity, some absent-mindedness and an invariable sense of beauty. Very often it is expressed in an unusual and unusual combination of things. This can be massive, even bulky shoes and an elegant evening dress. Tilda's facial features are always the same - small eyes, rosy cheeks.
Tilda literally became recognizable and famous all over the world in just a few years. In recent years, the designer and author of the Tilda brand has focused on national characteristics in his books. In her collection you can find dolls with a wide variety of features inherent in a particular ethnic group.
Tone in his books reveals all the secrets of creating not only the doll itself, but also provides patterns for sewing clothes. You can also find patterns in them that allow you to knit openwork outfits using a hook or knitting needles. For example, even a novice craftswoman can make a knitted jacket.
For reference! All doll patterns in the books are presented in full size.