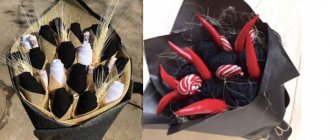
For birthday
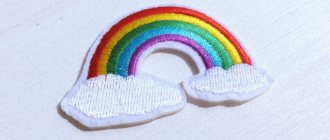
Balloons
“To decorate voluminous birthday cards that you collect yourself, you can use flags and pictures of gifts.”
A card with the constant attributes of the holiday will impress and add the right notes to the mood. To create this miracle you will need to prepare threads, pieces of colored paper, and a piece of A3 cardboard. To fix the elements we will use double-sided tape and transparent glue.
The cardboard, which is the base in this case, is folded in half. The choice of its color is, in principle, arbitrary, however, if you choose blue, you can realize the idea of balls floating in the sky. By the way, to decorate voluminous birthday cards that you collect yourself, you can use flags and pictures of gifts. But first things first.
Let's get back to making balls. They need to be cut out of colored paper in different shapes and diameters. Our elements will consist of two parts: a circle and a triangle. We glue the latter onto the circle so that we get an imitation of a ponytail. We fix the thread on top with double-sided tape. In total we will need 35 such blanks.
Prepare 35 balls
In parallel with the paper circles, you need to cut diamonds, from which flags will then be made. They are often used to write wishes. 1 checkbox = 1 letter. The rhombus is bent in half to form a triangle, folded onto the thread and its parts are glued together. In this way, the necessary words and phrases are composed.
Attach the flags to the base
Let's start laying out the base. We glue 20 balls to it in random order, making sure that the threads do not get tangled. The remaining 15 will be supplemented with small accordion linings before being included in the postcard. You can make a part from a 2x7 cm strip of paper. Just cut it out and bend it several times.
Accordion lining on the back of the balls
You need to glue the element to the ball from the wrong side, fixing it with the center and leaving springy edges. With these paws we will attach the ball to the card.
Now all that remains is to weave the threads into the tree and attach the garlands of flags.
Ready-made three-dimensional birthday card
Do-it-yourself voluminous postcards made of paper
This gift can be created in literally 15 minutes. We will need striped wrapping paper and a cardboard base.
We cut several strips of paper and give them the shape of a tube, winding them around a pencil. Secure the edge with glue and set the pieces aside to dry. During this time, we will cut out flames from red or orange (or maybe both) paper. Together we will assemble the parts on cardboard. You can include a glass of champagne, drawn or made in the form of an applique, into the composition. Candles can be “stuck” into a beaded cake. Scatterings of shiny stars are also suitable as decoration.
Volumetric card with birthday cake
Making crafts in the preparatory group
In kindergarten, in the preparatory group, children are already 6-7 years old. They are already quite smart and skillful. Accordingly, crafts may be more difficult to do than in younger groups.
I remember I really enjoyed playing with plasticine. This soft, flexible material was very pleasant for small hands and fingers. I have no doubt that sculpting small parts brings pleasure to other kids as well.
Under the strict guidance of their parents, 6-7 year old children can make interesting applications for the International Women's Day.
Spring came!
Raspberries ripen
Bouquet of meadow flowers
We make simple flowers step by step. We make plasticine appliques only on the front side of the cards. Everything inside can simply stick together and the craft will have a “non-marketable” appearance.
Two lush flowers
Don't just use paper and cardboard. Buttons are a good material. We glue appliques from them onto the front side.
Under the sun
Or we use pasta.
Dandelions
If you tint them a little with watercolors and dry them, the pasta will look even prettier.
Happy March 8th!
You can also make compositions from felt. It is practically similar to colored paper, but softer and more pleasant to the touch.
Amazing flower
DIY birthday card
You can make a birthday card this way even with a small child. Leave the sheet to dry and proceed to the main drawing. Fold the second sheet in half. Make blue streaks on the outside, it’s better if they are translucent.
You can make a beautiful card with this background if you add more water to the paint. Try using a large brush or even a smooth sponge. When the background is dry, draw a tree branch with thin pencil lines.
Let there be very few small side branches on it, create only contours. Once you have the desired shape, paint the branch with a thin brush using different shades of brown.
To make your greeting card pop, you'll need to grab that first sheet of flower splashes. On it, draw the outlines of butterflies according to the template, and then cut them out. Choose a butterfly template that has a pronounced middle, body. Bend the wings of the blanks upward, apply glue to the middle and glue them to the branches of your tree.
This is a great way to make a card with flowers, balloons and other “holiday” symbols. Experiment with different coloring techniques: try applying a pattern to paper with a wax candle, use a toothbrush to create splashes, create a gradient with soft foam and your card will turn out unforgettable.
You can make a postcard with your own hands using a more complex technique. In any craft or arts and crafts store you can find unusual products that you have probably never even heard of. If you make a birthday card with such details, the birthday person will certainly appreciate the effort and originality. Try to master several modern techniques at once.
DIY cards with flowers inside
Even a child can make a heart-shaped card with a three-dimensional flower inside:
YOU WILL NEED IT We make unimaginably beautiful flowers from paper, both simple and complex in the technology of creation.
A lush flower for the inside or outside of the card can be made from colored or even plain paper painted with watercolors or pastel crayons. You can cut flowers using this template:
Print out the flower template and color it with paints. Fold it according to the marked fold lines and glue the resulting flower onto the base of the card.
Such a lush and bright card with flowers inside, made with your own hands, will undoubtedly delight the recipient.
She explains how to make it in her master class TheJulianaHappy :
The option with delicate, pastel colors looks very cute. Making stamens for flowers is not difficult!
MASTER CLASS ON THE TOPIC
How to make stamens for flowers: 4 different ways
Flowerbed with flowers in the window
The original master class is in English, so for your convenience we offer a brief translation of the process of creating this flower card.
Standard materials and tools: colored paper, cardboard, scissors, glue, plastic to imitate glass in a window.
Take thick colored paper and fold it in half. Cut out a square window in one half.
We make a frame from colored paper of a different color. The glass for the window can be made from a protective film for your phone or transparent plastic. Glue the resulting window frame to the base of the postcard. You can do without “glass” at all.
Window frame
Glue it into the hole
We glue a flower pot out of cardboard and glue it in the middle of the card on the fold line. Glue the sides of the resulting pot together so that when you close the card, the pot folds up.
Glue the pot
Adding up the edges
Decorate along the edge
Next, from colored paper we cut out green stems and all kinds of bright flowers: crocuses, hyacinths, daffodils and tulips. Perhaps your bouquet will not be spring, but summer, which means that cornflowers, daisies, pansies, etc. will appear.
Stems first
Then we cut out the flowers
Glue the flowers into the pot
The height of the flowers should be such that they do not stick out from the card, but are visible through the window!
Gluing flowers into a pot
This is how they stack up
The window can be decorated with a cozy curtain.
Original master class
Using the same principle, you can make a card with flowers from felt or painted cotton pads. Additionally, insert a laconic but warm congratulation along with the flowers!
In addition to flowers, balloons, stars, and bows may appear from the card.
TheWorkshop shows how to make a panoramic flower card along with a greeting envelope in his master class :
Postcard with a pot of flowers inside
We take thick paper - the basis for our postcard. Create a rectangle in the center of the fold line of the card. The width of the rectangle is 3 cm, length is 7 cm.
We make cuts along the pink lines with a stationery knife. Then we fold the resulting rectangle inside the postcard. We attach the base of the card to another sheet, larger in size than the original base.
Then we make a floral design: a flower pot, the flowers themselves, fluttering butterflies and grass. We combine all this and glue it to the front of our postcard.
Making a floral design
Closer photo
Original master class.
Using the same technique, you can make an original vase postcard. You can also make flowers in such vases with your own hands from paper or other available materials.
Postcard-vase for flowers
Paper bouquet
MASTER CLASSES ON THE TOPIC
How to make flowers from corrugated paper with your own hands
How to make flowers with your own hands from scrap materials
Volumetric children's card
We bring to your attention a master class on making a very delicate three-dimensional card, which will not only congratulate the recipient, but will also fit perfectly into the interior of, for example, a children's room.
First we make a box frame. To do this, take thick blue paper and cut out a template for the box from it. We fold the edges of the template 4 times, 5 mm on each side, thereby forming a frame. Glue the resulting frames together.
On top of them we glue colored or scrap paper in a color that matches your composition.
Next, we will prepare the elements of the future composition. Glue together a balloon from paper circles. We fold the circles in half and glue them together. A waxed cord is glued into the base of the basket and directly into the circles, forming a ball.
We cut out clouds from scrap paper and a sun from yellow paper. Glue the elements of the composition into a frame. We glue the balloon as follows: we glue the base of the balloon with bulk tape, and the balloon itself with glue. We glue the clouds using the same principle: one with glue, the other with bulk tape.
We make green grass from a simple napkin. First we cut it, then glue it. On the right side of the box we glue a tree made using a hole punch for Scrapbooking. The final touch is to glue serpentine, butterflies and a congratulatory inscription into the empty spaces! We glue a ribbon with embroidery or lace to the bottom of the box. The original three-dimensional postcard is ready!
Original master class.
For all occasions
Bouquet in a vase
To create a three-dimensional postcard, you will need a package of colored cardboard and a glue stick. If this is not available, it is permissible to use ordinary PVA glue.
If you choose the latter option, then work with liquid glue very carefully, apply it little by little so that the paper does not become limp or lumpy. The highest quality products are obtained by using double-sided tape to assemble parts.
The postcard with 3D flowers with your own hands is assembled according to the following algorithm:
- Let's choose cardboard sheets for the title side of the postcard and the inside. The second one should be slightly smaller than the base, so we measure 2 cm on each side, draw a new rectangle and cut it along the resulting perimeter.
- We fold the smaller piece in half and begin drawing 7 lines from the fold side. We do this according to the following scheme. The length of the lowest line should be 2 cm. Set aside the specified size from the fold and draw with a pencil. The next line will appear a centimeter higher than the first and will be equal to 2.5 cm. Each subsequent line after it will also increase by 0.5 cm. The step distance of 1 cm is maintained for all seven levels.
Draw 7 lines on the fold side
Cut the folded cardboard along the resulting lines. We bend the strips to one side and press the folds well. This will simplify the work later.
Bend the strips to one side
- Unbend the strips and open the cardboard sheet. The cutting turns out to be concave inward. We'll have to fix them and take them outside. Remove each strip by folding it inward at the edges and bending it outward in the middle. Close the workpiece and place it under the weight. The paper must “settle down” so that it can open and fold easily.
- Now let’s reveal the main secret of how to make a three-dimensional postcard. Let's move on to the title part. We bend it in half and glue the inner part with the cut strips. This must be done so that the folds of both pieces of cardboard meet with pinpoint precision. Take your time. Fix one half first, and then work on the second. This will reduce the risk of displacement.
Glue the cut strips onto the inside
The main work has been done. All that remains is to fill the vase with flowers. You need to cut out stems with leaves from green paper, and several flowers from paper of a different color. Don't chase after curiosities, draw what you can. Plant two buds on the stems and leave one as is.
Cut out stems and flowers
We are trying to put the bouquet in a vase. We glue one flower on a stem on the left side of the card, the second on the right. We coat only the lower third of the stem with glue. This will allow the element to remain movable and take a standing position when opening the postcard. The bud without a stem is glued to the top strip of the vase.
Popular articles The Legend of a River
Place the bouquet in a vase
We check the quality of work. We close the postcard. If everything is done correctly, then decorative elements will not peek out from it and its doors will open and close with ease.
There is another interesting option on how to make a 3D card with flowers.
Flower glade
To create this masterpiece, you will need green and orange cardboard, a package of colored paper and a few sheets of pure white paper.
Stages of work:
Let's take cardboard sheets. We will leave the orange in its original form and use it for the cover, and adjust the green a little. It will need to be reduced somewhat. Let's shorten it on the sides by one and a half centimeters. Let's make the top edge wavy.
Make the top edge of the green leaf wavy
- Fold the piece of paper in half and draw 5 stripes on it, a little more than one centimeter long. The starting point should be the fold.
- We cut out the strips, bend them slightly upward, and then return them to their previous position.
Fold the stripes up
- We open the workpiece and bend the strips outward, making a bend in the middle of the cut section.
- Glue the part onto the base. The entire surface area must be coated with adhesive, leaving only the areas of the cut strips untouched.
Glue the part onto the base
It's time to start working on the flowerbed. Let's decorate it with flowers. We will make blanks of various shapes and sizes from colored paper of different shades. Let's plant them on stems with leaves. Let's place the finished parts in the clearing. You can complement the composition with butterflies or place a wasp on a flower.
Place the finished parts in the clearing
Card for mom
Now let’s look at an example of how to make a three-dimensional card as a gift for your mother. What, first of all, should be given to women? Of course, flowers. We present a master class on how to make a three-dimensional card with flowers yourself.
How to make birthday cards with balloons
YouTube channel Crafting Hours
What do you need
- Thick gray paper;
- double-sided paper of different colors;
- ruler;
- a simple pencil;
- scissors;
- double sided tape;
- compass;
- regular glue and/or glue stick;
- glue gun;
- twine or other thick threads;
- White paper;
- felt-tip pen;
- glue stick;
- colored tape.
How to do
1. Fold gray construction paper in half crosswise. Cut a rectangle with sides 20 and 14 cm from a pink sheet. Cut a rectangle measuring 16 x 10 cm from gray construction paper.
Using double-sided tape, glue the small gray part onto the pink one, and secure the latter onto the cover of the future card.
YouTube channel Crafting Hours
2. Cut many strips of colored paper of different thicknesses, but the same length. These are blanks for balls. Conditionally divide one strip into three parts and bend it twice along the lines.
Draw a circle on the resulting part using a compass. Cut along the contour - you will have three circles.
YouTube channel Crafting Hours
3. Prepare circles from the remaining colored stripes in the same way.
YouTube channel Crafting Hours
4. Cut small triangles from the remaining folded paper. Glue them to the bottom of each circle.
YouTube channel Crafting Hours
5. Fold a small strip of paper in half. Unfold and fold each side like an accordion, as shown in the photo and video below.
YouTube channel Crafting Hours
6. Make as many of the same parts as you have balls. Glue them to the circles so that the accordions are on top.
YouTube channel Crafting Hours
7. Using a glue gun, attach a piece of twine or other thick thread to each ball.
YouTube channel Crafting Hours
8. Fold the long edges of the white paper about 2 cm and cut along the contour so that you get two strips folded lengthwise. Fold each one in half crosswise three times. Cut out identical triangles from them so that the bases of the shapes are on the fold. Details are in the video below.
YouTube channel Crafting Hours
9. Write one letter from the phrase “Happy Birthday” on each triangle. Lubricate the inside of the flags with glue, put them on two pieces of rope and glue them together. Tie the ends of these two strings together.
YouTube channel Crafting Hours
10. Lubricate the accordions with glue on the back of the balls and distribute them beautifully inside the card. Save a few for the cover.
YouTube channel Crafting Hours
11. Tie the ends of the twine, twist and cut off the excess. Using a glue gun, attach the letter flags to the card.
YouTube channel Crafting Hours
12. Write a congratulatory message at the bottom of the cover. Glue a few balls at the top. Cut off the excess twine and tie it with ribbon.
What other options are there?
You can make a three-dimensional postcard with balls flying out of the box:
Here's a similar option:
Here's how to make balls using the quilling technique:
And this is a simple postcard made using the appliqué technique:
How will we do it?
We cut colored paper into strips 0.5 cm wide. We tightly roll them up like a snail, for example, around an awl or knitting needle - it’s easier. We seal the outer tip of the strip.
Draw flowers on cardboard with a simple pencil. If you don’t have the ability to draw, you can always download a template on the Internet. We stretch each of our “snails” according to the shape of the drawn petals and glue them to the base, filling out the drawing.
You can attach beads to the centers of the flowers, and glue a bow from a small ribbon that matches the color to the corner of the card.
General instructions using the example of 3 postcards
In order to move on to more complex paper products, you need to practice on the simplest ones. To do this, three options for creating a paper postcard will be outlined below. After practicing with these examples, you can move on to more complex instructions for making them.
For the first option you will need the following set of tools and materials:
- Colored cardboard.
- Colored paper.
- Scissors or utility knife.
- Regular writing pen.
- PVA glue or glue stick.
Production time is no more than 15 minutes.
Ready-made postcard
The first thing you need to do is cut out the base in the form of a frame. Thick cardboard is used for this. The color can be any depending on the preferences of the master himself. The edges of the postcard frame can be made curly, as in the example, using scissors or a stationery knife.
To create even shaped frames, it is better to use markings made using a pattern or ruler.
A second layer of colored paper is applied on top of the prepared cardboard base. Instead, you can use an image printed on a printer as the main background.
Now the most important task remains - making holiday candles and lights. To do this you need to use a pen
A thin sheet of colored paper must be wrapped around the handle. The edge where the paper joins is glued. In this position, you need to maintain the shape for 30 seconds. After that, remove the handle. Repeat the action depending on how many candles you need to place on the card.
Lights are cut out separately from colored paper and then attached to the candles. The resulting design is glued onto a postcard. After this, you need to sign it and write a wish for the birthday person.
The second card will have an award medal with the age of the hero of the occasion.
General view of a postcard with a medal
To create it you will need:
- Cardboard as a base.
- Set of colored paper.
- Threads.
- Stationery knife or scissors.
- Glue stick.
You can make such a postcard following the instructions in just half an hour. In order to do everything correctly, the instructions will be described step by step.
Instructions
- Preparation of all necessary materials.
- Prepare a base in the form of cardboard of any color at the user’s request.
- Decorate the cardboard with different paper elements.
- Take a thin colored sheet of paper and fold it like an accordion.
- Using thread, tie the folded accordion in the middle.
- Spread the accordion so that it has the shape of a circle.
- To fix the edges of the straightened accordion, secure it with glue.
- Cut a circle with a smaller radius than the accordion.
- Draw the age of the birthday person or cut and glue numbers from paper.
- Glue the circle onto the accordion.
- Glue the finished medal onto the base.
Now that's it, the postcard is ready.
The last postcard for training will have three-dimensional elements.
Ready-made postcard
It will also take a maximum of 30 minutes to create. To make a postcard you will need:
- Thick colored cardboard as the main background.
- Colored patterned paper or real gift wrapping paper.
- Ribbons for dressing.
- Scissors.
- Glue stick.
The process of making such a postcard consists of the following steps:
- Prepare a cardboard base. The background can be painted or additional elements can be glued.
- At the top of the cardboard write the word “Congratulations!”
- Take colored paper or gift wrapping paper and cut it into squares in the shape of wrapped gifts.
- Glue the squares at the bottom of the picture.
- Make ribbon bows and ties for each of the stick-on gifts and attach them to them.
Popular articles Felt hat
Instead of ribbons, you can also use colored threads or twine.
All is ready. The card looks quite bright and interesting and has voluminous elements in the form of gifts and bows.
Postcards for school
Primary schoolchildren already know how to use various complex materials for creativity. Every year their skills are only honed. The teacher will help hone the child’s skills and offer new and interesting materials. This section offers samples of products made from professional materials for creativity.
From paper
For schoolchildren, you can offer to make postcards from paper of various colors and textures. To make them you will need glue, scissors and a little imagination.
Excellent ideas will be provided by tear-off applique, quilling, and volumetric applique.
Master class postcard “Dress for Mom”
Postcard dress
How I want my mother to always be beautiful and elegant! To do this, you can give your mother a dress, and even if it is not real, it will give your mother a good mood.
For production you will need:
- A sheet of patterned paper for crafts;
- A sheet from a notebook in a box;
- A bright sheet of paper for packaging or a piece of fabric;
- A pair of ribbons;
- Beads;
- Pencil;
- Safety scissors;
- Glue.
Manufacturing process:
- Fold a sheet of patterned paper in half.
- On a checkered piece of paper, draw a dress pattern - a skirt, a bodice.
Dress pattern
- Cut out the pattern and transfer it to the paper or fabric from which the dress is planned.
- Carefully cut out the details of the dress, arrange and glue to the base. In the section of the dress, draw a hanger (hanger), under the skirt you can draw the legs of a mannequin.
- Glue decorative beads or ribbons on top of the dress.
The dress can be decorated with lace and ribbons. You can also add a handbag or shoes cut out of velvet paper.
Felt postcard “Owl and little owlet”
Excellent bright gifts for mom can be made from pieces of felt. An applique made of this pliable material is glued to cardboard.
To make the mother of an owl and an owlet, you need to take contrasting pieces of felt. On the reverse side of the pieces, draw curved ovals (one large, the other small - see Fig. 30), draw ears. Carefully cut out and paste onto cardboard in the order shown. Cut out a wing for an owl and an owlet from felt of a different color, and glue them on top of the birds’ bodies. Draw the paws, beak and eyes.
Postcards from foamiran
A porous, velvety, flexible polymer material similar to suede - foamiran. This modern material is loved not only by adult needlewomen, but also by children. It glues perfectly with a glue gun, and also heats up from the touch of your hands and hardens in the desired shape.
You can make luxurious voluminous flowers from foamiran. Using a template, petals are cut out from a sheet of foamiran, given shape and glued in the required order.
To make a gift card from foamiran, take:
- cardboard (A4 format) of delicate color;
- soft green and brown decorative paper;
- foamiran orange and yellow;
- hot glue;
- scissors;
- iron;
- template for flowers;
- decorative elements (beads, rhinestones, ribbons).
Manufacturing process:
- Fold the sheet in half, open it, write congratulations inside, and glue red hearts.
- Glue a rectangle of soft green paper on the outside, and glue a flower pot cut out of brown paper at the bottom.
- Using templates, cut out flower petals from foamiran.
- Heat the petals with a low-heat iron and form tiers for the flowers.
- On a light green field, above a flower pot, glue the resulting flowers. Glue a bead inside each flower and decorate with rhinestones. Glue a bow made of thin braid or ribbon to the pot.
Master class “Postcard using scrapbooking technique”
Scrapbooking is a rather complex, but very interesting technique. Make a magical postcard for middle and high school children with your own hands. To begin with, you can offer children a simple decor option.
To create a decorative card “Heart” you will need:
- colored cardboard for polka dot crafts;
- rhinestones;
- ready-made paper flower, butterfly;
- inscription “With love”;
- double sided tape
- glue gun;
- scissors.
A blank is made from cardboard - a heart is cut out.
Glue a bouquet of flowers on one side of the heart, and a butterfly on the other side.
Using a pencil, draw the flight path of the butterfly.
Glue rhinestones over the pencil line.
Glue the wish or printed verse onto double-sided tape.
Colorful Mother's Day cards made by a child have special value. They foster love for mother, responsibility, hard work, develop imagination and fine motor skills. Such a gift can be given not only to mother, but also to grandmother.
How to assemble boxes from postcards with your own hands in a step-by-step master class
In order to make a box you need to prepare the following tools:
- Scissors
- Old postcards
- Threads and needles.
Having prepared everything you need, you can proceed directly to making the box. To do this you need:
- Choose the shape of the box. In our master class it is square and rectangular.
- Next, using the existing pattern, you need to cut out all the necessary parts: case, lid, sides.
- After all the parts have been prepared, you can start sewing all the parts with the main seam. This must be done carefully so that it is even.
- After covering, you can safely merge them together using a hidden seam. Again, very carefully, following the attached diagram.
This is how we got such a wonderful box that you can give for a birthday or any other holiday, or even keep for yourself as interior attributes.
If this work is performed with children, then you need to strictly follow safety precautions when working with a needle. Overall a very beautiful box!
The next master class tells you how to make a box in the shape of a sofa.
The layout of this box is somewhat different from the previous one in its simplicity. But that didn't make her any less beautiful. To make such a box we need:
- Beautiful and bright cards
- Multi-colored cardboard
- Colored paper
- Threads and needles
- Button or lingonberry to make fasteners.
Now you can start manufacturing, guided by the attached photos:
- According to the existing pattern, patterns of the box are made, three pieces for each part. Two parts will be made from the outside and one from the inside. The third will be made of cardboard and inserted between them to make the box rigid.
- After all the parts are cut out and prepared, we begin to connect them together in this way: face - cardboard - face. First, they need to be secured to each other using paper clips, and then we begin to make holes around the perimeter with an awl, and then sew them with threads around the perimeter.
- Now that all the holes have been made, take a needle and thread and sew each part separately with an “over the edge” seam. The seam should be smooth and neat.
- According to the postcard diagram, all the sheathed parts are assembled together.
- To make the edges beautiful, you can trim them with braid.
- The box should now have a lock. It will be a button or a bead that needs to be sewn on.
The result is a very beautiful box that you can give to someone for the upcoming holidays. And to make it even more enjoyable, you can fill it with candies or any other sweets.
To make the body of the box you need: postcards and cardboard with the following dimensions:
- on the walls
- 6×8 cm – 2 pcs
- 6×4 cm – 2 pcs
- bottom and cover
- 4×8 cm – 2 pieces
- cover
3×8 cm – 2 pcs
- triangle on the sides (you can make an oval instead of a corner)
3x3x4 cm – 2 pcs
All parts are sewn with a buttonhole stitch. This seam is made like this: from right to left. You need to step back 3 - 4 mm from the edge, pierce the needle away from you, bend the end of the needle with thread and tighten the stitch. The next stitch is also done after 4 mm. The stitches are located at an equal distance from the edge and each other. The thread also needs to be tightened equally. At the end of the line, the seam is secured with two or three puffs of thread in the same place. On rounded areas it is better to make smaller stitches.
After all the parts are sheathed, all parts are connected to each other. They are sewn together as follows: a needle grabs the thread from the seam on top with the threads of another part and fastens it. First of all, you need to assemble the walls, and then sew on the bottom. The lid is made separately and only then sewn onto the body.
Making interesting crafts from paper and cardboard with middle school children
The kids in the middle group are already 4-5 years old. These are quite skillful and smart children who will happily make things. They are more patient and can sit in one place longer. This means that crafts need to be made more difficult.
Interesting ideas for making compositions from plain colored napkins. To do this, cut them into small squares and roll them into balls. All that remains is to draw the composition and paste it over with pieces like these.
Postcards from napkins “Mimosa sprigs”
Here is another option with this plant.
Yellow mimosa
First lilac
In general, as you can see, napkin compositions are practically quilling, but simpler and lighter. In my humble opinion and experience.
With the kids we make cards from corrugated paper. It is ideal for creating lush flowers. They look like real ones and you even want to smell them.
Below is a template on how to cut out the buds correctly. We make dandelion, cloves, chrysanthemum and chamomile.
And then you can immediately put them into action.
Blooming buds
You can also simply cut out the buds and stick them on a cardboard card. Inside we indicate congratulations for your loved one.
Dresses and skirts have symbolized femininity since ancient times. Instead of flowers, you can glue a dress to the cards. Fold the dress like origami. Look at the diagram below and try it.
And look, it turns out very cute and beautiful. And most importantly - original!
Craft “Cintz Dresses”
Making dresses doesn't have to be in origami style. Here is just an applique of a bodice and a fan skirt.
Mom's favorite dress
Summer sundress
Ideas and step-by-step making of crafts for a labor lesson for primary schoolchildren
Elementary school students are able to perform more complex crafts than preschool children. However, they also need templates for tracing shapes and details, especially for first and second grade students.
Elephant
Crafts made from paper and cardboard in the shape of animals most attract primary school children. And this is not just like that: you can play with the made figures: ride in a car or write an interesting fairy tale with their participation.
To make an elephant, you will need the following materials and tools:
- colored paper or cardboard;
- marker;
- scissors;
- “live” eyes;
- glue stick.
The process of creating an elephant figurine:
- It is necessary to draw the following shapes on a sheet of paper of the same color:
- 5 rectangles with sides 8 and 10 cm (legs and head);
- 1 rectangle measuring 1.5 and 9 cm (trunk);
- 2 circles with a diameter of 5 cm (ears);
- 6 small ovals measuring 1*2 cm (nails);
- 3 strips measuring 6 and 2 cm (connecting parts).
- Large rectangles should be rolled into cylinders, gluing their edges. There should be 5 such parts.
- Each oval needs to be cut in half to make 12 pieces.
- Now you need to take 2 cylinders, glue 3 semi-ovals at the base of each - you get a pair of elephant legs. This pair should be connected to each other from above using one of the strips and glue. The bottom also needs to be coated with glue, connecting the legs to each other. Do the same with the second pair of cylinders.
- Two pairs of elephant legs need to be connected to each other by a third strip. To do this, it must be glued under the first and second strips, which fasten each pair of legs. For better strength, the legs can be additionally fastened with strips from below, gluing them inside the cylinder.
- You need to glue the elephant's head to the strip connecting the first pair of legs, after which you should attach the ears inside it on both sides, the trunk in the middle, and the eyes on the sides of it.
This is another example of an elephant made from paper rolls.
Crocodiles
Materials and tools:
- colored paper;
- scissors;
- black felt-tip marker;
- PVA glue.
Crafts from paper and cardboard: crocodile
Manufacturing process:
- It is necessary to draw and cut 4 strips along the width of the ruler. The length of the strips should correspond to the length of the paper sheet. The color of the stripes can be any.
- Next you need to take 3 strips and cut them into 4 parts. The body of a crocodile will be assembled from 10 such parts.
- First you need to roll one quarter of the strip into a ring and glue its edges. After this, you should insert another piece of the strip inside the resulting ring and glue the edges. Thus, you need to use 10 quarters of paper strips.
- One whole strip should be cut into 3 parts, one of which should be folded in half and an elongated triangle should be drawn on one of the halves, slightly departing from the fold line. The triangle must be cut out, leaving it folded and without touching the fold line - you will get the mouth of a crocodile.
- Next, you need to bend the crocodile’s nose, stepping back a little from the top of the folded triangle-mouth. After this, you need to cut out 2 small white elongated triangles, which should then be glued inside the mouth. The fangs are drawn on the white parts with a felt-tip pen.
- The crocodile's head and mouth must be inserted through the outer ring of the body and glued with PVA.
- One of the pieces of the strip should be cut horizontally into 3 parts, making cuts every 1 cm. One of these thin strips should be rounded at the edges, inserted inside the triangle-head and glued under the bottom - you will get eyes that need to be completed with a felt-tip pen.
- Other thin strips need to be turned into paws, which need to be attached with glue under the crocodile's belly.
- Another piece of the strip should be inserted into the ring at the end of the body, folded into a loop, glued the ends and cut a corner on them - you get a crocodile tail.
Popular articles Luxury picture frame
3D anti-stress postcard
Tools and materials
- White paper A4 – 1 sheet.
- Cardboard - 1 strip.
- Paper glue.
- Scissors.
- Pencils.
- Markers.
Step-by-step production
- On a white sheet of A4 paper we draw a strip 15 cm long. We draw a perpendicular line in the middle, and also draw two lines along the diagonals.
- Along all the lines we retreat 2.5 cm from the center and draw rays, like a snowflake.
- From the center in each sector we draw petals - there are 8 of them.
- The next row has 2 petals in each sector, they should be a little longer - there are 16 of them.
- The third row - again 16 petals, they are shorter and wider.
- And the fourth row is also 16, also shorter and wider.
- Let's start decorating. We outline each petal with a pink pencil and paint over it. We do not paint over the center.
- Then we outline all the petals with a black felt-tip pen.
- Then, using a pink felt-tip pen, draw the bases of the petals of the first row and their tops with strokes.
- Then we do the same only at the base with a purple felt-tip pen (the strokes are a little shorter), and then with a red one (the strokes are even shorter).
- We outline the petals of the first row again with a black felt-tip pen, and draw strokes at the tops with a red felt-tip pen.
- Now we draw the tops on top with a pink felt-tip pen. All these manipulations lead to the fact that the flower looks three-dimensional.
- Next, we decorate the remaining 54 petals in exactly the same order.
- After this, we once again outline all the petals with a black felt-tip pen, and thicken the line at the tops.
- Cut out the flower.
- Fold the flower in half. We unfold it, now in half in the other direction.
- We place the flower on the table with one side of the resulting triangle, folding the sides inward. Press the triangle on top and smooth it out.
- Mark a line near the center and bend a corner from the right edge towards the center. Turn it over and fold the right corner to the center again. Unfold the folds and mark them with a pencil. We unfold the flower, folding the folds next to the stripes inward.
- Cut out a strip of cardboard 19x7.5 cm. Fold it in half and glue a rolled flower inside on both sides.
- We design the cover as desired.
Gift with love
Only handmade postcards can convey your feelings towards the recipient. Buying a regular cardboard card is easy, but making one yourself means putting a part of yourself into it. After all, when making such a gift, you imagine the person for whom it will be intended.
Remember, we all tried as children, in kindergarten or school, to make holiday cards for our parents - carefully cutting them out, folding them, and gluing them. Then they handed it over. Remember how carefully mom and dad accepted the gift, kept it, and many still keep it with your children's drawings and crafts.
Today, handmade products are becoming more and more popular. Embroidered pillows decorate the home, knitted items are worn with pride. Only the very lazy don’t sew, knit or glue.
Scrapbooking is gaining more and more admirers - photo albums, paper cards, made with love, made in a single copy - become a unique gift for various holiday events.
For anyone who has mastered at least the basics of scrapbooking, there is no question of what to give to a loved one, and these gifts evoke admiration.
Gift for dad
The heart of even the most formidable warrior will melt if his own child gives him something made with his own hands. Let’s take an example of how a child can make a simple three-dimensional card for February 23rd.
Even a junior schoolchild can cope with this task on his own, but those who are younger will need their mother’s help.
Why should you give preference to voluminous postcards?
There is no need to think that such an offering is not entirely respectable. In fact, such a gift will look more than original. You can include your best wishes in a card, as well as things that are difficult to convey in words. In such a frame, poems, especially those written for the addressee personally, a declaration of love, will look great.
It is also important that everything necessary for needlework is always at hand, because you can make a 3D postcard from paper, cardboard, fabric, etc. The simplest things that can always be found in household items are also used as decorations. We're talking about:
- ribbons;
- braid;
- buttons;
- beads;
- beads;
- shells
A voluminous postcard will become an original gift
Even children will work with all this with enthusiasm, the main thing is to give them an entertaining idea. So what can be made from such simple materials?
What to make a postcard from
A voluminous postcard can be made from just about anything.
It is easier to use cardboard or very thick paper for the base of the card. You will also need colored paper, glue, scissors, and pencils. And the rest is your imagination. You may need buttons, beads, ribbons, yarn and anything else you can imagine.
There are a great many techniques for making postcards. Some of them are very simple. Even after spending a little time, you can make a small miracle and give it to your family as a souvenir.
Let's start creating
We cut out 7 squares with a side of 10 cm from colored paper. Fold each square in half twice, and then once diagonally (as for a regular snowflake).
Draw a round petal on the blank with a pencil and cut it out along the contour. You should get seven flowers with eight petals each.
The six petals of the flower can be colored with felt-tip pens, shading the middle and edges.
We cut out one of the remaining two petals, apply glue to the second and glue the flower in the form of a voluminous cup. You can cut out leaves from green colored paper and use felt-tip pens to draw veins on them.
Let's move on to assembling the bouquet. Our goal is to assemble a bouquet so that one flower is in the middle, and for each of its petals other flowers are glued in a circle.
Important! Glue the flowers by the tips of the petals!
We glue the resulting composition by the halves to the cardboard base. We act carefully. When closing the card, the flowers need to be folded exclusively along the fold lines.
You can glue blank petals around the resulting bouquet. The gift is ready! If something is not clear, you can always find a video on the Internet that explains in detail how to make a three-dimensional postcard.
This is how, spending a minimum of time, you can make a wonderful gift with your own hands and please the people dear to you.
Execution technique
Draw a circle on blue paper. The diameter is chosen arbitrarily. The easiest way is to outline a regular cup with a pencil. From this circle you need to cut a spiral with a diameter of about 0.5 cm.
Cut out several clouds of different sizes from white paper.
On a sheet of red colored paper we draw a small airplane (the blank, similar to a small cucumber, should be approximately 7 cm in length).
You can draw round windows on the airplane blank with a felt-tip pen or colored pen. We cut out the wings separately and it is better to make them in a different color. Glue them to the plane.
Fold a sheet of blue cardboard in half. Glue clouds onto both halves.
We straighten the spiral of blue paper a little and glue it by the central part (the narrowest) onto one half of the cardboard - the top, and the outer part of the spiral - onto the other half. When the halves are opened, a spring should form.
When the workpiece is dry, glue the plane to the spiral (approximately in the middle). Between the clouds you can write a few warm words of congratulations.
General instructions using the example of 3 postcards
In order to move on to more complex paper products, you need to practice on the simplest ones. To do this, three options for creating a paper postcard will be outlined below. After practicing with these examples, you can move on to more complex instructions for making them.
For the first option you will need the following set of tools and materials:
- Colored cardboard.
- Colored paper.
- Scissors or utility knife.
- Regular writing pen.
- PVA glue or glue stick.
Production time is no more than 15 minutes.
Ready-made postcard
The first thing you need to do is cut out the base in the form of a frame. Thick cardboard is used for this. The color can be any depending on the preferences of the master himself. The edges of the postcard frame can be made curly, as in the example, using scissors or a stationery knife.
To create even shaped frames, it is better to use markings made using a pattern or ruler.
A second layer of colored paper is applied on top of the prepared cardboard base. Instead, you can use an image printed on a printer as the main background.
Now the most important task remains - making holiday candles and lights. To do this you need to use a pen
A thin sheet of colored paper must be wrapped around the handle. The edge where the paper joins is glued. In this position, you need to maintain the shape for 30 seconds. After that, remove the handle. Repeat the action depending on how many candles you need to place on the card.
Lights are cut out separately from colored paper and then attached to the candles. The resulting design is glued onto a postcard. After this, you need to sign it and write a wish for the birthday person.
The second card will have an award medal with the age of the hero of the occasion.
General view of a postcard with a medal
To create it you will need:
- Cardboard as a base.
- Set of colored paper.
- Threads.
- Stationery knife or scissors.
- Glue stick.
You can make such a postcard following the instructions in just half an hour. In order to do everything correctly, the instructions will be described step by step.
Instructions
- Preparation of all necessary materials.
- Prepare a base in the form of cardboard of any color at the user’s request.
- Decorate the cardboard with different paper elements.
- Take a thin colored sheet of paper and fold it like an accordion.
- Using thread, tie the folded accordion in the middle.
- Spread the accordion so that it has the shape of a circle.
- To fix the edges of the straightened accordion, secure it with glue.
- Cut a circle with a smaller radius than the accordion.
- Draw the age of the birthday person or cut and glue numbers from paper.
- Glue the circle onto the accordion.
- Glue the finished medal onto the base.
Now that's it, the postcard is ready.
The last postcard for training will have three-dimensional elements.
Ready-made postcard
It will also take a maximum of 30 minutes to create. To make a postcard you will need:
- Thick colored cardboard as the main background.
- Colored patterned paper or real gift wrapping paper.
- Ribbons for dressing.
- Scissors.
- Glue stick.
The process of making such a postcard consists of the following steps:
- Prepare a cardboard base. The background can be painted or additional elements can be glued.
- At the top of the cardboard write the word “Congratulations!”
- Take colored paper or gift wrapping paper and cut it into squares in the shape of wrapped gifts.
- Glue the squares at the bottom of the picture.
- Make ribbon bows and ties for each of the stick-on gifts and attach them to them.
Instead of ribbons, you can also use colored threads or twine.
All is ready. The card looks quite bright and interesting and has voluminous elements in the form of gifts and bows.
Popular techniques in making postcards
Experienced carmaker craftswomen use various types of techniques for creating decorative elements. You can realize your creative ideas using:
- scrapbooking,
- quilling,
- iris folding.
The simplest option is scrapbooking. This intricate word is called classic applique. You can use a variety of materials in it:
- colored paper;
- photos;
- images cut out from magazines;
- satin and silk ribbons;
- lace and much more.
Postcard for mom using scrapbooking technique
Using various available means, you can create a beautiful, informative composition that can express the whole gamut of your feelings. This technique does not require special skills, you only need creative imagination and good taste to create a unique, targeted product.
You can make your own birthday card for mom using quilling. This technique is also not complicated and allows you to implement a variety of ideas. All decorative elements are created from strips cut from colored paper. They are screwed onto any object having a circular cross-section. You can, for example, use a skewer or toothpick. The twisted spiral can be given any desired shape by pressing it with your fingers. From these details petals and flower cores are obtained; they can be elements of an animal, a bird, or a fantastic composition.
You can make a card for mom using quilling
Decorating using the iris folding technique is a little more difficult. But this method can also be mastered if desired. Various decorative elements are also created from strips of different shades. But they do not curl, as in quilling, but fold in the form of a fan.
Additional decor in creating a postcard
One of the advantages of this creativity is the absence of restrictions in the choice of materials for the implementation of ideas. A variety of objects and materials can be used to decorate a postcard. A festive, attractive look can be provided by:
- lace;
- braid;
- pearls and beads;
- pieces of textiles;
- sequins and rhinestones, etc.
Additional decor will give the card a festive look.
Ready-made decorative elements can be purchased in specialized stores. For example, boutonnieres, various stickers, chipboards, etc. can be used in decoration. Some craftswomen decorate cards with embroidery and beautiful buttons.
Making the central figure of the postcard
Let's make a heart. To do this, fold the piece of paper for rough work in half and draw half a heart with a pencil. Now you definitely need to check whether it is suitable for the postcard shape. To do this, draw a horizontal line from the point where the two halves of the heart connect. If it horizontally coincides with the point on the heart line on the right, then the drawing is not suitable for 3D format.
Let's fix the situation:
- raise the point of connection of the halves of the heart higher;
- draw a horizontal line again and look for the point of intersection with the edge of the figure; if they don’t coincide, then the drawing is what you need;
- divide the resulting horizontal line on the right half of the heart in half;
- draw a vertical line through a point in the middle of the horizontal line of the right half of the heart and find the points of its intersection with the contour of the figure at the top and bottom;
- Carefully cut out the heart along the drawn contour, you get a symmetrical heart.
With added confetti
Confetti is always a holiday. In order to make it, you don’t need to go out and buy special home fireworks. A hole punch and a set of colored paper in all the colors of the rainbow will help solve this problem.
First you need to make a base out of cardboard. It can be any color. It is better to make a postcard in the form of a frame. To do this, a large cardboard sheet is folded into pieces to form an isosceles triangle.
The base is glued to one part of it. To diversify it, you can make an envelope as shown in the picture. It is better to use thick cellophane or transparent paper for this.
By securing an envelope or other transparent object with glue, you need to make confetti. To do this, take a hole punch and a set of paper of different colors. Now the slits are made using a tool. The shavings have an even circle shape and look like confetti. Parts of the circles are glued to the card, and the other part is placed in an envelope.
Sometimes, in a handicraft impulse, you want to make something beautiful with your own hands, but as luck would have it, nothing comes to mind, and so as not to suffer again, I decided to put together a selection of examples of how to make a postcard with your own hands. Here are different examples of postcards and small descriptions of how to make this or that postcard.
I tried to select as many different images as possible, both in style and theme, so that there was plenty to choose from. Of course, each postcard is just an example of how you can make postcards with your own hands.
How to make a card for mom? It’s clear that it should be the most beautiful and touching, but I want some specifics, right? The first thing you need to do is focus on the reason, it could be:
- an unplanned card for no reason;
- Mother's Day or March 8;
- New Year's and Christmas;
- birthday or name day;
- professional holidays.
Original version of the butterfly postcard:
If it’s not clear from the pictures, see more details here:
And here is a version of a cute postcard with birds:
Of course, no one can stop you from making and giving your mom a postcard dedicated to the first snow or even the release of your favorite TV series, but in general, the main reasons are indicated quite clearly.
A New Year's card for mom can be ordinary (from the point of view of New Year's greetings, of course), it is not necessary to somehow emphasize the special relationship. But a birthday or Mother’s Day are special holidays on which it is worth presenting a personal card with the signature “To my beloved mother.”
How to make a birthday card for mom? Sketch out a sketch with a simple pencil, add a little color to get an idea of the color scheme and understand what shades you will need during the work process. So, you need to buy or find in the bins:
- a blank for your needlework (thick and thin cardboard is suitable);
- background image - it can be scrap paper, colored paper, any sheet that you like for the ornament, or you can simply artistically splash paint on a sheet of white thick paper or even use the monotype and marbling technique;
- chipboard for inscription - it is better to purchase a ready-made one or use a special stapler to decorate the edge;
- a couple of decorative elements - flowers, butterflies, beads and leaves;
- one or two large decorative elements - flowers or bows;
- decorative tape;
- good glue;
- scalloped ribbon or lace.
First you need to glue the background image to the blank, then arrange large flowers, and only then complement the resulting composition with small decor and lace. Dry the finished work well, decorate it with small decorations and sparkles, and then sign it - mom will be happy with such a sign of attention.
Now you know how to make a card for Mother's Day, and you can easily figure out what a card for an anniversary or angel's day should be like.
Another original option: the essence is that you need to cut out circles from colored paper, and then cut each circle in a spiral and twist it into a bud, you will get cute flowers with which you can decorate a card.
Relevance of the gift
Especially for children, many lessons have been created to develop fine motor skills. During labor at school, students are offered to perform various exercises related to the creation of paper products. A postcard will be a great solution for this. In addition to this fact, it is also worth considering that the child is trying to make such products and the process itself brings him pleasure.
The article will look at different ways to create postcards in different styles from paper and related materials. Manufacturing methods will be presented to readers:
- three-dimensional pictures;
- with added fabric;
- collected from figures;
- with added confetti;
- and an envelope for money and coins;
- with three-dimensional figures on the main part;
- with the addition of cut-out images of animals.
It is also worth noting that all the postcards described below can be made easily at school or at home. For this purpose, improvised materials can also be used. The main thing is to use your imagination and be smart.
Let's see what happened
The result was a postcard folded along vertical lines in the opposite direction with a heart inside. If you pull the ends of the card, the heart will turn over horizontally and its reverse side will be revealed. Each of them can be decorated, designed as you like or according to the theme of congratulations. This postcard can be easily placed vertically on your desktop, bookshelf, anywhere.
This video tutorial presents the technology for making a simple 3D postcard. There are more complex ones, dedicated to different topics and for different special occasions.
Start with a simple postcard, try it, it will turn out original.
In honor of the wedding
Making beautiful cards with your own hands for a wedding is not an easy task, and here it is better to watch master classes.
Sample:
A wedding is one of the most important events in the life of a young family, and therefore it is not enough just to draw a card, you need to carefully design and package it, and perhaps supplement it with some other elements.
How to make a beautiful card for congratulations on your wedding day:
- come up with an idea;
- find out from the bride and groom the main color of the wedding, or the main theme of the celebration;
- look at various options for postcards - using scrapbooking techniques, with embroidery, ribbons, and so on;
- choose several interesting lessons;
- make a rough postcard from paper and cardboard (and if you are not sure of your result, then it is better to do this step several times);
- make original cards with your own hands;
- choose packaging and make it a little more unique;
- sign the envelope and postcard.
Volumetric 3D postcard
Now we will consider more complex options for paper postcards. The first to be presented will be postcards containing 3D elements.
To create the product you will need:
- Several sheets of thick colored cardboard.
- Scissors.
- Glue stick.
- Set of colored paper.
The first thing you need to do is make a thick cover for the book. To do this, several cardboard sheets are glued together and folded in half.
On the outside of such a cover you can write congratulations and wishes, as well as place elements cut out of paper.
Now we open the resulting cover, and mark out a pyramid of future gifts in the center of the open cover. The workpiece is split in half so that the corner of the gift boxes begins to protrude forward when opened. Next, the base of the gifts is cut, except for the places where they are attached to the main sheet. Glue the resulting blank to the cover.
There is no need to glue the places where the gifts will stick out when opened.
When the glue dries, you need to decorate the pyramid of gifts that protrudes when you open it and glue a bow at the very top.