A magnetic stirrer is necessary for those who like to do various chemical experiments. With the help of this device, you can turn various ideas into reality not only in the laboratory, but also in everyday life. In order not to waste your personal savings, you can build a magnetic stirrer with your own hands in just a few hours. An unnecessary printer and CD-ROM can be used as the main parts. To make the design multifunctional, you need to prepare an old CRT monitor.
Assembling the magnetic stirrer
When everything is on the table before your eyes, you can start assembling. First of all, take a PC cooler and attach two magnets to it. They should be located in its middle part; they are placed in different directions with poles opposite to each other.
It is best to attach magnets with glue, but if you don’t have it at home, you can use stationery tape.
In the latter case, the connection will be movable and weak, but its advantage is its versatility: you can easily release the cooler and use it for other needs.
Next, you need to check the correct placement of the magnets on the cooler. To do this, take another piece, which is first applied to one, and then to the other. If the magnet was attracted to the first one and repelled from the second one, then everything was done correctly. The piece must be applied to both sides in the same place.
Because of the magnets, the computer fan becomes higher; to level its area, you can use the original bolts from the cooler. A piece of durable plastic will serve as a platform for glasses and mixing containers. In this case, the cover from the CD is taken. It is attached to the cooler with bolts or glue.
An insulated paper clip will act as a stirrer. It needs to be shaped like a hook. The cooler is connected to the battery using two wires: red positive and black negative. The mixer is ready.
For use, it is necessary to place glasses with mixtures in the center so that the stirrer does not create unnecessary vibrations. Dishes placed on the appliance must have a flat bottom.
Source: https://folksland.net/kak-sdelat/kak-sdelat-magnitnuyu-meshalku.html
Speed controller
A PC fan rated at 12V will run at lower speeds at a lower voltage, so you can control the speed of the stirrer by controlling the fan supply voltage. For example, the cooler used here starts at 3V and reaches maximum speed at 12V with a current consumption limit of about 200mA.
The speed controller is based on the popular 7805 three-pin voltage regulator (IC1). The variable voltage of IC1 is applied to its common terminal, which is usually grounded.
Here, the bias voltage is obtained by passing the quiescent current of IC1 to ground through a 1 kΩ potentiometer (P1). An additional 1 kΩ resistor (R1) is included intentionally to minimize the effect of potential output voltage drift when the quiescent current changes. The bias voltage of P1 is determined by the sum of the quiescent current and the bias current set by R1. This configuration will produce a drive voltage in the range of 5 to 10 V, sufficient for most 12 V PC cooling fans. Keep in mind that IC1 requires a small heatsink to operate for long periods of time.
Heated Magnetic Stirrer for PCB Etching
A heated magnetic stirrer is designed for long-term mixing of liquids, and is usually used by chemists in laboratories. But as it turns out, such a simple device can significantly simplify the process of etching printed circuit boards. The magnetic stirrer will easily fit into the interior of an ordinary radio amateur, who will not have much difficulty in assembling it with his own hands.
DIY heated magnetic stirrer:
A magnetic stirrer is nothing more than an ordinary motor with a permanent magnet glued to its axis (it is advisable to use a neodymium magnet) and a rotating piece of iron in a rubber or plastic shell.
The essence of a magnetic stirrer.
Assembling such a design is quite simple, you take a high-speed engine (on the Internet you can find versions of homemade magnetic stirrers with a magnet stuck to the cooler - it’s better not to do this - I checked, the cooler is magnetized with a magnet and it stops working), attach a plastic blank to its rotor and glue it to it has a neodymium magnet.
Neodymium magnet glued to the motor.
It is advisable to regulate the engine speed using an adjustable power supply; I installed its board directly inside the body of the magnetic stirrer.
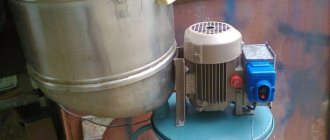
Power supply and motor in one iron case.
Then you need to select a non-magnetic platform, a suitable bolt or nail, and empirically find out the required distance from the magnet to the metal piece at which it rotates at the optimal speed.
You should understand perfectly well that the further the metal is from the magnet, the worse the adhesion.
Therefore, you will need to clearly take all this into account, just lean the platform against the magnet, but so that it rotates freely, and throw a piece of iron on it, but remember that in the water it will not scratch the bottom, but in the dry it will leave marks.
A piece of nail rotates under the influence of a magnet.
It is quite natural that water or another stirred liquid (in our case, an etching solution such as ferric chloride) will corrode the iron, so it must be isolated from the external environment. I just took a piece of a dropper, stuck a small bolt with a sawed-off head in there, and melted the ends with a lighter.
Sketch of a magnetic stirrer.
If you want to make a heated magnetic stirrer, then you need a metal body in order to get something like an electric furnace. So, for example, I simply screwed a heater from a soldering iron to the lid of the magnetic stirrer housing with an iron bracket, naturally insulating everything well with heat-resistant casings.
We attach the heater.
Well, then I painted everything and closed the housing lid, although it was scary to paint, I was afraid that when heated, the paint would start to stink, but fortunately this did not happen.
Ready-made magnetic stirrer.
In my version of the magnetic stirrer, I provided for adjusting the speed of rotation of the magnet (and, accordingly, the stirrer itself), provided a separate engine start button, and a separate toggle switch for turning on/off the heater, since solutions do not always need to be heated, nor do they always need to be stirred. All that remained was to place a container of suitable size on it (I used containers for food products, since they are designed to heat up to 60 degrees), poured the pickling solution into it and, naturally, threw a magnetic stirrer in there, the result exceeded all expectations.
Ready-made magnetic stirrer in action.
The solution heated up to 40 degrees, which is quite enough for me, the container did not melt, and the mixing was uniform and of high quality, especially since its speed can be adjusted.
In my opinion, such a magnetic stirrer is exactly what is needed for etching printed circuit boards; as my experience has shown, it is possible to make a printed circuit board much more conveniently, better and faster than in a bubble bath (even the option with a mixer is much inferior in terms of ease of use and ease of assembly).
Source: https://bip-mip.com/magnitnaya-meshalka-s-podogrevom-dlya-travleniya-pechatnyx-plat.html
Links[edit]
- ^ abc "Stir Bars". University of Colorado Boulder. Archived from the original on June 7, 2014. Retrieved February 16, 2013.
- Del Campo FJ, Neudeck A, Compton RG, Marken F, Bull SD, Davies SG (July 2001). "Low-temperature sonoelectrochemical processes: Part 2: Generation of solvated electrons and Birch reduction processes under high mass transfer conditions in liquid ammonia." Journal of Electroanalytical Chemistry
.
507
(1):144–151. DOI: 10.1016/S0022-0728(01)00368-0. - ↑
de Los Reyes CA, Smith McWilliams AD, Hernández K, Walz-Mitra KL, Ergülen S, Pasquali M, Martí AA (March 2022).
"Adverse Effect of PTFE Stirring Rods on Covalent Functionalization of Boron Nitride Nanotubes Using Billups-Birch Reduction Conditions". Self-propelled gun Omega
.
4
(3):5098–5106. DOI: 10.1021/acsomega.8b03677. PMC 6648908. PMID 31459687. - Girolami GS, Thomas B, Rauchfuss TB, Angelici RJ (1 August 1999). Synthesis and Engineering in Inorganic Chemistry: A Laboratory Manual (3rd ed.). Books of university sciences. p. 87. ISBN 978-0-935702-48-4. Retrieved April 23, 2013.
- US 2350534, Rosinger A, "Magnetic Stirrer", published June 6, 1944
DIY magnetic stirrer
The prices of magnetic stirrers in the store are impressive: the most budget ones start at 3,000 rubles, and the ceiling is more than 20,000 rubles. Fortunately, a simplified design that is not inferior in quality to professional models can be assembled at home. Elements for a magnetic stirrer are easily available, and the price is several times lower.
In this project, you'll learn how to make a simple model magnetic stirrer that works like a professional one, but costs significantly less. We will use a PC cooler, neodymium magnets, a power source and a regular paper clip. Neodymium magnets are sold with free shipping in this Chinese store.
What are our advantages
At Primelab you can buy practical tiles and stirrers of various types:
• compact and full-size; • with and without heating; • designed for sample weights from 2 to 20 liters; • with additional functions - programming, weighing, powered by USB.
We also sell kits consisting of a stirrer, a stand and a PT1000 temperature sensor.
All our products are of high quality, easy to use, stylish in design, and have an affordable price. We can safely call it one of the best on the domestic market.
Structural elements of a magnetic stirrer
ZickDRD Loading
03.10.2017
1630
Follow the author if you like his publications. Then you will receive notifications about his new posts.
You can always unsubscribe from notifications in the author's profile.
Subscribe
8
Good afternoon.
About a year ago I was faced with the need to make magnetic stirrers for the laboratory in which I work. Then it ended with DC fans with glued magnets - a heartbreaking sight


