How to make a weapon cradle in a case
Types of drainage.
Drainage for a flower Drainage most often refers to the removal of water from the surface of the soil or from underground sources. It can be either natural or artificial. Drainage is the removal of storm or groundwater for the purpose of...
Law Certificates - what is it? Types of certificates. Issuance of certificates
Certification refers to actions aimed at obtaining confirmation of the declared quality of goods or services, in accordance with established standards and requirements. After conducting them and receiving a positive assessment, the issue…
Health What is surgery? Types and stages of surgical operations
The concept of “surgical operation” is a Greek expression adapted to the Russian language, which literally means “I do it with my hand.” Many years have passed since the times of ancient Greece, and today...
DIY tool trays
Author on Youtube: Eugene Irimia
Number of views on Youtube 869.2K
DOWNLOAD One of the tool storage systems available for making at home. Materials: 1. Base - polyethylene foam 2. Glue -
Comments for this video:
The story of one task: how a fluffy cat was cut - Watch/download⇒ “Do you know how long it will take a cat to grow new hair? Same thing. This is not for you to cut off stubble with a machine...”Added - LADY BUG AND SUPER CAT Season 2 Episode 5 Russian dubbing full episode clear sound. — Watch/download ⇒ “thank you” Added — The most successful recipe for pancakes (pancakes) with kefir — Watch/download ⇒ “I used to cook pancakes with milk, because now Maslenitsa decided to try something new and cook pancakes with kefir. I tried to cook according to this recipe, and indeed the pancakes turned out delicate and tasty, and surprisingly the first pancake turned out well, and not lumpy as usual.. Thanks to Alena Mitrofanova for this recipe. “Added - TV series Matchmakers 4 (4th season, 1st episode) comedy for the whole family - Watch/download⇒ “Such a cool TV series Matchmakers! Very kind and positive! When I'm sad, I always turn it on and it 100% lifts my spirits!
DIY tool box (69 photos): assembly instructions and packaging tips
There is always something that needs to be fixed in the house. It could be a leaky faucet, a loose shelf, or a broken chair. Of course, for each of these actions a man needs a special tool. As a result, this leads to the accumulation of a large number of screws, hammers, wrenches, etc.
Where to put all the tools so that they are in one place and do not attract attention? Of course, the best option would be to have a toolbox, which you can purchase in a store or make yourself.
What types of boxes are there?
Construction stores offer not only materials for repairs, but also special boxes in which it is convenient to store tools in a compact form.
If you don’t have the time or desire to make such a box yourself, you can easily purchase it ready-made. However, it would be much better to do it yourself.
A homemade box will be direct proof that a man is a jack of all trades and can easily cope with any task.
Before purchasing or making one at home, you should clearly determine the type of box that will be most useful. For this purpose, its purpose is determined.
Irregular use does not imply the presence of a sophisticated design. In this case, a simple box-box with one section is much better suited. There is another type - an organizer box. It is more suitable for men who are constantly engaged in repair work, be it at home or at the workplace.
To make the right choice, you need to rely on personal preferences. The choice of box depends on the man himself and his ability and desire to make something.
How to make a box with your own hands step by step?
If you decide to make a box yourself, then you need to have step-by-step instructions, including a sequence of actions. It will allow you to accurately understand how to make a tool box without any special financial and labor costs. Let's define the main stages of work:
Defining a Plan
This stage is very important, since the calculations obtained and the diagrams made will allow us to draw up a prototype of the structure. If a mistake or inaccuracy is made somewhere, the final product may differ greatly from what was intended.
To depict a box in the form of a drawing, use paper and pencil or a special program on a computer.
Materials for work
You should clearly understand what materials will be used to create the future tool box. They are divided into mandatory and optional.
The latter depend on the specific case, and the mandatory group includes measuring devices, fasteners, a hammer, a hacksaw, etc.
Manufacturing process
The main work that will determine the outcome occurs precisely at this stage.
Manufacturing of lodgements
We value clients who return to us with new projects and give them discounts for continued cooperation. Departure to the client. We value our clients' time. We provide consultations on their territory, bring product samples, and promptly resolve any issues that arise.
Select and buy tool holders
We will develop packaging from scratch or according to your specifications for free. We have our own staff of engineers and technologists who will help you make a packaging drawing. According to your packaging drawing.
According to your product drawing. By the product itself. Send or bring us your product, we will take all the necessary dimensions and prepare drawings. Based on a hand drawing and photo of the product. Send photos and product parameters and our engineers and technologists will develop the packaging for you.
For clarity, here is a video on how to make a cradle yourself:
Order packaging development. Free sample for testing We make a sample tool holder with every order. Our clients have the opportunity to check the properties of future packaging before launching the main batch. They test it in the field and give their comments. If it is necessary to make minor changes to the packaging drawing and sample, we make them, and only after that we begin production.
For more information, please contact the managers. Everything is chewed down to the smallest detail. A very relevant topic.
Plywood tool box
The edged board can be replaced with ten-millimeter moisture-resistant plywood. This material is more durable with less weight and thickness. However, making plywood boxes requires certain skills.
PHOTO: bestdiy.ru Scheme for making a tool box from plywood with your own hands
Materials and tools
Making a tool box will require the following materials and tools:
- plywood 10-12 mm;
- wood glue;
- wood screws or universal 15×2.5 mm or nails 20-25 mm;
- wood varnish;
- a jigsaw with a variable ski position (some of the cuts must be made at an angle of 45º);
- Phillips screwdriver or hammer;
- drill with a set of wood drills;
- clamps.
| Illustration | Description of action |
| According to the dimensions indicated in the diagram, we cut out 4 walls of the box. 450×200 mm – long sides, 300×200 mm short (side) sides. The end edges of the walls that will be attached to each other must be cut at an angle of 45º | |
| Glue the cut areas with PVA-based wood glue | |
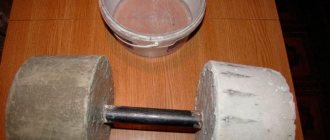
| Carefully fold them together so that there are no distortions. For convenience, we reinforce the corners with tape while drying. Let it dry for several hours. At the bottom of the box we nail 15×15 mm² slats | |
| Cut the bottom of the box 426x246 mm. Lubricate the slats with glue and lay the bottom on them. For a tighter fit, you can place a hammer or other heavy objects on the bottom | |
| A place for a grip and spikes are cut out in the handle. The width of the tenon should be 40 mm depth 20 mm | |
| We cut out pen holders 430×65 mm. Select a groove for the tenon in the holders. To do this, trace the outline of the spike with a pencil. Drill two holes. We connect them with a file and give them the shape of a rectangle. | |
| Use a file to adjust the size of the tenon so that it fits snugly into the groove. For additional fastening during assembly, lubricate it with glue. | |
| Using a drill with a stop, we drill blind holes 6-8 mm deep in the wall of the drawer and in the pen holder. Then wooden dowels are attached to the glue | |
| Apply wood glue to the joints of all parts and secure the assembled structure with clamps | |
| In the side toolbar we drill holes for the most used tools: chisels, screwdrivers, drills, cutters, etc. | |
| We coat the product with varnish to protect it from moisture |
Wooden fasteners: designs, types, application features and installation options (90 photos)
Today, to install structures made from natural solids, in addition to conventional connections with nails, metal fasteners are used. With its help, carpentry work is simplified, which will make the construction process as fast as possible. Manufacturers offer a variety of fasteners for wooden structures.
The proposed types of fastening elements are produced in different parameters, which makes it possible to choose the dimensions of a specific structure.
Types of fasteners
The mounting plates are equipped with a huge number of holes for bolts or nails. They make it possible to make a high-quality connection of the necessary elements at the required angle. Mainly used when connecting parts in rafter trusses. Allows for installation directly on the construction site
Nail plates are produced by cutting through a sheet of aluminum to produce nail teeth with a single base. Installed exclusively in industrial areas.
Beam rafter fasteners allow you to connect wooden beams and rafters, that is, perpendicularly placed elements that rest on each other. For durable fastenings, it is advisable to arrange several fastenings not too symmetrically, turning one with a shelf in the opposite direction.
Sliding fasteners for wooden houses are used in the construction of structures from solid wood with natural moisture when it is necessary to arrange inclined rafters.
In this option, after shrinkage of the assembled log house, changes from the girder up to the mauerlat are not excluded. For this reason, rafters cannot be rigidly attached to the Mauerlat.
Supports for load-bearing parts make it possible to attach beams at an even angle to different parts of the structure being built.
If structures are considered part of the interior space, then the fasteners are installed almost unnoticed or the method of cutting parts is used. Such parts include a hidden type bracket.
Methods of fastening wood structures
Let's talk in more detail about the options for fastening to a wooden wall and other solid structures, and also find out which one gives an excellent result.
Traditional
This method involves installing parts into a groove using a hammer, nails or staples. Cutting out the required grooves negatively affects the load-bearing capacity of the nodes from the array.
It is difficult to estimate the forces applied to cutting staples or nails, since they were not calculated. Also, with this approach, uneven distribution of expected loads throughout the structure cannot be ruled out.
minimum wage
Fastening for solid structures, including wooden stairs, using MZP is, as a rule, only possible if there is a hydraulic press designed to connect the units of the entire structure. The beams being constructed are installed at a certain angle and then pressed together.
The disadvantage is that the structural parts of such a fastening must initially be assembled on the ground. Also, additional rafters have to be installed on the ground to maintain not only the level, but also the configuration.
Once all the parts have been assembled, the frame should be assembled, which requires special equipment.
Perforated mount
This fastening of wooden elements, including the ceiling, helps speed up the installation of structures. This type of fastening consists of brackets and corners of different sizes and thicknesses made of steel. These parts are manufactured according to the dimensions of the timber.
When fastening solid wood structures using perforated fastening, you cannot do without a hammer, nails, and screws.
A huge advantage is the ability to assemble the entire structure in parts. With this method, cutting or pre-cutting is not required.
Metal fastening for solid structures
Nowadays, during the construction and reconstruction of wooden structures, or rather, as a connection of the elements from which such structures are made, a certain fastening is used. As a rule, the connection of such fasteners is made at an angle; for this purpose, steel elements are used.
Thanks to the use of these elements, construction is much simpler. This mainly applies to the work of installing the roof frame, or the structure itself.
When using special fastening, there is no need to use nails or staples, which is why the period of construction work is reduced to a minimum.
There are several varieties of this fastening: plates and steel parts. All have holes for self-tapping screws. In addition to the large savings, it is important to note such important indicators as a reduction in the price of the design, a significant increase in productivity, but the quality of the products remains at the highest level.
Photos of wooden fasteners
Production of lodgment
To learn more. Cradles for a set of tools. Presentation packaging made of chemically cross-linked PPE. Packaging for equipment with complex shapes.
Universal holder for the device in a plastic case. Photos of our products We have been developing and producing holders for various accessories, accessories and tools for more than 12 years. Our customers remain satisfied with our products and return with new projects. View more.
You can apply a logo or inscription. Production of polymer packaging. About the company News Our team Blog Contacts.
Development process. The client calls us directly or leaves a request on the website using the feedback form. The application is processed, after which our manager contacts him.
The manager advises.
Finds out the purpose, objectives of the packaging, wishes regarding its properties and qualities, budget and project deadlines. Selects the optimal type of polymer and production method. Design engineers are developing a drawing of the future packaging. Managers and technologists coordinate the production process. If the client has a ready-made packaging drawing, he sends it along with the request.
Then we produce packaging strictly according to the specifications.
We produce a test sample of packaging and deliver it to the client for testing. If necessary, we make small changes and then produce the entire batch of packaging. We ship and deliver packaging to the client in any city in Russia and the CIS. Clients and partners Our regular partners know that we have established production and logistics processes, and it is not in our nature to delay deliveries. We are glad that people and brands trust us.
For our part, we try to meet this level of responsibility.
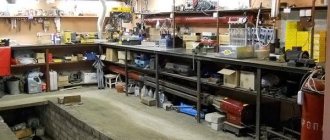
Photos of the test cradle inside a metal box
Benefits of working with us. Our managers are always in touch, control the project at all stages of production, and, if necessary, involve other specialists.
Payment deferment. We understand that it is impossible to plan everything in the world, so we can adapt to the client’s wishes and give a deferred payment. More than 12 years on the market.
The accumulated experience has allowed our company’s specialists to become real experts in the production of all types of polymer packaging. Discounts for regular customers.
Cradles: development, design and production of cradle
Production of lodgements, price:
| Name | 1-100 pcs. | More than 100 pcs. |
| Making a cradle, size within 16cm x 16cm (RUB/piece) | 150.00 | negotiable |
| Manufacturing of a lodgement, size over 16cm x 16cm according to one of the measurements (RUB/piece) | negotiable | negotiable |
*Prices include the cost of foam rubber (sheet up to 2cm thick). If a greater height is required, a multi-layer cradle is used; prices are given for cutting one layer.
Lodgment (laying or insert) is a part of simple or complex packaging, a substrate for fixing goods, which is inserted into cardboard, plastic or metal packaging. It is made using the figured cutting method from materials of different hardness.
RPK BrandPrint is the largest manufacturer of polyethylene foam and foam rubber trays in Russia. Our customers use the trays we produce for packaging optical instruments, jewelry, electronics, tools, porcelain and crystal tableware, cosmetics and perfumes, souvenirs, awards, alcoholic beverages, precision mechanical products, etc.
The production capabilities of our company allow us to produce both single signal cradle copies and inserts for serial production.
Foam rubber trays , or polyurethane foam trays as they are also called, are the most common in Russia due to their low cost.
The market produces a huge range of expensive and fragile/precision products with complex shapes.
For safe transportation, they require comprehensive packaging that will preserve not only the integrity of the product, but also make the product attractive.
Polyethylene foam (PPE) trays are widely used in the packaging of aircraft and automotive components, electronics, computers, glass and many other goods that require increased transportation requirements.
Polyethylene foam is a material with excellent shock-absorbing properties. At the same time, it is environmentally friendly, elastic, waterproof, and resistant to shock loads.
It is manufactured in roll and sheet versions, in different colors, different densities, it is possible to order polyethylene foam in an antistatic version. This material is ideal for mass production of liners.
Cradles made from isolon have a number of advantages, but one disadvantage is that they are more expensive than cradleboards made of foam rubber or polyethylene foam. It is also possible to make trays from polyethylene and plastic, but the cost is higher due to the technological process.
Often our clients ask us to make a tray for presentation purposes. Then we suggest using colored styling rather than standard gray and black. A colorful tray is beautiful, impressive and presentable!
How much does it cost to make a cradle?
The cost of production is calculated individually, depending on the circulation, the size of the product, the complexity of the shape cutting and the materials used. Our prices are flexible and often depend on the complexity of the routing.
To accurately calculate an order for packaging made of foam rubber, isolon or polyethylene foam, send a layout, drawing in .dxf or .dwg format, made using Solidworks, SolidEdge, Inventor, AutoCad, Compass software by e-mail indicating the amount of material and additional wishes.
If you do not have a ready-made layout, our specialists will develop and agree with you on a layout for your product for an additional fee. Call us and we will advise you on any issue regarding lodgements.
The cost of the minimum batch for the production of lodgements is 30,000 rubles.
Areas of application of supports
The holder reliably fixes products inside boxes, cases, portable technical bags and suitcases. Most often they are manufactured for metrology and instrument-making enterprises. But, in general, the scope of application is wide; they are used for:
- expensive equipment;
- precision instruments and measuring equipment;
- perfumery products;
- optics;
- medical and laboratory glassware;
- tools;
- cold steel and firearms;
- presentation samples;
- alcoholic products;
- souvenir and gift packaging.
Materials for making lodgements
Cradles are made from:
- penolon (cross-linked polyethylene foam);
- standard foam rubber (polyurethane foam);
- foamed polyethylene foam;
- expanded polystyrene;
- polyethylene with a density from 25 kg/m3 to 144 kg/m3.
These materials are distinguished by their high resistance to adverse environmental conditions (- 60 ° C to + 100 ° C), resistance to chemical products and decay, non-toxicity, elasticity and durability. But the most important thing is the excellent elasticity of these materials, which provides good shock absorption - an important requirement when packaging high-precision instruments and fragile products.
It is worth noting that foam rubber is the most optimal solution. Unlike extruded polystyrene foam, it is not dissolved by technical liquids; foam rubber is much harder than foam rubber and holds its shape well.
Unlike polystyrene foam, it does not crumble, foam rubber does not rot, is an extremely elastic material, absorbs noise, insulates heat, is hydrophobic (moisture absorption coefficient less than 1%), restores its desired shape after deforming loads, and is odorless.
We advise customers to use foam pads, but this does not mean that other materials are not suitable. For example, for transporting military equipment and heavy precision parts, we make carriers from MDF and fluoroplastic.
An important nuance of polyurethane foam is that the weight is so insignificant that it does not weigh down the packaging. Also, in the manufacture of supports, we use isolon (foamed polyethylene foam), the elasticity of which allows us to absorb repeated shock loads. This is important when shipping products over long distances by rail, sea or road.
If thermal insulation and sound insulation requirements for packaging come first, and the application of a brand or logo on the packaging is not an essential feature, then in such cases we recommend foam (expanded polystyrene) trays. This is a relatively inexpensive and physically lightweight material. At the request of customers, we can produce styling from unique materials.
Cradle manufacturing technology
The production of the lodgment in our company is carried out by contour cutting on the latest Zund G3 digital cutting plotters. Digital figured cutting of foam rubber and isolon is the most accurate and high-performance technology for manufacturing high-quality cradle of complex configuration. When designing liners, the following are taken into account: shape, dimensions, gaps, fit.
We produce both the simplest installations and multi-level (multi-layer) trays with a configuration of individual layers. It is also possible to produce with sliding sections on several levels.
The technological capabilities of our company allow us to produce foam supports of any complexity and color. We make lodgements from both sheet and block foam rubber.
If necessary, the block foam tray can be draped with velvet.
If you want to lay your product with a velvety, pleasant-to-touch surface, then we offer our clients a flocking service (creating a decorative velvet coating using electrostatics). Such supports are an integral part of the packaging of luxury gifts and branded souvenirs.
When ordering, pay attention to quality, because many companies offer laser cutting of foam rubber, which radically changes the color of the processed materials and also leaves sintering marks (burns). At the request of our clients, we can make chamfers and roundings with any radius without the use of a laser.
Lodgment – what is it?
The designation of the above term, according to the explanatory dictionary of the Russian language, is as follows: this is a cosmonaut’s seat, a small trench for sheltering infantry.
But in the modern world the word “lodgment” has another explanation. This is one of the various types of plastic packaging. It is used for the convenience of the client when consuming the product.
One of the most popular packaging all over the world is the blister. This category also includes transparent plastic packaging, blisters for alcoholic beverages, cassettes for seedlings, correxes and other types.
One of the most common and popular types of blister packaging is the above-mentioned tray. What's this? It is a kind of liner or an ordinary substrate, which has special recesses for product units. The tray is used to sort products in packaging.
It should be noted that the above packaging is similar to Correx. Even their production technology is the same. They are made using the vacuum forming method. But of course there is a difference. Correx is mainly used in the confectionery industry for sorting products. The lodgement has completely different, more extensive, areas of application.
Features of furniture fasteners: overview of popular hardware designs and options for their use
The modern furniture industry offers a huge number of new types of furniture fasteners. They help facilitate installation work on assembling furniture paraphernalia. In addition, they increase its durability.
For example, budget kitchen models made from fiberboard are more likely to be deformed and destroyed as a result of delamination of the top and side panels than furniture fasteners for chipboard and fiberboard material fail. This is due to the presence of high-quality products in the composition of the metal product.
Each type and model of fastener is designed for a specific type of work. They differ in size, color and shape.
Types of metal fasteners
The main purpose of furniture fasteners is to create a strong connection that adds strength to the furniture structure. Some types are used as point fixation, while others help create a kind of frame that will hold several elements together.
To date, several basic models of fasteners have been developed. These include:
- furniture corner. This element is designed to fasten two separate parts together. It helps to assemble all the parts into one design;
- confirmation These are ordinary bolts and screws for furniture paraphernalia;
- dowel It is a wooden retainer;
- screed;
- shelf holder;
- nuts and bolts.
Let's look at each category separately. The main characteristics of these parts will help you understand what these products are intended for.
Furniture corner
This model is available in two variations. Each of them differs in its size and the material from which it is made.
On sale are:
- plastic;
- metal corner.
This model belongs to hidden furniture fasteners. It is located on the inside of the piece of furniture. Plastic products are used for lightweight and suspended structures.
Most often, corners help hold a glass shelf or chipboard partition. The main disadvantage of such products is their fragility and disposable use.
Metal fastener options are intended for fixing large parts. Basically this is a wardrobe, chest of drawers, furniture corner. They fit tightly to both surfaces at the time of connection. The product contains durable aluminum alloys.
Confirmat
Manufacturers of furniture fasteners offer a large selection of self-tapping screws and screw nails to create a comfortable environment. There is no need to be particularly precise during the installation process. Metal screws can be easily tightened using a screwdriver or a screwdriver.
The most popular confirmations are products whose dimensions are 8 x 60 mm. This fastener model provides a super-strong connection between the parts. Iron parts can withstand great physical stress.
In addition to the advantages, there are a number of significant disadvantages. These include:
- during the fastening process, a mark from such fasteners remains on the surface of the furniture;
- These models are not recommended for use on fiberboard panels. Metal parts can greatly deform a wooden panel.
Dowel
This element can also be classified as a hidden type of fasteners. It is a wooden part that is fixed in the cavity of the snowstorm paraphernalia. It plays a connecting role for large parts. Specialized departments provide a detailed catalog of furniture fasteners.
The height of the product is from 30 to 35 mm. The diameter of the fastening element reaches up to 5 mm. To attach such a model, it is recommended to make shallow holes on two parts. Next, a wooden dowel is installed at one end. After this, the second hole is connected to the protruding part of the connecting part.
You can add strength using PVA glue. It dries quickly and promotes tight fixation of all parts to each other. A special adhesive composition has been developed for this purpose.
Ties
Today, specialized departments offer two types of metal screeds. These include:
- eccentric;
- intersectional.
The first model is used under factory assembly conditions. It is made of durable metal alloys. After fixation, the product becomes almost invisible. They are located deep inside the furniture structure.
The second type is an iron nut and bolt. They allow you to tighten two parts perpendicular to each other. Most often they are used to fasten a tabletop or the head of a sleeping bed. The photo of furniture fasteners shows modern types of parts.
Photos of furniture fasteners
Advertising tray
The above blister packaging is used mainly for an effective presentation of the product to a potential consumer. Advertising lodgment - what is it? It is actively used for the design of expensive goods and various promotions.
Experts note that if the product is packaged in such a blister, it will have a more attractive and original appearance, thanks to which it can attract the attention of many buyers and stimulate the purchase of this product. Agree, decor is the basis of any packaging
A creative approach to its design will help greatly to promote products.
The cradle in this case should emphasize the best and most effective aspects of the product. Since the technical side today is limitless, it becomes possible to implement the most interesting ideas and proposals.
The lodgment production method - vacuum forming - provides a good opportunity to create a wide variety of packaging configurations and reliefs. Combining it with a fairly wide selection of color shades allows you to achieve maximum efficiency.
Requirements for tool organizers
When choosing a finished product or materials and design for making a tool organizer with your own hands, you should consider some specific requirements:
- The bottom, or better yet, the entire lower part of the box should be monolithic or have particularly reliable fastening connections. The product will have to withstand significant weight.
- The base must be stable no matter how much the internal volume is loaded.
- It is necessary to provide feet made of sponge rubber or other similar material so as not to damage the surface on which the box will be installed.
- If the walls are made of elastic or deformable materials, they must have stiffening ribs so that when the box is fully loaded it does not change shape.
- If there are moving elements: a folding system, closing doors, drawers, all transformations must occur without effort, including when the containers being moved are partially loaded.
- The body of the box, as well as all its internal compartments and structural elements, must have no gaps. The lid should fit tightly and have additional fixation in the form of latches or locks.
Each of the materials used to make a tool box with your own hands is subject to stricter requirements for strength and wear resistance:
- wood, plywood - treated with antiseptic and fire-retardant impregnations or primers;
- metal - galvanized sheet is used or the product is painted with oil-based impact-resistant paints;
- polymers - impact-resistant plastic is used that can withstand a wide range of operating temperatures. As a rule, this is polyurethane, PVC, extruded or cross-linked polyethylene.
Tool box - a modern organizer for workers of different professions (95 photos)
Every home craftsman knows that storing and transporting a tool is much more convenient in a special tool case. If you do not have a separate workshop and workbench, then this becomes the only possible option for collecting all the tools in one place.
It would seem: it’s even simpler - a tool box, what could be special about that. However, this is only the initial impression of a person who has not encountered this problem in real life.
A tool box should be not so much spacious as it should be practical, provide easy access, allow you to store not only the tools themselves, but also consumables or accessories that will help you in everyday work.
Its design must be strong enough to serve faithfully for many years. In this article we will focus on all the implicit criteria for choosing a tool box, consider issues related to design features and help you understand the variety of products on the market.
If you look at the price lists of companies offering products for craftsmen, and pay attention to the photographs of tool boxes presented, even the most experienced craftsman will note the variety of various designs of different sizes, capacities and made of different materials.
How not to get lost in this diversity and choose exactly what you need, while saving the family budget and getting the optimal combination of price and quality - read about it in this article.
Modern tool box
If we use an organizer to store business papers and documents in everyday life, then the tool needs its own case - a special tool box. You can divide tool boxes into professional and universal, which are most often used in the household.
Our grandfathers generally made a toolbox with their own hands, but today there is no need for this - you can always find what you need on sale at a very reasonable price. Naturally, those who like to do everything with their own hands still have the right to express themselves here and assemble an original case that meets all individual requirements.
Professional boxes are generally made for specific sets of tools, which depend on the type of activity.
Naturally, in this case, it is possible to distribute the contents in the most optimal way, to provide everything that is required: from special mounts for specific devices and tools, to drawers for consumables and spare parts.
All tool boxes are divided into two types:
Cases. Such tool boxes are a flat suitcase with an opening design and compartments of a certain shape for specific tools: drills, keys, screwdrivers, etc. There are designs with customizable partitions that allow you to change the internal arrangement.
Container type box. This design usually has an opening top. Inside there are several compartments separated by a partition. The design includes separate lockable drawers.
Simple and small designs have a handle for transportation. More complex designs can be mounted on carts, have drawers, multiple compartments and individual boxes assembled into a single structure.
Container designs are more versatile, spacious and easy to use, but they are inferior in ease of access to case-type boxes.
Homemade designs
It is impossible to unequivocally answer the question: how to make a tool box with your own hands, since there are a huge number of options, unlimited by anything except your imagination. I would like to note that you can use old paper cases, bags, or make a complete box yourself. The material used is metal or wood.
Internal partitions are also made of wood or plastic. The lids are hung on hinges; it is necessary to provide a lock that will protect against accidental opening.
The finished box is painted or sheathed with available and suitable material, both outside and inside.
Not obvious aspects of choice
In the selection process, first of all, look at the material from which the case is made.
Plastic tool boxes are lightweight and easy to use and repair. Despite all this, they do not withstand mechanical stress and loads very well.
Stronger and more durable metal tool boxes made from aluminum, its alloys or steel. With greater weight, they are more durable, but require periodic maintenance: restoration of paintwork, cleaning of rust and traces of corrosion. Among other things, metal boxes are more expensive.
If you need to transport bulky and heavy tools, it is better if it is a tool box on wheels.
Homemade structures most often consist of a wooden tool box. Main disadvantages: bulky, heavy weight. At the same time, wooden structures have a specific advantage, namely: wood stores metal tools well, since it absorbs moisture from the surrounding space.
Keep practicality in mind: the drawer should provide easy access to all tools. It must have a fairly reliable case that protects the contents from moisture, dust and external influences.
It’s not always convenient when there are too many compartments and drawers inside: you can get confused in them and spend a long time looking for what you need.
Pay attention to the hinges and lock - as practice shows, these are the elements that most often break.
Photo of tool box
Tool box on wheels
The next project is much more difficult. To implement it, you will need a fairly expensive tool and a sufficient level of skills to work with it.
Tools:
- welding machine;
- Bulgarian;
- drill;
Materials:
- metal profile: equal-flange angle 30×30×2.5 mm – 6 m; square pipe 20×20×1.5 – 4 m; square pipe 15×15×1.5 – 6 m;
- plywood (10 mm) – sheet 1.5×2.0 m;
- aluminum profile (can be replaced with a CD profile for plasterboard): corner 50×20×2 mm – 6 m; n-profile 20×20×2 mm – 1m;
- furniture guides for drawers 45 cm – 3 pairs;
- rotating wheels – 4 pcs.;
- consumables: screws, bolts, paint.
| Illustration | Description of action |
| Three shelves measuring 1200×750 mm are made from angle steel, the connection is made by electric welding | |
| For the frame of the side walls, a profiled pipe 20x20 mm² is used. To get a rounding with a radius of 100 mm, you need to make 14-16 “cuts” (every 10 mm) with a grinder in a circle 2 mm thick | |
| The resulting workpiece is placed into a template with an internal distance of 750 mm. The slots are then welded | |
| The shelves are welded to the side posts | |
Plywood is cut:
The final size depends on the thickness of plywood you use | |
| From a square pipe 15×15 mm² we weld three load-bearing bases for shelves | |
| We make the sides for the drawers from an aluminum corner 50×20 mm. Fastening to the base is done with rivets | |
| We install plywood on the bottom and screw guides to the sides | |
| Handles are made from aluminum U-profile | |
| Handles are screwed to drawer fronts |
1 of 4
What happened in the end
Video instruction of the manufacturing process:
Watch this video on YouTube
DIY tool tray
No one can pass by, and after 15 minutes we are watching the next episode and laughing heartily with the whole family! The authors' imagination is limitless! This is cooler than any Brazilian TV series or American comedy! Lyudmila Artemyeva is our favorite actress))) “Added - Cherry pie with kefir Cherry pie simple recipe Recipe for pie with cherries. — Watch/download⇒ “Hello! Thank you for the recipe, everything really looks very simple, the set of ingredients is very accessible and the pie looks amazing) I was just looking for a juicy summer pie, and here is your recipe. I think you can also try making it with blackcurrant or plum, for those who like light sourness combined with sweetness. And as an option, you can roll the berries not in flour, but in powdered sugar, it will be even tastier! I just don’t understand why, after greasing the mold with butter, you also sprinkle it with flour? "Added -
home and family
DIY cradle
In general, the word logement is translated from French simply as “room”. Logical. In the storage area, such a substrate, an insert, becomes a “room” for a variety of items. The cradle reliably fixes objects, preventing them from falling out of storage even during transportation and in an upright position.
Of course, not only tools can be stored in such supports, which are usually placed at the bottom of a box, case or box, and mounted on the walls above the workbench. Gun safes are often equipped with holders; storing weapons in such a lock is safe and secure.
Most often, tool holders are included with them. A ready-made set of keys, screwdrivers with a variety of attachments, pliers and everything else that a home craftsman will need is sold in a holder. Each instrument has its own backing that is exactly the right size.
This is important to hold the item firmly.
Today, lodgements are most often made of foamed polyethylene. It is now widely used for packaging goods. The material is soft and yet quite strong.
However, lodgements are also made from plastic, wood, and plywood. At home, to create such a storage system, you can use foam rubber and wall insulation. Craftsmen advise painting the cut or extruded areas under the tool in a bright color so that it is immediately obvious that a Phillips screwdriver or a 16mm wrench is missing.
It can be difficult to choose a ready-made cradle if it does not come with a set of tools. What is important here is not only and not so much the material of manufacture, on which the price will depend, but the ideal dimensions of the recesses for specific tools. Therefore, home craftsmen often make trays to suit their own needs, for their own workshop.
The easiest way is to make a tray with your own hands from foamed polyethylene. The thickness of the sheet is selected individually - it is clear that for storing bolts and screws you can use thinner material, but for bulk tools you need a solid thickness for reliable fixation. For hand tools such as keys, pliers and screwdrivers, a sheet of polyethylene with a thickness of 10 centimeters will be sufficient. Each tool has its own hole cut out.
Home craftsmen even make trays from polyurethane foam. This is not a very attractive or practical method, but in general the substrate is reliable to use and quite durable. published econet.ru
If you have any questions on this topic, ask them to the experts and readers of our project here.
Now let's talk about the practical side
Depending on the thickness of the future cradle, you select the thickness of the sheet of material from which you will make the cradle. If the lodgement is quite impressive, then it is made of several layers, which are subsequently glued together. It is advisable to cut the maximum thickness in one pass of the laser beam, at least so that later fewer layers need to be glued together. And as follows from the results of Table 1, long-focal lenses come to the rescue.
Let's say if you need to cut foam rubber or polyethylene foam 30 mm thick, then it is better to install a lens with a focal length of 3 inches. If the thickness of the material is 50 mm or more, then it is already necessary to install a lens with a focus of 4 inches. By the way, we conducted an experiment and cut through 100 mm thick polyethylene foam with a 4-inch lens in one pass, and the quality of the cut was excellent and there was no rounding of the edges of the cut at the edges. You can cut larger thicknesses, but this will require the installation of 5 and 6-inch lenses.
It is worth considering that when installing long-focus lenses, it is also necessary to install an elongated nozzle, since the distance to the material increases and it becomes difficult to deliver air from the compressor to the cutting area. Also, the elongated nozzle has a larger outlet diameter. This is important because long-focus lenses provide an increased diameter of the light spot and the increased diameter of the hole eliminates the contact of the beam with the walls of the nozzle at the exit.
You will have to select the cutting speed experimentally for each material separately, depending on the power of the laser radiation.