The impact impulse of a simple hammer is directed inside the struck surface, as a result of which it is deformed. In a reverse hammer, the direction of the impulse is opposite, making it possible to eliminate the deformation. The device is widely used in body repairs of damaged cars and, in capable hands, can even remove deep dents. A reverse hammer will also help when removing bearings in hard-to-reach places. A pneumatic version of the device is used to remove burnt-out diesel engine injectors. The article will tell you how to make a reverse hammer with your own hands.
The most common mechanical and pneumatic devices are:
- Mechanical. The design consists of a metal rod about 50 cm long and 1.5-2 cm in diameter, which is equipped with a handle with a metal stop. A freely moving cylindrical metal weight is placed on the rod. The free end of the rod is attached to the deformation site or to the bearing using various attachments or welding. The weight is moved forward along the rod by hand, then sent back with force. When the weight hits the metal handle stop, the device moves away from the surface, pulling out a dent or removing a bearing. Making your own reverse hammer suitable for body repairs is not particularly difficult.
- Pneumatic. The device is similar to a pneumatic jackhammer, in which a metal piston strikes the shank of the pike at a frequency of several thousand blows per minute. In a reverse hammer, the piston strikes the wall of the device, as a result of which the hammer receives a momentum of movement directed in the direction of impact. The resulting force is enough to use it to remove 90% of burnt-out diesel engine injectors during repairs. A reverse hammer is also suitable for removing bearings, especially in awkward, hard-to-reach places. The industrial product is easy to use, but expensive - the price starts from 30,000 rubles. The cost of the reverse hammer described in the article is much lower. However, its manufacture requires experience in metalworking and turning, and drawing skills, which may not be possible for a beginner.
Vacuum dent removal
If a dent has formed on the body (door, fender, roof), but the paintwork has not been damaged, you can correct the defect using vacuum straightening.
To straighten dents, a pneumatic or vacuum tool (suction cups) is used; this method is used to straighten so-called “poppers” measuring more than 15-20 cm in diameter. The advantage of this method is that after correcting the defect, painting is not required - the paintwork is not damaged, and the work is completed much faster than with conventional straightening. But vacuum dent extraction requires a certain amount of skill, and not every dent can be straightened out.
Varieties
Despite the fact that the design of the reverse hammer is quite simple, over time even it has had several modifications. This or that option is used in different cases - it all depends on the skill, as well as the type of deformation. But in general, the design is always the same, the operating principle is the same. The differences lie only in the method of attaching such a tool to the body.
The simplest version of the hammer:
- This is a metal rod, at one end of which there is a hook, and at the other - a load and a stop;
- A hook is attached to the washer, and the washer is welded to the place of deformation by welding;
- Provided impact forces are applied to the load, the deformation is extended to the desired moment.
But the second option (also quite simple) will differ somewhat from the first. At the end, instead of a hook, there is a simple thread. In order to level the surface using such a device, a hole is made in the center of the deformation, into which the threaded end is inserted, and a nut and washer are attached to it on the reverse side.
A vacuum hammer is the most complex version of its implementation. It is attached to the surface of the deformed area using rarefied air. The suction cup begins to work both in the usual way and with the help of a compressor.
Thanks to the vacuum device, minor body damage can be repaired and the paintwork can be preserved intact.
Reverse hammer application method
The method of leveling the body using the tool made is simple, but it will require some effort. First of all, you should attach the tip to a curved surface. Next, by hitting the weight towards you, the workpiece is leveled as needed. If the effort is insufficient, it is worth changing the weight. To level a large area of metal, you can weld a couple of washers that will be in line. Then you should put it on the pin. Next, the rod should be secured with a hook, which, together with the iron, is pulled back, while smoothing everything to the desired state. But you should be careful, as you can damage the body part, causing additional damage.
The car body can have dents of different sizes. And at the same time, it’s not difficult to make a reverse hammer with your own hands, suitable for different irregularities. It is enough to add the ability to change the weight into the mechanism. Simply changing the weight for larger damage. Sometimes it is worth welding on additional washers. Then the tool will work smoothly. But don't forget that you can damage your car by overdoing it. Therefore, it is worth making smooth movements when repairing the car. Thus, with proper repairs, every car enthusiast will be satisfied with his homemade device. After all, this mechanism is simple to manufacture and does its job perfectly.
Brief instructions and tips for using the tool
Again, to clearly understand how this happens, the easiest way is to watch the video. If this is not possible, then the procedure for working with this device is approximately as follows:
- the tip is fixed on a deformed area of the body;
- by hitting the load on itself, the part is leveled to the desired position;
- if the effort is not enough, then the load is changed to a heavier one.
When pulling out a relatively large section of metal, you can weld several washers on one line and thread the pin through them. To do this correctly, it is advisable to watch a video on this topic. This pin is then engaged by a hook, which is welded to the fixture and pulled back along with the metal, aligning it to the desired condition. When using this method, you should be careful, since welding a large number of washers can excessively pull the metal and damage the body part.
Scheme for a homemade spotter
A homemade spotter can be made from an old inverter. But for this you need to know how the structure is assembled. The work of a spotter depends on a number of required components:
- welding transformers;
- primary winding;
- diode bridge;
- thyristor.
The equipment operation diagram is determined along two diagonals. The power of the transformer of the first diagonal is higher than the second. Therefore, it accepts voltage after turning on the device. Electricity flows through the secondary winding through a diode bridge and a relay into the capacitor. Thanks to this system, charging is ensured. In this case, voltage passes through the transformer and does not accumulate. With this starting scheme, the thyristor closes.
To start welding, you will need to open the thyristor. After turning off the charging of the capacitor, the secondary winding of the transformer will receive sufficient current for welding. You can see the elements of the scheme in more detail on the plan.
Vacuum return hammer
There is a separate type of device - a vacuum hammer. Vacuum straightening of a car body has its own peculiarity, thanks to which it is possible to put in order a fairly large damaged surface of the car.
Its advantage is that it has a vacuum suction cup, thanks to which there is no need to remove a thick layer of paintwork before starting body repairs. Also, compared to conventional tools, there will be no need to drill or weld staples in the area to be repaired. In this case, caps of different configurations and shapes are used. Using a vacuum suction cup, the material is well held when leveling the dent. Working with a vacuum tool will reduce work time and labor costs.
Vacuum straightening of the body is carried out as follows:
- First, the area to be leveled is cleared of fat and warmed up;
- The dent in the center and edges is glued with glue pins of the required size. The pistons are engaged with a vacuum hammer, and the impact on the surface is quite accurate;
- Repeat the previous two steps in turn until the surface of the body takes on its normal shape;
- At the end, after leveling, it is well worked out using a mini-lifter, which comes complete with pistons.
Despite the obvious advantages of vacuum extraction over conventional leveling, this method of body straightening also has its disadvantages. It will not be possible to completely remove the defect. Moreover, if there were cracks in the damaged area, then you risk damaging it even more. Accordingly, you need to be careful when choosing a straightening method, as well as choose the right tools for the job.
As you can see, a reverse hammer is an indispensable tool for body straightening work. It has many disadvantages, which we discussed above. But despite this, only with its help can you get rid of dents in hard-to-reach places. Therefore, it must be present in the arsenal of tools of every automobile mechanic.
As you know, body repair requires a number of special tools. Without them, it is simply impossible to do quality work. One such tool is a reverse hammer. Its main purpose is to level out small areas of the car body that have received minor deformation. Using a reverse hammer, you can apply a certain force to places where access is limited.
One clarification needs to be made here. Individual sections of the car body, if they are deformed, can be leveled using a regular rubber hammer, applying gentle blows in the right place from the back side. However, the problem is that such access is not always possible. In such a situation, a reverse hammer comes in handy for a car mechanic. Also, this tool can be used as an addition to a spotter (spot welding machine) for removing CV joints. Moreover, a reverse hammer can also be used when performing certain types of repair work related to the engine. For example, in some cases it is used as a puller for injectors.
Why is it necessary to attach the handle?
The popularity of wooden handles is due not only to their cheapness. Wood is a lightweight material, and for hammers this is an extremely important parameter. The handle should be light in weight, and his head should be weighty. This is necessary to increase the impact force. Using homemade wooden holders, a person has the opportunity to adjust the tool depending on his anthropometric characteristics, taking into account the thickness of the handle, its length and other dimensions.
For normal operation, tools must be kept in perfect order. This is especially necessary if you have to use tools quite often. To drive several nails a couple of times a year, you can use a bad hammer with a dry handle. However, if a hammer is the most necessary tool for a job, then it must be kept in excellent condition. If the instrument is not in proper condition, then you risk not only injuring yourself, but also causing harm to others if its striking part comes off.
It is important to note that on dangling instruments this happens quite often, not only due to wear of the material, but also due to improper seating of the striking part on the holder. In addition, the wood used as a handle is of particular importance.
Login to the site
To ensure that the hammer does not fly off the handle during operation, but sits on it securely and firmly, it is enough to just place it correctly on the handle once.
Lever
First, about the dimensions: the hammer handle should be oval in cross-section, from 250 to 350 mm long, smoothly tapering to the end on which the hammer head is mounted.
The best wood for making handles is birch, beech, oak, ash, maple, hornbeam or rowan. It is completely unacceptable to make hammer handles from species with easily splintered wood: pine, spruce, aspen or alder.
Hammers with metal and plastic handles are now available for sale. They completely avoid the problem of fitting the head onto the handle, but for some reason I prefer hammers with wooden handles. They are warmer to the touch, feel more secure and comfortable in the hand.
Most often, hammer handles are made from birch wood. If you plan the handle yourself from a thick birch branch, it must be dried in a warm, shady and well-ventilated place.
Do not try to dry wood using artificial heat sources: electric fireplaces, air heaters, radiators. With such drying, the wood inevitably cracks and loses its strength.
If the wooden handle for a hammer is not sufficiently dried, over time it will dry out and decrease in volume, and the head will dangle on it, constantly threatening to fly off the handle of the tool.
Fitting the hammer head onto the handle
Insert the thin end of the handle into the hole in the hammer head. The ideal would be to fit the head on the handle with a certain force or, as the masters say, “with interference.”
If the handle is too thick, sand its thin end first with a rasp and then with sandpaper. As a result, the end of the handle should be a gentle cone. Having attached the hammer head to the handle, make sure that it is strictly perpendicular to the center line of the handle.
Holding the handle vertically, with the head of the hammer up, strike it with the back wide end against a hard surface from top to bottom. With each blow, the head of the tool will slowly but surely fit onto the expanding handle, becoming stronger and stronger on it.
The immobility of the head during subsequent impacts will indicate that it has “sat” firmly enough on the handle.
Wedging the hammer handle
Prepare a place for a wooden wedge. To prevent the wedge from moving to the side and damaging the handle, use a narrow chisel to make a notch about 5 mm deep at an angle of 30° to the longitudinal axis of the hammer.
A wooden wedge is a blade about 3 mm thick, about 15 mm wide and 30 to 50 mm long. The wedge should gradually taper towards the front, but its end should be blunt.
After the wooden wedge is driven into the handle approximately 15-20 mm, use a fine-toothed hacksaw to saw off the upper part of the handle protruding from the head of the hammer so that it protrudes... Next
What will you need?
Materials needed include the following:
A small piece of rubber. Measuring the required size of rubber is quite easy - the length should be slightly longer than the length of the handle, and the width should be the same as its perimeter. It is not necessary to purchase tires separately; you can use an old bicycle tube
It is important to use high-quality rubber without any admixtures of other substances. PVA glue. Any lubricant - lithol is most often used. Pre-made wooden handle of suitable size. It should be oval in cross-section. The handle should gradually narrow towards the place where the striking part is inserted.
It is best to make it a little longer than the intended handle. Standard handle length is 250-350 mm. The wooden blank must be pre-dried. Otherwise, after drying, the wood will shrink in size, which can lead to a weak fixation. Hammer. Here this word refers to the striking part of the instrument. Sandpaper and file. Their presence is not required. They are used only to adjust the size of the handle or the striker of the hammer hole.
The handle should gradually narrow towards the place where the striking part is inserted. It is best to make it a little longer than the intended handle. Standard handle length is 250-350 mm. The wooden blank must be pre-dried. Otherwise, after drying, the wood will shrink in size, which can lead to a weak fixation. Hammer. Here this word refers to the striking part of the instrument. Sandpaper and file. Their presence is not required. They are used only to adjust the size of the handle or the striker of the hammer hole.
Varieties
Despite the fact that the design of the reverse hammer is quite simple, over time even it has had several modifications. This or that option is used in different cases - it all depends on the skill, as well as the type of deformation. But in general, the design is always the same, the operating principle is the same. The differences lie only in the method of attaching such a tool to the body.
The simplest version of the hammer:
- This is a metal rod, at one end of which there is a hook, and at the other - a load and a stop;
- A hook is attached to the washer, and the washer is welded to the place of deformation by welding;
- Provided impact forces are applied to the load, the deformation is extended to the desired moment.
But the second option (also quite simple) will differ somewhat from the first. At the end, instead of a hook, there is a simple thread. In order to level the surface using such a device, a hole is made in the center of the deformation, into which the threaded end is inserted, and a nut and washer are attached to it on the reverse side.
A vacuum hammer is the most complex version of its implementation. It is attached to the surface of the deformed area using rarefied air. The suction cup begins to work both in the usual way and with the help of a compressor.
Thanks to the vacuum device, minor body damage can be repaired and the paintwork can be preserved intact.
Manufacturing
Making such a device yourself is not that difficult. No special tools or materials are required. And it won’t take much time for this. To have a clear idea of the work, you can watch a training video and also make a rough drawing.
If we talk about tools, then for work you will need the following:
- Metal pin 50 cm long and 20 mm in diameter;
- Weight with internal hole;
- It is advisable to have a thread cutting tool;
- Welding apparatus;
- Bulgarian.
If you want to make a hammer with a hook type of fastening, then make a hook at the end of the pin. It can be made from pliers or a vice. Another option is to weld a ready-made hook from another tool.
If the tool grip is threaded, then cut the thread at the end of the pin with a special tool. There is no need to cut it much, since the metal of the body is quite thin.
When the tip is ready, a weight is placed on the pin, limited on the back side of the tool. This can be done using a threaded stop or by welding. A threaded stop is a more acceptable option, since you can use weights of different weights depending on how much force is needed at the end of the tool.
Application
This tool has the following operating principle:
- To begin, carefully examine the deformed area on the machine and select a suitable hook depending on its location, as well as the size of the dent - this will allow you to correctly calculate the accuracy of the applied force in the future;
- Then thoroughly clean the damaged area on the body from the excess layer of paint, as well as primer down to the metal;
- Next, weld special brackets (repair washers) onto the metal surface of the dent on the car using a welding machine. If an electric spotter is included with the hammer, then when leveling you only need to change the nozzle;
- We hook the hook of the tool into the staples, then carefully and easily pull out the dent. It is recommended to do this until the damaged area of the body completely disappears;
- To completely remove dents, first weld several staples, and then pull a tool rod through their holes so that the damage disappears;
- We treat the corrected area with a primer and cover it with paint depending on the tone of the body.
However, along with the advantages, such a hammer also has a number of disadvantages. Because of them, it is possible to remove, along with the existing dent on the body, a previously undamaged layer of paint. In addition, this tool is not suitable for repairing large dents on the hood, roof or trunk surface of a car. And welding staples can damage the metal, which means the part will need to be completely replaced.
Do-it-yourself pneumatic diesel injector remover
The injectors are located in a hard-to-reach place - the well of the cylinder head (cylinder head). From exposure to dirt and moisture, these elements rust and become firmly attached to the seat. Screw and hydraulic pullers cope with dismantling, but the parts immediately fall apart in two and become irreparable.
If you want to dismantle the injectors with your own hands intact, build a pneumatic return hammer.
Drawing of a hammer for removing injectors
You shouldn’t start work without a drawing. It is necessary to imagine the design, structure of the pneumatic hammer, the number of components of the future tool, the sequence of connecting them into a single whole.
Before designing, decide on the dimensions - usually a length of 50 cm is enough to crawl under the hood and remove a burnt injector. The drawing can be found and downloaded on the Internet.
Materials and tools
As for power tools, you will need a powerful autocompressor with a capacity of 250-300 l/min, an angle grinder, and a pneumatic chisel. From the latter, already at the preparatory stage, remove the boot, retaining ring and bushing with spring: they will no longer be needed.
Prepare metal blanks from which the body and plugs of an air hammer are usually turned on a lathe.
Blanks for making a reverse hammer for removing injectors
To make a reverse hammer for removing injectors with your own hands, you will also need:
- hose fitting;
- hacksaw for metal;
- gas wrenches and wrenches;
- calipers.
Don't forget the air hoses for the compressor.
Manufacturing instructions
You have already removed unnecessary parts from the pneumatic chisel. Next, you can make a reverse hammer for injectors with your own hands in the following steps:
- Clamp the chisel in a vice and unscrew the cylinder from the body.
- Remove the piston from the removed part, followed by the air valve.
- From the outside of the cylinder from the front cut, cut a thread for the plug.
- Unscrew the bushing for the fitting from the handle of the chisel, cut the body into 2 parts.
- Measure all the details of the inside of the case: threads, location of the air hole, other parameters.
- Turn another cylindrical body on the lathe. It is necessary that its inner surface matches the sawn part.
- Next, on the machine, make a shank on the outside of the back wall - a rod 5 cm and 1.5 cm in diameter.
- Mill a plug whose internal threads match the external threads on the cylinder.
- Temper the body and plug for strength.
- Weld a bushing over the air valve.
- Place the tail section, cut from a chisel for a pneumatic tool, into the end of the cylinder.
- Install the piston inside the cylinder.
- Screw the wide part of the cylinder into the new housing.
- Insert the already prepared chisel shank into the other part, tighten the plug (secure the part from unwinding with the fixing bolt).
- Screw a fitting through the adapter above the air hole and attach the air duct from the compressor to it.
The DIY injector return hammer is ready for use. The tool will also be useful for removing bearings in the future.
Source
Types of hammers
Different types of hammers are used in different areas of repair and construction work. Moreover, each model is made of different materials and has a different structure and design. What types of hammers are there:
A carpenter's hammer is designed to work with wooden parts, so the back of the head is often equipped with a nail puller. The weight is 100-500 g. This lightness is necessary in order to make precise rather than forceful blows. The impact area of the hammer is flat, and the handle can be made of wood, metal or metal-plastic. Rubber pads are usually attached to the base of the handle for a strong grip.
A carpenter's hammer can also be considered a mallet. This instrument is made entirely of hardwood. A mallet designed for working with wooden parts in cases where there is a risk of dents forming in the wood. A mallet is used to connect grooves in wooden parts.
- A plaster hammer is not only designed for working with clay surfaces. This tool is actively used in the process of installing drywall. The device is small in size, and its striking part is round in shape. The back of the head is represented by a small hatchet. This design allows you to drive nails into it without damaging the finishing material or carry out stripping (trimming).
- A rubber hammer is used to lay tiles, tiles or bricks. Accordingly, such a rubber hammer is also called a mallet. The tool helps to compact and level fragile parts of decorative building elements. Since a rubber hammer is called a mallet, this type of tool is ideal for working with wood.
- A carpenter's (roofer) hammer is a tool with a metal head. The striking part can be round or square, and its surface is usually grooved. The head is additionally equipped with a nail puller or a pointed “tendril”. The weight of the tool is usually 300-800 g. The tool is intended for driving nails, wedges and adjusting wooden roof structures and support beams.
- There is a special impact tool for masonry, with which you can knock out bricks while working with bricks and concrete. Thanks to the presence of a flat, narrow part, it is possible to chip off individual parts of stone, brick or concrete. A mason's hammer is called a pick, and is popularly called a “cam”. The tool should be durable and not too heavy.
- The plumber's hammer is considered the most popular and widespread. What exactly does a metalworker's tool consist of? First of all, it is a head that is round or square on one side and hardened on the other at an angle of 45°. The handle is usually made of wood, but can be metal or metal-plastic. Using this tool you can drive wedges and nails.
- The sledgehammer or hammer is considered the largest type of hammer among all. You could say that this is a professional device designed to destroy. Used to deliver powerful blows without much precision. Using a sledgehammer you can drive piles and break concrete. The weight of the device is 8-10 kg. Consists of a rectangular metal head and a wooden handle.
There are also types of devices that are used in narrow areas. A copper hammer is similar to a sledgehammer, but the tip is made of copper. This alloy does not produce sparks upon impact, so it can be used in flammable situations. A small analogue of a plumbing tool is suitable for a welder. But in this analogue, the narrow part has a larger rock angle of about 45°-50°.
Depending on the type of work, the type of percussion instrument is selected. Different head designs help to perform certain manipulations with different finishing and building materials.
Distinctive features of a hammer and sledgehammer
If we consider 2 options for percussion instruments that differ only in mass, then the question arises of how exactly a hammer differs from a sledgehammer. Sledgehammer is one of the subspecies, but all the differences are striking.
The main differences between a hammer and a sledgehammer:
| Characteristics | Hammer | Sledgehammer |
| Weight | 50 - 1000 g | 8-10 kg |
| Size | 28 - 38 cm | 40 cm to 80 cm |
| Purpose | For driving or removing nails | For breaking and driving in piles and wedges |
The main difference between these tools is the impact force and mass. In general, it is believed that a device for hammering, which has a mass of more than 4 kg, is already a sledgehammer.
Ax mounting side
According to the instructions, it is recommended to mount the ax so that the wedges and the cross section of the ax handle stick out slightly. Half a centimeter will be enough. Thus, this can only be done if the ax is pushed towards the wedges with the narrow part. Accordingly, the wide part will be directed towards the handle.
Experienced carpenters use back-fitting quite often. Its use is necessary only if the tool is used as an auxiliary tool. For example, for hewing or planing. This method is often used for a sledgehammer or a cleaver. However, these tools do not have wedges. The main part of the load falls on the outer parts of the handle, which are necessary to hold the metal part of the weapon.
How to attach an ax handle to an ax, see the video below.
Wedges
GOST 18578-89 Construction axes: “1.3.2. Wedges must be made of steel grades 10, 15 or 20 in accordance with GOST 1050 or from any steel grade in accordance with GOST 380. It is allowed to make wedges from hardwood in accordance with GOST 2695.”
I usually make wedges from sheet steel 5mm thick. The manufacturing process is simple. Excess metal is cut off and the workpiece is given a wedge shape. The length of the wedges is 5 mm less than the depth of the groove for the wedges. Wedging is done on a cross.
Among some carpenters there is an opinion that metal wedges are worse than wooden ones. However, my experience says otherwise. The fact is that when an ax is used all year round, in the cold season the humidity of the wood of the ax and wedges increases, which means the volume increases. When warm days come, the ax handle and wedges dry out and the ax begins to wobble. Wooden wedges, which, according to technology, sit on glue, cannot be knocked out, but knocking out metal wedges or replacing them with thicker ones will not be difficult.
FakeHeader
Comments 62
What I mean is, if a hook is needed at the end of a new tool, have you prepared a bolt with a hook?
I have welding and a lot of scrap metal) so I can do a lot)
does it perform a specific task? pull out the axle shafts?
No. He also removes pulleys well. In short, a universal thing.
I would like to warn those who are especially hot from using a reverse hammer when removing CV joints without removing the axle shaft from the car. Reasons: 1. On some cars (Mitsuban gearboxes KM201, KM200, F5M21 and the like), the inner CV joint is simply inserted into the box, not screwed in, and by tearing off the outer CV joint with a reverse hammer, you risk pulling out the entire axle shaft, which will entail changing the oil in the box.2. On many cars, like the Audi C3, the inner CV joint is bolted to the box and by pulling off the outer CV joint with a reverse hammer you break the threads in the box body. Personally, I haven’t found anything better than fortune + a ball puller when replacing a CV joint without removing the axle shaft.
This is generally contraindicated for “particularly hot” people - it’s better to go to a service center, but in this group the people in general are of a slightly different temperament. But to the point: 1) How would you explain logical things - as for me, a person who welded a reverse hammer with his own hands, and who is going to change grenades on a car with them, must understand that the force acts on both grenades in almost the same way, and certain actions need to be taken so that what is needed “flies out”. It’s not so difficult, right? 2) For that matter, on some Toyotas it is generally impossible to use a reverse hammer - since the fixation ring sits in a one-sided groove, so the manufacturer warns against “you and me” - that only the drive assembly be changed .And there are a lot of such examples - everything comes from a specific case, but often a reverse hammer is the only way to simplify the work and save your time.
Classification of pneumatic hammers
Nowadays there are many pneumatic jackhammers from different manufacturers on the construction tools market. Therefore, it will be quite difficult for a non-professional to figure out which hammers are better in terms of their parameters, and what should be taken into account when choosing such a tool.
Jackhammers are divided into 2 main types:
- volumetric - the device is driven by the rapid expansion of air in a special chamber;
- turbine - work due to the energy that is generated when the blades of an air turbine rotate.
All jackhammers, according to their technical characteristics, are classified into four standard sizes according to such indicators as energy and frequency of blows per second:
- The first type - the impact energy reaches up to 30 J, and the impact frequency is up to 45 Hz. The tool is used to remove and destroy materials (clay, brick, asphalt) with medium strength, as well as when carrying out work in cramped conditions.
- The second type is impact energy - up to 40 J, impact frequency up to 34 Hz. The devices are used for general construction work.
- The third type is impact energy up to 45 J, frequency up to 20 Hz. Used when working with durable materials with blows directed vertically downwards.
- The fourth type is energy over 50 J, frequency up to 24 Hz. Carrying out work with high-strength materials.
In addition to the impact energy, a pneumatic hammer is conventionally divided by the average weight of the tool:
- from 5 to 6 kg – light – carrying out high-rise, finishing and other work, which by its specific nature does not involve large-scale destruction. Often used in everyday life. Such a tool has a relatively low level of power;
- from 6 to 10 kg – medium – it is preferable to use when carrying out horizontal work. This weight allows you to hold the tool for quite a long time while maintaining a certain direction of work. Therefore, the device is widely used in construction and repair work;
- within 15 kg – heavy. Such pneumatic hammers are intended only for carrying out heavy types of work, most often in industry.
Impact force is an indicator related to the amount of material hit in 1 blow. It can range from 2 to 63 J. It is believed that the higher the impact force, the higher the speed and degree of efficiency of the device.
Impact frequency - this criterion displays the number of impacts per unit of time, that is, the operating speed of the equipment. The greater the force of the blows, the lower their frequency will be. Often, heavy hammers have 1,100 blows per minute, while lighter tools have 3,500.
To ensure the effective functioning of a pneumatic jackhammer and maintain a high level of its performance, you should also pay attention to the characteristics of the compressor used: operating pressure and volume of compressed air. https://www.youtube.com/embed/e4-HJmXsyWw
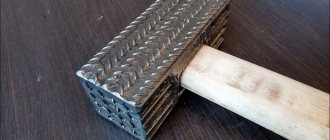
Communities › DIY › Blog › Reverse Hammer.
I needed a reverse hammer, but today, and not on order for 2 weeks. I decided to assemble it myself from scavenged materials.
After digging around, I found only bolts and something similar to a reverse hammer. But don't worry, it doesn't work)
I cut everything off and kept only the rod itself. I found a piece of tube that was more or less suitable in diameter.
I decided to reinforce the tube with bolts, since there are a lot of them)
Instead of a handle, I welded a bolt from the axle shaft to one end.
On top is a “strike pad” or puck in Russian. So that the blow would be more clear and would not occur during welding.
I made the same platform for the cue ball.
I decided to protect myself from scuff marks on my hand, and even when you work with axle shafts, you get covered in molybdenum. in short, to prevent the hand from slipping off the cue ball, I made this “antislip”)
I took the belt and made a groove.
And fixed it with a bolt.
Wrapped it, made a bevel and a groove on the other side
And I recorded it the same way.
The handle should no longer slide.
I welded a nut on the opposite side of the rod, immediately with the pitch I needed.
And this is how the hammer turned out.
As soon as everything cooled down, I immediately tried it.
He completed his task with flying colors. It took about 2 hours. Almost all the time I was waiting for the metal to cool down)
Mechanical return hammer
For production you will need:
- two used VAZ 2108 rear racks;
- two pieces of metal pipes 12 cm long;
- an old side handle from any power tool;
- metal washer 60 mm with hole diameter 22 mm;
- lead for weighting;
- electric welding machine;
- gas burner (for melting lead);
- grinder or hacksaw.
- The construction tank is cut along the circumference from the side of the rod at a distance of 2 cm from the edge.
- The strut cylinder is removed.
- The guide sleeve of the rod is knocked out with a hammer.
- The rod is removed.
- The two rods are connected with threadless ends and welded. The joint is cleaned and polished. The resulting rod is about 60 cm long with threads on both ends.
- On one side, a 60 mm washer is put on the rod and welded. The distance from the edge to the attachment point is selected depending on the length of the handle.
- The handle is secured with a nut.
- Pieces of pipes (one is slightly thicker than the rod, the second can be cut from the rack tank) are inserted into each other and aligned - the walls of the tubes should not touch each other. On one side, a washer of a suitable size is welded onto the pipe cuts.
- Pieces of lead are placed in the space between the pipe sections.
- The part is heated with a torch until the lead melts.
- After the lead has hardened, the striking weight is ready. For ease of use, the part can be equipped with supports for compression buffers of the racks, which have the form of metal covers with a central hole.
- The weight is placed on the rod.
- A safety washer is secured to the end of the hammer opposite the handle with nuts, which prevents the weight from sliding off the rod.
The device is ready for use.
from tool design to its markings
Definition
Design
Marking
A hammer is a necessary thing in the household. It’s not bad to have several varieties of it in your toolbox. This sometimes greatly facilitates the performance of specific work. But for most household needs, an ordinary, one might say, standard plumber's hammer is quite suitable.
Bench hammer, definition
A hammer is a percussion instrument that is designed for hammering or, conversely, breaking some objects (in the first case, these are usually nails, in the second, for example, contaminated tightly separated joints). It is also used for some impact work (when manipulating with a chisel or a screwdriver with a thrust bearing). Its weight, dimensions and design features are determined by GOST 2310-77 “Steel hammers”. He also clarifies the concept of “metalwork” - created for the needs of the national economy and export.
Design
A steel metalworker's hammer weighs from 50 grams to 1 kilogram. The design of the tool: a head (for striking the surface being processed), a wedge that holds the first element, preventing it from going “flying” with the next blow, and a handle that serves to increase the swing, and at the same time making the entire object more convenient for the worker .
The working part of a plumber's hammer - the head - also has its own characteristics. Its two ends: the toe and the striker, differ in shape, which allows them to be manipulated differently.
The firing pin can be round or square. The toe is usually thinner and may be triangular or cylindrical or rounded at the end.
In the photo: 1 - head, 1a - firing pin, 1b - toe, 2 - handle.
According to GOST, a metalworking hammer must have a head made of steel grade 50 or U7. Other brands that are not inferior in properties to those mentioned are also allowed. A prerequisite is the presence of a protective or protective-decorative coating. Being steel, the tool head is usually galvanized. The coating can be oxide, phosphate, followed by oiling or painting with enamel or varnish.
According to GOST, a steel hammer can have one of three types of handles. The most common of them is an oval-shaped handle with a rectangular cross-section. Others are its modifications, oval-shaped with a narrowing or double narrowing for greater ease of operation. GOST allows other ergonomic forms. The width of the handles, depending on the size of the mounted heads, ranges from 18 to 41 mm. Length – from 200 to 400 mm. Household hammers often have a handle length of 250 to 350 mm and a corresponding head weighing from 100 to 400 grams.
to come back to the beginning
Hammer handles should be smooth, without burrs, as well as elastic and heavy enough to reduce the load on the hand when working. Hardwood has suitable properties. The most commonly used trees are birch, oak, maple, rowan, ash, hornbeam and dogwood. Modern materials - high-strength plastic and rubber coating. Another GOST requirement is the absence of any cracks on the tool handle outside its connection with the head (at the wedging point).
Locksmith hammer, marking
Everything a potential owner needs to know about a hammer should be printed on the head of the tool. This is the recommendation of the state standard. The list of data must include the manufacturer's trademark and the nominal weight of the product.
Previously, a mandatory indication of the price was required, but now this data is optional, as is the possibility of applying the manufacturer’s emblem to the hammer elements.
Reverse hammer device
There are several options for the reverse hammer structure:
- vacuum;
- with pneumatic pulling mechanism;
- devices with multiple weights;
- models with an adhesive base or replaceable nozzles.
The first of the presented types has a unique advantage over similar devices. The vacuum suction cup allows you to carry out repair work without damaging the paintwork. Depending on the power of the vacuum reverse hammer, it is possible to pull out small and medium-sized damage on various parts of the body. However, when working, it is necessary to follow a special technology: pulling should be done from the edge of the damage to its center. Otherwise, a dangerous stress for the metal arises, which can lead to fracture or unpredictable deformation.
Pneumatic reverse hammers are convenient because they require reduced effort when performing work. Another area where this tool is indispensable is work under the hood, including removing stuck parts.
A homemade reverse hammer can be built from the simplest components:
- a metal rod of suitable thickness and about half a meter long;
- steel washers of the appropriate diameter for installing stops;
- weights to increase impact force;
- rubber handle (can be replaced with any other convenient material);
- a hook or a metal plate with a holder - depending on the design of the intended hammer.
The condition of all components determines whether grinding and cleaning of metal parts will be necessary. To do this, you can use sandpaper or a metal grinding disc, and special compounds can also be useful. The design features will determine whether a welding machine is needed or only a thread cutting device is required. However, most often it is impossible to do without welding, since it is better to secure the lock washers to the rod of the reverse hammer using a reliable seam.
Device design
In fact, the structure of a reverse hammer for body repair is quite simple. It consists of a metal rod with a diameter of 10–20 mm and a length of about 50 cm. A steel weight (bushing) is placed on this rod, due to the weight and impacts of which the damaged area of the part is gradually leveled.
On one side, a hook is attached or welded to the rod, with which you can hook onto the mounting loops welded to the body. On the other side, a washer is welded, which prevents the weight from flying off, and serves as a bumper, hitting which the force is transferred to the rod and then the metal surface is leveled under this pressure. If you buy a factory-made reverse hammer, it usually comes with several replacement hooks for grabbing staples of various shapes. There are modifications of such hammers with two and three bushings, which allows you to control the impact force when leveling out dents.
There is another variety on the market - a vacuum reverse hammer for body repair. With the help of such devices, large areas of dents are repaired, and the previous design is suitable for minor damage. Here, suction cups are used as a hook, which eliminates the issue of first removing the old paint layer from the part.
How to use a reverse hammer?
The technology for working with a reverse hammer is as follows:
- Cleaning the damaged area down to bare metal, usually using a sander and sandpaper.
- Using a spotter, staples are welded to the body in various places of damage so that they can gradually be pulled out, restoring the shape of the body part.
- The staples are hooked with a reverse hammer hook.
- Using gentle, not strong movements of the weight, we begin to slowly level the surface, making blows. The main thing here is not to overtighten, so as not to drive the bulge back in later. Using these gradual procedures we pull out the entire area of the damaged part.
- We remove the staples by cutting or unscrewing.
- We clean and degrease the part and you can start applying putty.
One of the main disadvantages of using a classic reverse hammer is the need to remove the old paintwork, even if it was not seriously damaged. In addition, as mentioned above, this method is only suitable for small dents.
Video example of leveling a dent with a reverse hammer.
How to make a homemade reverse hammer?
You can buy such equipment in almost any auto store, and often such a hammer comes complete with other equipment, the same spotter. But due to the simplicity of the design, it will not be difficult to make a reverse hammer with your own hands.
To get started you will need:
- metal rod 50 cm long and about 20 mm in diameter.
- a washer or handle that will serve as a bump stop.
- welding machine and protective equipment: glasses, mask, overalls.
- steel hook.
- weight.
- steel washers, 2 – 3 pcs. with a diameter of 2.5 - 3 mm.
The method for assembling a reverse hammer from these components is as follows:
- We grind and clean the metal rod from rust and burrs.
- We will weld a threaded fastener to the hook, and also grind a thread on the stubble on one side to create a removable connection. As an analogue, you can permanently secure the hook using welding.
- We make a hole inside the weight 1 mm larger than the diameter of the rod so that it can move freely along it. Next, we put it on the rod.
- We weld a handle with a washer against which the weight will hit, transferring the thrust to the rod itself.
At this point, the stage of independent development of a reverse hammer for auto body repair is completed. If desired, you can also make a vacuum version of the tool. But here, instead of hooks and welded staples, a suction cup will be used, which is attached to a wide dent and slowly pulled out.
Body repair is a complex operation that requires certain knowledge, special tools and equipment. One such device is a reverse hammer. This is a simple tool that is easy to make with your own hands. There are many photos and videos for this on the Internet. You can also download a drawing of the simplest version of the device.