A little about spot lighting
Due to design features, spotlights have a 30-degree lighting vector. That is why one such light source will not be enough for a room, but at the same time, this property allows the lamps to be mounted quite tightly along the entire plane of the ceiling.
In order to fill the room with light, the distance between the lamps should not be more than 100 cm. At the same time, the outermost spots should not be further than 60 cm from the wall. Such indicators are typical for ceilings with a height of 2.5 m, so the installation step should be determined depending on the conditions of your room. The main condition for placing lamps is the intersection of the cones of illumination at a height greater than the bulk of the objects in the room.
Ceiling spotlights can be installed on suspended structures of any configuration. The simplest and most reliable solution would be to install spotlights in a plasterboard ceiling. But the installation procedure is similar for ceilings made of MDF, plastic panels, and aluminum strips.
Lamps in suspended ceilings should only be installed by a professional. This is due to the characteristics of the ceiling surface and the need to use special inserts in places where spots are attached for a stretch ceiling. Such inserts are thermal rings that protect the fabric from stretching and overheating.
In all other cases, spot lighting of ceilings can be organized independently. To do this, you only need tools, certain skills and the desire to create high-quality lighting for your home yourself.
New light in design: DIY lamps and fixtures
Just a perfectly selected lamp design can radically change an ordinary, faceless interior into a trendy, stylish one. It may even seem like your home has been recently renovated. Our selection of amazing ideas will tell you how to achieve what you want.
Perfect design in eco style
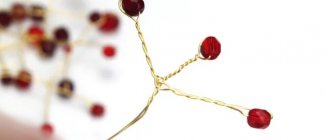
Decorative chandeliers and lamps made from branches
Extreme design “upside down”
Blooming Planet
A lamp is just as important in interior design as a chic sofa or a beautiful blanket on it. An exclusive option on a stand made of branches gathered together with jute rope is a real highlight of the room’s design.
Light from under the birches
A great idea for eco-design is a lampshade frame decorated with decorative green grass.
Soaring flower lawn
glowing flower
Delightful chandeliers with luxurious lampshades made of beads and stones – the undeniable chic and brilliance of interior design.
Textile lamps
Flower extravaganza
Lamps with nautical decorations are the perfect touch of Mediterranean style.
Stately vintage for traditionalists in design
Everyday life will become even brighter and more cheerful when there are such rainbow lamps at home.
Design for those who break the rules
Shining hat - an illusion of magic and tricks in your home
Do you recognize this wonderful mustache and cap? Introducing a stunning bright table lamp design for true Mario fans.
Lighting wheel
Do you have an unusable bicycle wheel? We will find a use for it!
A bright accent of high-tech design is an ordinary incandescent lamp. This unobtrusive element produces a double impression: as if dissolving in space, it cleverly focuses the admiring glances of family and guests on itself.
A delicate lace lampshade on a wooden hinge is an original combination of incongruous elements.
These stylish concrete lamps will add an industrial touch to fashionable design.
Have you been dreaming of a pet parrot for a long time? We have a more functional, and even creative proposal: how about a lamp in the form of a cage with colorful decorative birds?
The best places, cities and favorite photos are always in sight. They do not have a unique place - a wonderful lampshade or lamp!
Lampshades made from improvised means
A great idea for a needlewoman’s room is to cover the lampshade with bright buttons,
and for the writer’s room - wrap it with pages from old books or author’s manuscripts.
And in the musician’s room, let his favorite melody always be in sight.
“Naked” lampshade
Now it’s even easier to make a lamp more original. It is enough to remove the textiles of the lampshade, leaving one frame. A creative lamp will reflect graphic shadows and illuminate the space around even more brightly. If you get bored with asceticism, decorate the frame with decorations or wrap it in fabric.
Multilayer construction
Designer's fantasy
A real revolution in interior aesthetics will be made by lampshades made from kitchen utensils. Now cups, spoons and graters will sparkle above your head!
Zig-zag design
A movable mobile lamp is no longer a boring object on the desktop. This option is a full-fledged requisite of luxurious design.
Delightful macrame
Immense luxury
Warm jute rope design
Simple geometry
Radiant Scale
The cascading branch of a lovely chandelier made of special white paper harmoniously complements the themed decor.
Design “around the world”
These charming lampshades with manuscripts will bring some mystery into the interior.
What is better, openwork textiles or luxurious crystal? There is absolutely no point in arguing about this - each interior has its own choice. The important thing is that even when turned off, you would like to admire the lamp again and again.
Installation of a standard ceiling spot
It is recommended to use the same type of ceiling lamps for each zone. This way you can correctly calculate and purchase the required number of lamps. In this case, it is important to pay attention to the presence of a reflective cone at the base of the incandescent lamp base. For suspended ceilings, it is recommended to use lamps with a power of no more than 40 W, otherwise the ceiling will overheat, which can lead to structural damage or even fire.
LED and halogen lamps must be selected based on power and color spectrum. The wire is selected depending on the ceiling material. So, for example, for drywall, a regular two- or three-core wire VVG-2(3)*1.5 is suitable. For MDF or plastic boards, a fireproof ceiling wiring option is selected. At the same time, it should be soft, each core should appear as many small threads woven under one insulation.
In order to connect the wires and connect lamps to them, you can use special terminal blocks. But it is worth remembering that the bolted connection must be checked twice a year. Otherwise, the contacts on the terminal blocks and wires may become loose, which will lead to overheating and charring of the surfaces.
A more durable and reliable option is fixation using copper or copper sleeves. The connection points are protected with electrical tape or heat-shrinkable tubing (pro
Lamp and its functions
A lamp is a large lamp suspended from a ceiling or wall. There are also floor, table and other designs. The main function of the lamp is to illuminate the house, but now a decorative one has also been added to it. The lamp becomes part of the interior; the lighting device can be invisible, or it can become a central element.
The lamp helps complement the atmosphere.
In addition to the installation method, lamps vary in size, number of lamps, design solutions and materials used. It is important to pay attention to all this not only when choosing in a store, but also when working with a lamp with your own hands.
Installation procedure
Spot lighting for ceilings is installed in several stages:
- planning;
- wiring;
- forming holes in the ceiling;
- wiring connection;
- fixing the lamps and checking the system.
Why is such a simple task divided into several stages? This is due to the fact that each step is best performed at a certain point in the installation of ceilings.
What style will a lamp made of PVC pipes fit into?
Before you start creating a masterpiece, it would be nice to think about how it will fit into the interior of your apartment or house. Lighting fixtures made using building materials are most organically combined with grunge, industrial and, of course, loft styles.
These areas are characterized by the following features:
- rooms that have increased in area and require special lighting;
- high ceilings, crossed beams, visible pipes and vents;
- large, often almost the entire wall, windows;
- many untreated surfaces (concrete ceilings, brick walls).
These styles are characterized by deliberate negligence, roughness, natural colors, and simplicity of lighting. Therefore, when creating a lamp from pipes with your own hands, you should first abandon the use of textile lampshades, glass and crystal pendants, beads and other elements of luxurious decoration.
Planning
Even before you start covering the ceiling with the chosen material, you need to decide on the placement of the lamps on the ceiling. This is especially true for multi-level suspended structures. Each level is separated into a separate lighting circuit. Do not forget about the recommended distance between lamps.
It is important to distribute all lighting points so that they do not fall on the frame structural elements. Thus, the holes for the spots should be at a distance of at least 3 cm from the frame elements. Otherwise, the profile may interfere with the normal fastening of the lamp using latches.
When distributing lamps, also take into account the installation features of chandeliers or sconces. When using these two types of lighting simultaneously, spotlights can be moved to the sides. You can also create two wiring circuits - for the central chandelier and spotlights.
Features of connecting 12V lamps
Many people prefer to use 12 V spotlights for lighting. Connecting them requires a voltage-reducing transformer and a device that stabilizes the current (can be made from a capacitor, resistor, diode bridge). Factory-produced devices are more reliable and are sold with a guarantee.
The driver parameters must be calculated after purchasing the lamps. Its power should be 20% higher than the total power of the lamp(s). It’s difficult to make a mistake with your choice, since popular manufacturers indicate the power on the packaging. It is imperative to evaluate the conditions at the installation site of this equipment. For example, for a bathroom you need to buy a driver that is resistant to high humidity.
The connection diagrams are the same as for a 220 V network. The transformer is mounted and connected first, wires are pulled from it to the lamps.
Most often, spotlights are used in suspended ceilings. These are built-in models that come with a driver and a connection connector. The cable in the ceiling structure is laid in advance. At the installation site of the lamp, a hole is drilled, the braiding and insulation are removed from the cable cores, and the covers hiding the terminals are removed from the transformer. The wires are connected according to the diagram on the case. Two terminals are provided for the cable, the rest (usually on the other side) for lamps. First, the cable wires are connected (exact polarity is not necessary, since the current from the network is alternating). On the other side, the wires of the lamp (or several lamps, if the driver is designed for this) are connected.
Next, the transformer covers are put in place, the device is hidden in the hole, and only the connector for connecting the lighting device remains outside. The lamp body is installed in the hole, the clamp is removed, the light bulb is installed, and secured with the clamp.
Wire distribution
At the stage of forming the ceiling frame, it is necessary to distribute the wires and secure them so that when drilling holes for the lamps they can be easily reached. As a last resort, you can stretch the wire to the first hole, and for the remaining lamps the wire will be threaded from hole to hole. However, this method has a significant drawback - you will not be able to attach the wires to the frame, that is, they will simply lie on the ceiling material.
With the usual method of wiring distribution, the wire is laid according to a certain pattern to the places where the lamp is installed, leaving 10-15 cm of wire at each point. The wiring is secured to the frame using plastic ties. But do not tighten them too much, as the wires tend to change their length when heated. Now you can begin installing the suspended ceiling.
Installation materials
For ceiling installation of the lamp you will need certain materials and tools:
- the lamp itself;
- junction box;
- screwdriver (curly);
- switches;
- as an alternative - dimmers (rotary toggle switch to adjust brightness, turn on/off a light bulb);
- wires;
- electrical tape;
- indicator (tester);
- pliers;
- connecting blocks.
Ideally, electrical wiring should be laid using connection blocks. If such products are not available, then twist the bare ends of the wires using pliers and hide them under a thick layer of electrical tape. The connections can also be placed under polymer caps. Make sure the wires are tightly wrapped around each other.
When laying the cable, pay attention to the material from which it is made. It is advisable to twist aluminum with aluminum or copper with copper. When wires made of two different materials come into contact, gradual oxidation will occur, leading to burnout and loss of contact.
Forming holes for lamps
So, you have a project, but you can still finally determine the position of the lamps only after the ceiling has been completely covered. At this stage, it is important to take into account the location of the seams between the individual sheets of suspended ceiling material. If the installation point of a spotlight for a suspended ceiling is at a joint, then it must be moved to the side.
The hole for the lamp is made using a special wood crown. With its help, it is possible to create perfectly even holes, which has a positive effect on fixing the lamp. Moreover, such a crown perfectly makes a hole both in MDF ceiling panels and in plasterboard or plastic.
The diameter of the hole is selected according to the size of the lighting fixtures. Its size should be 3-4 mm smaller than the outer diameter of the front part of the lamp, but larger than the inner part of the spot. Therefore, the hole width often ranges from 60-75 mm.
Before drilling into the ceiling, think again. Make sure the location of the lamp is correct and only then start drilling.
Installation of spotlights, detailed video instructions:
How to correctly position and connect lamps
After the ceiling is sheathed, the lamps can be distributed, since the location of the spot spots has already been taken into account when designing the frame.
It is necessary to take into account the passage of seams on a suspended ceiling, especially when choosing plastic or aluminum cladding for the ceiling frame. It is best not to install lamps at joints.
Main lighting
As the main lighting in living rooms, lamps are arranged in a checkerboard pattern. Experts recommend longitudinal installation of spotlights in straight lines strictly perpendicular to the windows, the interval between lamps is from 80 to 100 cm, at a distance of 60 cm from the walls. In order to achieve the required lighting brightness, you can combine both spot installation schemes.
Backlight circuit
When choosing a layout of lamps to illuminate individual zones, it is necessary to install spots with a maximum distance of 80 cm between them, and 40 cm from the wall. Most often, lighting is performed zonally in places of relaxation, for reading books, periodicals, or for practicing hobbies: knitting, drawing, sewing, etc.
LED strip
The LED strip provides room illumination in selected areas, that is, it is installed in the room in rest areas, creating dim light. The light from LED strips is very useful and gentle on tired eyes if a person works a lot at the computer.
Choosing an installation location
When installing lighting, you can install it around the perimeter of the room. For a more convenient lighting arrangement, it is best to consult a specialist.
Connection
After you make all the holes, the loops of wires come out (those 10-15 cm that you left). If you chose the second method of laying wires, then now is the time to stretch the wire from hole to hole.
Remember that before starting any wiring work, you must disconnect the power to the appropriate wire.
The wire loops are cut along the bend and exposed. To connect each lamp, wiring 10-12 cm long is used. Having exposed 10-15 mm of wire on each side, the ends are clamped into the terminal on the lamp and connected to the supply wire. In this case, it is necessary to observe the markings on the lamp. So, wire L is phase, N is zero, PE is ground. They may have different braid colors, so check each wire with an indicator screwdriver or tester just in case.
Installation features
To correctly connect spotlights, you need not only to choose the right circuit. It is necessary to follow a certain sequence of actions, which depends on the type of ceiling.
You just need to connect a few spotlights - and you have a beautiful interior
In suspended ceilings
Spotlights are usually installed with suspended or suspended ceilings. If the ceilings are suspended, all wires are laid in advance. They are attached to the ceiling without connecting to power, the lamps are placed and secured on pendants, then the wires are connected to them and the operation is checked.
Prepared for installation of suspended ceilings
Before installing suspended ceilings, turn off the power, remove the lamps and remove parts that may be damaged by temperature. After installing suspended ceilings, holes are cut in the material (the lamps are visible or can be felt), sealing rings are installed, and then the lamps are assembled.
In plasterboard ceilings
If the ceiling is made of plasterboard, you can proceed according to the same scheme, but the lamps must be installed after the ceiling has been plastered. That is, separate the wiring and leave the ends of the wiring hanging freely. To avoid problems with determining the location of lighting fixtures, it is necessary to draw a detailed plan indicating the exact distances from the walls and from each other. According to this plan, markings are made and holes are cut out using a drill with a crown of the appropriate size. Since there may be small movements - a few centimeters - when cutting the cable, leave a margin of 15-20 cm. This will be quite enough (but do not forget that the wires are attached to the main ceiling and they should extend 7-10 cm beyond the level of the drywall. If the ends turn out to be too long, you can always shorten them, but extending them is a big problem.
If you need to install a converter
There is a second way to connect spotlights to a plasterboard ceiling. It is used if there are few light sources - four to six pieces. The entire installation of spotlights along with wiring is done after the work on the ceiling has been completed. Before installation begins, the cable/cables from the junction box are led beyond the ceiling level. After finishing the puttying and sanding work, markings are made and holes are drilled. The cable is passed through them, bringing the ends out. Then the lamps themselves are installed.
Everything is simple, but this method cannot be called correct: the cables simply lie on the drywall, which definitely does not comply with fire safety standards. You can still turn a blind eye to this if the ceiling is concrete, the cable is non-flammable, the cross-section of the wire is not small, and the connection of the wires is done correctly.
Sequence of work in photo format
If the floors are wooden, the PUE requires installation in non-flammable all-metal trays (cable ducts) or metal pipes. You can install such wiring only before starting work on the ceiling. It is very undesirable to violate installation rules - wood, electricity, heat generation during operation... not the safest combination.
Consolidation
Most spotlights have brackets on the sides. They are bent upward until it stops. In this position, the lamps are inserted into the hole. Be careful not to allow the wires to get caught under hooks. After you insert the lamp, the hooks independently press against the ceiling, thereby holding the spot on the surface (read: “Inserting on a suspended ceiling”).
After installing all the elements, you can connect the lighting system to the main power wire on the junction box, step-down power supply or switch. At this point, the work on installing a spot lighting system can be considered complete.
As you can see, there is nothing difficult in installing spotlights in the house. You can see the results of such work in the photo. Using lamps of different colors and brightness, you can highlight certain decorative elements or divide the room into functional zones.
How to install
To install the lamps, you need to drill holes and prepare the necessary tools. In addition, there is a big difference in making holes in tension ceiling systems and special care is required so as not to break through the fabric outside the selected area.
Hole preparation
To make holes for spots, you need to prepare the following tools:
- a crown that is used for woodworking with a diameter of 68 mm;
- screwdriver or electric drill;
- thin drill for metal or wood;
- stationery knife.
In a suspended ceiling
Glue thermal rings to pre-designated points on the stretch ceiling fabric and very carefully cut the fabric inside the ring. The lamp is attached to a special bracket installed on the ceiling frame in the area of the hole.
In a plastic suspended ceiling
In a plastic ceiling, holes for spots are made with a crown, just like in a wooden one. Be sure to treat the cut areas with sandpaper, sanding them well.
In a wooden ceiling
Holes for installing lamps are most often made using a special device - a crown. The diameter of the hole should be almost identical to the diameter of the selected electrical lighting device. For a more durable installation, it is best to drill a hole slightly smaller than the diameter of the front part of the spot, by 3-4 mm, but slightly larger than the inside of the lamp. The spot's fixation springs securely press it to the ceiling.
If you don’t have a crown, you can make holes as follows: draw a circle of the required diameter on the ceiling. It is necessary to drill holes along the line of the circle with a drill without going beyond the outer contour. Then, using a stationery knife, cut out the outlined circle along the drilled holes, and cut off the jumpers and burrs in the same way.
In drywall
The plasterboard plates produce even holes, which makes it possible to securely mount the spots on the ceiling. When working with drywall, you can use the second method of cutting holes using a utility knife.
Problems
When making holes for mounting lamps, you must be careful, since any suspended ceiling material has its own characteristics. Wood can crumble, drywall can wrinkle, plastic can crack, and tension fabric can break in the wrong place due to strong tension.
Wire pulling
The wire puller must be made of rigid steel or copper wire; it is used to pull the wires through the holes. Make the broach as straight as possible and bend it with a hook at one end. If it’s not very convenient to use one broach, you can make two by inserting them into the holes at the same time and pulling out the wiring.
Types of wire fastening
The end of the wire, secured with electrical tape in the form of a loop, is easily pulled out by pulling it out. The cables are attached to the ceiling frame, similar to the diagram for connecting them to lamps.
Wiring diagrams
When the frame of the suspended ceiling is formed, it is necessary to distribute the wiring, securing it to the frame in advance, in order to then remove the loops from the drilled holes. After all, if you secure the wires in advance according to the selected spot installation scheme, this will greatly facilitate the installation of lighting.
The loop-arc on the wiring at each hole is secured with plastic ties with slight sagging of the wire, to facilitate installation and prevent its strong tension from the possible effect of thermal changes in length during operation.
How to route wiring by placing it in the frame
This wiring is carried out at the frame installation stage, at predetermined installation points for lamps, to prevent possible difficulties. By bringing the wires to the installation points of the spots, a kind of wire loop is made, with a small supply of material.
You can lead it to one hole and then simply extend it to each lamp gradually. In this case, the wiring will lie on the ceiling itself inside the frame, since it is not fixed.
Connection features
Spotlights are installed after the finishing coating has been applied to the plasterboard ceiling sheets. The ends of the de-energized wires must be pulled through the holes and connected to spotlights.
Installation of spots may differ slightly, be sure to read the instructions.
How to connect spots
Necessary:
- Bring the antennae of the lamps together and forcefully insert the lamps into the holes; the springs of the antennae will firmly press the body of the lamp to the drywall.
- After checking the operation of the lamps, finally fix them in the housing.
When installing spots, it is important to position the wiring correctly so that it does not get caught under the clamping tendrils, since a stretched wire poses an increased fire hazard, since the electrical wiring may heat up during operation.
Connection to a two-gang switch
A three-core wire located on the frame is connected to a two-key switch in such a way that it is possible to turn on the lamps in groups. Each of the 2 keys is assigned to certain groups of lamps.
Correct serial connection between each other
The connection is very simple, the phase approaches all lamps one by one, in a chain, and the zero is connected to the contact of the last lamp in the circuit. Connecting spots in series saves consumables, that is, electrical wire, but has significant disadvantages, because if one lamp burns out, the next ones stop working. In addition, the lamps do not operate at full power, since each subsequent lamp in the circuit receives a reduced voltage.
How to assemble a lighting circuit using other connection diagrams
According to a parallel circuit, the lamps are connected in two ways:
- beam method - a separate wire and phase and zero are suitable for each lamp;
- loop method - for each unit there is both a phase and a zero in series from lamp to lamp.
How to assemble a lamp together
Spotlights have the same structure:
- cartridge;
- protective shade or glass.
Insert the lamp into the socket removed from the housing and secure it in the housing, securing it with a ring. The housing is attached to a special bracket, which is screwed to the ceiling.
For accurate and correct installation of spotlights, the main thing is to follow the installation sequence. The installation process itself is not labor-intensive and does not take much time, but the quality of room lighting is significantly improved.