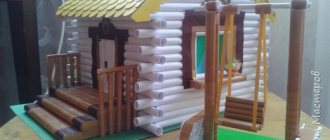
Oddly enough, even in a country as rich in timber as Russia, not everyone can afford to build a full-fledged log house for a bathhouse. However, we have quite a lot of examples of folk art, among which there are bathhouses made of straw, dry branches, wood logs, bottles, etc.
The price of such structures is incomparably lower than the price of traditional buildings, so we decided to dwell on this topic in more detail.
In the hands of a master, any available material can turn out to be construction material.
Choosing a barn project
As a rule, sheds are purely above-ground premises, which is why compacted platforms, a screw or columnar foundation can be used as a foundation for them. Examples of such projects are presented below.
Shed made of profiled pipe (assembled on gussets and corners) with cladding and roofing made of corrugated sheets, without insulation, on a concrete site
Wooden barn with a gable roof (on one side the overhang is increased) and a vestibule-porch
Shed on a wooden frame with a pitched roof, windows on a columnar foundation
However, often in addition to a room for storing various things above ground level, an underground room is also required. In this case, the construction of a shed becomes more complicated, since it is necessary to dig a foundation pit for the basement (cellar) and thoroughly protect the walls located below ground level from ground moisture.
Barn with basement
The building itself can be either wooden or frame, or capital - made of foam or gas blocks. The walls of above-ground sheds are also made of blocks; in this case, a strip foundation is required.
The choice of a specific project depends on the needs and capabilities of the future owners.
Choice of material thickness and color
The dimensions of polycarbonate coatings, as well as their colors, depend on the specific type of product. Thus, the thickness of honeycomb sheets varies between 0.5–2.5 cm. The width of one such product reaches 210 cm, its length is 6–12 m. The weight can exceed 10 kg.
Important! Wavy monolithic sheets are available only in color versions. In this case, a transparent structure is not provided.
Color palette of cellular polycarbonate:
- turquoise;
- blue;
- red;
- bronze;
- orange;
- crimson;
- yellow;
- green;
- grey;
- transparent;
- milky (matte).
Monolithic sheets are produced according to standard parameters. The length of one product is 305 cm, the width does not exceed 205 cm. The thickness varies between 0.2–0.6 cm. If necessary, you can order products of greater thickness - 0.8–1.2 cm.
You will be interested to know which color polycarbonate is best to choose for a greenhouse.
Color palette of monolithic polycarbonate:
- transparent;
- bronze;
- black;
- red;
- milky (matte);
- green (matte).
Insulation of a bathhouse ceiling with sawdust
Quite common methods include insulating the bathhouse ceiling with sawdust. This material is especially recommended for use where the bathhouse will be used by elderly people and children. It is the safest.
However, you should know that using sawdust exclusively can also be fraught - uncovered scattering of sawdust:
- fire hazard (any spark can cause a fire);
- too dirty (a draft can scatter sawdust throughout the bathhouse).
It is best to use sawdust mixed with clay or cement. The advantages of clay are described above, and sawdust combined with cement provides a reliable and strong screed on the ceiling.
Common options include a layer of sawdust covered with a layer of earth on top. This guarantees protection from possible fire, and the layering guarantees high insulating properties.
Which frame to choose
The frame for a bathhouse from a greenhouse is made in the same way as for greenhouses from various materials: metal pipes, aluminum profiles and metal corners, wood, including planed timber.
Metal is an expensive material with high performance characteristics. The connection of a metal structure is carried out with standard hardware products; during assembly it is necessary to combine several types of connections. In this case, you will additionally need to use a welding machine.
Lumber frames are affordable, easy to make yourself, reliable and durable. The downside is the risk of pests, rot and fungal infections. As a preventive measure against damage, treatment with special antiseptic agents made on an organic basis can be used.
Such a frame is assembled in full accordance with the design and assembly process diagrams. The classic scheme is a gable structure on racks. The frame elements are fastened together with bolts with spacers, steel angles and self-tapping screws.
Initially, a foundation is built with waterproofing and anchor bolts installed for mounting the frame. Then the roof racks and slopes are installed.
The baths are lined with a block house - it consists of wide semicircular planks that imitate a log house. The best option for interior decoration is considered to be lining.
Advantages and disadvantages
Properly using all the advantages and, if possible, leveling out the existing disadvantages - perhaps this is the main task of a person who undertakes the independent construction of a frame bathhouse. If you have studied the projects of bathhouses made of foam blocks and seen what shortcomings this material has, do not think that everything is so rosy with frame structures. Let's not mislead you: there are disadvantages in every business, and therefore the best way to deal with them is to carefully study them. Actually, let's start with them.
Flaws
- possible shrinkage of the bath over time;
- the need for high-quality insulation and the associated increase in costs;
- material and time costs for finishing - both internal and external;
- careful care and careful use.
It is no coincidence that we started with the minuses. So you will immediately see the pitfalls that the construction of a frame bath is associated with
And if, after getting to know them, they seem to you not like large cobblestones, but like small pebbles, then pay attention to the following advantages of the chosen type of construction
Advantages
- lightweight construction does not require grueling preparation of a solid foundation;
- retain heat well, but only with high-quality insulation;
- attractively cheap assembly;
- environmental friendliness and resistance to vibrations in the earth's crust;
- the ability to build a frame bathhouse in the shortest possible time, even in difficult weather conditions.
If the advantages still outweigh the possible disadvantages, and you still want to build a bathhouse of this type, then proceed to the next stage.
Components and equipment - what needs to be installed inside
Of course, everyone knows that the stove is the most important thing in a sauna. But in addition to the required elements, you can think of what else you can supplement it with. And yet, first of all, about the main thing.
Mini-stove for a bath – buy or make?
This question cannot be answered unequivocally. If a home craftsman has experience in making such equipment, then, of course, a do-it-yourself mini-stove for a wood-burning sauna will be preferable. If not, then you will have to purchase a similar heat generator. In this case, a good and relatively inexpensive solution would be to purchase a “Varvara mini” sauna stove.
Bath stove “Varvara mini” is a very good choice
Do you need a pool in a mini sauna and how to arrange it?
It makes sense to purchase a pool for mini-baths only if the size of the building allows it. Although sometimes it is installed directly next to the building. Of course, this is a pretty good way to relax after a steam room, but if the area is small, it may be overkill.
Sauna inside a bathhouse – what’s good about this option?
A mini-sauna in the country will be very useful for those in whose family not everyone likes a hot enough steam room. Then, by making a firebox on the back side of the door, you can fence off a small room inside. The temperature in it will be significantly higher than in the washing room. This way, those who like intense heat will be able to relax with a good steam. Others will be in the next room, where the heat is not so strong.
Related article:
Bathhouse projects with a relaxation room and a terrace. In a separate publication you will learn about the most successful layouts of bathhouses with an extension in the form of a veranda or terrace.
Tips for finishing and caring for wood
In addition to treatment with an antiseptic composition, it is desirable to further protect the wooden fence from external influences. For finishing wood located outdoors, there are the following methods of exterior finishing:
- Painting with waterproof acrylic compounds in 2 coats of primer.
- If there are no special requirements for the appearance of the fence, then the wood can be impregnated with waste oil or bitumen. For fear of getting dirty from head to toe, local thieves are unlikely to want to climb through such a fence onto your property.
- Cover with homemade Swedish paint, which protects against pests and precipitation no worse than antiseptics.
- For gourmets, it is suitable to open up wooden surfaces with several layers of varnish over an artificial blackening made using stain.
Beautifully painted fence with a canopy
The ends of the slabs can be beautifully cut and then painted
Recently, Swedish paint has gained popularity; it has a remarkable red color and can be prepared with your own hands. You will need the following components:
- regular salt - 250 g;
- red lead - 240 g;
- copper sulfate (otherwise known as copper sulfate) – 250 g;
- drying oil - 230 ml;
- flour - 500 g.
Fence painted with Swedish paint
Pour the flour into water (3 liters) and cook the paste. Strain it through cheesecloth, add drying oil, then salt, red lead and vitriol, while heating the mixture over low heat. At the end, add another 1.5 liters of water and mix well. The predicted consumption of Swedish paint is 200-250 g/m2 surface area.
Additional filling with components
To create a strong connection and fasten individual sheets together, as well as to reliably seal the joining areas, fittings and additional accessories are used. They are usually presented in different versions:
This:
- Guides for polycarbonate sheets.
- Sealing materials in the form of perforated or end strips.
- Fasteners. They are represented by clamping strips, adhesives designed for polyurethane resins, roofing screws, and end caps.
You can build a bathhouse from a greenhouse with your own hands on a summer cottage in a short time, from high-quality materials, without going into debt. This building will delight its owners and their guests for a long time. If necessary, it can be easily dismantled and transported to another location.
Crafts from slab
The original interior can be supplemented with crafts that will become a functional addition and will delight you with an unusual design. From pre-processed slab you can make a convenient hanger for the kitchen or hallway. It can have either the simplest design from one flat board, or a more complex device with shelves located on the top and sides. Curly hooks can serve as decorative elements and be arranged in one or several rows.
In a hunting or country house, a picture frame made from slab, or photo frames made from small-diameter branches sawn lengthwise, would look organic. To secure the structure and decorate it, you can use twine or braided rope, depending on the size of the frame. Also, a wide processed slab can become a material for making a decorative pot or flower tub.
A wide slab can be used as a base for panels or shelves (in order not to overload the structure, you can make them glass) for small items. If you hang the boards horizontally on ropes, you can use them as shelves. They can be single or arranged in several tiers.
If you use your imagination, you can create unusual crafts by combining materials. The slab goes well with timber and glass. For decoration, you can use branches of different thicknesses, pebbles, pine cones, artificial flowers, berries, and greens. Depending on the design and style of the interior, furniture and crafts can be organically integrated by choosing the method and materials for wood processing.
Interior work
Benches, hangers, and shelves are placed inside the premises. High thresholds and doors are installed between rooms. The internal walls are sheathed with both clapboard and polycarbonate.
It is necessary to provide a hole on the floor for water drainage with a mesh. The water will be drained into a special drainage pit with subsequent drainage.
Varieties
The bathhouse can be built both winter and summer. In winter, the room will warm up well at an outside temperature of minus ten degrees. Even if there is wind, it will not penetrate inside. There is a stove inside with stones on it. They retain heat in the room for a long time. In addition, you can make a portable heater in the bathhouse. Make it from an old metal bucket. Attach a wire rack instead of the bottom. Place small cobblestones in it and heat the bucket with them on the fire. Then take it to the bathhouse. Spray water on these cobblestones. Pre-soak the broom in hot water.
Remember! The heated heater must be placed on a metal tray. Be careful when handling heated stones.
What is the difference between Finnish and Russian?
The Finnish sauna uses heat-reflecting screens that create a “thermos” effect in the steam room. They are corrugated metal or crumpled foil with a shiny surface.
It is enough to install screens under the wall cladding of the heater furnace. There are also a few additional differences:
- The Finnish sauna is often dry. The heat will be evenly distributed throughout the body, warming painful areas and joints.
- In the bathhouse, due to high humidity, the temperature can reach 65 degrees. In this case, even the internal organs will warm up.
Before starting design, it is advisable to consult a doctor. Not every person today can afford to visit a Russian bathhouse.
How to make a table from a slab with your own hands
Practice shows that even in the open air, a wooden table, provided proper care, can reliably serve for many years. When using a slab, you can make original furniture for the garden or home. You can combine the material with timber or solid logs or thick branches. If you show your imagination, such a table will become a real decoration.
For work you may need:
- a grinding machine for polishing the surface (alternatively, you can use sandpaper for these purposes);
- drill for drilling holes;
- a jigsaw or hacksaw if necessary to saw the slab;
- screwdrivers (for places with difficult access it is worth using short models).
A ruler and a small building level will also come in handy.
Standard manufacturing technology may vary slightly depending on the characteristics of the selected model (size, shape of the countertop, design). When using a slab to make furniture, you should select the boards in advance so that they fit tightly together. To determine the amount of material, the product is detailed, taking into account the thickness of the slab and the method of its processing.
The following sequence of actions is taken as a basis.
- Design. To make the design look aesthetically pleasing, it is worth making a drawing, foreseeing in advance the types of connections, their location, and types of fastenings. Based on the data obtained, materials are selected.
- Marking, cutting wood for all structural parts from which the table will subsequently need to be assembled.
- Preparation of the slab. Choose well-dried wood. To extend the service life of the table, it is advisable to remove the bark and sand the surface, removing irregularities and burrs.
- Preparation of holes in jumpers, inserts for connecting parts. The diameter of the fastener must be larger than the hole.
- Making a table top. The number of boards depends on the width of the material. To secure them, 2 jumpers are enough.
- Manufacturing of supports. Their upper part is cut at an angle of 45°.
- Assembly. All screws must be countersunk and covered with plugs.
- Final sanding of the table.
- Treatment with a primer, antiseptic, after they are completely dry, varnishing is performed.
To design a table that can comfortably seat the whole family, it is important to determine the optimal size of the tabletop. 3 people can comfortably accommodate if the furniture size is 60x90 cm
For 6 people, a table of 90x120 cm or larger is sufficient, if the installation location and available materials allow.
How to attach a frame to a timber foundation
After the base of the foundation is filled with concrete mixture, bolts with curved or conical bases are immersed in the places marked on the diagrams. After the concrete layer has hardened, you can begin preparing the timber to be mounted.
To attach the timber to the frame use:
- partial cutting of half a timber;
- complete felling;
- fastening with a metal corner.
Fastening with a corner is stronger and more reliable.
Suitable materials, tools and devices are selected. Among them, it is necessary to provide for the presence of:
- screwdriver and drill. Instead of a drill, you can use a screwdriver with a drill function.
- drills 1 mm in diameter;
- self-tapping screws;
- regular washers;
- thermal washers;
- connecting profile for merging adjacent polycarbonate sheets.
Before construction, it is advisable to develop drawings:
- overall plan;
- each department;
- foundation installation;
- installation diagrams for frame installation;
- layout of polycarbonate sheets.
The frame is mounted on a dried and insulated foundation of any type. First, the floorboards are laid and secured, then the posts and rafters are installed. Jib bars are added to the racks for strength and aesthetics.
Polycarbonate walls are cut with a sharp knife, then secured to the frame with self-tapping screws and thermal washers. The UV protected side faces outwards.
Stage two. Hemming the floor beams
Start work by filing the ceiling. The algorithm of actions is given below.
Step 1. To hem the ceiling beams, use boards about 2.5-3 cm thick (the specific figure depends on the pitch between the beams). Ideally, the board should be tongue-and-groove or with a quarter, and it must be planed and dry, even if it costs more than an unplaned edged one.
Step 2. On top of the fixed vapor barrier, nail the boards completely with nails 10 cm deep or screw them with screws 5-6 cm long (2 pieces at each fastening point).
False ceiling installation
Treat boards and beams with an antiseptic and fire retardant before starting installation work. This will protect the wood from pests, fungi, and also reduce its flammability.
edged board
Bioprotective tinted antiseptic
Choosing a site for construction
The location of the building is chosen taking into account its design; if the building is erected on a foundation, its placement in the dacha is determined by SNiP standards. If it is a mobile or ergonomic structure, or a converted shed without a foundation, it can be placed literally anywhere.
General requirements:
- it is prohibited to place a bathhouse closer than 5 m from the red line;
- if the building is wooden, it should be 10–15 m away from the residential building;
- It is better to remove the bathhouse from the reservoir or block - 15 m;
- It is recommended to build on a hill.
To save on insulation, choose a place protected from the wind.
Recycling process
Croaker is usually processed in small enterprises, since large producers are not interested in additional labor costs, they usually sell it to smaller ones. Often the processing of slabs is of interest to private owners who do it at home. This is beneficial since expensive complex equipment is not required. It is also worth noting that no regulatory documents regulate the dimensions of the product, so even half a log can be called such material.
Based on the thickness of the material and the available features, the complexity of processing and the purpose of the finished product depend. But, if you have high-quality equipment, you can make a high-quality product even from low-grade material.
Before processing begins, it is necessary to determine the geometric parameters of the board. Its length should not exceed 3 m, since this is the maximum length that most machines are designed for. Next comes the stage of installing the material in the working area, where the upper edge is removed along with the bark. This allows you to achieve a clean and smooth surface, which is suitable for making lining. In some cases, you can only get by by separating the bark. Billets processed in this way are most often used for the construction of fences or temporary buildings.
When the raw materials are of low quality, the best option is to process the slab into wood chips, from which you can produce fuel briquettes or use it as bedding, as well as in the construction industry.
Bathroom layout: recommendations
When choosing a one-room space, problems arise with storing clothes and resting. Therefore, the most popular summer option remains a two-room layout: a locker room and a main room for taking water treatments. Size recommendations: 220 cm height x 200 cm length and width. 100 cm long for each room. You can increase the main room to 150-250 cm. The water tank is either combined with a bathhouse or placed nearby on small legs-supports.
The optimal layout for the winter option: a dressing room, a relaxation room, a steam room and a wash room. The area is calculated from the ratio of 5 sq.m per person. To make partitions, you can use the same material as for the main structure - polycarbonate. It is necessary to set a high threshold to prevent water from entering the locker room. Windows, ventilation holes and shelves for bath accessories and supplies are planned locally.
Do-it-yourself camping sauna and stove equipment
You can build a tourist bathhouse yourself, or purchase it partially or completely in specialized stores. The design of such a steam room is simple and usually includes:
- frame;
- canopy;
- bake;
- stones.
The most profitable option, from a financial point of view, is, of course, to build a camp sauna with your own hands. But you can’t do this kind of work spontaneously. Setting up a tourist steam room in nature requires timely preparation.
First, you need a foundation, that is, a frame. Craftsmen can make it in advance from light hollow pipes, and care should be taken to ensure the mobility of such an installation so that it can at least be folded for transportation. The simplest option is a frame made from improvised means. Suitable branches and sticks are already in place, connected to each other with rope or wire in such a way that the simplest stove-heater and a certain number of people can fit in the internal space.
Secondly, it is necessary to build something like a tent, that is, cover the frame with material. It is not recommended to use regular synthetic tents for these purposes, because the fabric from which they are made is not intended for use in high temperatures. A thick tarpaulin or ordinary oilcloth is much more suitable. The material must be strengthened onto the frame in such a way that only one side can be used to enter/exit during further improvement of the bathhouse.
The third, no less important stage is assembling the heater stove. To build a stove, you need to bring stones with you or find them on site. They should be flat, preferably oval in shape and about the size of your palm. Such stones will retain their temperature for a long time and heat up fairly quickly. You can easily fold the stove by alternating stones and sticks, so that at the bottom you get a kind of niche for lighting a fire, and stones are laid around it and on top, which will maintain the temperature. Having assembled the stove, you can start lighting it directly. It should be noted that while the stove is burning, one side of the camping sauna tent should be open to avoid the accumulation of carbon monoxide and smoke.
While the fire is burning and the stones are warming up, you should think about installing a floor for a camp sauna. You can throw pine paws and tree leaves under your feet, organize seating areas, benches and chairs. It is worth maintaining the fire in the hearth until the stones turn red or white. As soon as this happens, you should put out the fire, take the ashes out of the tent and close it hermetically. Now, the camp sauna is ready for use.
So, the construction of a camp bath requires:
- a great desire to take a steam bath in nature;
- homemade preparations in the form of a frame, coal, film or tarpaulin for covering. In the end, you can bring stones for the stove so as not to waste time searching for them;
- improvised means and materials that will be collected on site - logs, sticks, leaves, etc.
Baths made of non-traditional materials
Clayworm
The process of laying clay walls is simple and straightforward.
A clay bath is one of the most exotic options. The main building material is masonry made of chocks (wooden firewood) and a mixture of clay and straw. Hence the name.
Obviously, firewood and clay can be prepared absolutely free, so there is no need to talk about the cost of construction.
There are different approaches to the construction of such structures:
- Firewood masonry is used only to fill the walls between the frame elements; otherwise, the building does not differ from the traditional one - it stands on a foundation with a plinth, has a typical roof and bathhouse frame design. The technology is reminiscent of half-timbered timber, only instead of pure clay and straw, masonry made from firewood is used;
- The masonry is also a load-bearing structure; there is no monolithic frame. This approach allows you to build rooms of unusual shapes - round, oval, polygonal;
- The usual foundation and frame are completely absent. The bathhouse is placed on a rubble base, which goes no more than a meter into the ground, and the walls are made of clay. The roof is often made from straw and other available materials.
The absence of a frame allows the construction of buildings of unusual shapes.
Often various decorative inclusions are added to the masonry, such as glass bottles, glass blocks and other interesting objects. By the way, bathhouse walls are increasingly being built consisting only of empty glass bottles: such walls are practically not afraid of moisture and have excellent thermal insulation, since they consist mainly of air.
The photo shows the process of constructing the “bottle wall”.
Important! The main advantage of the method, in addition to saving money, is the simplicity of laying, in which even women can take part.
Dead wood
A bathhouse made from dead wood is another option for using scrap materials in construction.
A bathhouse made of straw, clay and firewood is not the only option for using scrap materials in construction. Another great opportunity to save money is to use old dried out trees standing on their roots. You can prepare such logs yourself, or you can purchase them at the price of firewood.
Otherwise, the process of constructing walls and roofs differs little from the construction of a conventional log house:
- the house is also placed on a columnar or shallow strip foundation;
- the walls are built from logs with bowls and joints cut into them;
- and the roof is a rafter system of thinner long trunks, which are used as rafters.
Such walls are usually not decorated, as it spoils the unique authentic appearance of the structures. It must be said that, contrary to the opinion of skeptics, dead wood is a good building material, which in terms of strength and dryness can be compared with laminated veneer lumber if you use northern wood.
Walls are often left in their original form to emphasize the unusual nature of the structure.
Advice! If you harvest the material in winter, it will have a minimum content of moisture and pests, and if you store them in a dry, ventilated area, then pests will no longer appear there, since it will be too dry for them.
The advantage of the technology is that it is an order of magnitude cheaper than the traditional one, and you can build it with your own hands, even alone, since the logs are light.
Adobe
A bathhouse made of clay and straw can look interesting and expensive.
Adobe is a mixture of clay and straw. The composition may also include sand and manure. The material is quite common and old, simply forgotten due to being replaced by modern materials.
There are several options for building baths from adobe:
- Half-timbered technology. Adobe is used to fill the gaps between the elements of a monolithic load-bearing frame made of timber, boards or logs;
- Heavy adobe technology. About 80% sand is added to the composition, which makes adobe more durable and quick-drying, and its consistency resembles plasticine. The walls are sculpted from this material, raising it by 30 - 40 cm in one go, then wait until the layer dries. The method allows you to realize the most unexpected architectural fantasies, since you can fashion anything you want out of heavy adobe.
The felt-lined adobe bathhouse in the shape of a soccer ball proves that buildings made of clay and straw can take any shape.
The material is quite warm, harmless, easy to make and absolutely free. What could be better?
Construction of a bathhouse from adobe
For convenience, adobe is placed in molds and made into building blocks.
You build a bathhouse from adobe with your own hands, otherwise all the meaning and savings are lost. First, a few words about adobe.
If you wish to build unframed walls using pure adobe, you will need heavy adobe. It consists of 80% sand, the rest is clay and straw. Straw plays the role of reinforcement, which prevents the sand-clay mortar from cracking or crumbling.
To make this material, the easiest way is to dig a hole 1.2 meters deep and 1.5 meters in diameter, which should be covered with polyethylene or tarpaulin to retain moisture. Next, water is poured into the pit and a mixture of sand, clay and straw is poured, which is mixed with feet until a homogeneous mass is obtained.
The adobe is cooked in a pit, stirring it with feet.
Now a little step-by-step instructions for building such a bathhouse.
- Design. You can create a project yourself, you can purchase it, or you can use a ready-made project, which is easy to find on our website;
Not a single construction project is complete without a project.
- Foundation. According to the project, we dig a trench around the perimeter of the house and walls about a meter deep. We lay rubble or broken brick and concrete in layers in the trench, pouring cement laitance on each layer;
We fill the trenches with rubble and spilled cement laitance.
- We begin to sculpt the walls. The thickness and shape are indicated in the project and depend on the climatic conditions of your area and the architecture of the building;
We sculpt the walls according to the project.
- As construction progresses, we install boxes for the doors and windows of the bathhouse, which we tie to the walls with wire and cover with adobe;
We insert window boxes as the walls are erected.
- We embed ceiling beams and rafters into the upper edge of the walls. We fill the rafters with sheathing and lay roofing material;
We install rafters and floor beams.
- When sculpting the walls, do not forget to leave holes for ventilation and pipes;
- We waterproof the walls from the inside, especially in the steam room and washing room, which we then plaster, cover with clapboard or cover with tiles;
The inside of the bathhouse can be upholstered with clapboard.
- We make the floor on the ground on beams from dead wood or timber, ensuring water drainage and sewerage. We build the floor before starting finishing work.
- We produce external finishing according to our own tastes and preferences.
Exterior decoration depends on your imagination.
Choosing a frame for a bath
The frame of the bathhouse consists of wooden racks 3-3.5 m long with a lower frame made of boards, an upper frame made of hewn poles and braces at the ends of the frame. Then the frame is sheathed on both sides with a hewn slab or well-hewn poles. As the sheathing is completed, its space is filled with cheap dry insulation (sawdust, peat) with the addition of lime or gypsum. In the process of backfilling the walls, the insulation should be lightly compacted layer by layer to prevent its settling and the formation of voids.
Rice. 1. Bathhouse with backfill walls: a – general view; b – plan of the bathhouse; 1 – dressing room; 2 – steam room; 3 – stove-heater; 4 – hot water tank; 5 – support under the floor joist.
Inexpensive mini-baths
Such designs are usually chosen for small areas or with a very limited budget. Mini-baths can be of several types, but they all include a dressing room and a steam room. A washroom or shower room is found only in the largest structures of this type, and in this case it is always combined with a steam room.
Mini-baths are usually built from boards, logs or timber. They can be built on a wooden frame or mounted on wheels for mobility of the structure. The most popular models of inexpensive mini-baths are barrels. They are convenient, attractive in appearance, and can be installed on a foundation, without it, or on rolling stock.
It is recommended to build mini-baths only in cases of limited space. In terms of cost, due to the peculiarities of size and design, such baths will be equal in cost to frame-tile type structures or those built from cinder blocks.
Processing business
Croaker is a very cheap material that can often be obtained for free, but products made from it will cost many times more. It can be processed both into finished products and into some intermediate product, for example, planed bars of various sizes or laminated veneer lumber/board.
For example, from a pile of scraps you can select those that are approximately the same in shape, size and thickness, then cut them to the same width and remove the bark from them.
As a result of such processing, you will get a finishing or decorative material, the cost of which is many times higher.
And the remaining waste is crushed into wood chips, from which wood concrete blocks or compressed fuel are then obtained.
Another way to process slabs is to produce various turned or milled products, such as:
- balusters;
- skirting boards and fillets;
- platbands;
- window sills;
- lining board, floorboard, decking;
- cutting boards and coasters;
- figured pillars.
Typically, boards or sawn timber are used to make such products, and the larger the cross-section of the source material, the more expensive it is.
At the same time, the load-bearing capacity, as well as compressive and bending strength, will be at least no worse than that of its solid wood counterpart.
We build a polycarbonate bathhouse on our own
Many home owners want to have their own bathhouse. Today there is a wide variety of materials from which it can be built. In this article we will talk about what kind of bathhouse can be made from polycarbonate. It will become a place for washing and having a good time. A unique building material is polycarbonate. It is transparent, strong, flexible and durable. This polymer is often used in the construction of greenhouses and greenhouses. First of all, decide on your budget. Without the availability of certain funds, it will be difficult to build the bathhouse of your dreams. Consider how many people will be steaming in it; the room must be appropriate. First of all, make a drawing with the layout of the structure. Plan for additional additions.
How to make a block house from slab yourself
In production, making a block house from slab is not difficult. Specialized machines, in one motion, remove the bark from a rounded surface, cut out a tenon and groove, and also cut moisture-wicking grooves on the reverse side. With independent production, the procedure becomes several times more complicated. It is unlikely that a person who decides to make a block house from slab for himself will have specialized equipment, so he will have to improvise and work with what he has.
This kind of work cannot be called quick and easy, but if you have a router and a table saw, everything will work out. You can work step by step with each board or conveyor; the second method is simpler, so we’ll consider it.
Having assessed the quality and overall dimensions of the original slab, we determine the width of the lamella of the future block house. It is better if the slats are the same, but a slight variation in size can add its own flavor.
We measure the size on the back side of the board, draw a line with a pencil and ruler, and cut the board on both sides using a regular circular saw. Immediately after this, you can do the work with a router, cutting out the tongue-and-groove fastening on both sides. If desired, this procedure can be left for later; it does not matter.
When the boards are cut on both sides, the saw on the machine is set at an angle of 45 degrees and the bark from the side inclined sections is cut off from the slab. After cutting the edge, we determine the height of the board and remove the upper part of the bark with an even cut.
As a result of this processing of the slab, the result is something like a block house with a convenient tongue-and-groove system, but a far from ideal surface. At this stage of work, it is worth temporarily stopping and sending the workpieces to dry in order to avoid problems with cracking and deformation of the finish in the future.
As soon as the future lamella has reached the required humidity, its surface is processed with a plane with a cutting depth of 0.5 to 1.5. The procedure allows you to get rid of sharp corners. Next, the grinding machine comes into play, monotonously and for quite a long time filing down all the unevenness and roughness, turning the angular, roughly cut slab into a perfectly smooth block house. Once the desired result is achieved and the entire surface is smoothly processed, you can begin covering the walls with a block house made of slabs with your own hands.
What extensions should be made in front of the bathhouse?
The bathhouse could use a small simple canopy. For ease of entry, you can add a porch equipped with a canopy and railings. A terrace is also attached to the bathhouse. It is appropriate to place a grill or barbecue on it, as well as place furniture for relaxation.
Construction of a barn frame step by step: detailed instructions
The frame is a structure made up of racks, upper and lower beams, lintels, and inclined jibs. Installation can be done in 2 ways:
- connecting all elements in series;
- using the “platform” method, fastening parts into large sections on the horizontal surface of the subfloor.
For the frame, timber 150x100 mm and dry planed board 150x50 m are prepared. All lumber must be treated with antiseptics and fire retardants.
Fasteners - galvanized screws, nails, bolts, plates, staples. Additionally, you can use wood glue.
Do-it-yourself frame shed, according to step-by-step instructions, is installed in the following order:
- The bottom trim beam is laid on the waterproofing layer along the foundation. Secure with anchors, studs or bolts.
- Install floor joists.
- Starting from the corner, racks are installed in increments of 60 cm, and fastened along the top with a strapping beam.
- The openings are reinforced with boards laid on edge.
- The frame is reinforced with jibs made of boards or perforated steel strips with inserts into the lower and upper horizontal beams.
- The structure is sheathed with finishing materials, windows and doors are installed.
- If necessary, install wooden floors or a concrete screed on the ground, install communications, and carry out interior finishing.
If you use OSB or multi-layer plywood to cover a frame shed with your own hands, jib bars are not required, since rigid sheets give the frame stability. The facing slabs must be staggered with the long side parallel to the foundation.
Options for installing foundation posts in the ground
First of all, the developer needs to choose the option of installing the frame posts in the ground. Depending on the nature of the soil, we offer three options for installing stands. The first option (Fig. 2) is the installation of frame racks in dense, non-heaving soil (rocky, gravelly, dense sand) with a low groundwater level, when the possibility of either settling of the racks or squeezing them out during heaving of the soil is excluded. To ensure better stability of the rack, a support cross is installed in its lower part, and when backfilling, the soil is compacted layer-by-layer with the addition of fine crushed stone or gravel. The lower part of the rack must be well coated with bitumen mastic, oil paint or, in extreme cases, burned, which will protect the racks from rotting. The frame racks are installed at a distance of 0.7-0.8 m from each other, and at the ends of the building - at a distance of 1 m.
Rice. 2. Installation of bathhouse racks in dense, non-heaving soil: 1 - support cross; 2 — frame stand; 3 - bitumen coating; 4 - bottom frame trim board; 5 - wall cladding; 6 - floor support beam; 7 - bath floor; 8 - vapor barrier; 9 - backfilling of the wall; 10 - support strip of the bottom trim board.
The second option (Fig. 3) ensures reliable installation of the bathhouse frame racks in heaving soils. The wooden stand is first tightly inserted into a piece of metal or asbestos cement pipe and buried in the ground. In this case, the buried part of the pipe should be covered with bitumen mastic outside and inside, which will ensure that the soil slides along the surface of the pipe when it swells in winter. To protect the wooden stand from rotting, bitumen coating is also used. They protect the stand in the upper part of the pipe insert and its end inside the pipe. The frame stand with a pipe insert should rest on a dense sand-crushed stone cushion, which will reduce the subsidence of the frame. The bottom board of the frame trim is installed in the racks by means of a tie-in, secured with nails and resting the board on the end of the pipe insert. The subsequent technology for constructing walls is similar to the first option.
Rice. 3. Installation of bathhouse frame racks in heaving soil: 1 - pipe insert; 2 - bitumen coating of the pipe; 3 — frame stand; 4 - bitumen lock; 5 - bottom frame trim board; 6 - braces.
The third option for fastening the racks of the bathhouse frame must be used in soils with subsiding weak-bearing layers. To attach a wooden rack, a pipe insert is also used, which is embedded in a concrete columnar foundation (Fig. 4). Then the stand is installed in a pipe with a side gap of 10-15 mm, immersing the end of the stand in the concrete mixture, and the annular gap is tightly secured with cement-sand mortar. After installing all the frame racks, the frame wall elements are installed using the methods of the first and second options.
Rice. 4. Fastening the racks of the bathhouse frame in the foundation: 1 - sand cushion; 2 - concrete; 3 — pipe insert; 4 - linoleum, glassine; 5 - cement-sand mortar; 6 - bitumen coating; 7 - wooden frame posts; 8 - wall cladding; 9 - bottom frame trim board. For all options for installing racks, the diameter of pipe inserts can be used in the range of 100-150 mm. If racks made of durable wood (oak, ash, beech) are used, then the pipe diameter can be 100-110 mm. During the installation of the frame racks, it is advisable to remove the surface layer of soil under the bathhouse building, while cutting into the racks of the lower plinth board is carried out at a level of 250-300 mm from the ground. When using pipe inserts for racks, the upper part of all pipes must be installed strictly at the same level, thus ensuring the horizontality of the lower frame trim. After installing all the racks, they are fastened together with temporary braces and sprinkled onto the laying of the lower trim boards. If you have a large number of different slabs, you can choose the bottom board with a thickness of 40-50 mm. The width of the bottom board should be determined by the diameter of the stand, which, in turn, is determined by the diameter of the pipe insert. To install the bottom trim board, cut-ins 10-15 mm deep are made in the frame posts, into which a board is inserted, secured to the support strip or to the edges of the pipe inserts using nails. The bottom board of the trim must be covered with tar, bitumen mastic, i.e. The lower part of the bathhouse frame is made of antiseptic boards.
Selection of building materials
If you decide to build a building made of wood, then you will need the following materials:
- A square beam with a standard size of 15x15 cm or 18x18 cm. Also suitable with dimensions of 20x20 cm.
- Floor covering board with parameters 15x5 cm, length – 4 m.
- Cladding board for arranging ceilings and walls. A lining with a width of 10 cm and a thickness of 2 cm is suitable.
- Vapor barrier material. Films are usually used. They come in two types: polyethylene and polypropylene. They are also divided into single-layer and multi-layer. It’s up to you to decide which type to use in building a bathhouse.
- Waterproofing material. The rolled variety is suitable for baths. For example, roofing felt.
- Insulation for the ceiling. This can be basalt or glass wool, slag wool, ecowool, expanded clay, sawdust, sprayed polyurethane foam, cork boards, extruded polystyrene foam. Mineral wool is considered one of the most common options.
- Sheet asbestos. It will be needed to sheathe wooden walls next to the stove structure and chimney. Thanks to this, high temperatures will not be able to destroy the wood.
- Cement, crushed stone, sand and water are all that is needed to build a reliable foundation.
- Material for roof installation. The choice depends on personal preferences, financial capabilities and the need to maintain a certain style. For roofing, you can use slate or euro slate, metal tiles, flexible bitumen shingles, rolled material, shingles, polycarbonate and even straw. The main thing is that the finished roof fits into the overall appearance of the site.
- Insulation for the space between the rows: jute, tow, moss.
There is no need to purchase materials in advance. If stored improperly, timber can deteriorate: mold, rot, and fungus will appear. It is better to purchase it immediately before starting work.
Read on to find out more!
How to combine a bathroom in an apartment
Bath: the main element
Wooden floor in the bathhouse
Do-it-yourself bathhouse roof, calculation and installation of eaves
Do-it-yourself sauna sewer
Do-it-yourself plank and concrete floors in a bathhouse
- 2.6
Rating: 2.6 out of 5 Votes: 189
- 8
Reply
6 years ago
Svetlana
6 years ago
Quote
The steam room that is described in the video can be taken with you on a hike without any problems, it seems to me that it won’t take up much space. I will definitely save the information to try to make it at home. I don't think I'll spend much. No honestly, that's a good idea. Thanks for the interesting information.
Andrey
6 years ago
Quote
A common misconception is that a bathhouse, even in a country house, must be built from 150 mm timber. To keep it hot. My dacha is used in the spring and autumn. Therefore, I built a bathhouse from 50x100mm boards. The steam room is lined with foil from the inside and clapboard made of aspen on top of the foil. The fever easily lasts for a couple of hours. But what a saving in material.
Dmitriy
6 years ago
Quote
Building a bathhouse at home is no problem at all, if only there was a desire and need for this very steam room! A friend of mine fenced off part of the garage and made a steam room right in it, laid out the walls from cinder blocks, put moisture-resistant sealant on top and covered everything with wood! The main thing is to choose a good boiler, which is the source of the hot steam room.
anastasia
6 years ago
Quote
A bathhouse is the most necessary thing in any home. We bought a house, but unfortunately there was no bath there. But there is an opportunity to make a bathhouse just for us. Your method is cool and practical. We will immediately begin building the bathhouse.
Alla Knyazeva
6 years ago
Quote
Interesting method. My father started building a bathhouse a year ago, and then gave up - prices for building materials began to rise. And here is a truly alternative option. I’ll show my father, we’ll resurrect our bathhouse)
Alla
6 years ago
Quote
The instructions in the article are simple and clear, but the materials in question are not entirely accessible, at least for me, but the video really allows you to have a bathhouse always close to you
Angelina
6 years ago
Quote
A bathhouse is a necessary thing these days! If you don’t have a house yet, this is not a problem - you can always spend the night in the dressing room. But if you have a house and nowhere to wash yourself, this is already serious. The construction option described is really very profitable! You can also make a shaped panel from plywood for the ceiling: beautiful and inexpensive!
What to heat - choosing a stove
When choosing a stove for a sauna, first of all you need to pay attention to the power. This indicator must correspond to the volume of the steam room
The presence of uninsulated areas and the material used to make the door are also taken into account. According to the type of fuel, sauna stoves are as follows:
- Wood-burning. The classic version of the firebox allows you to create a special atmosphere. A ubiquitous tree does not require additional communications. You can independently prepare all kinds of varieties to create different effects.
- Gas. Units of impressive size can only be connected by a qualified gas technician. In such stoves there is no need to constantly add firewood and control the flame. They have no firebox or ash pan. Gas furnaces significantly increase the fire hazard of the entire structure.
- Electric furnaces. Miniature devices heat the room evenly and quickly. The installations are absolutely safe, with great functionality. Due to the high electricity consumption, the operating cost will be high.
Let's start building
- First you need to install a columnar foundation using timber and roofing felt for waterproofing. Lay timber frames on the foundation pillars. Secure it with 50*100 boards. This will be a good supporting element. Make sure that the boards cut into the floor of the beam. The boards need to be secured vertically and diagonally. Mount the rafter system from the same boards.
- Now start attaching polycarbonate sheets to the finished frame. If desired, you can make a combined cladding using LSP. Make it only from the outside, and the inside of the bath is made of polymer material.
Insulation options
When creating a mini-bath, one of the important points is its high-quality insulation. Before doing this work, it is necessary to eliminate all the cracks that are present in the walls. When installing a layer of thermal insulation, it is optimal that its thickness be at least 15 cm. In regions with harsh climatic conditions, this figure can be increased to 25 cm. The process of laying the material occurs staggered. This technique allows you to completely eliminate the appearance of cold bridges. If they are present, the heat will quickly leave the bath. This cannot be allowed.
To create a layer of thermal insulation, you can use a variety of materials:
- mineral wool;
- sawdust with clay;
- expanded clay
If you need an inexpensive solution with high performance, then you can hardly find anything better than polystyrene foam. Many are skeptical about its use in the bathhouse. But it still provides good thermal insulation performance. A 12 cm thick layer of insulation based on it is enough to replace an 80 cm layer of mineral wool. This material can operate effectively in the temperature range from -100 to + 80 ° C.
Small indoor sauna
You can also set up a small steam room in your home, for example, in the bathroom. This can be achieved in two ways. In the first case, you will need to install a removable shelf on two bars. The height from the floor should be no more than one meter. The bars are secured to the wall with reliable anchors. Above the bathtub, the height of the shelf should be between 400–600 mm.
To climb onto the shelf, you will need to make several steps or a ladder using rubber bearings. Tie the ladder to the shelf with twine. The shelf width should be 600 mm. This steam room is heated by an electric stove. It can be installed on a special stand, for example, above a washbasin. As a heater, use a basin or metal bucket, which should be filled with stones and placed on the stove.
Another option is to create a sitz steam bath on your bathtub. It will be covered with removable wooden panels. The shelves will be used as a seat, and you can rest your feet on the durable panels. To make the room remind you of a bathhouse, cover the walls and ceiling above the bathtub with clapboard or install removable panels. They can be installed and removed without much effort. Heating is performed by an electric stove with a container of hot stones placed on it.
Choose your version of a small bathhouse, plan your actions and get started!
Recommended reading:
DIY infrared sauna;
How to choose a design
If you decide to build a polycarbonate greenhouse with your own hands, it is advisable to choose a design that allows you to use the main advantage of this material - its ability to bend. These are two types with curved roofs with arch-shaped supports.
In one design, the arcs extend from the ground itself. If they are curved in the form of a radius, a lot of area is lost at the edges, since it is very inconvenient to work there due to the small height.
If a radial polycarbonate greenhouse is made according to this drawing, it will be possible to work near the walls
Another design solves this problem - with a composite frame welded from several pieces. Straight posts emerge from the ground/from the base, which rise to a height of at least one and a half meters. An arc is welded to them. With this arrangement, the roof is rounded and the walls are straight. You can even work along walls without problems, standing up straight to your full height.
Option with composite frame
But the rounded greenhouse roof has several disadvantages. The first is that it is more difficult to make ventilation windows in it than in a straight line. The problem can be solved by making transoms in the walls rather than in the roof. The second disadvantage of a rounded roof in a polycarbonate greenhouse is that snow falls off from it worse than from flat, sloping surfaces. If you live in a region with snowy winters, you will either have to make reinforced trusses, or make a pitched roof - with one or two slopes.
If you weld two half-arcs at an angle, the snow will melt better
There is a third solution - to make a rounded part of the roof from two arches, welded at an angle, which forms a kind of ridge. With this structure, the snow melts well and the ridge can be protected with a wide strip of metal. This will improve snow melting and protect the joint from leaks.