Furniture in the loft style will complement any modern interior.
This trend originated in New York in industrial areas during difficult times. Due to the ruin of industrial enterprises, buildings were rented out or sold for next to nothing to the common people. Therefore, this style is characterized by simplicity, strict straight lines and natural materials. If you want to add some zest to the interior of your home, install a loft-style table in it. It will fit into any modern style, and will be distinguished by functionality, practicality and original appearance. You don’t have to buy such furniture in a store; you can make it quite easily and simply with your own hands.
Style Features
The peculiarity of furniture in the loft style is that it combines the incongruous . That is, furniture items can have a rather interesting and original appearance.
It can be assembled from different parts. For example, you can assemble a table in the loft style from different products: take a tabletop from one table, attach legs from another to it, and install drawers and shelves from a third.
There are several loft style trends:
- industrial is the most popular. It contains rough and untreated surfaces and metal parts. A table in this direction should be functional and simple. Its color range can be: white, gray, black or brown;
- bohemian _ It maintains an industrial atmosphere and allows for a mixture of styles. An excellent choice for such an interior would be a table with carved metal legs. It will be perfectly complemented by modern chairs;
- glamorous _ A variety of colors is allowed here. You can make the product blue or lilac. The tabletop can be not only wooden in this direction, but also glass.
Attention : a loft-style table should be large in size and have strict lines.
There should be nothing superfluous here; the main purpose of this direction is functionality, practicality and ease of use. The loft style is characterized by rough and brutal textures. As for the variety of models, a loft-style table can be used in rooms with different purposes:
for a small studio apartment you can make a transforming table ;- suitable for the hallway - console model ;
- for the bedroom - a small coffee table ;
- for the living room - dining table ;
- for an office or child's room - a desk .
DIY workshops
Before the process of creating a table in the loft style, you need to think about the purpose, design, functionality and color. You also need to decide on the materials and evaluate your abilities as a craftsman. To manufacture parts and assemble the frame, a drawing should be drawn up. If you are planning a table made of metal parts, then you need to prepare tools: a grinder, a vice, a drill, a device for cutting threads.
Computer from the array
If the size of the room allows, then for a schoolchild you can make an original computer desk in the loft style with your own hands. To make it look organic next to other things, it is better to adhere to minimalism in the room (tall uncurtained windows, maximum space, simplicity of furnishings). Before making loft-style tables, you need to read the instructions.
Stages of work:
- Weld a frame-frame from a metal corner and attach rotating swivel wheels. They will make the table more functional. It is better to use products with a stopper, then they can be fixed in one position, thanks to which the furniture will not move when pressed.
- Prepare a tabletop from solid wood (cut, sand). To make it decorative, the wood must be burned. It is better to do this outside, since the work is dirty. Use a gas burner. When working, you need to move the workpiece, not the cylinder (it is held vertically, do not shake). It is important to burn the ends and edges of the table, the middle remains light.
- Then the product needs to be brushed to remove the burnt fibers. First, use a coarse wire brush to do this. It is better to move along the fibers. Then you need to process it with a fine brush. After sanding, the texture will become more prominent and brighter.
- Wipe the product with a damp cloth.
- Make a small recess in the front of the table to make it easier to work at the computer.
You should also choose original fittings for the product. The computer chair must match the style, have a simple design, and also match the color and quality of the material with the rest of the furniture. The finished product can be decorated with stars or a bicycle chain.
Instead of a welded frame, it is permissible to use a cabinet from a sewing machine, machine tool, or any other original metal structure.
Weld a frame from a metal corner
Attach the rotating caster wheels
Prepare a solid wood tabletop
Burn the wood to make it decorative, remove burnt fibers
Make a small notch in the front of the table
Install fittings
Kitchen with metal legs
A metal corner is used to make the table. First you need to draw a sketch and prepare the tools. You will need an angle machine with an abrasive wheel, a welding machine, a workbench, clamps, and a drill.
The stages of creating a table are as follows:
- cut the metal into pieces according to the drawing;
- trim the ends of the corners, maintaining an angle of 45 degrees;
- weld two horizontal frames;
- when working on a metal frame, secure structural elements using clamps;
- assemble the corners of the lower frame with a vertical shelf up, and the top one down;
- weld vertical posts between the frames;
- weld two transverse metal strips 30 cm from the edges of the upper frame;
- sand the seams;
- use a level to check the location of the upper frame of the underframe;
- prime the metal with a brush, and after 12 hours cover it with special enamel;
- Drill 4 holes in the metal strips with a drill.
Then you should fix the tabletop by cutting the ends of the boards to the size of the pedestal with a jigsaw. Sand the top surface and secure with 25 mm long screws. After this, coat the table with furniture varnish, dry it, sand it again, and apply a finishing layer of decorative coating. Check the quality of welds and painted surfaces.
Cut metal into pieces
Weld two frames
Weld two transverse metal strips
Drill holes
Fix the tabletop
Coat the table with furniture varnish, dry, sand
Check the quality of welds and painted surfaces
Rectangular dining room with epoxy
Loft-style tables with epoxy resin look very bright and unusual. They are good not only from an aesthetic point of view, but are also reliable and durable. Initially, you need to decide on the brand of epoxy compound. It is characterized by resistance to ultraviolet radiation, hardening time, and transparency. The tabletop is made using natural and artificial wood.
The loft-style dining table made of aged wood and slab looks especially impressive. The latter is made by longitudinal sawing of trees. This layer has a unique pattern and shape. During operation, the elements are connected with epoxy resin.
Making a table begins with creating a support. It is usually made of wood or metal. In the latter case, a welding machine is required.
The following devices and tools are used:
- formwork, form made of plexiglass or aluminum;
- separators (wax, petroleum jelly);
- sanding tools or sandpaper with different grits.
It is necessary to prepare the room, remove dust and humidity. The temperature should be between 20-25 degrees, since epoxy resin does not react well to cold, and the countertop can be irreversibly damaged.
Filling is carried out according to the following scheme:
- establish the form, checking the correct position using a level;
- treat the wood (sand, stain and varnish);
- place it in the mold, fix it;
- mix the components of the composition thoroughly;
- pour the first layer and check the thickness, observing the norm allowed by the instructions;
- after the first layer has hardened, wipe the surface of the tabletop with a rag, then pour the second;
- After complete hardening, the table should be sanded and polished.
The table can be used after a week, during which time the material will gain strength. It will take 10-20 liters of resin to make a working surface 120 cm long.
Set form
Treat wood
Place the wood in the mold and fix it
Mix the components of the composition, pour the liquid in two layers
Sand and polish the product
Coffee table with glass top
The glass table looks impressive and weightless. However, the high price of such furniture often deters consumers from purchasing it. But you can reduce the cost of creating an interior by making a loft-style glass table with your own hands.
An industrial-style product should have a simple design, for example, have a base made of rough, carelessly processed wood or a simple cross. The shape of the tabletop is usual (round or square), without any figured cutouts or half-moons. The tandem of a wooden base and glass top corresponds to the loft-glamor style and will suit almost any interior. But if you do not have much experience in making furniture, it is better to use legs made of chromed metal. To create a loft-style coffee table with your own hands, you will need a sheet of glass no thinner than 6 mm and 4 legs with suction cups.
Tools that will come in handy:
- glass cutter;
- file;
- glue for metal and glass;
- rubber hammer;
- pencil, ruler;
- sanding paste, felt wheel.
You also need plywood for laying glass, protective gloves, and vegetable oil for lubricating the glass cutter. The glue must be chosen so that it remains transparent after drying. The table manufacturing process consists of several stages:
- make markings;
- cut the workpiece using a glass cutter and carefully separate it, tapping the cut line with a rubber hammer;
- first process the edges with a file or grinder, then sand them with sandpaper;
- polish using paste and a felt wheel;
- mark the attachment points of the legs;
- make holes in their upper part for suction cups, apply glue, attach;
- After the glue has dried, wipe the table and place it in the right place.
Using your imagination, you can create a unique table in an industrial style yourself. Sometimes, just looking through the contents of your pantry or garage is enough to spark an idea. As a tabletop, for example, you can use several bottles, lamps, coils of wire, barrels, and various mechanisms.
Make markings, cut the blank
Process the edges
Mark the places where the legs are attached
Make holes for suction cups in the upper part of the legs, apply glue, attach
Materials
A table in this direction can be made from the following materials:
- solid (for countertops). Here you can use both boards and plywood, pallets and other lumber;
- metal (used to build a frame or legs).
Important : to make a table, you can use polished or untreated wood, shiny or matte metal. In other words, there are no restrictions here.
If we resort to original ideas, designers offer tables with wooden tops mounted on glass bottles. But most often, furniture makers offer solid wood tables combined with metal supports .
You can make such furniture from old building materials, which almost all people have in their garages. So it will be even more exclusive and designer.
This furniture must have an aged look. If you use new materials, they must be aged artificially.
Attention : special importance in the manufacture of furniture in the loft style is given to its color scheme. It should match the overall style of the room.
The main advantages of a loft table
The “attic” style originated in the USA back in the 40s. 20th century, when most factories were moved outside the city. The old premises were no longer used for their intended purpose, and creative people began to use them as housing, preserving the original interior. That is why a loft is characterized by brickwork, open ceiling pipes, beams, wires, etc. A table made in this style should be just as simple, but high-quality and durable. Therefore, the main advantages of this product are:
- Practicality - manufacturers pay special attention to achieving maximum design reliability, and therefore this table serves its owners for many years.
- Ease of use is a key characteristic of these products, because a person should feel extremely comfortable while dining.
- Naturalness – natural materials, specially processed carelessly and roughly, make the table especially original and effective.
- Minimal decor - loft does not accept prints and pretentiousness. Therefore, these pieces of furniture should not be decorated with numerous decorations.
- Freedom of form - the product can have a typical shape (rectangle, square) or a more original one (in the form of a guitar, oak leaf, etc.).
Drawing
Before we begin manufacturing a piece of furniture, it is necessary to think about its design and dimensions, purpose, materials of manufacture, and color scheme. To manufacture parts and assemble the table, you will need to make a drawing. We indicate all the data on it with millimeter accuracy. Next, you will often have to use the drawing in the process of manufacturing individual elements and when assembling the product.
If you do not have the skills to create circuits, you can use certain computer programs . They will accurately calculate all the dimensions of the product and help you draw up a competent drawing.
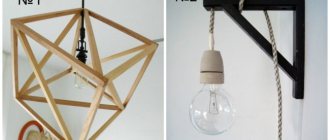
Loft shelving
Loft rack, characteristics:
- Overall dimensions: 1840x1000x440 mm
- Square pipe 40x40 mm
- Shelf: 1000x360x40 mm
Drawing - assembly of loft shelving
Loft shelving detail drawing
Download loft shelving drawing
The drawing can be downloaded HERE or by clicking on the button below:
Crafting tools
Since the design of a loft-style table is simple, it will take very little free time to make it. The most important thing in manufacturing is to assemble the frame of the product . It can be of any shape, size and color. You can buy a tabletop for such a piece of furniture ready-made and paint it yourself.
We selected the following materials
- two fir boards (for the tabletop);
- 3 pine beams;
- polyurethane varnish and stain (dark walnut, ebony);
- screws;
- furniture corners.
The tools we need are:
- sander;
- vice;
- Bulgarian;
- drill or screwdriver;
- jigsaw;
- Ruler and pencil.
Making a loft chair from a metal profile
Using a square profile and a couple of boards, you can make a very simple and interesting chair that will fit perfectly into a loft style interior. However, this will require a little more effort than when creating a bed, and will also require some welding work.
Step 1. The first step is to draw a diagram of the chair and mark all its dimensions on it.
Scheme of the future chair
Step 2. Then, in accordance with the diagram, you need to apply markings to the profile along which the pipes will be cut.
Markings are applied to the profile
Step 3. Next, you need to cut the part from the square section metal profile to the required length. It is important to understand that not all parts will have straight cuts - they may also be beveled. This is necessary to make it easier to join them when assembling the chair frame.
Metal profile cutting
Step 4. Each section must be processed to remove burrs and other defects.
Sections are carefully processed
Step 5. Next you need to carry out welding work and connect the elements of the chair frame into a single structure.
Carrying out welding work
The parts are connected into a single structure
Step 6. Now the welding areas need to be processed so that they are even and do not stick out. A simple grinding with a grinding wheel is sufficient.
Processing of weld seams
Grinding wheel used
Step 7. After this, you need to assemble the back and seat of the chair from two boards of the same size. They can be immediately connected to each other. Or you can attach it to a chair separately.
You will need 2 boards of the same size
Chair back and seat
Step 8. In the metal frame and in the wooden blanks for the back and seat, you need to drill holes of the same diameter, which must coincide with each other when fitting the same seat to the frame.
Drilling holes in wooden pieces
Drilling metal elements
Step 9. Now you need to sand the wooden elements and varnish them, and the metal frame of the chair needs to be painted. Work cannot be continued until the paint and varnish materials have dried.
Painting the metal frame
Sanding wooden elements
Step 10. All that remains is to assemble the elements together, that is, screw the back and seat to the frame. And the chair is ready, you can use it.
Screwing the backrest
Ready-made chair in loft style
Video - Simple pipe shelving
How to do it yourself?
So, the product drawing is ready, the materials and tools have been collected, now you can begin the manufacturing process:
We prepare 4 boards for making the tabletop and 4 bars for the frame.- We cut them into pieces of the required length, based on the drawing.
- We assemble a frame from timber and fasten it with screws. Since three boards intersect at each corner, they need to be held together with two screws. To prevent the wood from warping and splitting, holes in the parts should be made in advance.
- We sand the boards for the tabletop with a sanding machine and stain the tabletop with dark walnut stain. We paint the frame with ebony stain. To give the legs a metallic shine, the stain should be applied in two layers and varnished.
- Next, we attach the tabletop to the frame . For this we will need about 12-15 screws.
Pallet sofa
You can even make a sofa from wooden pallets, just attach its back to the base with corners. To strengthen the structure, you can place additional wooden slats on the sides.
Finishing
Finishing includes sanding surfaces, painting them with stain and varnishing. This will not only give the product an aged look, but will also increase its performance characteristics and resistance to negative factors.
Craftsmen also give the product a finished look using transparent oil with hard wax . This material is applied to wooden elements with a brush or roller.
Important : when applying oil to the ends, its consumption will be significantly greater, and due to the good absorption of wood, it will not be possible to achieve a rich color.
When painting a product with oil, it is worth considering that it gets very dirty. Therefore, we recommend wearing gloves .
Advice : if you like to create unusual furniture, also take a closer look at a cabinet made of cardboard, tables made of glass and pallets, and an epoxy resin tabletop.
Rack of wooden boxes
A shelving unit is a good zoning element. And its shelves can be a place to store books and collections. There are different ways to arrange a piece of furniture. For example, if space allows, then a full-fledged rack is installed, the frame of which must be knocked down from beams, and wooden boxes are made for the shelves. Another option is possible - the rack becomes an exhibition stand, which is installed against the wall.
In this case, take a Euro pallet and turn it over so that the surface remains on the floor. That part of the boards that forms the base of the pallet is cut off. This will be the material for the shelves, which are fixed in the transverse direction on the shield obtained from the main part of the pallet. All wooden surfaces are sanded using sandpaper. If desired, they can be varnished.
Sometimes pallets are used to make hanging shelves of the same type. However, they are heavy. Therefore, they can be installed only when there is confidence that the wall or partition will withstand such a load.
Bedroom in loft style
A loft bedroom is a focal point of comfort and functionality.
In an open-space layout, it can be separated from the main part of the room with glass walls.
And if the ceilings are high enough, they make a second floor specifically for the bed.
A bedroom in a niche is
a great option for saving space.
The bedroom space is created with a more neutral color palette.
This is a place where the eyes should rest, so you shouldn’t overstrain them with bright colors.
An interesting move would be if one wall turns out to be a different color or texture, for example red brick
.
- If you add a fireplace to your interior, it will become more cozy and homely.
It is not necessary to heat it with wood - an electric analogue is enough. - If there is a problem with the size in the bedroom, it is best to be patient and make a panoramic window, bring a lot of glass elements into the interior or get a large mirror.
- The decor of the bedroom should not stand out from the general loft concept.