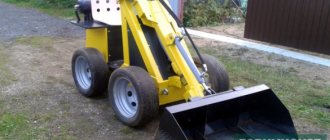
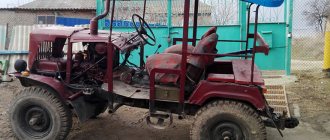
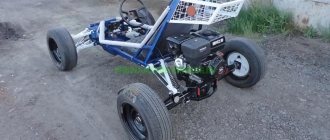
A mini tractor is a modern agricultural technique. A large assortment of canopies expands its functionality. If it is not possible to purchase a small-sized tractor, you can make one based on an old car.
A do-it-yourself minitractor with an Oka engine will not be inferior to a unit from the manufacturer in terms of technical parameters and performance. The homemade product will be economical, productive and reliable. The tractor can be designed taking into account individual preferences.
A mini tractor with an Oka engine can handle soil cultivation, cultivation, hilling, transporting goods and other work.
Areas of use
A mini-tractor, assembled independently, can completely replace Uralets, Bulat 120, Belarus 132N, Yanmar, Kubota and Scout. The areas of application are almost the same. Special vehicles made from Oka have all-wheel drive and have all the necessary characteristics for agricultural work. Thanks to ergonomics and ease of operation, the owner of the equipment will be able to get rid of most of the physical work.
Even a person without experience can make a mini-tractor from Oka with his own hands. Such special transport is suitable for work for which purchased transport is used:
- digging up root crops;
- application of root fertilizers;
- weed removal;
- uprooting of small trees;
- formation of beds;
- soil cultivation;
- planting root crops and other crops (using additional equipment).
Attention! This multifunctionality is ensured by the ergonomic design.
Advantages and disadvantages of a homemade mini-tractor
The first reason for converting the Oka into a tractor with your own hands is efficiency. Buying a factory model can hit your wallet hard. At the same time, an unnecessary car has all the necessary characteristics to create a MT. The functionality of such special equipment will not differ and can be expanded by installing additional parts. Even if we limit ourselves to standard transport capabilities, they are sufficient to carry out all agricultural work on a summer cottage or in a garden, the area of which does not exceed 10 hectares.
A small tractor from an Oka car quickly pays for itself due to its low cost. Mechanisms for special equipment can be obtained free of charge or purchased at a symbolic price. The only drawback will be the lack of warranty, because such parts are removed from old and broken vehicles. You can purchase additional components from an official dealer, but the price of a homemade mini-tractor will rise significantly.
The presence of special equipment on the site always simplifies life, because a person has to spend less effort on physical work. However, self-assembly of MT has its disadvantages:
- No warranty. If a factory vehicle breaks down in the first year, the owner can contact a service center where free repairs will be made. When assembling a tractor from an old car, this is not possible. You will have to purchase parts and replace them yourself.
- Difficult to find mechanisms. Oka is an old car, so components are rarely found in stores. Before you start remodeling your car, you need to check the functionality of all parts. If any of them turn out to be faulty, you must ensure that a replacement is available before starting assembly. Otherwise, it will turn out that the necessary components are not available for sale.
- Need for knowledge. It will be difficult for a person to assemble special vehicles on his own if he has not previously worked with drawings and does not have technical skills.
- Collection of documents for Gostekhnadzor. Any vehicle used for agricultural work must be registered with the relevant authority. To travel along the road access area, equipment must comply with all standards.
Attention!
If the owner plans to drive a mini-tractor on public roads, it is necessary to obtain a license.
Tags: shortening the VAZ bridge for a tractor break, making a tractor break.
Comments 33
The shank is from the classics on the gearbox and the oil seal I put in the same place has a smaller diameter from the shank box, I also want to do this, but I can’t figure out the seal
This is a photo of shortening the axle on an old tractor, it has already been sold. Then, by the way, I didn’t even think about it, that the oil seal was larger, for some reason the oil didn’t leak out when driving, maybe because the revolutions were very low, it didn’t splash it so much.
then I’ll try to put it in the same way, maybe it won’t work, I think I’ll put a tube on the flange under the diameter of the seal and put it on the sealant, it will hold no
Try it, I don’t see anything wrong with it. Only if it doesn’t allow debris and dust to get in there. If it doesn’t work out, then think about the oil seal. What can’t you do with the original shank. Now I’m making a loader and will install a short front Nivov cardan from bridge to bridge or do you not have all-wheel drive?
All-wheel drive will be so easier to connect the driveshaft from the box with a shank because of this, that’s the only way I want to do it
hi on the box, what diameter should the pulley be installed? Is 15cm something like this will do?
The tractor doesn’t need speed, the more, the more powerful it will be. Basically, they install a 2-strand Neva walk-behind tractor, approximately 30 cm in diameter.
Important TOP 7 models of LG forklifts from Shandong Lingong
thanks, clear, how to put it on the splines
On the first tractor, I found a pulley with a hole that fit tightly on these splines (but the pulley itself was without splines), but there was a counter bolt on the pulley. I don’t remember exactly, but I think I used a grinder to grind it on the shaft for this bolt and there are no other fasteners anymore. it was. And so you take the core (one or both sides at once) from the clutch and weld it to the pulley and that’s it.
thanks, I'm shopping, I'm running around looking for a pulley from a walk-behind tractor
The day before yesterday I looked in two stores, although there are no spare parts on the shelves, and if you ask about spare parts, they say there are spare parts, so I was looking for a pulley from a Neva walk-behind tractor, but it wasn’t there, we’ll continue the search. Maybe I’ll find something for the compressor .
We have a lot of spare parts for the walk-behind tractor here, I'll spend the weekend
The day before yesterday I looked in two stores, although there are no spare parts on the shelves, and if you ask about spare parts, they say there are spare parts, so I was looking for a pulley from a Neva walk-behind tractor, but it wasn’t there, we’ll continue the search. Maybe I’ll find something for the compressor .
HI, what do you think, a Chinese engine from a 6 5 hp walk-behind tractor will be suitable, it will handle no, such an engine is the cheapest we have 5 hp
My first tractor rode on a 4-horsepower engine, but I didn’t try to clear snow or plow with it. And there are a lot of people on YouTube with a 6.5-horsepower engine. Take the same Soviet walk-behind tractor from which engines are installed on tractors, there too 6-6.5 horses and nothing to plow and clear snow. Of course, it is advisable to use more power.
Well, yes, more powerful prices bite, we'll see
We have a point on the market (I don’t take the stores into account, they’re a bit expensive), that’s how many horses there are, that’s how much it costs. I want to get a 7 or 9 horsepower engine. And then we’ll see, maybe we’ll ride on our own.
I went through all this once. If you sculpt something from something just to make it cheaper and drive somehow, then repairs and alterations will take more time and money. I know firsthand. After several failures, the craftsmen simply abandoned their project or, having gained some experience, radically limited their homemade product. I advise everyone who loves and knows how to tinker with hardware to study the transaction itself, fortunately there are a ton of videos on YouTube.
Preparation of drawings and details
You can’t start work without a ready-made plan. Converting the Oka into a mini-tractor will be successful if everything is done according to the drawings. For a frame structure, you need to stock up on two spars - right and left. You will need the same number of crossbars: 1 on each side. The first ones are made from channels No. 10, for the second, the profile of structural elements No. 12 and No. 16 is suitable. Elements made from a transverse beam are suitable.
The main part that needs to be removed from Oka's car is the engine. It must comply with the standards prescribed in the legislation of the Russian Federation. It is especially important to take this into account if the mini-tractor will be used on additional access. The power of the engine determines what licenses you will have to obtain for such special vehicles. It is best if the old car used a 4-cylinder engine.
Using the VAZ rear axle
What you can definitely make with your own hands is a multifunctional trailer from the rear axle of a Zhiguli.
To do this you will need a few materials:
- steel tubular blanks 60x30 and 25x25 mm;
- wheels and springs from the rear axle of a Zhiguli;
- sheet pieces of steel from 0.8 mm thick;
- channels, duralumin sheets from 2 mm thick.
The trailer body can be assembled in various ways. One of the most common options is wooden with metal corners and screw fastenings. The working process is as follows:
- The wooden frame is attached to the metal structure of the rear axle.
- Metal parts are welded together.
- The transverse crossbars are made from a 25x25 mm profile; tubular blanks are useful for the spars.
- From 25x25 mm corners we make a metal frame for the frame and weld it to the lower bridge.
- Next, the beams are connected.
- Using springs we connect the spars to each other. To do this, the edge of the springs is carefully placed on the axis of the beams. The beam is connected to the central part of the structure with stepladders.
- The last part is a triangular drawbar, which is welded from metal pipes. The drawbar is welded to the metal frame.
All that remains is to build a transition from the trailer drawbar to the walk-behind tractor.
What to pay attention to when remodeling
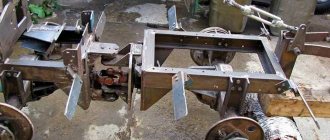
The frame design of a mini-tractor made from Oka comes in two types. The first is when the internal combustion engine and the driver’s seat are on the same platform. In this case, the assembly will be the simplest, because It is enough to fasten 4 channels in the form of a rectangle. You can use 4*4 cm corners. However, such material requires the additional installation of metal pipes with a square cross-section. Without them, the structure will not be strong enough to support the driver and all the parts.
It is important to make the structure strong. The slightest gaps and defects in size can cause damage. When registering such a vehicle with Gostekhnadzor for use on additional access points, the owner will 100% face a refusal due to non-compliance with technical assembly standards. To strengthen the frame, you will need front and rear crossbars. Another element that will make the structure strong are the cross beams installed under the engine and seat.
Scheme for creating a walk-behind tractor
A homemade walk-behind tractor from a ZAZ gearbox consists of 2 wheels, is self-propelled, and is assembled with an engine that has forced cooling of the cylinder head. It is carried out using air. The motor must be selected so that it can operate at different speeds, including low speeds, and be capable of performing large volumes of work. You can install a motor from a scooter and remove other elements from it:
- control cables;
- engine mounts;
- handles;
- chains;
- arc, frame.
The brakes on the walk-behind tractor are used both factory-made and our own. Homemade brakes will allow you to take into account the necessary parameters and loads.
Having everything you need at hand, you can make a homemade mini-cultivator at home quickly and without any problems. A walk-behind tractor based on the ZAZ gearbox is created as follows:
- A U-shaped frame is made from steel pipes.
- On a lathe, you need to turn a wheel axle from a steel pipe with a thick wall with a diameter of 80-100 mm. Weld homemade wheel hubs to the ends of the pipe, which can serve as ball bearing housings with a place for mounting the wheel.
- Weld brackets to the pipe, attach the Zaporozhets gearbox and the holder for mounting the motor to them. The engine can be installed directly on the ZAZ gearbox.
- Make 3 homemade hinges that are installed on the front and control rods. This approach to assembly was used by designer Arkhipov when he made his walk-behind tractor. Hinges were used to connect the cultivator, steering wheel and plow.
- Weld a steel pipe onto the frame of the car, on which there should be an axle. It is needed to carry out the tension that is transmitted to the gearbox. In order for such tension to be constantly present, it is necessary to make a rocker arm.
- Weld the gear shift knob. A small piece of steel pipe is suitable for these purposes.
- The chassis can have chain pitches of 12.7 and 15.9 mm. The sprockets on the chain have the following characteristics: output shaft - 11 mm, secondary shaft - 60 and 20 mm, running axle - 20 mm.
The main stages of manufacturing a walk-behind tractor:
- The frame is welded, on which the engine must then be installed, 2 pipes in the form of an arc.
- The fuel tank is attached between them.
- We assemble the motor using a bracket, which is also welded to the frame.
- You need to attach a motor with suspension to the axle, and then all the parts are connected to the frame arches.
- The secondary shaft is mounted.
- Control cables are being pulled.
- The chains are stretched.
Required Tools
It is impossible to do without a screwdriver and wrenches. They will be needed at all stages: from dismantling the old car to attaching parts to the new frame. Even when using ready-made structures, we must not forget about the grinder and discs for cutting metal. Special transport will be unreliable if at least one element does not correspond to the dimensions specified in the drawings. Most spare parts are attached to nuts and bolts, which should also be in stock. An electric drill is needed regardless of the elements used.
Most people who decide to make a mini-tractor from a walk-behind tractor or Oka purchase all the tools separately. However, in specialized stores you can find KIT kits, which include the necessary devices for assembling such equipment. They are selected depending on the available parts. Additionally you can purchase:
- brake fluid containers;
- backs and seats;
- axle shaft locking levers;
- brake drums;
- tow hitch pins;
- mechanisms for a mower or shovel;
- lifting axles;
- driven and drive sprocket chain;
- lifting mechanism shaft;
- intermediate tension roller.
Attention!
When purchasing additional elements, it is important to check the quality of the metal, otherwise the part will have to be replaced after a year of using the tractor.
How to make a cabin for a mini tractor
If in the summer you can work on a mini tractor without a cab, then with the onset of the autumn-winter period, using the unit becomes quite uncomfortable or even impossible. Therefore, craftsmen are trying to assemble tractors with cabins in order to use this equipment all year round.
The cabin for homemade equipment is made of sheet steel according to a pre-prepared drawing. You can take the cabin from the MTZ tractor as the basis for the calculations. The following photo shows a drawing, based on which you can make a cabin yourself.
Advice! If the cabin dimensions shown in the drawing do not fit the dimensions of your mini tractor, then they must be changed. But the main thing that needs to be taken into account when adjusting the dimensions is the size of the windshield and the height of the cabin. Its ceiling should be 25 cm higher than the head of the person sitting in the cabin.
The cabin is manufactured as follows.
- First of all, you need to assemble a frame from wooden blocks according to the dimensions of the drawing.
- Next, a metal profile pipe is cut to the size of the wooden frame parts. All parts are connected by welding.
- The welded structure is placed with the roof on the ground and glass holders are welded inside the cabin.
- The roof is made of 1 mm sheet steel. The fragment can be cut out with a grinder and welded to the top of the cabin.
- The floor and side parts of the cabin are made of 2 mm thick sheet steel.
- The door frame is also welded from a profile pipe. To automatically close the doors, gas elevators can be installed on the frame.
- After installing the glass, the inside of the cabin can be lined with foam rubber and covered with leatherette.
- The cabin is installed on the frame, in a place prepared in advance for it.
In general, to better understand how to make a mini tractor with your own hands, you can watch this video, a kind of guide for beginners.
