During construction work, you may have encountered the need to mark walls for gating or align the position of a TV or painting on the wall. Piece work with a one-time measurement of the position of objects in the horizontal and vertical plane can be performed with a bubble level. But if you need to lay wiring, install socket boxes, boxes, or mark for other purposes, you will have to tinker with a regular level for quite a long time. Therefore, it is much easier to use a laser level; the only stumbling block is its high cost, so it becomes much more profitable to assemble a laser level with your own hands.
How to check if a homemade level is working properly
Using a simple rope, the device is suspended from a support in the center of the room. The equipment is turned on, directed in the desired direction, and the required distance along the length of the beam projection is noted. After this, a special stick is installed to ensure ease of marking.
After such important events, you can begin to use the device and point it in any direction. If you leave the position of the stick unchanged, the same height of marks will be ensured. After marking the laser dots, they are connected with construction cord. Next, using a measuring meter, preferably a hard one, draw a marking line.
Making a simple level from a laser pointer
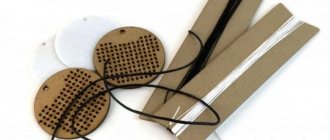
Of the entire list of elements of such a level, you only need to buy a pointer. It is quite possible to make the remaining auxiliary parts yourself. The goal of the presented process is to build a reliable fastener that will allow the device to rotate around an imaginary axis completely unhindered. The tool consists of the following parts:
- laser pointer;
- wooden beams (length - 0.5 meters, width and thickness - 25x25 mm, respectively);
- cord intended for construction work;
- drill for drilling holes;
- support (an ordinary stick will do).
To assemble the equipment, just follow the simple steps described below.
- The block is drilled on both sides. As a result, neat holes are formed, which must be parallel to each other. One of the holes made will be used to securely fasten the pointer, and the other will fit the construction cord.
- The pointer is securely fixed in the hole and a rope is secured, making it possible to install the device above the floor surface. The hole drilled specifically for the cord must be of the optimal diameter so that the cord can pass through it freely.
- A rope is threaded into the hole that was prepared in advance and secured as securely as possible.
Laser-based level and level design
Laser levels and levels use the principle of directly indicating a target - a point or line on a surface. They can be tracked directly (in relatively low light) or through the eyepiece of the device.
In addition to a point or line (the trace of the intersection of a light plane with a solid opaque surface), levels and levels allow you to obtain a cross-shaped pointer, as well as simultaneously use two or more emitters.
Due to the scattering of the laser beam into a plane, such devices are often called “laser plane builders”. In general, the set of functions of the device depends on the number of emitters and optical devices for concentrating or scattering the beam.
Device design features
The device is compact and ergonomic. It can be easily placed in a pocket, mounting case or bag. The case is equipped with fastening elements. They may be:
The beam projected onto the marking surface is constructed along a plane or in a direction. Construction levels, used to indicate a certain direction, produce a projection in the form of a point. Devices for marking a plane are equipped with a special type of optical instrument that turns the beam into a straight line. Levels are divided into types:
- Rotary devices, due to rotation around their axis, are capable of producing a clear line (used when pouring floors and constructing ceilings);
- positional levels consist of 2 laser radiation sources to create a visible plane (used during finishing work indoors);
- self-leveling (can emit up to 5 beams and are equipped with a sight in the form of a simple cross and pendulums located inside the device).
The price of the presented equipment is several times higher than the cost of a conventional level based on liquid and air bubble.
Option No. 1 – Use a flat stand
In the first case, in order to make the device ourselves, we will need the following materials:
- a regular laser pointer (shown in the photo above; if you don’t have it lying around from previous years, you can buy it, the price is low);
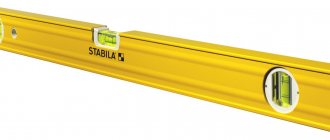
- bubble building level;
- wooden peg, 1 to 1.3 meters long, 5 to 6 cm in diameter;
- a small piece of rubber;
- a sheet of plywood or board along the length of the level.
Having prepared all the materials, you can proceed to assembling a homemade device. To make it clearer to you how to make a laser level with your own hands, we provide a step-by-step guide:
Prepare the laser pointer. To make the beam brighter and clearer, break through the glass in the nozzle. To do this, cover the nozzle with cardboard and carefully break the glass. We will improve the construction level. You need to attach a pointer to the top of the instrument, for which it is better to use clamps. To be able to slightly adjust the direction of the laser beam in the future, place a piece of rubber between the level and the pointer, as shown in the drawing. Assembling the stand. First, one of the ends of the bar needs to be sharpened so that it fits well into the soil. After this, you need to assemble a reliable stand from a peg and a sheet of plywood with your own hands, screwing the sheet to the second end of the block with a self-tapping screw
We draw your attention to the fact that the plywood must be screwed strictly perpendicularly, otherwise the accuracy of the measurements will leave much to be desired.
That's all the manufacturing instructions. As you can see, it is not difficult to make a simple laser level with your own hands, but the problem is that such a homemade product cannot be installed on a hard surface, for example, a concrete screed. To solve this problem, you can also evenly screw a board from the second end of the peg, which will serve as a stand. In addition, you can make a stand, like a real level, but making a tripod will take more time.
Using such a homemade laser pointer device is not difficult. First, the stand is driven into the ground, after which it is leveled with a bubble level - the bubble should be strictly in the center. Next, you need to turn on the pointer and mark the point projected on the wall with a pencil. After this, the stand carefully rotates along its axis in a horizontal plane to the next mark. The two points are connected to each other and that’s it – the straight line on the wall is ready, you can start installing the electrical wiring!
It should be noted right away that you should not rush and start important marking work from the very beginning. First of all, you must make sure that the homemade product works correctly so that the result does not become disastrous for you. To do this, you need to adjust the homemade laser level (in other words, check the accuracy of the work).
You can make the adjustment yourself like this:
- You need to screw a self-tapping screw no more than 120 mm long into the sheet of plywood on which the level is installed. The head of the screw must coincide with the projecting line of the laser pointer, as shown in the drawing.
- Next, you need to turn on the pointer and point it at one of the walls, then make the appropriate mark with a pencil. The second self-tapping screw must not be completely screwed into this point.
- Now a profile for drywall or any other plank of light weight is carefully installed on the heads of the screws.
- A homemade laser level is installed on the profile and, if required, the bar is aligned in a horizontal plane at the base of the bubble. Alignment must be done by tilting higher/lower the edge of the profile that is located closer to the wall.
- Having leveled the profile, you need to screw a new screw into the wall, if necessary, and then remove the profile.
- In the end, the homemade level is installed on the stand and the pointer is adjusted to a new point (the screw head). Now your device is perfectly level.
With the help of such a homemade laser device, you can independently make horizontal lines to conduct hidden wiring in the house. However, you should not trust the accuracy of the measurements too much, because... This is not a professional tool and the error here is quite high.
Video review of a more complex self-regulating cross-type model
How to make a level with your own hands
This is interesting: How to make a soldering iron with your own hands: a thorough look at the question
Manufacturing technology
You can make such a level with your own hands from a laser pointer. It is enough to know the structure of a laser pointer and the structure of a conventional construction tool.
If you take into account the price of a water level and a regular pointer with a beam, it will be several times cheaper than a professional tool.
Step-by-step instruction
For a laser pointer you will need:
- Water level
- Laser pointer
- Fastenings
When choosing a water tool, you need to pay attention that the back side is smooth, otherwise the pointer will be inconvenient to attach. The laser pointer should also have a flat surface
They are connected using glue or tape
It is important to set the pointer as level as possible to the water level. After the joints have been glued, you need to use a ruler to measure the distance from the bottom of the water level to the very sight of the laser pointer
The resulting size will indicate the bottom of the mark from the direction of the laser beam.
Homemade level
Making a laser level with your own hands is not so easy. It will require not only the above materials, but also a device for installation. For example, it could be a stand made of wood or metal. It will not be possible to assemble such a tool from available materials. You need to correctly calculate the holder for the level.
The instructions for assembling such a level indicate the accuracy of its geography when used. If you go to hardware stores, you can find a round water level that ensures the evenness of both surfaces at once. If you assemble and install it on your pointer, you can easily use this device for home use.
Remember that a professional tool is built much better than a homemade one. And when creating and using homemade devices, you are more susceptible to construction errors. After all, if it is not possible to buy an expensive instrument, you can always borrow it from friends, neighbors, or rent it from special companies.
How to make a level yourself
To make a level you will need a tripod, a housing, and a leveling device. Laser devices with a directed beam must be purchased or taken from an old module.
Increase the operating time of the device by connecting to an external power supply. To do this, remove the batteries and accumulators, and connect the contacts to a voltage source with a value of at least 4.5 V. The standard value may vary depending on the model.
When purchasing a pointer with a laser beam, take into account the power. It is optimal to purchase a device with a green light beam to increase visual perception and make it safe for vision.
From a laser pointer
Laser pointer level
In addition to the device, you will need other materials and equipment:
- a wooden block 2.5 cm thick and wide, 50 cm long;
- construction lace made of silk, synthetics;
- a metal or wood rod to support the level;
- electric drill;
- tube along the length and cross-section of the pointer;
- a simple motor from a children's car;
- battery "crown";
- terminal block;
- switch;
- mirror for household cosmetics.
Holes are drilled in the rail on both sides, one of which is needed to fix the emitting device, the second for the rope. The laser is attached to one end, and a cord is threaded into the hole of the second so that it moves freely through the opening.
The support stick can be taken from any material. This can be a specialized galvanized profile, wooden slats, handles, brooms, shovels, rakes. The main condition is the possibility of rigid fixation.
From polystyrene foam and a container of water
A piece of foam plastic placed in a container of water can serve as a support for a laser level. The center of gravity and buoyant forces will be balanced, so the object will be in equilibrium. In an aquatic environment, the foam with the pointer is rotated in different directions, the beam will draw a line along all vertical surfaces of the room.
You will need:
- laser device;
- foam scrap;
- electrical tape, plasticine for fastening;
- a vessel filled to the brim with water.
The condition for proper operation is that the top side of the foam is even and the laser is firmly attached to the surface. You can use a piece of polystyrene foam, it will also show horizontal when immersed in water.
Cross level
Homemade level from an old hard drive
This homemade variety is used in different situations. The method works especially well when hanging furniture on walls, or in other cases when you need to find the horizontal and determine the vertical lines. This method makes it easy to check verticality when installing doors, windows, plaster beacons, and laying brick walls. The device replaces the usual plumb line.
To make the module, prepare the following items:
- laser devices (pointers) 4 pieces;
- tripod (can be from a video camera, camera, old level or theodolite);
- CDs - 3 pcs.;
- drive from a computer, player;
- electrical tape, adhesive tape or plaster for fixation.
Pendulum device
They make devices with their own hands that are close in characteristics to the factory ones. This category includes devices using a pendulum system. In this case, you do not need a laser pointer, but a module with a laser and prisms that project lines vertically and horizontally. For movement, you will need four AA batteries, which are placed in a similar compartment from a children's toy.
Layout of a laser level with a pendulum:
- find a pendulum from an old joystick, or take another similar device;
- the laser device is fixed on the lower part of the pendulum; for this, a hole is drilled along the diameter of the thickness of the module;
- We make weights to adjust the device - slots are made in the pendulum barrel in the horizontal and vertical directions for mounting threaded rods, and I screw nuts onto them.
Level on tripod
The difficult part is creating the correct distribution of the laser beam. The function is facilitated by installing the module on a tripod or tripod and attaching it to it. A piece of hard foam or rubber is installed between the device and the surface. The gasket is secured with rubber bands or clamps. In the absence of a professional tripod, use a shovel handle, a broom, a flat block, or a piece of pipe.
Making a laser level on a tripod:
- the stick is fixed to the board or chipboard vertically, trying to ensure stability with the help of spacers;
- the angle between the rod and the support is controlled with a carpenter's square or a building level;
- A bracket with a pointer is attached to the top of the rod.
Selecting components
Now let’s finally decide which parts of the level’s design you should pay special attention to:
- The rotation unit is integral with the base of the emitting head.
- Support with independent vertical installation.
- The emitting head is a laser pointer.
- 2-axis level for precise installation of the leveling unit.
Rotation unit
This leveling module is easiest to make using sliding friction from slab materials manufactured with a surface evenness of at least 0.5 mm/m. An additional condition is that the material, without losing its properties, must be amenable to processing with hand tools and subsequently withstand operating conditions. Based on the results of the selection (there is no room to dwell on the details here), the following are suitable, in descending order of degree of suitability:
- Postforming is a thick, high-density fiberboard used to make countertops for kitchen sinks and the like. The evenness of the surface of postforming slabs of 0.25 mm/m is not uncommon. Postforming is wear-resistant, does not warp from splashes and dust; In order for it to swell, it must be soaked thoroughly and not allowed to dry for a long time.
- Furniture laminated chipboard with a thickness of 16-24 mm. Forming accuracy is no worse than 0.5 mm/m. Evenness is not lost from splashes and dust, but in terms of wear resistance, the material in the level will last 3-5 seasons. Excessive moisture without immediate wiping and drying causes irreversible warping. Blanks for the device parts (see below) must be cut with an indentation of at least 5 cm from the edge of the board, because slabs of edged furniture laminated chipboard have a sheer edge across the layers of up to 1 mm.
- Laminated MDF with a thickness of 12 mm. Surface evenness approx. 0.5 mm/m. In terms of wear resistance, MDF of at least class 33 is suitable for a level (the first number in the designation characterizes mechanical strength; the second – wear resistance). With slight moisture it swells irreversibly.
Note: other fibrous and layered materials (plywood, including birch plywood, OSB, laminated plastics, e.g. textolite) are not suitable for evenness and/or operational durability.
L, M and H
Pressed wood fiber boards (fiberboards) are available in 3 types. Their basis is fibrous lignin isolated from ground wood pulp; as a rule, from wood processing waste. The properties and cost of the material are determined by the quality of the raw material (degree of lignin purification), temperature and pressure during its pressing.
Low Density Fiberboard (LDF) is a well-known fiberboard used to make backings for cabinet furniture, etc. Medium Density Fiberboard (MDF) is also a well-known substitute for MDF commercial wood. But High Density Fiberboard (HDF) is postforming. This material is called so because it is supplied to product manufacturers not as finished slabs, but in the form of a loose mass, which is pressed into tabletops, etc. The reason is that lignin is of high purity, every crumb is protected, and it was better to waste some of the material when cutting slabs would be unprofitable.
Support
Photo/video tripod, suitable for use as a support for a homemade level
The best option for an independently adjustable level support is a tripod for photo and video cameras. It can also be useful in many other cases, even if you never shoot anything on camera.
Don’t look for an old Soviet tripod on the cheap - the ones that went on sale are outright rubbish. But a modern photo-video tripod device is not that expensive and the price fits into the conditions specified at the beginning.
Any modern photo and video tripod is stable enough to withstand construction site conditions. When choosing, pay attention that (see figure on the right), firstly, the tripod is equipped with its own 2-coordinate level - it is on this level that the support is installed vertically on an unprepared surface. Secondly, adjustment and use of the level will be greatly facilitated by at least a rough degree scale; both are shown by arrows in Fig. And then look at the price, which one suits you.
Leveling pan?
In RuNet you can find instructions: they say, fill a saucepan or basin with water to the top, let a piece of foam float there, put a laser on it - and level it out for your health. Sorry, this is an absurd invention.
Firstly, the entire floating craft will float on the water without heeling only if the projections of the center of buoyancy of the float (CB) and the general center of gravity of the device (CG) coincide. This is theoretically possible; practically impossible. Can you imagine a ship with empty holds and cargo piled high on the deck? Container ships take cargo on deck only when the hold is full, and even then they are the most dangerous of ships.
Secondly, the container with water is not the sea or even a pond or puddle after rain. The float with the laser is already tilted by the forces of surface tension of the water in the vessel. The tilt of a float with a diameter of 10 cm of 0.5 mm is invisible to the eye, but the marking error will be more than 5 mm/mm. What kind of leveling is there...
Pointer
Have you ever had to disassemble the laser head of a level? If so, think about what it is most similar to structurally. More precisely, which of the laser pointers.
For the cheapest one without any optical effects, see Fig. It is precisely these keychain pointers that, as a rule, do not require additional adjustment of the emitter when setting up the level. If this is required, it is carried out simply, quickly and reliably.
Laser pointer-keychain, suitable for use in a homemade level
You need to choose a keychain pointer for a homemade laser level that does not have annular protrusions on the body; it should be a simple cylinder; this will make it easier to adjust the device. The only drawback of a cheap keychain laser pointer is its rather large light spot. But determining its center by eye and putting a mark there is a child’s task.
Level
For a 2-coordinate level for a homemade level, it is best to take a round bubble one, but a T-shaped one will also work, see figure. There are a sea of round bubble levels on sale, in sizes ranging from a button to a plate. For a level you need a level with a caliber of 20-25 mm and a thickness of up to 15 mm. Better is a precision one, with cross marks and degree inclination marks, but a simple one, as in the figure, is generally no worse.
Bubble two-coordinate levels round and T-shaped
Note: If you search for additional information on this topic on Google, do not type “2-axis bubble level.” The popular search engine does not understand what it is and produces a few results that are actually irrelevant to the matter. Type "round bubble level".
The simplest laser from a computer mouse
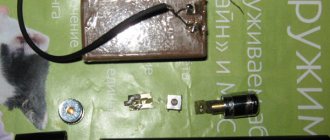
If you need a laser just for fun, it’s enough to know how to make a laser at home from a mouse. Its power will be quite insignificant, but it will not be difficult to manufacture. All you need is a computer mouse, a small soldering iron, batteries, wires and a shutdown switch.
First you need to disassemble the mouse
It is important not to break them out, but to carefully unscrew and remove them in order. First the upper casing, followed by the lower
Next, using a soldering iron, you need to remove the mouse laser from the board and solder new wires to it. Now all that remains is to connect them to the shutdown switch and connect the wires to the battery contacts. Batteries can be used of any type: both finger batteries and so-called pancakes.
Thus, the simplest laser is ready.
If a weak beam is not enough for you, and you are interested in how to make a laser at home from improvised means with sufficiently high power, then you should try a more complex method of making it, using a DVD-RW drive.
To work you will need:
- DVD-RW drive (write speed must be at least 16x);
- AAA battery, 3 pcs.;
- resistor (from two to five ohms);
- collimator (can be replaced with a part from a cheap Chinese laser pointer);
- capacitors 100 pF and 100 mF;
- LED lamp made of steel;
- wires and soldering iron.
Work progress:
The first thing we need is a laser diode. It is located in the DVD-RW drive carriage. It has a larger heatsink than a regular infrared diode. But be careful, this part is very fragile. While the diode is not installed, it is best to wrap its lead with wire, since it is too sensitive to static voltage
Pay special attention to polarity. If the power supply is incorrect, the diode will immediately fail.
Connect the parts according to the following scheme: battery, on/off button, resistor, capacitors, laser diode. Once the functionality of the design has been verified, all that remains is to come up with a convenient housing for the laser. For these purposes, a steel body from a regular flashlight is quite suitable. Don’t forget also about the collimator, because it is the one that turns the radiation into a thin beam.
Now that you know how to make a laser at home, do not forget to follow safety precautions, store it in a special case and do not carry it with you, as law enforcement agencies may file complaints against you in this regard.
Watch the video: Laser from a DVD drive at home and with your own hands
A laser cutter is a unique device that is useful to have in the garage of every modern man. Making a laser for cutting metal with your own hands is not difficult, the main thing is to follow simple rules. The power of such a device will be small, but there are ways to increase it using available devices. The functionality of a production machine that can do anything without embellishment cannot be achieved with a homemade product. But for household chores, this unit will come in handy. Let's look at how to build it.
What you need
To ensure that the workflow is continuous and does not take much time, it is better to immediately prepare all the necessary components and tools:
- double-sided tape;
- wooden plank;
- 3 V flat batteries – 2 pcs.;
- a transparent plastic box with a lid;
- two-position switch;
- any saw (for example, pendulum);
- tabletop drilling machine;
LAMBDAWAVE laser modules
- grinding stone;
- soldering iron;
- wallpaper knife;
- drill with a thin drill bit;
- a pair of laser modules;
- spindle stop.
Advice! The main component - laser modules - can be purchased on popular Internet sites at a minimal cost.
Device setup
To set up a homemade laser level, you can use different methods, but one of the simplest is to use a mirror. The diagram below shows how this technique is used.
After the initial installation of the device, the laser is turned on and at the point where it falls on the wall (any other suitable plane), a small mirror is attached using a piece of plasticine. Using a level, achieve a strictly vertical (perpendicular to the planned position of the beam) position of the mirror plane. After this, the laser is turned on again. If the incident (emanating from the device) and reflected beam coincide, the adjustment is considered to be of high quality. If a match does not occur, change the position of the laser emitter until the desired result is achieved.
To set up a laser device that has a line rather than a point as a target designator, a target-rail is used (it is convenient to use a metal profile for drywall). In the place where the light line is reflected on the vertical surface, press the target (rail) and use a level to check its horizontalness (or verticality, depending on the position of the laser).
There is a quicker way to check if the settings are correct. The diagram shows how, using a bubble level and a stretched cord, the horizontality of the lines connecting the laser emitter and the screws on the wall at the point of impact of the beam is checked.
Laser level for construction and repair
Now we are ready to make a laser level that is not inferior in accuracy, stability and practicality to an expensive store-bought one. This device is equally convenient for marking both horizontal and plumb lines. The procedure for using it is simple:
- The tripod is placed in place and, by pulling up/extending its legs, it is set vertically at its own level;
- A level is attached to the tripod head (see below);
- To plumb, the tripod head is tilted 90 degrees (this is possible in any tripod);
- Place a 2-coordinate level on the level and align the device horizontally (for marking horizontal lines) or vertically (for marking plumb lines);
- By rotating the turntable (also see below), they move the beam away from the surface to be marked and make marks on it.
The design of a homemade construction and repair level for a laser pointer is shown in the figure:
Design of a homemade laser level
It is not necessary to completely mark the limb (degree scale); It is enough to make marks of 30, 45 and 60 degrees in each quadrant. The tray for laying the laser pointer is selected using an edge plane (you can use a drywall plane). The emitter itself is secured in the tray with strips of rubber on self-tapping screws. In a bar perpendicular to the base plate for leveling the device when striking plumb lines, a hole is also selected for a round level. After sawing, the edges of the parts are impregnated with eco-construction primer (water-polymer emulsion) and painted. A washer (preferably 2-3) is placed under the head of the rotary assembly bolt. A sleeve made of a metal tube is pressed into the base plate under the bolt. When the device is assembled, the turntable should lie tightly with its entire face on the base plate, rotating with some friction.
Do you need a tripod nut?
Photo/video tripod mounting screw with machine thread (not pipe thread) 1/4”. Finding or turning a nut for it is quite difficult, but it is quite possible to do without it. The mounting platform of modern tripods is removable and is held on by a spring latch with a lock. You can drill a couple of through holes in it and attach the platform from below to the level rotation unit with self-tapping screws. In this option, a hole is selected under the “tail” of the tripod screw at the bottom of the rotation unit; under the pin - the camera lock does not need to be selected; it is spring-loaded and recessed. It is easier to place the level on a tripod in this design, but it is more difficult to remove the support to use it for another purpose (for example, as an easel, a photozone illuminator holder, etc.), however, the level on a tripod is thus held more firmly and the error is smaller.
Laser alignment
Properly made from suitable materials (see above), a level of this design does not require separate adjustment manipulations. However, it may be necessary to adjust the laser pointer to the beam axiality. It is produced as follows. way:
- The device is installed on a horizontal tap, as described above;
- The pointer is placed in the tray freely (without securing it with rubber on the screws);
- The emitter of the device is directed at a white wall from a distance of 3-5 m;
- Turn on the laser;
- Rotating the emitter with your fingers along the longitudinal axis, watch how the light spot “dances”;
- If the spot describes a visible circle, mark its center on the wall;
- Also, by rotating the pointer, find its position in which the light spot goes exactly down or up from the center;
- The pointer is normally secured with rubber and self-tapping screws, see above;
- If the stain has moved upward from the center, slip a thin nail with the point forward under the pointer from behind until the stain is in the center. If the stain has gone down, a nail (in this application an adjusting wedge) is slipped under the emitter from the front;
- Secure the adjustment wedge to the cap with a drop of hard glue, and mark the location of the rear edge of the emitter on the turntable. Now the laser can be removed and put back (say, to replace batteries) without losing the accuracy of the device.
Note: in passing - an old army joke. The championship of an exemplary motorized rifle regiment in driving nails into the wall with their foreheads. The commander and political officer reach the finals. The commander drives 59 nails in a minute; political officer 60, but the first place is given to the commander. Not because he was senior in position - the political officer hit the heads of the nails with his forehead, and the commander hit the points.
Using a water container
You can make a simple design with a high degree of marking accuracy from materials available at home. To do this, you will need to prepare a water tank, a piece of foam plastic (expanded polystyrene), a pointer, any sticky material - plasticine, adhesive tape.
- First, the container, which can be used as a bucket or pan, is filled to the brim with water.
- The laser pointer is installed on foam plastic, trying to place it evenly, and secured with plasticine, adhesive tape, and rubber bands.
- The container is installed at the required height.
- Styrofoam with a pointer is placed in the tank.
- Move it to the on position.
- By changing the direction of the light pointer and rotating it around its axis, the beam is projected onto the marked surfaces and the projection locations are marked. All points relative to the horizon will be strictly in the same plane.
Homemade laser devices can hardly be called ideal, but the clarity of the markings applied is very high. Another advantage is that anyone can assemble such a tool with their own hands from available materials, spending a little money and time on its production.
A laser level is a very important tool for various indoor construction and renovation work. Using a laser level, you can easily project the intersection points of horizontal and vertical directions onto the work surface, creating an exact 90-degree angle. Also, a laser level makes it easier to perform such construction work as:
Step-by-step instructions: how to make a laser pointer at home
Making a laser level yourself can be done in various ways. For example, with magnetic fasteners, with a ruler, using a cress - a tripod or straps.
And on this mechanism they install an unnecessary disk and attach laser pointers to it, but the fastening of the pointers must be cross-criss. This level option is ideal in cases where you need to hang a shelf or picture evenly, and the like.
If you suddenly need to quickly mark, but you don’t have a laser level at hand, you can do it yourself. For such purposes, there are step-by-step instructions for making a level without a tripod.
In order to make a similar level, which will have a very light structure, and its production is the simplest and has a self-leveling element, then you need to perform some steps.
Namely:
- Prepare a small container of water;
- We take a piece of polystyrene foam, but in the shape of a triangle, and attach it with an elastic band to the laser pointer;
- We set this container to the desired height and lower the foam with a fixed pointer into it and turn on the laser pointer.
After some time, the water will calm down and you can make marks by moving the pointer along the wall. The marks will be at the same level.
So, you’ve decided to make a homemade level with your own hands, watched all the relevant videos, found out what the structure of the finished unit is and how the homemade one works, and now you have a completed diagram in front of you.
Of course, it cannot be said that a homemade version is better than a store-bought electronic one, but it may well replace a wooden spirit level. Such a ruler will become a reliable assistant for cutting and if adjustment is needed, but for geography lessons this is generally an ideal option. It makes it easy to repair any surface yourself.
Step-by-step instructions for making a laser level
Let's improve the children's laser pointer. It is necessary to unscrew the part of the pointer that does not have inserts with a pattern. The hole needs to be sealed with cardboard and a small hole clearly made in the center, then put the cap back on. Now if you point the pointer at the surface, the laser dot will be clearer. A straight stick must be sharpened at one end and made in the form of a peg. You can also use a shovel handle or a tripod for support. A piece of plywood or a flat board must be firmly attached to the flat end of the stick.
It is very important that the plywood is as level as possible and attached at an exact 90 degree angle. A strip is attached to the surface of the board that matches the length of your bubble level. It should be located in the center of the plywood surface and supported by a screw (nail) so that it can be conveniently turned in different directions. A laser pointer must be attached to the bubble level. This can be done using a clamp and secure it quite firmly to the side of the level.
Now we will place a prepared piece of porous rubber under the pointer for shock absorption. This is necessary in order to easily adjust any angle of inclination along the longitudinal axis.
This can be done using a clamp and secure it quite firmly to the side of the level. Now we will place a prepared piece of porous rubber under the pointer for shock absorption. This is necessary in order to easily adjust any angle of inclination along the longitudinal axis.
Having made all the necessary fastenings, your laser level is ready for use.
How to use a laser level
Once adjusted to your level, you will realize that it is very simple and convenient to use. First, you need to secure the structure to the surface using a pointed corner in a stick. After this, using a bubble level, we align the plane with the bar, so that the laser level we made ourselves shows an even horizontal position.
Now you need to turn on the laser pointer and point it at the surface you need. You will see a reflected laser point, make a mark at this place, now move the laser point further along the surface, check if the horizontal level is off on the bubble level, and place another point.
By connecting two points to each other, you will get an even horizontal line, after which you can start working. The easiest way to connect the dots is to use a metal profile for.
Another video guide
How to mount a laser level with your own hands, and is it even possible? Such a high-tech device for projecting vertical or horizontal surfaces when leveling them is manufactured using high-precision equipment. Professional models use special diode lamps that, using prismatic glass, convert the outgoing light into a thin beam.
This definition sounds somewhat scary. But there is no need to despair, because this applies to professional devices used on construction sites. But such models are not very suitable for home use. There are various options on sale for professional use, as well as for indoor renovation work.
You can purchase household models, but again, after using them once, you will put the device in a drawer, and it is not known when you will need it again. Therefore, we suggest considering the option of making a laser level yourself at home.
Leveling from a laser pointer and bubble level
One of the available options for making such a tool at home is to upgrade a conventional bubble level. The idea is to attach a light pointer to the body of the level, which will expand the possibilities of using the instrument and allow you to place points on distant planes. If you additionally adapt a tripod with a rotating platform, the efficiency of its use will increase noticeably.
During production you will need:
- bubble level, medium size;
- laser pointer;
- rubber, hard foam rubber, polystyrene foam with dimensions 40/15/5 (length/width/height in mm);
- for fastening, worm clamps, nylon ties in the amount of 2–3 units.
The level should be taken with handles in the middle of the side edge, through which it is more convenient to attach the laser pointer with clamps or ties. The requirements for the indicator are simple - the light point at any distance must remain clear and not blur. To do this, rotate the cap on the laser side, under which the focusing lens is hidden. Depending on the direction of rotation, the outline of the point will change. The adjustment is carried out in such a way that deviations from the original shape of the light spot are minimal, regardless of the distance.
1 – laser pointer; 2 – rubber backing; 3– clamps, ties.
The device is attached to the top, where the insert with the bubble is located. First, lay the substrate, a prepared piece of rubber, foam rubber, or polystyrene foam. Then there is a light indicator, which is tightly secured with nylon ties and worm clamps.
The direction of the beam is set strictly parallel to the edge of the level. The adjustment is made by placing the instrument on any long, flat surface, this could be the top of a table installed against the wall. The height of the light beam from the base should be the same throughout.
If there are no holes suitable for attaching the handle, then in order to securely fasten the light indicator, drill them yourself in the most suitable place with a 3 mm drill. Further fastening steps are similar to those listed above.
To carry out marking in different planes, the tool is applied to a base that is set strictly horizontally or vertically. By rotating it around its axis, the marks are transferred to the walls, ceiling, and floor. Instead of a surface, it is allowed to use a tripod with a rotating element with a fixed flat board or metal plate.
How to repair
If the laser mechanism fails, it may display the wrong level or not work at all.
Homemade device requires repair:
- in case of diode failures;
- when buttons and switches stick or fail;
- when the emitter malfunctions, when the laser does not glow or the beam is very dim.
Most often, repair of laser levels is required after the device has been dropped. In this case, the settings are lost, which leads to the device producing incorrect indicators.
If you need to repair a homemade laser, you need to disassemble the device and reassemble it. If the problem is in the pointer, it is easier to replace it with a new one.
In order to avoid repairing a homemade laser level, it is important to be careful when working with it, especially outdoors. Industrial levels with a large operating range have been created to build level planes on large-scale construction sites.
For minor repairs, you can make a laser level yourself
To build level planes on large-scale construction sites, industrial levels with a large operating range have been created. For minor repairs, you can make a laser level yourself.
How to do it?
As noted above, high-quality devices from famous brands will not be affordable for everyone. You can reduce costs by purchasing Chinese models, which are significantly inferior in quality and basic characteristics. But do not forget about the possibility of making the necessary structure with your own hands. A homemade tripod can be assembled in several ways, namely:
- equipped with fastening elements in the form of magnets;
- using so-called cross tripods;
- using belts to secure devices.
One of the simplest options, involving minimal costs, is to use a regular tripod for a camera or camera. If you have such a device, all that remains is to adapt it to install a laser level. An equally simple way would be to make your own tripod with a platform for a level from any materials. The main requirement will be the stability of the entire structure.
You can make a telescopic rod yourself and at relatively low cost. To do this, you will need two tubes, the diameters of which are selected so that one fits into the other. One of them should be twice as long as the other. The manufacturing process includes the following steps:
- cut the larger tube in half;
- We put a larger one on both ends of the smaller pipe to achieve a telescopic effect;
- holes are drilled in the tubes onto which nuts are welded;
- To fix the components, wings with appropriate threads are used.
The most budget option would be to build any stable stand. It could even be a shovel handle with a stand made of plywood or OSB board
It is important to set this structure strictly vertically, using a regular level or plumb line
How to make a building level with your own hands and varieties
How to make a building level with your own hands and varieties It is difficult, and sometimes unrealistic, to imagine how to carry out construction and repair work and not use such an important tool as a building level. A good level is a guarantee of the quality of the work performed. It is thanks to the building levels, as well as in combination with the conscientiousness of the direct builders, that it will be possible to create perfectly even corners in a room with 90 degrees, a smooth surface of the walls, horizontal floors at the same level, correctly installed window and door openings. It’s impossible to imagine repairs of any complexity, even cosmetic ones, without using the level.
The building level is used for wallpapering a room and for laying tiles. But the most important thing is that you don’t have to buy it, and make a building level with your own hands, which is described in this article.
Advantages of a homemade tool
Despite the fact that such a tool cannot provide high accuracy, it is quite profitable to use it in everyday life. In any case, the marking will be more accurate, and the process itself is much simpler than when using a water level. It is for this reason that such equipment is in demand among household consumers. The positive characteristics of the tool include:
- long beam length;
- minimum error;
- high marking speed.
The use of the equipment is fully justified for walls, floors, ceilings and other supports of a similar type with any type of surface. Alternative applications include marking the following objects:
- personal plots;
- fence structure;
- facade finishing.
Ingenuity, accuracy and strict adherence to the instructions described above will help to significantly save money and time. Before spending money on expensive equipment, a thrifty person should think about whether it’s worth making the device yourself, saving money? Moreover, its quality and ease of use in everyday life corresponds to an expensive device.
Characteristics of laser levels
There are a large number of models on the construction market. To understand how each of them works and what capabilities it has, you need to familiarize yourself with its technical characteristics. These include:
- Measurement range
. Some types of professional devices operate at a distance of 300 m, but for most devices this parameter does not exceed 20 m. The higher the indicator, the more capabilities the device has. - Number of rays
. The standard number for all devices is 5, but it may vary depending on the technical characteristics. The more rays an optical level generates, the more difficult conditions it can work in. - The type of alignment and the ability to disable it
. In some models, the parameter must be adjusted manually, in others it is adjusted automatically. In the latter case, the device will make more accurate measurements. Manually adjusting the level is not always convenient and there is a risk of error. - Measurement accuracy
. Depending on the parameter, all devices are divided into household, semi-household and professional. The first allow an error of up to 8 mm per 10 m, the second up to 5 mm, the third up to 3 mm. - Type of food
. The levels are battery operated or battery operated. The first type of model can work longer without recharging – up to 20 hours.
Laser level
A laser level is one of the most expensive types of instruments. This device is used for professional work or more complex repairs to determine how smooth the surface is.
This level will easily indicate both horizontal and vertical marking lines for you. There are also devices that have a cross beam. A special advantage of this tool is that it is installed either on a stand or on a plane and, using a special air indicator, is leveled horizontally or vertically to the nearest millimeter.
Types of devices
Since the production of tools does not stand still, the variety of leveling levels is constantly increasing. Now you can find several main types that are most often used in repairs.
- Floor
- Wall
- On a stand
The names of these species speak for themselves. Floor mounted on a flat horizontal surface
It is important to know: if the level will be installed on a table or other surface, it must be centered
The wall level is installed on a vertical surface. There are special mounts on it to keep the device on the wall. This level is useful when marking vertical guides and other materials during repairs. For example, if you are hanging paintings in an apartment, then this type will provide you with maximum symmetry between the paintings.
The laser level on the stand has a special sight and beam. Usually the beam has a cross glow, which immediately determines both the vertical and horizontal lines. This level will facilitate any type of construction, especially finishing work. It has a special water device that shows how level you have set the stand
Before work, it is important to set up the tool correctly, because the evenness of all your material depends on it.
In other types of level, an electronic computer is installed on a stand instead of a water device. It is much easier to use because if set up incorrectly it will self-level.
Laser center finder for router or drilling machine
A laser center finder is an extremely useful addition to a milling or drilling machine and can be used for a variety of alignment tasks with an amazing degree of accuracy. Centering a cutter or drill press over a hole or other feature on the workpiece is very easy.
There were three features that the wizard wanted to include, namely
;
1. The ability to continue processing in the place where it was installed. 2.Adjustable laser angle. 3. Adjustable focus.
This tool was made entirely from an old damaged laser level and a few pieces of aluminum from a scrap box. The only items "bought" were two AAA batteries. Step 1: Preparing materials and tools
The technician cut off the end of the old level to remove the laser unit. The laser and its lens were mounted inside a small aluminum housing. He rotated this housing to remove the mounting flange that is visible in the photographs. He needed to redesign and use this housing because it was internally threaded for the brass lens holder. This thread allows you to adjust the focus. The last photo also shows the red cover and switch for the battery compartment and the battery spring contact.
The frame was made from several scrap aluminum parts. The dimensions of the parts depend on the size of the device on which they will be installed and are left at the discretion of the reader.
— The craftsman used a milling machine to shape the frame; - A lathe will be useful for making a drill chuck adapter; — Soldering iron for connections; Step 2: Making the Frame
The frame consists of three main parts. Two of them form a clamp for attaching to a router or drill spindle, and one of them is drilled for the battery compartment. The third part is the laser unit housing, which bolts to the half clamp of the battery compartment so that it can be rotated to align the laser to the desired circle diameter.
The two halves of the clamp are connected to each other by a hinge and a bolt. See the first photo above. This design is fast and reliable. The hinge consists of a pin made from a piece of 12 mm steel rod, the length of which is equal to the thickness of the clamping material (in this case it was 19 mm). This trunnion was drilled through the center and tapped with a 6mm thread. The other clamp had a piece of 6mm thread that screwed into the trunnion. The hinge clamp is held closed on the spindle by one bolt. Step 3: Laser System Design
The original laser housing is glued to the drilled hole in the new adjustable support piece. The original threaded housing fits onto a brass lens assembly, allowing the focus to be adjusted according to the distance between the laser and the workpiece. Between the lens assembly and the laser is a spring that acts as a focus adjustment lock.
The back of the laser unit was filled with epoxy resin after small wires were soldered to the laser circuit board. These wires go to the battery compartment. Step 4: Battery Installation
The original spirit level had a red screw-on battery cap that included a switch. The master wanted to save this part, but it was screwed on, and the author did not have a suitable threaded tap. So he cut out the original brass piece that it screwed into and glued it into the battery compartment hole. Being copper, it was easy to solder a wire to transfer energy to the laser. At the other end of the battery hole, a spring contact was installed, which is shown in step 1. Step 5: Balancing
The mechanic has a motorcycle wheel balancer he made many years ago that he uses for a variety of balancing tasks. He made a spindle with a thick disk to mount the laser finder, and this allowed him to check the balance as shown in the picture.
The craftsman wanted to be able to use the laser device when routing, so it had to be fairly well balanced to avoid vibration. First, the balance was checked, which revealed that too much mass was concentrated at the laser end. The excess metal was ground off in this area and a 10mm adjustable steel bolt and nut was added to the opposite side. as a counterweight. Shown in the second photo above. This brought the balance to an acceptable level. Step 6: Installation on Router
The assembly is attached to the spindle of the milling machine so that it can rotate with it without impeding the use of the cutter.
Since the laser is offset relative to the axis of the cutter spindle, the light it emits will describe a circle on the workpiece below. The diameter of this circle is determined by the distance between the spindle and the workpiece, as well as the angle of the laser beam, which the master has made adjustable. The focus can be adjusted as described in the previous step to obtain a visually clear, precise circle. Step 7: Installation on Drill Press
The usefulness of this device is enhanced if it can be mounted on a drill chuck, either on a router or in a drill stand. To use this feature, the craftsman made a special disc to grip the clamp with a 12mm center rod to install the chuck. The photographs show the installed unit, as well as the mounting disc. Step 8: Problems
When the master first began testing the laser device on his milling machine, he noticed a strange phenomenon.
Initial tests with hand rotation gave excellent results, however, as soon as they were turned mechanically, at high speeds, part of the circle disappeared. Strange right? It turns out that at such a high speed, the batteries moved away from one of the contacts. The fix was simple, the technician simply used a stronger spring in the battery compartment. Step 9: Modification
Initially, the master made a stupid mistake with the first clamp design.
He made four points of contact with the router spindle. Of the four points of contact, one will not touch or will not touch as much as the other three. In practice this did not create any problems; the clamp was always reliable.
This first photo shows how the artist corrected this situation in Photoshop.
He then physically fixed it by trimming the area of the original two contact points and then installed a flat head screw to provide a single contact on that half of the clamp, giving a total of three clamp points. Step 10: Use
These photos show a job where the laser center finder saved a lot of time.
The technician needed to drill holes for the cover screws in the crankcase of the motorcycle to allow the installation of small oil o-rings.
The first photo shows how you can focus on each hole. Once centered, all that was required was to lower the cutter to the specified depth of cut and move on to the next hole. The whole operation was completed very quickly.
Details of creating a laser center finder can be seen in the video:
Advantages of using a laser level
A homemade light indicator allows you to apply mirror-like, symmetrical markings and mark spatial points at a large distance. The range of action of such models does not exceed 10 meters, but this distance is sufficient to perform most of the necessary marking work. Professional devices (construction level, cut indicator) have greater functionality, but many of the available capabilities are not always in demand. Therefore, at home you can get by with a homemade design.
The characteristics of such a level are quite sufficient to satisfy the basic requirements and apply the necessary markings, because it:
- provides the required beam range, up to 10 m;
- increases measurement speed;
- guarantees an acceptable minimum error.
The main advantage of the device is the positioning of the light beam in the horizontal plane, which allows you to effectively mark structures and control levels, including vertical ones on the wall. In addition to carrying out repair work in an apartment, house and interior design, it is used to lay out the plot of the personal territory, control the construction of fences, and decorate the facade.
What is the device for?
The purpose of laser devices is varied. They are necessary for the following types of work:
- layout of the territory and installation of equipment with horizontal and vertical position control;
- marking and determining direction;
- surface leveling of floors, walls and ceilings;
- arrangement of concrete screed and assembly of floors with adjustable level;
- construction of communication highways;
- installation of bulkheads and hanging accessories;
- installation of staircases.
In the latter case, the device’s ability to mark inclined planes is used. For example, it is necessary to install railings on a flight of stairs. By fixing a level with a laser on it, it is easier to install the railing parallel to the flight.
You can understand how to use a level using the example of common construction and repair work.
Leveling floor, wall and ceiling surfaces
When carrying out such work, additional control marks will be required. Then the laser beam is directed along the plane. The laser is adjusted according to the marks to more accurately determine the evenness of the surfaces.
When using a laser level and obtaining the same data, the floor turns out to be absolutely flat
Laying ceramic tiles
For such work, it is better to take a device with the function of cross-projection of rays horizontally and vertically. Thanks to them, even a novice master will be able to lay tiles flawlessly.
The intersection of the level lines is placed at the center of the proposed tile joints
Wallpapering
The gluing process itself is quite easy, but using a level makes the work even easier. Focusing on the laser beam projected onto the wall, it is much more convenient to align the wallpaper.
Horizontal projection will facilitate the correct gluing of fillets and borders
Assembly of cabinet furniture
Even if there are straight walls in the house, which is a rather rare occurrence, the interior can be ruined by crookedly hung cabinets, shelves and other hanging accessories. And with the help of a laser that creates a circular level line, you will immediately see how to install hanging furniture without distortions.
The horizontal beam of a laser level will help when installing curtain rods
Redevelopment
The plane builder allows you to simplify this process. To determine the exact placement of plasterboard walls and partition elements, you will need to install the laser so that its projection on the floor, walls and ceiling is a mark for the intended partition.
When installing a metal frame under a plasterboard wall, place the laser level on the floor, direct the beam upward so that it marks the profile installation line
If a lot of external work is expected (digging trenches, laying communication lines, laying a foundation), it is better to get a professional plane builder with a beam visible in sunlight.
Components of the structure
The main element of an industrial laser level is a special laser emitter. In a homemade level, its role will be successfully played by a cheap laser pointer, which can be bought in any office supply department. This is only the main detail, but not the only one; the entire list of what is needed is as follows:
- laser pointer;
- building level (bubble);
- a peg with a square or round diameter (d=5-6cm) 1-1.3m long (you can use a shovel holder);
- thick plywood or board;
- a piece of porous rubber.
A laser pointer and a building level are the basis of a homemade laser level
Advantages of using a laser level
A homemade light indicator allows you to apply mirror-like, symmetrical markings and mark spatial points at a large distance. The range of action of such models does not exceed 10 meters, but this distance is sufficient to perform most of the necessary marking work. Professional devices (construction level, cut indicator) have greater functionality, but many of the available capabilities are not always in demand. Therefore, at home you can get by with a homemade design.
The characteristics of such a level are quite sufficient to satisfy the basic requirements and apply the necessary markings, because it:
- provides the required beam range, up to 10 m;
- increases measurement speed;
- guarantees an acceptable minimum error.
The main advantage of the device is the positioning of the light beam in the horizontal plane, which allows you to effectively mark structures and control levels, including vertical ones on the wall. In addition to carrying out repair work in an apartment, house and interior design, it is used to lay out the plot of the personal territory, control the construction of fences, and decorate the facade.
Differences between a homemade model
A homemade laser level can be used for mirror and symmetrical markings over long distances during construction or repair. Of course, the homemade version has a short range of action: approximately 10-12 meters. But this is quite enough to complete most of the necessary notes. Professional devices are capable of creating marks, calculating angles and much more. But the big disadvantage of such devices is their price.
Some of the electronic models start at two hundred dollars, which is not that cheap. But in most cases, many of the proposed capabilities of professional equipment will not be needed, so you can get by with a homemade design. A homemade level will cost tens of times less, and you will need available materials to assemble it.
Power supply
Some of the work is done. Now the homemade device must be provided with electric current. The power supply of a standard diode should be 3V, and the flow rate should be up to 400 mA. These values may vary depending on how fast the disk is written.
There are 2 ways of eating, each of which has advantages and disadvantages. However, each one is powered by a battery(s).
First option
A distinctive feature of the first method is voltage regulation using a resistor. The laser does not require high power. So, the components of a drive with a write speed of 16X will need 200 mA. You can increase this value to a maximum of 300 mA, otherwise there is a possibility of damaging the crystal and forgetting about the homemade laser. The main advantages of this method are the reliability of the product and ease of manufacture. The main disadvantage is possible problems with the placement of batteries.
Second way
It will be more difficult to create a laser using this option. In addition, the finished device is more suitable for stationary placement. The point is the driver (LM-317 chip), which is a board for creating a certain power, as well as limiting the electric current.
As you can see in the diagram, to create a laser you will need:
- Directly, the LM-317 chip.
- 2 resistors at 10 ohms.
- 1 variable resistor per 100 Ohm.
- 1 diode
- 100 µF capacitor.
Regardless of the environment as well as the power source, the driver will maintain 7V power.
Do-it-yourself powerful laser in one evening
Briefly.
Hello ladies and gentlemen. Today I am opening a series of articles devoted to high-power lasers, because Habrasearch says that people are looking for such articles. I want to tell you how you can make a fairly powerful laser at home, and also teach you how to use this power not just for the sake of “shine on the clouds.”
Warning!
power 500 Chinese pointers), which can harm your health and the health of others! Be extremely careful! Use special safety glasses and do not point the laser beam at people or animals.
!
Let's find out.
On Habré, articles about portable Dragon Lasers, such as Hulk, appeared only a couple of times. In this article I will tell you how you can make a laser that is not inferior in power to most models sold in this store.
Let's cook.
First you need to prepare all the components: - a non-working (or working) DVD-RW drive with a write speed of 16x or higher; — capacitors 100 pF and 100 mF; — resistor 2-5 Ohm; — three AAA batteries; - soldering iron and wires; — collimator (or Chinese pointer); — steel LED lamp.
This is the minimum required for making a simple driver model. The driver is, in fact, a board that will output our laser diode to the required power. You should not connect the power source directly to the laser diode - it will break down. The laser diode must be powered with current, not voltage.
A collimator is, in fact, a module with a lens that reduces all radiation into a narrow beam. Ready-made collimators can be purchased at radio stores. These immediately have a convenient place to install a laser diode, and the cost is 200-500 rubles.
You can also use a collimator from a Chinese pointer, however, the laser diode will be difficult to attach, and the collimator body itself will most likely be made of metallized plastic. This means our diode will not cool well. But this is also possible. This option can be found at the end of the article.
Let's do it.
First you need to get the laser diode itself. This is a very fragile and small part of our DVD-RW drive - be careful. A powerful red laser diode is located in the carriage of our drive. You can distinguish it from a weak one by its larger radiator than that of a conventional IR diode.
It is recommended to use an antistatic wrist strap as the laser diode is very sensitive to static voltage. If there is no bracelet, then you can wrap the diode leads with thin wire while it waits for installation in the case.
Don't mix up the polarity! The laser diode will also fail instantly if the polarity of the supplied power is incorrect.
The diagram shows a 200 mF capacitor, however, for portability, 50-100 mF is quite enough.
Let's try.
Before installing the laser diode and assembling everything into the housing, check the functionality of the driver. Connect another laser diode (non-working or the second one from the drive) and measure the current with a multimeter. Depending on the speed characteristics, the current strength must be chosen correctly. For 16 models, 300-350mA is quite suitable. For the fastest 22x, you can even supply 500mA, but with a completely different driver, the manufacture of which I plan to describe in another article.
Looks terrible, but it works!
Aesthetics.
A laser assembled by weight can only be boasted of in front of the same crazy techno-maniacs, but for beauty and convenience it is better to assemble it in a convenient case. Here it’s better to choose for yourself how you like it. I mounted the entire circuit into a regular LED flashlight. Its dimensions do not exceed 10x4cm. However, I do not recommend carrying it with you: you never know what claims the relevant authorities may make. It is better to store it in a special case so that the sensitive lens does not become dusty.
This is an option with minimal costs - a collimator from a Chinese pointer is used:
Using a factory-made module will allow you to get the following results:
The laser beam is visible in the evening:
And, of course, in the dark:
Maybe.
Yes, in the following articles I want to tell and show how such lasers can be used. How to make much more powerful specimens, capable of cutting metal and wood, and not just lighting matches and melting plastic. How to make holograms and scan objects to create 3D Studio Max models. How to make powerful green or blue lasers. The scope of application of lasers is quite wide, and one article cannot do it here.
Laser-based level and level design
Laser levels and levels use the principle of directly indicating a target - a point or line on a surface. They can be tracked directly (in relatively low light) or through the eyepiece of the device.
In addition to a point or line (the trace of the intersection of a light plane with a solid opaque surface), levels and levels allow you to obtain a cross-shaped pointer, as well as simultaneously use two or more emitters.
Due to the scattering of the laser beam into a plane, such devices are often called “laser plane builders”. In general, the set of functions of the device depends on the number of emitters and optical devices for concentrating or scattering the beam.
Useful tips for creating homemade levels using laser pointers
Despite the convenience, compactness and low price of self-made devices, they have two main disadvantages: relatively low accuracy and a short period of operation with constant use of laser emitters. The first issue is solved by setting up the device. To eliminate the second drawback, experts advise replacing the coin-cell batteries in laser pointers with an external power source. It is important to select a source with the required voltage. Typically it is 4.5 V, but may vary for different models.
When buying a laser pointer for a level device, you should carefully select its power and the color of the emitting diode. The best option is a green beam, it is less harmful to vision and is better visible even in relatively bright rooms.
By slightly increasing your budget, you can purchase a simple laser level with or without a tape measure. In this case, you can attach a ready-made device to any base, rather than a combination of a bubble level and a laser pointer.
Often these devices already have places for mounting on a tripod or tripod.
You can also use a laser tape measure as a source of laser radiation.
One more nuance: if a ready-made tripod (tripod) is used to install the laser, a useful addition to it will be a strip with markings or an ordinary metal (wooden, plastic) ruler. This will allow you to raise or lower your homemade level to a certain height without additional measurements. By the way, it is convenient to make the tripod itself from PVC pipes.