Do you have a box in your kitchen with a stack of neatly folded recipes left over from your grandmother?
It turns out that passing recipes from one generation to the next is an incredible experience. In fact, a home cookbook is one of the most treasured types of heirlooms you can create.
If you've been wondering how to make a cookbook filled with your treasured family recipes, we can help. Use our advice and your dream will come true.
Choose your size
This may seem like a lower priority, but choosing the right size is one of the most important steps in creating a cookbook. This item will determine the layout of your book, the number of photographs you will use, the cost of printing and many other aspects.
The more recipes and photos you use, the larger your book should be.
Seal
Step 9
Bringing a recipe book to life
By creating your own cookbook, going through every step of its birth, you will get a lot of positive emotions. But the greatest pleasure is when the book is printed and you and your whole family use it in your daily life. Thinking about what to give to your friends or relatives? Print several copies of your author's culinary photo book, and you will always have a duplicate on hand that you can give as a gift at any time.
Each of us will be pleased to bring our ideas to life, to see our own recipes, designed in the form of a beautiful illustrated culinary photo book, which you will keep for many years.
Now, having learned all the secrets, create your own unique recipe book!
Decide on a Layout
Once you've chosen the size format you want, you'll need to look through some templates and choose the layout you like for your book. This should be done before you begin any photography or text work.
Russian software will be installed on Apple iPhones from April 1
Colorful March. Brown snow fell in Colorado (USA)
High blood pressure in your 20s and 30s can lead to problems with thinking later
Volumetric option
If the notepad type does not suit the cook, he should take a master class on how to make a real book. For this you will need:
- sheets in the required quantity, A4 format;
- cover from an unnecessary book, notebook, album, etc.;
- scrap paper for wrapping the cover;
- kraft paper;
- figured hole punch;
- scissors, stationery knife, strong thread and needle;
- two stationery clips, glue, pencil;
- decoration elements;
- instant coffee;
- ink;
- ribbon and 4 eyelets.
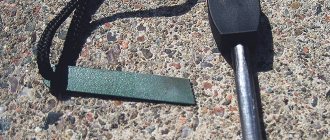
Coffee is essential for coloring sheets of paper, giving them an aged effect. To do this, the warm solution with coffee is poured into a baking tray, where sheets of paper are placed one by one until they are completely wet, after which the paper is hung out to dry. After drying, the sheets are smoothed with an iron. We bend each sheet evenly in half, decorate the edges with a hole punch, making them openwork.
Related article: DIY box quickly and easily with photos and videos
The paper should be folded into an even stack, the top and bottom of the workpiece should be pressed with paper clips, placing squares of paper under them so as not to spoil the sheets.
On the spine of the workpiece we make 6 marks with a pencil along which shallow cuts are made with a stationery knife.
To sew the sheets, you need to take two strips of fabric, place them along the intended areas so that two areas from the edges and the middle are free.
We thread a thread through the notches of each sheet with a snake so that it passes along the top of the areas with fabric strips. All sheets are sewn together in the described manner into one tight binding, the end of which is secured with a good strong knot. Having placed the clamps on the workpiece again, coat the spine with transparent glue and place it under a press, for example, from several heavy books. Drying should take several hours.
We wrap the cover with kraft paper, folding 4 cm into the inner edge, carefully cutting and gluing the paper.
For the external decoration of the cover, we cut out two fragments from scrap paper, half a centimeter less than one turn of the cover. Fragments can be stitched on a machine or by hand. We add decorative elements according to our imagination or using pre-prepared ideas.
To tie a book, you need to make holes in the middle of the front and back covers, which we cover with eyelets. We stretch ribbons through the holes, the edges of which are secured on the inside of the covers with glue and tape.
To combine the cover with the glued sheets, we apply a square of paper to the latter with glue, which, after spreading with glue, is placed on the other side into the cover.
The endpapers for the book are made from ordinary sheets of paper; they should be half a centimeter smaller in size than the edges of the cover. We paste them at the beginning of the book and at the very end.
The title of the book can be printed on a printer or written in ink yourself.
Article on the topic: Women's pullovers with knitting needles with a description of the knitting process and patterns
Outline the chapters
Once you have selected the recipes you want, organize them into chapters. You've probably seen cookbooks with separate sections such as appetizers, soups and salads, main courses, and desserts. If this option doesn't work for you, consider organizing your recipes by season, main ingredient (such as beef and seafood), cooking technique (baking, pressure cooker, stovetop), or another logical format that works for you.
Back to Russia: Serebryakov, who returned from Canada, was inundated with new roles
The shorter the better: what stylish hairstyles deserve the attention of women after 50
“Let the children grow up first!”: why people put off apartment renovations
Think about a format that will accommodate all the recipes
Now we have come to the layout of the photo book. Think about how you would like to place the recipe on the page. If the recipe is not accompanied by a photograph, then it would be correct to devote a separate page to it. Recipes with photographs will look great on a full spread: text on one side, illustration on the other. At the same time, it is not necessary to adhere only to this format when collecting a photo book. Some recipes may require more emphasis or space in the book than others. Try not to overload the pages with lots of text in small font. The clearer and more logical the format for placing information in your cookbook, the easier and more convenient it will be to use it in the future when preparing a family dinner.
Step 7
Post Recipes
Once you have roughly imagined the layout of the future cookbook, you can start posting recipes:
- Upload the collected recipe photos to the Multiphoto account. You can create a separate “Recipes” folder for this;
- To insert text, right-click anywhere in the editor and select “Insert Text”.
Find out more about how to work in the photo book editor in
VIDEO
Design
- Use ready-made page designs, backgrounds, decorations;
- Create your own design for the entire cookbook if desired.
Step 8
Add illustrations
Whether every recipe comes with a photo, or you've chosen to illustrate just a few of them, now is the time to post those images. Cookbook illustrations can be ordinary photographs taken on your phone, or more advanced graphic files that you can export using any of the programs we named in the previous step.
Write the recipes correctly
When you're rewriting recipes for your cookbook, it's important to follow some structure. This plan usually includes:
- recipe name;
- introduction;
- list of necessary equipment;
- time estimation;
- list of ingredients and their quantities;
- preparation instructions (including preheating);
- detailed cooking steps.
When creating a cookbook, consistency is key. Keep the structure the same from one recipe to the next. Also, make sure you use the same terms throughout the book.
Download cookbook recipes for PC
| Purpose: | Free computer program for recording and storing culinary recipes |
| The name of the program: | Cooking notebook |
| Manufacturer (author): | Cooking at home® |
| Status: | For free |
| Category: | Notepads |
| Installer (archive) size: | 3 MB |
| OS support: | Windows XP,7,8,10 |
| Interface language: | Russian |
| Safety: | No viruses |
| Similar programs: | — |
| Link to installer/website: |
…
…
On the official website of the program you can download the regular (installation) version or the portable version (which does not require installation on your computer).
Testing
This step is by far the most important of all the steps in creating a cookbook. You should check each of your recipes to make sure you haven't missed any steps, ingredients, or other items.
Will there be happiness? Reading the marriage lines under the little finger (branches and circles)
Huami will present its new smartwatch with a 1.3-inch display
Bitcoin: Why it takes so much electricity to support the cryptocurrency
Since it's very difficult to do this on your own, ask family members, friends, or professional recipe testers to test each chapter and report all the good points and mistakes. Then make adjustments until you're sure each recipe is perfect.
Read the text carefully
Once everything is written, you will need to proofread the material more than once. Typos and poor grammar can seriously damage your credibility, effectively ruining all your hard work. If you can fit it into your budget, consider hiring a professional editor to give your cookbook a final review.
What does the church advise to those people who have broken Lent?
We decorate the festive table with a spectacular dessert: chocolate cupcake with cream inside
Fashionable bun for short thin hair: three clever effective ways
Master class with photographs
We will need the following materials:
- Sheets of white office paper A4 size;
- Instant coffee;
- Figured hole punch;
- 2 stationery clips;
- Glue “Moment Crystal”;
- A small piece of cotton fabric;
- Kraft paper;
- Cover from an old notepad or book;
- A sheet of scrapbooking paper with a checkered print;
- Paper for watercolors or pastels;
- Ink Distress;
- Decorative elements for decorating the cover (ribbons, brads, paper flowers, silicone stamp “Handmade”, eyelets;
- Threads.
Select a printing company
This last step is also one of the most important. Once you are 100% sure that your cookbook is exactly what you wanted, it's time to print it.
Sure, you can simply print the book yourself and take it to a copy shop, but if you really want to create a lasting legacy, you'll need to turn to professional cookbook printing services. They are fairly inexpensive and well worth the effort, especially after you've put so much hard work into your project.
Found a violation? Report content