On June 12, Russia celebrates a holiday important for all citizens of a powerful power - Russia Day. Celebrations take place throughout the country and both young citizens and adults take part in them.
Props for the holiday are prepared in advance. A handmade national flag looks very touching. You can immediately see how much warmth ordinary people put into these crafts.
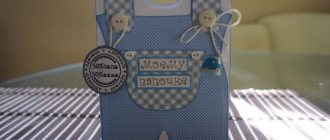
One of the main state symbols is the flag. Adults can prepare for the holiday together with children. For example, you can make a postcard with the Russian flag on it. In addition, such work contributes to the study of state symbols.
Applique postcard
The craft is made with your own hands and its central part is the tricolor flag of Russia. The applique postcard is decorated with the image of a dove. It is called a symbol of peace. The bottom of the card will be decorated with flowers to match the flag.
It is worth noting that to create a beautiful craft or create a master class, you cannot do without specialized sites where these instructions are described in detail and shown in the photo, for example, the portal master-klassi.ru has a huge selection of ideas for creating crafts.
You will need for the postcard:
- cardboard sheet of rectangular shape and high density. The size is chosen at your discretion, the color of the sheet also does not matter;
- corrugated paper in three flag colors. The roll is white, the second one will be blue and the third roll will be red;
- glue;
- medium sized scissors.
The work is divided into two parts. The first half of the work is the design of the image of the flag itself. The second stage is its decoration.
For the base, a rectangle is cut out of a sheet of cardboard. In equal portions you need to cut small squares for the craft from corrugated paper in the three colors of the flag.
They form dense balls that will cover the surface of the cardboard. The balls are formed using the clumping technique, which means that a large number of lumps will be made.
Borders are drawn on the cardboard with a pencil, dividing the sheet into three stripes. This will help you carefully glue the lumps according to the colors.
To do this, the cardboard is covered with glue over the entire surface. The lumps of colors are pressed onto the cardboard. This creates three stripes that imitate the stripes on the flag.
The lumps are placed close to each other. The work is finished when the surface is completely filled with these lumps. The Russian flag craft will look voluminous.
Decorative elements for applique are being prepared. Work begins with making flowers. They will add a festive mood to the craft. You will need colored paper to match the colors of the flag. Square-shaped blanks are made from white and blue paper.
Fold each square in half several times. The wide side of the workpiece is cut with a bird. Templates are obtained in two colors to form a flower.
The blue flower is glued to the white one. Balls are formed from red paper and glued to the center of a two-color flower. These flowers decorate the bottom of the card.
A white dove will hover over the flowers. In the center of the postcard is placed her figurine, cut out of white paper.
- How to sew a decorative mini bag with your own hands
- Crafts from cotton pads - beautiful ideas and tips on how to make decorations and toys with your own hands (70 photos)
- DIY New Year's crafts: 70 photo ideas and a master class on making crafts for the holiday
Crafts from salt dough for February 23
Today, the souvenir departments offer a large selection of products made in the relevant theme. Do-it-yourself military-patriotic crafts help to instill an understanding of the Great Patriotic War, military battles and enormous losses.
Professional teachers recommend choosing handicraft techniques that are based on fine motor skills. For example, the sculpting process helps activate the imagination of toddlers and preschoolers.
What can you choose for a patriotic craft for school? We propose to make a miniature picture from salt dough, in which a soldier and military equipment will be present.
For the creative process you will need:
- Salty dough;
- Set of acrylic paints;
- Set of brushes;
- Hot melt adhesive;
- Small plywood;
- Frame;
- Glitter.
Progress:
- It is necessary to sculpt the head, arms, legs, and torso of the future soldier from salt dough. The thickness of each part should be no more than 1 cm. Thanks to this, the fake can be fixed in a vertical position. All elements must dry on their own within 3 hours. In the process of sculpting in the face area, it is necessary to form the eyes, nose and mouth.
- Using acrylic paints, we paint all the details in accordance with the sketch. To make the product realistic you will need to use brushes. We paint the soldier's body in a beige shade. His clothes will combine several colors. The child must independently paint the uniform dark green. For camouflage spots you will need to use black and brown tones.
- When all the parts are ready, you need to glue them to the surface of the plywood with a heat gun. The background can be decorated with dense plantings of trees, grass and flowers. The child can independently design small elements in a military composition.
- Let's move on to making the tank. It is also made from salt dough. The first step is to make a powerful body of the combat vehicle. To do this, a small element of plastic mass is turned into a trapezoid. Wheels are made from small balls. The tower is made of a compact oval, and the barrel is made of a miniature square. All parts must dry well so that cracks do not appear on their surface. After which you can paint them with acrylic paints.
- For work, dark green, brown and black shades of dye are used. After this, we glue the elements onto the plywood. Use a hot-melt gun to make smooth lines, which we sprinkle with bright glitters. As a result, we get a festive fireworks display. The final step will be to use a photo frame. This creates a beautiful panel dedicated to the holiday of February 23 and May 9.
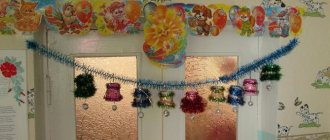
Flag layout
The craft can be designed as a layout for the Russian Flag Day. A group of children, for example, in a kindergarten, can be involved in making flag crafts.
For the layout you will need children's palms cut out of colored paper. Each child will feel their importance in life by looking at the end result.
To work you will need to prepare the following material:
- 2 types of corrugated cardboard. One is A4 sheet size. The second one has side parameters of 6x12 cm. There should be two such sheets.
- Paper in three colors: white, blue, red. Paper size A4.
- Paint brush, red gouache.
- PVA glue.
- Pencil.
The base for the flag is made of corrugated cardboard. A rectangular shape with sides 25x35 cm is cut out. To attach the base, you need to make slits 3 cm deep.
From the corners below it is 5 cm apart towards the center. A photo of step-by-step instructions for making a Russian flag model will help you clearly understand the work process.
- Crafts for Mother's Day - how to make simple and beautiful original decorations and toys with your own hands (130 photos + video)
- Eyes for crafts: how to make templates and a master class on making eyes from various materials (100 photos)
- Craft angel - 105 photo ideas on how to make your own angel quickly and easily from scrap materials
Next you need to prepare stands for the flag. Prepared rectangles with sides 6x12 cm are cut so that one of the corners becomes semicircular. The slots for fastening are made identical to the slots in the base.
Two important elements are connected: the stand with the base. The part of the stand that is visible in front of the base is covered with red color on the front side.
Palms are cut out, 8 pieces of each color. Palms are glued to the base from top to bottom in rows. First the white palms are glued on. The parts are placed overlapping.
It is necessary to place your palms so that the base is not visible between them. It is recommended to apply the adhesive base to the wrist area. Your fingers should be free of glue.
The craft will be ready when three stripes imitating a flag are glued.
Both works can be exhibited at an exhibition of children's crafts dedicated to Russia Day and Flag Day. Some ideas in the design of two crafts can be used in a wall newspaper.
- Crafts from matches - 125 photos of original ideas for professionals and simple crafts for beginners
- Crafts with children: a review of interesting and exciting ideas for creating toys and decorations (115 photos)
- Crafts from tights: 60 photos of basic ideas and sewing original crafts with your own hands
Airplane made from a plastic bottle
Products made from scrap materials turn out to be unusual. For example, from a simple plastic bottle you can create a beautiful airplane that children will use for everyday games.
What will be needed to build it? For creative activities use:
- Plastic bottle with a volume of 0.5 l;
- Green cardboard;
- Red acrylic paint.
Progress:
- We make through holes in the side parts. Cut out two rectangles from green cardboard. Their length should be at least 15 cm and width 5 cm. Carefully insert the cardboard blanks into the plastic frame. Draw red stars on the surface of each wing.
- We make the propeller out of cardboard. We cut a through hole in the middle. Thanks to it, it will be possible to fix the part in the lid area.
- Let's move on to the tail section. It consists of 3 rectangles. We glue the parts at an angle of 45 degrees. Using a heat gun we fix the part on the surface of the plastic bottle. The combat aircraft is ready!
Application on the theme “Russian flag”
This version of the application can be developed for both small and older children. The background will be the outlines of the Russian borders on the map.
The territory is divided into three lanes. Flowers of the desired shades are glued to each strip. For kids, it is better to prepare templates of simple flowers.
Older children can use a template to cut out flowers that grow in Russia. For example, daisies are cut out for a white stripe. For blue - cornflowers. Poppies are suitable for the red stripe.
The flowers are cut out the same way. They differ from each other only in the design of the middle. For chamomile it is a yellow circle, for cornflower it is blue “snowflakes”, for poppy it is a black circle and an even smaller green circle is glued to it. The map of Russia can be cut out of colored paper, or drawn with pencils or paints.
It will be fun for kids to do a job using spaghetti. The basis is a colored sheet of paper. A flag is drawn with a pencil on the entire sheet.
Glue is spread on the canvas and spaghetti is laid out carefully, close to each other. Next comes the paints. They cover spaghetti in three colors: white, blue and red.
The wooden handle is finished with brown paints. Children will be able to do this kind of work and will be interested in learning about the symbols of the country.
Every year, on public holidays, exhibitions of children's work are organized, where interesting crafts are exhibited. The number of participants is not limited. The priority is given to the originality of the craft.
Step-by-step implementation of the coat of arms of Russia using quilling technique
The coat of arms of Russia is the official symbol of the Russian Federation along with the tricolor flag and anthem.
The modern form of the coat of arms was approved in 1993. The heraldic symbol of Russia is a double-headed eagle on a red background. The eagle holds a scepter in its right paw, and an orb in its left. The eagle is crowned with three crowns, and on its chest there is a depiction of a horseman slaying a dragon. The Russian coat of arms is inextricably linked with history, undergoing changes under its influence. The double-headed eagle was first mentioned as a heraldic symbol at the end of the 15th century during the reign of Ivan III. Since then, the eagle has changed its appearance several times before acquiring its modern appearance.
Quilling the coat of arms of Russia could be an interesting joint project, since the work is quite extensive and requires some experience in quilling. However, a paper coat of arms, as a rule, is made up of many twisted basic figures, which are not difficult to master even for beginners. This master class is recommended for teachers and educators: crafts in the form of a coat of arms are a good opportunity to introduce students to the symbols of Russia and raise the patriotic spirit.
Symbol of Tatarstan
Using the quilling technique, using a simple master class, you can make not only the coat of arms of Russia, but a symbol of any of its regions.
One of the simplest examples is the coat of arms of the Republic of Tatarstan. To make it you will need a standard set of tools, paper strips of white, red, green, yellow and brown. You will also need a diagram of the coat of arms and some free time.
First of all, we apply the diagram to the base. This can be done using carbon paper or by sketching the outline by hand. We start laying out the quilling elements from the central part of the coat of arms, for which we twist one small dense white roll and 8 small “eyes” of the same color. We assemble a flower from the blanks and braid it with several turns of brown paper. Using this master class, you can change the algorithm a little by starting to lay out the middle with a brown ring, and only then placing a flower inside it.
Around the central ring, according to the diagram and example, we steal small free spirals and 5 curved “eyes” of various lengths. After the figure is completed, we create the outline of the second circle and outline the boundaries of the third. We make the edging of the largest circle wavy. To do this, first fold the pancake strip of paper like an accordion and then straighten it.
Fill the inside of the middle ring with red loose rolls. In this case, we lay out the first row from the edge with the largest spirals, the second row with rolls of a slightly smaller diameter, the third and subsequent ones with even smaller parts. By placing the red elements around the white figure, we slightly change the shape of the rolls so that they fill the entire space as tightly as possible.
In the free space between the middle and outer rings, we first place yellow petals with brown curls (as in the picture), and then fill the rest of the space with green rolls and scrolls.