All children know the African giant with a long neck, but few have seen it alive, since giraffes are not found in our latitudes. Cartoons fill the gap, so children accept the offer to sculpt a figurine from plastic material with delight. A homemade giraffe made from plasticine can be a cartoon character or as close as possible to a real animal. It all depends on the child’s skills and age, but in any case, the hobby will be useful for the development of motor skills and visualization of fantasies.
How to make a giraffe from plasticine
To initially have an idea of future work, you can use a diagram that shows all the stages of sculpting a giraffe from plasticine. The choice of color and size of the craft must be made before starting the process.
A simple plasticine giraffe for children
Thanks to its long neck, the giraffe is considered an unusual and tallest animal, and therefore attractive and interesting to children. It’s not difficult to make such a craft. Based on the master class, you can mold a giraffe from plasticine in stages. Step-by-step photographs will make the process simple and clear.
- Sculpting begins with the base - the body. Roll out a medium sized oval from the yellow mass.
- The next stage is blanks for the giraffe’s legs. To do this, roll 4 balls of approximately the same size.
- The blank balls are given a cone-shaped shape.
- Attach the legs to the body.
- Roll out a “sausage” from a mass of the same color and make it flat. Place a toothpick in the middle so that its edges remain free.
- The toothpick is tightly sealed with the mass, smoothing out the seams.
- They “pin” the giraffe’s neck to the body. Compact and level the joints.
- The next stage is making the head. To do this, make an egg-shaped blank from the yellow mass.
- To mold the nostrils, first roll two small balls of the same size and flatten them, making round indentations in the center. The ears are made triangular in shape. All sculpted parts are attached to the giraffe’s head.
- Roll two white balls, attach dark pupils to them and place them on the head.
- To make the horns, take a brown one, roll two sausages and attach them to the very top of the head. Check the strength of the attached parts and attach the head to the neck.
- Create a small ponytail, decorated with a brown tassel.
- Smooth out all unevenness and roughness. A stack is used to cut the mouth in the shape of a smile.
- To add spots to the giraffe, tear the brown mass into small, uneven pieces and flatten them.
- The spots are distributed over the entire body and neck of the giraffe, trying to ensure that they lie smoothly and the edges do not stick out.
Giraffe made of light plasticine
Step-by-step modeling of a giraffe from light plasticine brings joy and does not entail any difficulties. This is an excellent material that does not stain your hands and table surface, and also does not have an unpleasant odor.
- The giraffe's head is rolled into the shape of an egg, pointed on one side. The ears are sculpted in the form of petals. For the horns, choose orange color and make them spherical at the ends.
- Balls for the eyes are molded from a white mass, pupils from any dark one. Roll sausages for the upper eyelids and eyebrows. Use a match or toothpick to make the nostrils at the end of the nose.
- The body is created in a pear shape. Cover it with orange spots of different sizes. To attach the head to the neck, use a toothpick.
- Roll out 5 yellow sausages, slightly thicker on one side, these will be 4 legs and a tail. The hooves and tail brush create a brown color. All the parts are assembled and the body is given the required shape.
Application giraffe made of plasticine
An excellent option for crafts is plasticine applications. The giraffe will look beautiful among the African palm trees on which bananas grow. The principle of creating such paintings is simply “smearing” plasticine on cardboard and rolling it out with a rolling pin.
The first step is to create grass and sky by smearing blue and green plasticine. To make the task easier and make the application more interesting, you can take blue cardboard. In this case, only grass will be plasticine.
The body, legs, neck and tail of the giraffe are made yellow. Place all parts on the surface of the picture.
The next step is to create the head, ears, horns and eyes. Nostrils, smile and other features are created using a toothpick. A mane is created from the orange color using a stack. For the spots, take brown plasticine, first rolling balls and then flattening them.
The applique is completed by creating a palm tree and bananas on it. The leaves are made from green plasticine, making a pattern on them in a stack. They take pieces of the red mass, roll them into droplets and place them on the surface, forming a trunk.
The applique can be decorated with plasticine flowers, butterflies, etc.
Necessary materials
Before making a funny giraffe from plasticine, it will be useful to prepare materials and tools:
- stack - a safe plastic knife will help cut the material;
- plasticine of different colors;
- matches or toothpicks for constructing horns and fixing parts;
- A large plastic board or sheet of thick cardboard will be useful for appliqués.
Expert opinion
Ekaterina
Sculpting expert
So that your child can safely sculpt, lay thick film or paper on the work surface. Then you can remove it, the table surface will remain clean.
Progress of the lesson:
Good morning, girls!
Good morning boys!
And everyone becomes kind, trusting -
May good morning last until evening!
- Guys, a guest came to us today, I’ll tell you a riddle, and you guess who he is?
He's tall and spotted
With a long, long neck.
And he eats leaves -
Tree leaves.
Children: giraffe
Educator: That's right, it's a giraffe. Look, our giraffe got sick and all his little cubs - the giraffes got sick too (showing a giraffe with a bandaged throat)
. How can we help him?
Children: treat a giraffe
Educator: let’s you and I blind many, many giraffes with sore throats and be sure to treat them - tie their necks with a scarf, and now I’ll show you how you will do this.
-First, let's look at and determine what and how it is made of
Children: the torso and head are made of plasticine, and the legs and neck are made of cocktail straws.
Educator: What parts does a giraffe consist of?
Children: head is a small ball, body is a big ball, long neck, long legs.
Educator: tell me, if I put a small ball and put my head to my body, will I end up with a giraffe?
Children: no, the giraffe has a long neck.
Educator: That’s right, so for the neck I’ll take a cocktail tube and string the tube onto the body. Pointing it upward, and a small ball on the tube - the head
Educator: Guys, tell me, is my giraffe ready?
Children: no, he needs more legs.
Educator: look at the giraffe and pay attention, the giraffe’s legs are slightly apart and placed in pairs - two in front and two in back. Guys, if I put my legs together or line them up in a row, what will happen? Children: he will fall
Children: he will fall.
Educator: so when you sculpt giraffes, be careful.
-But before we get to work, let's prepare our fingers:
Finger gymnastics:
Tiger, giraffe, huge elephant, (for each name they bend Zebra, Puma and Bison, one finger, starting with
Two jackals, a hippopotamus, the little finger of the right hand)
There he stands with his mouth open.
And above them is the king of beasts (towards the end of the element, calling him quickly. Leo, we unclench our fingers)
-Now let’s sit down at the tables and make our “sick baby giraffes”
Guys, since our giraffe is sick, what do they need?
Children: scarf
Educator: look how I will do this: for this you need to make a sausage and twist it into a rope and close the neck.
Reflection:
- Guys, what a great fellow you are, what beautiful giraffes did you get? How did you make it?
-Guys, who came to visit you today?
_What happened to him?
-How did you help him?
Step-by-step photo lesson:
The easiest way to create a craft is from the upper parts. To sculpt the head, prepare orange and beige balls.
Stick the beige portion on top of the orange one. Wrap your fingers around the beige plasticine and pull it into your nose. Pierce the eyes and nostrils, mouth.
Insert white eyeballs and pupils, add ears.
Attach brown horns to the top of the head with a thin wire.
Keep moving down. Next comes the giraffe's long neck and body. Make them from the same orange plasticine.
Ladybugs from bottles
Surely such decorations have been seen more than once in photographs of friends or in various blogs. Simple to make, these ladybugs lift your spirits and create a relaxing, positive atmosphere.
To make it, you will need materials, most of which can probably be found in household supplies:
- plastic bottles,
- stationery knife or scissors.
- paints (preferably acrylic),
- foam balls or black plasticine,
- plastic forks,
- dense wire.
The bottom of the bottles is cut off, the sides are several centimeters high. The blanks are painted red on the inside in several layers.
Head: Styrofoam balls should be painted black or balls of the desired size should be formed from plasticine. To create antennae, you can use either painted tines of forks or wire cut into pieces.
Black spots appear on the red body of the ladybug. The head, antennae and eyes are attached to the resulting blank.
Such a simple craft made from waste material does not require much effort and time, but at the same time it fits perfectly as a cute decoration in the landscape of the dacha.
Lesson: making a giraffe
The tallest animal on the planet, the handsome spotted creature, an inhabitant of the African savannah... Prepare white, black, green, brown and orange plasticine for work. Let's sculpt the hero of Madagascar!
To make a cool giraffe, you need to know how to mold animals from plasticine. Step-by-step modeling plan for children on how to make a giraffe from plasticine. Let's make a funny giraffe with the children! Plasticine modeling lessons for children.
Giraffe made of plasticine
Children really like activities such as modeling, especially if the plasticine toy turns out beautiful. Try to choose beautiful colors to make the giraffe bright and colorful. Kids love bright colors!
We sculpt the eyes, horns and tongue of the giraffe
- Roll two small black balls for the tassels on the horns, two larger orange balls for the horns, two small white and two tiny green balls for the eyes and another purple ball for the tongue.
- Make round holes in the white balls. Roll out the orange and black ones into rollers.
- Also form a roller from the purple ball.
- Insert the green balls into the white ones and press them in a little. Roll out the purple roller into a long cake.
- Fold the black rollers in half and attach them to the orange rollers.
The next stage is the muzzle and ears
- Roll two small orange balls for the ears, two slightly larger brown and orange balls for the muzzle.
- Roll out the balls for the ears into spindle rollers.
- Make transverse notches on them. Flatten the brown ball a little on the sides.
- Blind the edges of the rollers together. Cut out the nostrils and mouth into the brown flattened ball.
- Roll nineteen balls from brown plasticine.
- Roll them into roller cones of different sizes.
- Flatten the rolls into triangular shapes.
- Roll one larger orange ball and five small ones from the brown one.
- Roll the balls into rollers.
- Stick the brown rollers to the sharp end of the orange roller. Blind them into a tassel.
- Roll four orange balls and one long roll.
- Roll the balls into spindle rollers. Cut the long roll into four equal parts.
- Make notches in the middle of the rollers and bend them in half - this is how the hooves should look.
- Attach the hooves to the legs.
- Roll a large orange ball
- .Attention: the head and body of the giraffe are one piece. Roll the ball into a long dumbbell. Flatten its upper end - this is the head.
- Attach the eyes and the orange part of the muzzle to the head. At the lower end of the dumbbell, cut through the navel. Stick spots on the body
- .Attach the brown part of the muzzle and horns to the giraffe's head.
- Attach ears, tongue, tail and legs.
Knowing how to make a giraffe from plasticine, now all that’s left is to do it with the kids. And be happy with what and how they do it! Children really need emotional feedback!
Crafts from waste materials - Children's master class. Craft from paper candy wrappers “Caterpillar”
Publication “Children's master class. Crafts made from paper candy wrappers...” Goal: to develop children’s creative abilities through making crafts from candy wrappers. Objectives: 1.Give an idea that candy wrappers are an excellent artistic material. 2. Develop children's imagination, artistic taste, fine motor skills; creative...
Image library "MAAM-pictures"
Project “We love different outfits, we make them from scrap materials at hand” for senior preparatory age Educator: Pominova Valentina Vladimirovna. PROJECT “We love different outfits, we make them from scrap materials at hand.” for older preparatory age. Relevance of the project. The relevance of the formation in children of primary ideas about the work of adults, its role in society and...
Master class for parents “Making massage mats from improvised material for the prevention of flat feet” Purpose: to introduce the technology of manufacturing non-standard equipment for the prevention of flat feet at home. Objectives: - deepen knowledge about preventive measures to prevent flat feet in children; — to identify the relationship between foot stimulation and health...
Master class on making a “Vase” craft from colored double-sided paper, corrugated cardboard and waste material Dear friends, good day! I bring to your attention a master class on making a “Vase” craft from colored paper, corrugated cardboard and a disk. Necessary materials and tools: • a sheet of double-sided colored paper • a cardboard paper towel tube •…
Crafts from waste material – DIY theater from waste material
The article “Do-it-yourself theater from junk…” In my work with children in theatrical activities, I use various types of theater. I bring to your attention a theater made with my own hands from waste material Theater “Egg” Goal: Improving the ability to invent and expressively tell fairy tales. Tasks: 1….
Consultation for parents in kindergarten “The importance of construction from waste material in the development of a child” Construction is a productive activity. Its main goal is to obtain a specific product. Construction from waste material creates favorable conditions for physical development, improves movements, stimulates the actions of various organs, strengthens the nervous…
Educational games with children using available tools Hands are a delicate instrument. Therefore, you will need a lot of toys to develop a child’s fine motor skills. “There is a time for everything” - this means that an educational toy should appear in the children’s room on time. So, you can introduce your baby to frame inserts at 10-12...
Children's master class "Craft "Chicks in a nest" from waste material - a container from a Kinder surprise" Children's master class "Craft "Chicks in a nest" from waste material - a container from a Kinder surprise" Necessary materials: Paper plate Brown paint Brush for drawing Water jar Cardboard from boxes Container from Kinder surprise Scissors Plasticine…
Pages: …
You probably all remember from the well-known morning program that you can make anything from a plastic bottle from a washbasin to a vacuum cleaner. What's worse about our talented children? They will certainly quickly cope with making charming flowers that will decorate both the group and any area in the flower bed near the garden. Children of older groups can even cope with butterflies, which are made not only from bottles, but also from leftover fabric that any mother can find.
Waste material is probably one of the most common materials for crafts, arts and crafts. Plastic bottles, food containers, cups, spoons and plates, plastic straws, kinder surprises, old things and other household waste are worth nothing, but using them in your creativity you can make real masterpieces.
DIY giraffes and giraffes
Contained in sections:
- Animals of Africa, hot countries. Construction, crafts 279
- Giraffe. All about giraffes for children 237
Showing publications 1-10 of 27.All sections | Giraffe. Construction, crafts
New
Master class on origami “Giraffe”
Description: This master class will be useful and interesting: for children of senior preschool age, educators, parents for joint activities with children. Application: for decoration of the game “Zoo”
,
“Africa”
, children can use their crafts in the game Goal: Making...
Children's master class on making a finger toy from cardboard and colored paper “Giraffe” for World Giraffe Day
This master class will be of interest to children of middle and senior preschool age. Controlling such a toy is not at all difficult - just insert two fingers into the holes and the giraffe is ready to go for a walk or to a watering hole. Purpose: for games, for dramatization, inventing fairy tales and...
Figures made from cups
Another affordable option for crafts made from waste material for kindergarten will be figurines made from plastic and paper cups. Disposable tableware doesn't cost much, and you'll probably have a few around the house. You will also need:
- plastic tubes,
- acrylic paints of different colors,
- colored paper,
- glue,
- scissors,
- markers.
The glass will become the body of the future figurine of an animal or insect, so it needs to be painted in suitable colors. Tubes will be needed to create antennae for insects and paws for animals. They are cut into pieces of the required length.
Eyes, a nose, ears, and also, if it is an insect, wings are cut out of colored paper. All parts are glued to the base cup.
The figurine is ready! Working with small parts like this will help develop your child’s fine motor skills.
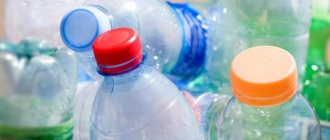
Crafts from plastic bottles
Plastic bottles are one of the most common types of hazardous waste. Nowadays you can find many examples of recycling this container on the Internet.
Ladybug from a bottle
You can make funny ladybugs from plastic bottles to decorate your flower bed.
To complete the work you need to prepare:
- acrylic paints and brush,
- candle.
- plastic bottle with cork,
- disposable fork,
- knife,
Step-by-step master class.
- The bottom of the bottle should be cut with a knife, painted on both sides with bright varnish and left to dry.
- Heat the tines of a plastic fork over a candle flame, bend and cut. This is an empty space for antennas.
- Make a head out of a bottle cap. Paint it black, dry it, and attach it to your mustache.
- Draw or glue paper eyes.
- Draw black dots at the back.
- Glue the cork head to the body of the craft.
The goods are ready. If desired, you can make a whole family of such insects from bottles of different capacities.
Mushrooms for the garden based on a plastic bottle
Original garden figurines will perfectly decorate the dacha and look original on the flowerbed and pedestrian area of the kindergarten.
You can make your own mushrooms from scrap materials at minimal cost to decorate an area near your house.
To work you need to prepare:
- sealed plastic bottle for milk or automotive chemicals,
- concrete, acrylic paint.
- old pan roof,
It's a simple job.
The basis of the craft will be the bottle. She is the stem of a mushroom. The work begins with attaching the cap to the bottle. This is the base of the mushroom cap. It can be secured by fixing the handle in the neck of the bottle using a mechanical link. Or with a fabric-based patch. Scotch tape is no good. A cement mortar is being prepared. The solution is carefully coated with the bottle and cap. The work is carried out in several stages
After the concrete layer has dried, the next one is carefully applied. When the product takes the form of a mushroom, it is dried. The leg and hood are varnished. The brown or red color of the cap is achieved by adding powder paint to white acrylic paint.
The mushroom is ready. This garden figurine will last for at least one season. It does not suffer so much from humidity as it is afraid of mechanical damage. A soft plastic bottle is not suitable as a base. It will pierce, the concrete layer will crack and fall off.
Various flower pots for home and garden, garden figurines are made from bottles and jars. The simplest example of such figures is found everywhere. These are big bottle pigs.