Types of folding barbecues
There are two types of transformers most often found on the market:
Brazier-suitcase
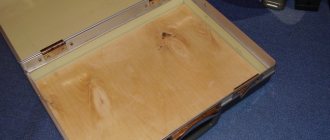
It is also called a mangal-diplomat. Compact design, folded into a flat suitcase. Most models have a handle that makes the barbecue easy to carry in your hands. A steel diplomat does not take up much space, fits easily into the trunk, and does not require much time to assemble.
Of the minuses, it is worth noting a large number of fasteners. The hinges, rollers or screws they use are usually the first to fail. It all depends on the quality of the product.
Brazier-book
He’s also a grill-laptop. It's easy to open and fold back, plus it has minimal hinges and rivets. The main disadvantage of this design is the triangular shape of the roaster. In order for the burning coals to be at the desired level, they need to be poured in a larger volume compared to classic rectangular barbecues.
How to choose metal
Braziers can be made from sheet metal, cast iron, heat-resistant, stainless or
galvanized steel. It is better to use heat-resistant steel so that the product does not deform.
Cast iron grills are reliable and durable. But it’s hardly possible to do them yourself. Cast iron is not suitable for a folding barbecue; it is very heavy.
Galvanized steel is used, but not widely. There are different opinions about the safety of this raw material. If the entire grill is made of stainless metal, it will last indefinitely.
Advantages and disadvantages
Folding barbecues are in deserved demand due to a number of advantageous features:
Light weight
This is one of the main requirements for camping models, since not everyone goes out into nature by car. This condition is met by reducing the thickness of the walls of the device. It is important to strike a balance between lightness and durability.
Compact dimensions when folded It is convenient to carry in your hands or bag, or put in storage. The size of the case also depends on the amount of metal. The thicker the walls, the larger the dimensions of the structure.
More durable than collapsible ones
High-quality barbecue suitcases use steel sheets with a thickness of at least 1.2 mm. The walls of the firebox do not burn out longer, retain heat better and do not deform longer. The latter is especially important, since the distortion of the walls will make it impossible to assemble the barbecue into a neat case.
Extended equipment
Some manufacturers provide additional work surfaces, skewers, and grill grates in their barbecue models. This is convenient because all elements are adjusted to size. Plus, when purchasing one device, the buyer immediately receives tools for frying meat.
General description of the design
The grill is a compact metal product consisting of 4 walls, a bottom, and legs. Mobile products, depending on the dimensions and types of construction, are divided into:
- transformers . They unfold conveniently and easily, and often have a hinged connection between the parts;
- grill and barbecue sets . Such structures are made mainly of stainless steel, and are delivered to the picnic in the form of separate parts.
Criterias of choice
Before purchasing a barbecue, we recommend that you pay attention to the following parameters.
Material
The best solution is AISI 340 stainless steel. It is resistant to corrosion, is an environmentally friendly material, resistant to high temperatures, and is lightweight. However, a stainless steel device is more expensive than rolled steel, which is widely used for the manufacture of portable braziers.
Length
In folding models, this figure varies from 40 to 60 cm. The length of the brazier determines how many skewers can be placed over the smoldering coals at the same time.
Double bottom
Some manufacturers equip suitcase grills with an additional bottom, where ash from burnt coals is collected. And the air gap between two sheets of metal provides more even heat.
Below we have compiled for you a rating of the best models of barbecue suitcases, and have also prepared instructions with which you can make a transforming barbecue yourself.
When it's bad weather outside
Snow, rain, and drizzle prevent you from enjoying the holiday, and they also prevent you from lighting a fire. In this case, a barbecue with a roof is required.
You can build a gazebo with a barbecue with your own hands. To do this, we choose a spacious area,
so that the wooden parts do not get hot from the heat source. We drive in the metal support posts and fasten the veins between them. We cover it with light and durable profiled sheets. They can also be secured on the sides for protection from the wind. We put a grill in the center and no vagaries of the weather are scary.
Note!
How to make a garden (construction) wheelbarrow with your own hands: detailed instructions with description + 85 photos of fresh ideas
How to make a bench with your own hands - 90 photos of the best ideas from the master. Review of finished drawings, diagrams and dimensions of the bench
How to make a hot smoked smokehouse with your own hands: drawings, dimensions, choice of material, photos of finished options
Do it yourself (instructions)
A folding barbecue suitcase, needed outside the city, can be made with your own hands. We have prepared detailed step by step instructions. As a result, you will get something like this:
The basis for the structure will be a 25 mm corner. It will be 600x400 mm. First you need to mark, then move on to the band saw.
If you don’t have this or that tool in your arsenal, this does not mean that it is impossible to repeat this or that design. For example, this operation can be easily performed using the most ordinary grinder. But if this tool is not in stock, then the remaining option is a hacksaw. Oh, you'll suffer with her.
Cut all the necessary blanks. You should try to save metal.
Weld the base. To obtain an angle of 90 degrees, a primitive and fairly accurate method is used. Attach the blanks to the pre-welded profile pipes using clamps.
For the future, it is recommended to make a normal corner clamp. It will be easier this way and it will take much less time to work.
Boil the outer corners in the same way, after chamfering them.
Next comes the processing of the seams on the grinder. For example, when making sheathing on a homemade lathe, this technique shows good results. This way the workpiece turns out smoother.
The next stage is making the bottom. Like the entire structure, it must be cut from a 2 mm sheet of metal. This thickness should be enough. If not, you can always add stiffeners.
To ensure a tight fit of the sheet to the frame of the corners, it should be made a little smaller in size.
If the leaf is not fresh, it is recommended to clean it with a grinder. This will make it much easier and more pleasant to work with him in the future.
Check everything locally. It should fit perfectly.
Attach the bottom using electric rivets. To do this, mark and drill 6 mm holes.
Now weld the bottom through them to the base on the sides.
Next, work on the legs. Their length will be 550 mm and they will be removable. They are attached to the base using an M12 thread. To do this, you need to make nuts from a 20x20 mm square. Of course, you can simply weld larger versions, but the easy way is not always the best. Moreover, their production will not take much time.
Using the same principle, make plugs for the ends of the pipe and weld them in, after installing a piece of thread inside.
The nuts should also be welded to the base, maintaining an angle of 90 degrees.
As a result, the main structure turns out to be quite rigid and stable.
Since the grill must be mobile, now you should work on the folding wall. Weld a couple of corners to the two main ones. They provide additional rigidity and act as fasteners for the walls.
You should try to hide all the welding: it’s more beautiful and there will be more space inside.
The metal itself will definitely react when heated. To do this, we weld stiffeners from a 15 mm pipe. Let's cut it at an angle of 60 degrees.
Next, drown it, process it on a homemade grinder, and weld it.
Make markings for skewers. As practice shows, 50 mm from the edge and 90 mm between them is a lot, you need to take a little less. The height of the walls of the grill should be optimal: 125 mm - just right.
Make slits at the ends of the corners. With their help the side walls will be attached.
The folding parts are completely ready. You can install them on awnings (purchase at hardware stores, one piece costs about 35 rubles). There is no need to resort to the services of a lathe.
First prepare the area for the awnings. It will be much more accurate to do this with a homemade drill.
Go to the side walls. To fasten them in the grooves, use the most ordinary m8 bolts. Adjust so that the wall fits freely and secure temporarily with superglue.
When cutting the thread, they will no longer turn.
The middle insert is made in the same way. Initially it sits tightly, but whether it’s good or bad can only be known after the first frying.
Ready-made handles of a suitable color and elegant shape fit perfectly into the overall style of the barbecue. True, sometimes you have to grind it down a little.
Everything is ready for painting. Degrease and take the product outside. It is better to paint with heat-resistant enamel up to 1000 degrees in two layers.
While the paint is drying, you can quickly sew a cover for the skewers. It is very convenient when they lie in their place, in the grill.
Now everything folds inward.
The weight of the barbecue is a little more than 20 kg.
It comes together in literally a matter of minutes. With such a barbecue, cooking outdoors is much safer.
Tools and materials required for work
To make the perfect homemade barbecue you will need the following materials and tools:
- stainless metal with a thickness of 2 to 4 mm;
- 10 mm reinforcement for making legs;
- drill;
- grinder or hacksaw;
- hammer;
- vice;
- roulette;
- Sander;
- fasteners;
- welding machine;
- pencil and piece of paper for creating a drawing.
Important : the thicker the metal used to make the barbecue, the stronger and more durable the product will be.
Drawings with dimensions
Examples of different designs:
There are also drawings with dimensions in the next chapter.
Product design
Before starting work, you should prepare a project for the future barbecue. Schemes can be downloaded from the Internet. But when using them, the result will not always meet expectations. Therefore, it is preferable to develop drawings yourself, especially since it is not at all difficult.
Detailed drawing of a collapsible kebab-suitcase indicating the dimensions of the structure
Barbecue maker-suitcase disassembled and assembled
Schematic drawing of a barbecue indicating approximate dimensions
It is important to think through every little detail and provide for everything so that the finished product is ideally suited for the given operating conditions. You can draw drawings with a pencil on paper or in special computer programs such as Compass, AutoCAD or SolidWorks. When designing yourself, you need to follow these principles:
- The product must include a minimum number of components so that the kebab maker can be easily and quickly assembled and disassembled.
- The parts should be small so that they can be easily transported.
- When choosing the length of the legs, remember that the height of the barbecue when unfolded should be about 1 meter (plus or minus 200 mm).
