Why bind a book? How will this master class be useful? The answer is quite simple. Maybe the cover of your old but beloved book is torn or doesn’t look as attractive as it did when you bought it. Or maybe you printed it from the Internet. After all, it would be more pleasant to store a printed publication not as a stack of sheets, but in a bound form. Or you wrote your novel, a collection of poems, and the printing house asked too high a price for a couple of copies. This is where our interesting educational master class on how to bind a book at home comes in handy.
DIY book binding
Of course, it will not be possible to achieve the same quality as in a professional printing house, so if you need to bind a book for sale, it is better to turn to professionals for help. If for home use or as a gift, then our master class on how to bind a book yourself is what you need. Who doesn’t love handmade work - it increases the value of the gift. And also such a handmade item can serve as a new interesting decor for the home.
When designing a book, you can give free rein to your imagination, play with the colors of the cover, the main material, and decorate it to your liking. In addition, if you are interested in how to bind an old book at home, then our master class is an excellent way to restore your favorite literature.
Do-it-yourself hardcover binding of publications is a very interesting, accessible and not too complicated hobby that can be done by a craftsman with any experience. Moreover, homemade hardcover books are not that expensive. It does not require complex equipment, expensive tools, or large space for work.
Preparing for bookbinding
Making binding at home begins with preparatory work.
First of all, a book taken for binding must be separated into separate parts (notebooks): remove the binding cover from the block, separate the cover, carefully remove old glue from the spine, then carefully, without disturbing the integrity of the sheets from the spine of the notebook, remove the old connecting threads or staples .
Having separated the top cover of the binding, you need to open as carefully as possible with a knife the strip of fabric that served to fasten the binding to the spine of the book. The next step will be to inspect the sheets and carry out restoration work.
Necessary materials
Required material
Before we get started with the master class on how to bind a book yourself at home, let's talk about what materials and tools we will need.
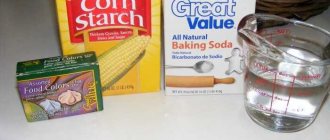
First of all, for binding you will need PVA glue; it perfectly bonds paper, fabric, and thick cardboard. You will also need white threads for stitching; thin wool or iris threads are perfect. If there are none, take a thin white rope.
Thick gauze or a piece of cotton fabric to create a tight, strong spine.
Cardboard of any color to strengthen the cover. Choose a very dense material so that it barely bends. It can be difficult to purchase one, but it can be replaced. To do this, glue 2-3 sheets of cardboard together.
To cover the cover, you can use either colored paper or fabric: choose according to your taste or depending on the design of the book. You can also print the image on paper that is not too thick.
The spine cover is a small cloth roller. To get an idea of what we're talking about, look at the spine of a regular hardcover book. You can buy one in craft stores or online. You can replace the material with dense canvas. In general, a captal is a decorative detail that covers the unsightly spine and insides of a book, so you can do without it.
How to make a leather-bound book
In this article you will learn how to make a leather-bound book with your own hands. Not everything is as complicated as it seems, and together with the master we will go through all the steps of making a book.
Tools and materials:
-Sheep leather 0.4 mm; -Fibreboard; -96 sheets of E3 size paper (110 g/m2); -2 sheets of A3 black paper (140 g/m2); -Jute cord; -Hemp thread; -Brass decorative corners; -Brass nails; -Amethyst; -Decorative detail for stone; -Gold leaf; -Satin ribbon; -Linen fabric; -Paint for leather; -Parchment; -Coating; -Tools for working with leather; -Jigsaw; -Wax; -PVA glue; - Mallet; -Press; -Epoxy adhesive; -Glue moment; -Scissors; -Knife; -Drill;
Step One: Preparing the Paper
For the book, the master uses 110 g/m2 paper, it is stronger than 80 and more convenient to write on. The format used is A3, i.e. sheet of paper 297×420 mm. Fold each sheet in half. Places sheet within sheet, forming blocks of 4 sheets. Smoothes out the folds with a bone knife. Then he stacks the blocks and presses them with a press. The stack remains under the press for several hours. According to the advice of the master, in the absence of a press, you can use any suitable load.
Step two: spine
Marks six lines on the fold side. The first and last lines are 2 centimeters from the edge. Then he makes cuts along the lines with a hacksaw.
Next, the master uses a tool such as a chair with a backrest. Four jute strands are tied to the back. She places the sheets of paper to be stapled on the seat of the chair. Aligns the sheets by height and the cords by the distance between the four middle cuts in the sheets. Now pulls the thread through the outermost hole of the first sheet (inward) and pulls it into the next hole (outward). Ties the thread to the cord, and pulls the end into the next hole. Thus, having reached the outer hole, he pulls the thread into the hole of the next sheet. So you need to sew all 96 sheets. To understand the process, a video will be posted at the bottom of the article.
After stitching the sheets together, apply PVA glue to the spine. Glue on a flyleaf made of black paper. Places the glued book under the press.
After the glue has dried, the craftsman uses a mallet to give the spine a semicircular shape.
Glue three satin ribbons.
Then a piece of leather cord is sewn on with a black thread on top and a blue thread on the bottom. I glued linen fabric to the top of the spine.
Step three: cover
The master makes the cover from 3 mm chipboard. Cuts to size. Places the cover on the book and marks where the cords are placed. Drills four holes. The holes need to be drilled at an angle, then the cords will not protrude too much. Pulls out the cords. He fluffs their ends and glues them to the wrong side of the cover. To prevent glue from getting on the sheets of the book, place parchment paper.
Cut out and glue a decorative overlay from cardboard.
Step Four: Leather Binding
Now it's time to glue the skin. First, the leather is glued to the spine of the book. Using a thread, the cords under the skin are highlighted. After the spine dries, the skin is glued to the book covers. He trims the edges and turns them inward. Glues the endpaper (the first black sheet of paper) to the cover.
Step five: finishing
Next comes the finishing of the cover. Installs brass corners on the corners of the cover. Glues the “golden” foil edging.
The master makes a belt-lock from thick 2 mm leather. Turns the skin black. Makes a gold edging. The master fastens the belt using brass rivets, having first drilled a hole in the cover.
Glues the stone to the rosette. Glues the rosette with stone and corner decorative elements to the cover. Apply wax to the belt buckle.
The book is ready. As you can see, if you wish, you can learn this fascinating and possibly small-income business.
Source
This post may contain affiliate links. This means I earn a small commission from links used at no additional cost to you. See my privacy policy for more information.
book, leather, binding, cover
Required Tools
And of course, before you bind a book at home, you need to prepare the necessary tools. There are not many of them, but they will definitely come in handy during the work process.
For such purposes you will need:
- two boards;
- two clamps;
- metal file;
- paper knife (stationery);
- scissors;
- glue brushes, tightly packed with bristles.
Having prepared all the materials and tools for work, you can begin to learn how to bind a book yourself.
How to make a book cover from leather - DIY leather cover
Before creating leather book binding with your own hands, you should prepare all the necessary tools and material. To work you will need:
- Natural or artificial leather.
- Ruler, scissors.
- Medium sized cloth.
- A stationery knife, ten cotton pads.
- A meter of thick cardboard for the cover.
- Wooden sticks.
- Thick paper for endpapers.
- Wood glue.
Step-by-step instructions on how to make a leather book cover:
- The original book cover and flyleaf are removed. The book must be open. The hand rests on the first pages and presses them tightly. At this moment the cover is pulled in a different direction. It is important to be careful, otherwise you may damage the pages or binding.
- The spine of the publication is cleaned - adhesive residues, excess paper. Cotton pads are alternately wetted in water. They carefully remove the layer of previous glue along the entire binding. As a last resort, a tissue flap can be used instead of discs.
- The sheet type for the endpaper is calculated. You can make the first page a single color or add drawings, patterns, etc. When choosing, it is important to consider the topic of literature. The future endpaper is trimmed according to the size of the publication. The height of the sheet should ideally match the contours of the book. The width should be twice the width of the publication.
- The cut sheet is folded in half. Before bending, it is important to determine the direction of the fibers. The paper should only be folded along the grain. Otherwise, there is a high probability of deformation of the sheet under the influence of humidity. An incorrectly folded endpaper also causes a loud rustling sound when opening the publication. You need to create two such sheets.
- The folded paper is applied to the cover of the literature. Size compliance is checked. If the copies are suitable, they are glued to the first and last sheet of the book in one piece. When applying glue, it is important to distribute it correctly around the perimeter. A strip of no more than one centimeter is applied. The layer is as thin as possible.
- The fabric is fixed in the spine area with glue. A small piece of material should have a rectangular shape. It is carefully smoothed out, all wrinkles are removed.
- At the bottom and top of the spine, small pieces of fabric are fixed with glue. They make the imitation binding more similar to the original. A drop of glue is applied to a rectangular piece of fabric. A thick thread is glued to the center, after which the ends of the fabric are glued together.
- Rectangles are cut out of ordinary cardboard. These are two bases for the future cover. They are attached to the publication one by one for the purpose of correcting and adjusting the sizes. According to the standard, the book cover extends beyond the boundaries of the publication pages on three sides.
- A cardboard strip is cut out for the spine. The size must completely match the length and width of the spine. The strip is connected to the rest of the elements using tape. Afterwards, a one-centimeter indent is formed between all parts of the cover.
- The work with the skin begins. You will need thin leather of medium elasticity. Then it will be easier to cover the book with leather. The outer side of the cardboard is carefully coated with glue. The application layer should be thin. The entire surface of the cardboard must be completely coated.
- The skin is placed on top of the cover coated with glue. It is glued to the paper with a special spatula. During work, light pressure is allowed, but the material cannot be stretched.
- When the leather covering is completely glued, the excess fabric around the edges is trimmed. You must leave 2.5 cm as a reserve on all sides of the book. Triangles of corners are cut off.
- The cardboard is smeared with glue from the inside, the allowances are folded. Corner bends should be handled with the utmost care.
- After the glue has completely dried, it is necessary to check the tightness of the fit of the new cover. If there are no flaws, a new cover is glued to the front and back endpapers. Next to the spine on the front side, dowels are placed on the cover. The updated book is then sent to press.
Using the above technique, a beautiful leather folder and leather notebook can be created. You can sew any logo on top of the cover.
Before starting work
Before you bind a book into hardcover yourself, take some leftover material that you won’t mind throwing away if it fails. After reading the master class, try to make your first binding on them - a rough draft, so as not to spoil the good material and the printed book.
To understand the principle of assembling a hardcover book, we strongly recommend that you carefully examine the printed products from the store. If there is a book that you don’t mind throwing away, then take it apart, inspect the spine, cover, feel the density so that you have an idea of what we need to do with the finished print.
Where to begin?
Recently I received several almost identical questions in PM. Where to begin? Where can I get materials and tools? How to make a beautiful book (notebook)? But in general, all questions can be reduced to one denominator - “How to make binding when there are not enough materials, tools, time, money, and so on?
I will try to answer all novice bookbinders at once. Everything is very simple - if you have an idea and desire, then anything is possible. I repeat, for the first binding, no special tools or materials are needed at all.
First, you need desire and understanding of what you want to do. That is, read any brochure for beginners. This is necessary to understand the sequence of operations.
Then just create, using what you have at hand.
Almost any stationery paper is suitable for the block, but if you don’t even have that, then the pages can be typed out from old magazines. For the endpapers you will need two sheets of thicker paper.
The main thing is not to assume that on the first try you will get a masterpiece. You're just learning, so the first block can be made from anything. For the first block you need about 50 - 60 sheets. Each sheet, folded in half once, is four pages of the future block. The only requirement is to determine the direction of the fibers of the paper from which the block is made. How to do this can be easily found on the Internet or in issue No. 2'1 of the Hand Binding magazine. The fold line of the sheets should go along the fibers. From every 6 sheets of paper folded in half, create notebooks by nesting the sheets inside each other. From 60 sheets we get 10 notebooks. Next we sew a simple block until you don't need a sewing machine or cords. All you need is a needle and thread. There are many sewing patterns; first you need to choose the simplest one. If all the sheets of paper were the same size, and folding them in half was done carefully, then the first block need not be cut. In the first binding, this is quite acceptable.
Glue the endpapers to the block using regular flour paste as glue. There are a lot of recipes and methods for preparing it on the Internet, some of them are also given in issue No. 2'2 of the Hand Binding magazine. If you don’t want to mess around with paste, you can use PVA glue. Then we align the spine by tapping it on the table, and place the block on the edge of the table so that the spine protrudes a few millimeters. On top is any board with a load. We glue slime onto the spine, for which we use a piece of gauze or any thin natural fabric. The captal can be made from a scrap of fabric and a piece of twine. After gluing the captal to the block, we cover the surface of the spine with a strip of paper. You can use regular newsprint for this.
Now all that remains is to make the lid. I will not describe in detail how to make a binding cover. This is described in any bookbinding manual. You will need two thick pieces of cardboard for the sides, a strip of thinner cardboard for the edges, and a covering material. If there is no cardboard, then it can be glued together from sheets of paper. When gluing sheets, you need to alternate sheets with longitudinal and transverse fiber directions; final drying of such homemade cardboard must be done under load to avoid deformation. Almost any paper, paper wallpaper or fabric can be used as a covering material.
Having made the binding cover, we insert the block into it and immediately under the load. Your first binder is ready. After the book (notepad) has completely dried, you need to carefully examine it from all sides, noting shortcomings and errors. Open it up and see how the hinge works. This is necessary to take these shortcomings into account in future works.
Conclusion - it all depends on you, on your desire and understanding of what you are doing. For the first work you do not need a large set of tools and materials. If there is no experienced master next to you who is ready to teach you “from scratch,” then learn yourself. Your trials, your mistakes, your successes - this is all the way to success, to your goal, where each result is a small step towards mastering a wonderful hobby - bookbinding. As you master the intricacies of this business, you will need various tools and devices, the range of materials you use will expand, and new knowledge will be required. Recommendations and advice can be found in the group “Hand Binding, Book Repair and Restoration” (https://vk.com/pereplet_kaluga) and on the new website “Hand Binding” (https://propereplet.ru).
Create, learn, don’t despair at the first failures, don’t hesitate to share your work, good luck!
Preparing a book or working with sheets
The book can be printed in any size, but the optimal size is A5. Once you've printed the stack (or perhaps you want to restore an old edition), you need to line it up. To do this, tapping on a board or desktop from all sides, collect all the sheets into an even stack. Before doing this, be sure to carefully review them so that they are smooth, beautiful and fully printed.
When the edges become, in your opinion, even, very carefully place the stack on the board so that the future spine protrudes slightly beyond its limits by a few millimeters. This makes it easier to apply glue. And also carefully place the second board on top of the stack - the press. Thickly coat the protruding edge of the book with glue, possibly in several layers. Let it dry, 2-3 minutes is enough, but it’s better to wait 5-7.
There is another way to create a hard and strong root. This method is most often used in printing houses. It's called a "notebook". However, in this case you will have to do a little more work. Each notebook (a stack of 6 sheets) will have to be stitched manually or using a high-quality sewing machine.
In addition, to prevent the book from looking square, you will have to trim the edges, which is almost impossible to do at home.
When the glue dries, the pack can be moved. But still, carefully remove the top board and slowly slide the spine back onto the table. Clamp the future book between the boards with two clamps. Leave for several hours. Ideally, PVA glue needs 12 hours to dry, but you can continue working after 3–4.
You cannot clamp a book with clamps without boards, otherwise marks will remain.
The initial gluing of the sheets is necessary so that the pack holds more firmly, does not move, and is more convenient to work with later. This is an important stage of the master class on how to bind a book at home.
Book binding
In this master class you will learn how to make a beautiful hard book cover with your own hands. This technique is useful for creating various creative albums, notebooks and notebooks. We will use the simplest materials and techniques that even a novice craftsman can handle. The time and effort required to create this craft will be minimal. Step-by-step instructions will help you understand the process.
The idea of making a book binding with your own hands should appeal to those who are interested in scrapbooking. Fill a homemade notebook with clippings, photographs and applications - this will be a great gift for loved ones. When using special paper, you can also make an original sketchbook for sketches and sketches. Using regular printer paper, your homemade book binding will form the basis of a great, unique notebook. In short, you have many options.
What do we need?
- several sheets of good paper
- cardboard
- sewing thread
- wide ribbon
- braid
- burlap (or other fabric)
- PVA glue
The number of sheets will depend on how large the format of your book binding will be, as well as the thickness of the homemade notebook or album. The main thing is that all sheets of paper are the same size, and their number can be reduced or increased as the assembly progresses.
Progress
Fold the paper in half and make markings so that the tape can be placed at equal distances from the edges and exactly in the center. Take a look at the photo to see what it looks like. Poke holes with a needle at each marked point.
Make a double thread and tie a knot. We thread it through the holes and immediately attach the fabric tape to the future book binding. Please note that the ends of the tape should be left protruding 3-4 centimeters.
Gradually we increase the mass of sheets and continue making the filing.
When the binding is complete, tighten the tapes well to make the paper fit snugly. Then glue the ends of the ribbons to the paper.
Next, you need to measure the length of your homemade book binding and cut the fabric so that it completely covers it, and protrudes from the sides to approximately the middle of the notebook sheets. Pre-glue another tape onto the binding itself to better secure the sheets together. Also add a ribbon - it will become a bookmark in your notebook.
Secure the fabric with glue. Then place the binder under the press.
The next step is to measure the parameters of our book binding. We cut out the front and back covers from cardboard so that they cover the sheets evenly and protrude only a few millimeters from all ends. You also need to cut out the central piece, which should be equal to the width of the binding and the length of the cover.
We cut out a piece of fabric to cover our hard book cover and fold about one and a half centimeters of fabric inward. Pay attention to the central part - the distance between the cover and the strip is left intentionally.
Glue the fabric to the cardboard. Next, we paste our binder into the cover. In this case, the first and last sheets must be connected to the cover with glue. Place the craft under the press for a few minutes.
A beautiful hard book cover is ready! If desired, you can add interesting details to the cover. Inscriptions made with fabric paints and appliques look very beautiful. It's a good idea to pre-embroider the fabric. If you are planning to give your craft to someone, you can write the person’s name - it will be original, unique and cute.
We recommend you watch: notebook for scrapbooking without stitching
Creating a spine
Let's proceed to the second stage of the master class, how to bind a book with your own hands. Remove the clamps after drying. Move the book again to the edge of the table by 3 centimeters. Holding the product with a clamp, use a pencil to make marks along the spine every 2 cm. On the marks, make even cuts with a depth of at least 1 mm. They should be even and perpendicular to the spine.
Insert the white rope into the cuts; it should fit very tightly there. This is an equally important stage in creating the spine, because the threads will help strengthen the book and prevent it from breaking or falling apart. Coat the spine and thread with PVA glue, making sure it flows into the cuts.
While it dries, prepare the material. The piece of gauze should be 1 cm smaller than the spine, but the width should be equal, and add 2 cm on both sides. Prepare a piece of captal.
In addition, for the spine you will need a small piece of paper, the size of which is 7–8 mm less than its length.
Thickly coat the edge of the book block with glue, and also saturate the gauze and captals with it. Do not glue the excess edges of the fabric to the sides of the book; they should hang freely. Apply gauze to the spine, a piece of captal on top and bottom, and a piece of paper on top. Press both the gauze and the paper firmly into the stack. Leave the product to dry overnight.
How to quickly bind a book?
One of the simpler and less labor-intensive ways to make binding at home is glue binding. Execution order:
- The printed book is placed on the board.
- Align the sheets using a ruler.
- The sheets are fixed between the boards, secured and tightened with clamps, leaving five millimeters of the spine outside the border of the board.
- Glue the spine.
- Cover design. The thickness of the spine is measured; in the process of marking the cover, its width plus two cm is taken into account (one cm on both sides).
- Formation of the book. The glued spine is inserted into the cover and secured with staples and dried.
- The final stage. Trimming a book block on three sides.
In general, binding a book is not as difficult as it might immediately seem. And if you master the technique, you can make a nice gift with your own hands, for example, a notebook or a weekly planner.
Endpapers
The next stage of the master class on how to bind a book into a hardcover yourself is the creation of the hardcover itself.
Take several sheets of thick paper, you don’t have to choose white, you can use any color. Fold the endpapers in half. If your book is A5 format, and whatman paper is A4, then its edges will have to be trimmed a little so that they are not larger than the book.
Having folded the endpaper, try it on the book, and then, smearing a strip of glue at the fold (4 mm), glue it to the block. Turn the book over, glue the second endpaper and put it under a press to dry for half an hour.
At this time, you can start creating the cover.
Cover
First, cut out the cardboard. The hardcover is in three parts. Measure the dimensions of the block and then mark them on pieces of cardboard. Two identical crusts should be 8 cm longer than your block of sheets and equal in width. The spine should be as long as the crust and as wide as the block.
Next, select paper of a suitable color and cut it out. In height, it should protrude beyond the crusts by 2–3 cm on each side. On its reverse side, make the following markings, starting from the middle: the dimensions of the cardboard spine, the crusts on both sides, 8 mm indents on each side and 2–3 cm to the edge.
Then glue the cardboard and paper together. Glue the spine and two crusts onto the markings.
Stepping back 3–4 mm from the corner of the cardboard, cut the corners of the paper diagonally. Coat the protruding edges on the sides of the future cover with glue and stick them on the cardboard.
Place the press on the cover and leave for 1 hour.
After that, we move on to working on the cover decor. You can sign the book manually by drawing a picture or gluing a printout or sticker. It's a matter of taste here.
Compound
All we have left is to connect the block and the cover. Place the book against the cover, making sure it is not upside down. Then coat the spine with glue and press it to the block. Lubricate the hanging several centimeters of gauze with glue. Glue it to cardboard - the crust of a book. When applying, firmly press the parts together. Then attach the endpaper side of the book to the cardboard, thereby covering both the gauze and the side pieces of paper.
Close the book and run a ruler or corner of a ruler along the spine to sharpen it.
Put the book under the press overnight, and it will be ready in the morning.
Our master class on how to bind a book at home is completed. After spending a few days, you can design any collection, your own or a book printed from the Internet, without spending a significant amount at the printing house. We hope you find the knowledge of how to properly bind a book useful, because using this method you can create many other useful things, for example, albums, sketchbooks or notebooks.
Preparing the skin.
First, you need to get a couple of pieces of vegetable tanned leather. The pieces should be rectangular in shape and slightly larger than a book block.
Then find an embossing design on the Internet or draw it yourself. I search for drawings on Google, most often among tattoo designs. I download them to the computer and adjust them to the size of the future binding. Please note that part of the top cover on the spine side is free from the design by about 2cm. We will subsequently cover this strip with a leather binding strip. Accordingly, there is no need to apply embossing there.
What size should the leather be? Very good question. I have included all sizes in the picture below.
Embossing.
Embossing leather is not as easy as it might seem. You can achieve really cool results if you stray from the “right” path. I will give a little explanation of how I do it, you can read more about artistic embossing here: Engraving vegetable tanned leather.
You need to start by preparing the leather for embossing.
Using a stylus or pencil, transfer the design onto damp skin.
Using a rotary knife, I cut out the outlines of the design.
I use the beveler to hit the perimeter.
Next, I fill in the background with a background stamp.
You can add volume and shadows to the design by using “pear”, matte and other stamps.
Final cover editing.
To make the cover look prettier, I process the ends. First I remove the chamfer with an edge cutter.
Then polish the ends. You need to wet the ends with gum traganth or water and rub it with a wooden slicker. Many people recommend using gum traganth, but I have not found that it works better than water.
If you wish, you can cover some areas of the design with acrylic varnish to give the cover a more “multi-colored” look. Acrylic varnish will not allow the antique to penetrate deep into the skin and the latter will be lighter. I covered the leaves of the tree with one coat of varnish, and the apple, the snake's eye and its tongue with three.
I apply antique gel. It's a simple process - just rub it into all the nicks and scratches to remove any excess gel. The longer the antique gel remains on the skin, the darker it will be.
I apply several thin layers of acrylic varnish.
Then I polish everything with a cloth or paper towel. Pay attention to the tongue, eye and apple:
We fasten the cover with a leather spine.
I have found that soft leather on the spine lasts longer. The book opens easier and the cover does not push the book block out of itself. Take a good piece of 1-2mm chrome tanned leather and cut a strip to the desired size. The cover should be made in such a way that this leather strip covers the area of the cover without embossing.
Three things can be learned from the picture below:
- soft leather on the binding covers the spine and is glued to the covers
- soft skin should be about 2cm higher than the cover.
- Additionally, you can cut a strip of hard, thin cardboard to strengthen the spine. The cardboard strip should be as wide as the spine and as tall as the cover.
My cover is 24cm high, so the soft leather is 29cm long.
The spine is about 5cm (book block and cover), which means you need to add a couple of centimeters on each side - and you get the width of soft leather.
Then I sand the edges of the soft leather along the length. This way it will fit flush to the cover and will not cling.
Next I line up the parts of the cover, the soft leather and the cardboard reinforcing strip. I glue everything with PVA glue.
When the glue dries, we will get a ready-made “box” for the book block.
Glue the cover.
Place a piece of paper under the endpaper to protect the book block from glue. I apply glue to the endpaper with the exception of a narrow strip near the spine and close the cover. I repeat the same operation on the back side of the cover.
Then I put the book on the table and place knitting needles in the places indicated in the photo.
I put a weight on top and leave it for a couple of days.
Carefully open the dry book. If done correctly, you will have a spine that is strong and easy to open.
We admire it.
You now have a beautifully bound book. And it doesn’t matter what book is inside - now you can admire and admire your work, as well as use the book for its intended purpose.
Author of the solobo master class
Translation LeatherThoughts