Greetings my beloved readers and blog guests!! Once upon a time in the distant past I worked as a teacher in a kindergarten, the work was very interesting, but poorly paid... But today we will not talk about that!! It’s just that anyone who has worked in this system knows that all the materials we use in creative work with children must be environmentally friendly or certified. Therefore, homemade tools come to the aid of purchased stationery. And the simplest means for development is salt dough.
Salt dough has been familiar since ancient times and is still popular in our time, because it is very easy to make, and it is a pleasure to sculpt from such a soft material. And what kind of crafts you get!! Just a sight for sore eyes!! I haven’t worked in the garden for a long time, but at home with my baby we often do modeling, and what was my surprise that not everyone knows how to prepare the dough and what can be obtained from it. That's why I decided to write an article on this topic.
And for a change, you can make New Year’s crafts with your kids from scrap materials, see ideas here.
Classic salt dough recipes
Salted dough for sculpting crafts can be prepared in three main ways. Each proposed option allows you to obtain three working masses with different properties:
A dense mass for sculpting panels and large parts is prepared from 1 part flour, 1 part salt and 0.75 parts water.
For the classic recipe for salt dough for sculpting crafts, you will need 1 part each of flour, water and salt (moreover, you need two types of salt - coarse and finely ground). This option is a viscous and very plastic base that allows you to sculpt the smallest details.
A very soft salty dough for creating crafts is prepared from a mixture of 1 part flour, ¼ part hot water, 1 part salt and PVA glue. After thoroughly mixing all the ingredients, the working mass is wrapped in cling film and left for 30-35 minutes or until completely cooled. A similar recipe is used to create three-dimensional figures with relief.
There are also several rules regarding the preparation of salted play dough:
- First of all, the dry ingredients are mixed in a container, and only then water (hot or cold, depending on the recipe used) is poured in fractionally.
- For subsequent decoration of dough crafts, it is better to give preference to wheat flour, as paint adheres better to it. You can also add fat to the dough to obtain an even decorating coating.
- When preparing any of the three recipes, you should avoid iodized salt, otherwise large cracks may appear on the surface of the finished product.
- Drying out of the working mass can be prevented by wrapping the dough in cling film.
- If the dough is too thick or too thin, you can add water or flour (depending on the situation).
- Finished salt dough crafts should be dried in the oven at low temperature. Mostly acrylic paints or gouache are used for decoration, and an additional layer of acrylic varnish will protect the toy from excess moisture loss.
There are quite a lot of nuances in working with salt dough, following which you can get stylish and durable toys, souvenirs, refrigerator magnets and even a set of decorative dishes.
How to make salt dough
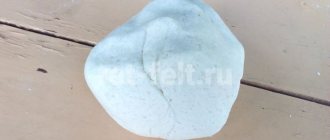
The recipe for making play dough is simple.
- You need to take “Extra” salt and flour in equal proportions, one glass each.
- Mix in a deep bowl and add half a glass of ice water.
- Knead the dough well. To prevent the dough from sticking to your hands, you can add a tablespoon of vegetable oil.
- If you plan to sculpt small decorative elements, it is also recommended to add a dessert spoon of PVA glue to create a more elastic consistency of the dough.
- Dough products can be painted with paints in finished form, or you can make the dough colored initially.
- You can get color in two ways: add gouache or acrylic paint when kneading the dough, or add food coloring to the water according to the recipe.
Different colors of dough are easily mixed, creating new shades.
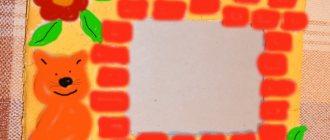
Gift fridge magnets
To create original souvenirs in the form of a magnet you will need the following kit:
- Dough.
- Cutting board.
- Rolling pin.
- Felt.
- Glue and magnet.
- Cardboard, pencil, scissors.
- Toothpicks.
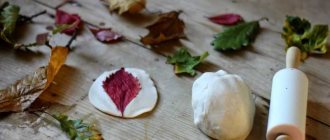
For decoration, acrylic paints, brushes, varnish and coloring samples will be useful (if desired, the master can use his own ideas for decoration). How to make a craft from salt dough with your own hands:
- Prepare a template in advance. You choose a drawing or figure yourself, and then draw the outline of the future image on cardboard. The shape is cut out with scissors.
- In a separate container, knead the dough using one of the well-known recipes.
- On a cutting board, roll out the salted dough into a thin layer using a rolling pin.
- Place the prepared mock-up on the dough, lightly pressing it into the soft mass.
- The template is removed, leaving an imprint of the future magnet on the surface of the dough.
- Using a sharp knife, cut out the figure. Using a toothpick and other auxiliary objects (tweezers, sticks, buttons), highlight the relief and small details on the surface of the magnet.
- Dry the product in the oven.
- Focusing on the sample, paint is applied to the surface of the magnet.
A piece of felt is glued to the back surface, on top of which a magnet is placed. It is quite difficult for a novice master to choose the right design, and therefore you can use ready-made projects and ideas.
Technology for making textile crafts
Now we’ll tell you directly about how to sew a matryoshka doll with your own hands. To begin, take the white fabric selected for the top of the toy and fold it in half. We transfer the pattern onto it, but not the whole thing, but only its upper part. We cut along the contours and get two blanks that will become the face and back of the toy. We make a round hole in one of the parts. Next, take beige fabric and cut out a small square from it. We cut out a strip from dark red fabric; it will become the doll’s handkerchief. We also prepare a strip of lace equal to the length of the burgundy material. Now we sew a lace braid to the dark red stripe from one edge. Turn the piece over and iron it from the front side. Place a scarf blank on one edge of the prepared beige square. We cover these two parts from above with a white cloth with a hole cut in it. We fix all the elements with pins and sew them with a hem stitch (or buttonhole). Turning the product over, cut off the excess beige and dark red materials. The result is a head with a face and a scarf on the forehead.
Volumetric hedgehog toy
Three-dimensional toys are used as creative work for older children. Before starting classes, you should prepare a standard set of materials and tools, as well as a plastic backing as a base. Master class on creating crafts from salt dough:
- The working mass is mixed in a container. The dough should be kneaded thoroughly so that the mass acquires sufficient elasticity and no air bubbles remain.
- On the prepared base, a central part is sculpted, which should have the shape of a drop.
- To obtain black eyes and nose, you can use pre-colored dough or large beads.
Hedgehog needles are made using nail scissors. The blades of the scissors are inserted into the dough, an incision is made and the layer is slightly lifted upward until needles are obtained. By analogy, several consecutive rows are formed. The next step is to dry the product at low temperatures.
After the dough has hardened, you can begin to apply paint and open the hedgehog with acrylic varnish. Separately, the master can make a couple of apples or a mushroom, which is placed on the back of the toy.
Master class on making animal crafts for children
And since most of us do little creative work, those who have children try to come up with interesting activities just for them, so that joint activities will be very exciting.
I suggest you, together with your daughters and sons, make this funny hedgehog, look for photo instructions further.
We will need:
- Salty dough;
- Scissors;
- Beads
- Paints.
Manufacturing process:
1. Make a drop-shaped piece from a piece of dough.
2. Make eyes and a nose from beads.
3. Now we will make needles, for this we take nail scissors and make small cuts, lifting them up a little.
4. We perform the next row in a checkerboard pattern and so on until the entire back is covered in needles.
5. Dry the finished toy in the oven. We color the hedgehog at will.
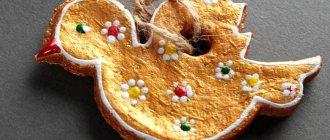
It’s also very easy to make a bird and decorate it with bean seeds; it’s not only easy, but also useful for developing children’s fine motor skills. Watch the video of how this craft is made:
Of course, there are a lot of options, and if you surf the Internet, you can find a whole storehouse of ideas, and your leisure time with your child is guaranteed. I share souvenirs that I personally liked:
- Magic fish
- Cows
- Princess Frog
- Mice
- Snail
- Blue elephant
Decorative dough plate
A beautiful and bright plate with vegetables will become a real decoration for your kitchen apron. For work, you should select a plate of a suitable size and a standard set for creativity in advance. Step-by-step making of crafts from play dough:
- Mix the dough ingredients in a container and stir thoroughly to remove air bubbles.
- Food coloring can be added directly to the dough at this stage, or you can decorate it after drying the finished product.
- On a cutting board, roll out a layer of the working mass to the proper thickness.
- Using a plate, a deep impression is left on the layer.
- Using a sharp knife, I trim off the excess dough.
- The decorative plate must be supplemented with fruits and berries from the dough. To do this, they sculpt a bunch of viburnum or grapes, an apple, a pear (any fruit at the discretion of the master).
The plate is sent to the oven until the product completely hardens. Immediately after cooling, begin decorating the surface. Apply gouache and then clear acrylic varnish.
Using salted dough, you can create the most vivid and unusual images: figurines to decorate a wall clock, your favorite mug for tea and coffee, souvenirs for the mantelpiece. New Year's crafts made from salt dough with your own hands are very popular.
Benefits of the test
When mom rolls out dough and makes pies, children love to watch the process and take part as much as they can. Baking dough is not entirely pliable to children's hands; it is difficult to work with it carefully.
Making a craft from salt dough with your own hands is not difficult even for a very small child. The material is very plastic, absolutely safe, and does not require special skills. It is easy and cheap to make from raw materials that are always available in every home.
The dough does not particularly stick to hands and clothes, and can be easily washed off if necessary. Due to the strong salty taste, the child will not want to eat it.
After production, the craft will need to be dried. This is done either naturally, at room temperature, or in the oven, which significantly speeds up the drying time.
Photos of crafts made from salt dough
0
Devices for work
To create interesting crafts from salt dough with your own hands, you will need various additional tools and equipment.
A rolling pin for rolling out the dough into a layer, cookie cutters for cutting out figures, stencils and patterns for creating crafts from salt dough, a plasticine stack, cocktail tubes for making holes, a fork, sticks, toothpicks, a felt-tip pen cap.
Beads, buttons, lace, watermelon seeds, dry peas, pasta, cloves and black peppercorns, and seashells are suitable for decorating crafts.