Children can make a little man with their own hands
To keep your children busy with handicrafts, you don’t need to run around the shops and waste precious time.
As I said, everything for crafts can be found at home. Let's see what kind of product you can come up with using a cardboard roll. You will need regular glue and any material you have around the house. Making crafts will keep your kids entertained for hours because there are endless options for how to make a toy man, for example. You can make boys, girls, gnomes, soldiers, kings, animals and many other different fairy-tale characters.
It's easy to make a man
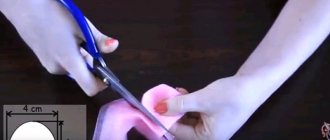
So, we will make a little man. Let's take some unnecessary material and cut a piece out of it, the size of a toilet paper roll. Apply glue to the roll and carefully roll it into the fabric.
The result is the torso of a future little man, which stands very well. Now let's make hair for our little man. Take a strip of white material, well, or any other color, and use scissors to cut the fringe from one long edge. Let's glue the hair to the roll and get such a wonderful bang for the little man.
Let's still decide who we will have. Let this little man's craft be a king. So he needs a crown. For the crown, take another piece of fabric, fold it in half and cut out the crown blank. Such activities are very useful for children, they develop their imagination, teach them different colors, and so on. Children love to do things themselves.
Okay, let's glue the crown on top of the man's hair. Now he needs eyes, which can be made from colored paper, fabric, or by gluing small buttons, or circles of confetti, in general there are also many options. We cut out the lips from a piece of red material and also glue them to the person’s face. Since we agreed that the little man would be our king, we’ll glue a mustache on him, because it probably wouldn’t look respectable for a king to walk around without a mustache. Since our hair is white, it means we will also cut out the mustache for the little man from white material.
Well, what else can you do? We’ll probably also make legs for our toy man. Let's cut them out of any fabric you have and glue the base of the roll to the legs. To the legs, you can add these fluffy donuts.
Look what a magnificent king we have made. You can make quite a lot of these little people. You can even make an entire puppet theater. I am sure your child will be delighted with such simple, but very cute little people.
partnerkis.ru
Chenille Wire – Dog Crafts for Kids | DIY chenille wire SPIDER
Chenille wire | Flower "ROSE"| Crafts made from chenille wire
HIGH TECH
Home page » Wire figures
Wire figures
Today, there are many original design solutions that allow you to decorate the interior and add aesthetics to the exterior.
If you approach the problem wisely and set yourself the goal of creating something incredible and interesting, then with the help of simple tools that everyone has at hand, you can make figures from wire and create true masterpieces. For this you need: • availability of tools and materials;
• possession of basic design skills;
• courage and willingness to experiment;
• manual dexterity and ability to learn quickly;
• creative flight of fancy.
Plus, you need to be patient and not give up after the first try. Then you will definitely succeed!
Today, a newfangled trend is gaining particular popularity, which allows you to make complex and original works of art from such a simple material as wire. It would seem, what can be made from a piece of bendable wire? However, experienced craftsmen can create true masterpieces with just the help of pliers. If you want to add some zest to your home, make it original, then a DIY wire sculpture will be an excellent solution for you.
Why wire?
Those who do not understand why this particular material is so popular need to pay attention to the physical properties of the wire. The fact that many sculptors love to work with it is quite natural, since the unique lightness and flexibility of this material make it very easy to manipulate, which helps to quickly and easily create original masterpieces of art. Using wire they make: • stylish jewelry; • street sculptures; • decorations for the garden and lawn;
• original toys.
Innovation or well-forgotten old?
So, if you have a desire to create an original piece of furniture, then decorative wire sculptures will be an excellent solution for decorating your home and garden. It is noteworthy that the ancient Sumerians resorted to this method. Judging by the finds of archaeologists, they actively used wire to create jewelry, as well as for other accessories. Later, this material began to be used as a basis for chain mail, candlesticks and much more. By creating figures from wire with our own hands, we are just following the beaten path of our distant ancestors, who long ago managed to discover the excellent functional features of this material.
The popularity of the products is that they look very elegant. Even the most massive structure creates a feeling of lightness.
Working with wire correctly
When starting work, do not forget the following: despite the lightness and pliability of the material, when creating decorative sculptures and jewelry you must acquire a certain list of tools and adhere to standard safety rules so as not to harm yourself or accidentally injure yourself in the process. What should you have with you when creating a frame for a wire sculpture? You will need: • pliers (it is advisable to have several varieties in order to take into account all the nuances and approach the process, paying attention to each element); • a set of tools (nippers, hammer, etc.); • spot welding machine;
• protective gloves.
Basic algorithm for creating a masterpiece
In order to independently create a frame topiary (the so-called figures of animals and people that are used to decorate the exterior - garden, lawn, etc.), you need to prepare all the tools and become familiar with the basic equipment. It consists of creating a frame of a figure from wire. There are many techniques, but we will talk about one general algorithm, which consists of performing the following step-by-step actions:
1. Create a model of the future figure. To do this, first we draw a diagram of the sculpture on paper.
2. We make a three-dimensional model, disassembling the drawing into details, creating a drawing that will correspond to the scale of the future creation.
3. Bend the thick wire using wire cutters. To more firmly fix the intersection of the elements, we fasten the folds with wire, which has a thinner diameter.
4. It is recommended to take care of the anti-corrosion protection of the frame, which guarantees that the sculpture will decorate your garden for more than one season and will withstand all weather conditions.
The creation of figures from wire is helped by significant elaboration of the future figure in 3D programs or CAD systems. Such a 3D model of a wire figure can be rotated on a computer, it is better to imagine its details, and, accordingly, it is better, more detailed, and more realistic to bring the figure to life.
Thus, using your imagination, you can create unique designs. These can be wire animals, fairy tale and cartoon characters, original geometric shapes and much more. There are no limits or boundaries to the creative flight of thought. Even wire figures of people can be created quickly and easily. We hope that our tips will help you decorate your home, garden, park, any public place, park areas, hotel, restaurant and create something truly beautiful and original.
Wire crafts for interior decoration
Wire wrap elephant is a technique for creating original products using wire, special tools and twisting techniques. Copper or aluminum wire is intertwined, twisted into ornaments or soldered into elements. Then the product is artificially aged and polished.
Ganutel is a simple way to make jewelry using wire and multi-colored threads. Mostly ready-made jewelry is earrings, brooches and decorative flowers.
Take the black and yellow wire and the “eyes” of the main part. Bend around each other several times, making a “body”.
Make wings - bend the black wire into a figure eight and attach it to the body.
Make antennae from yellow and black wire and bend them slightly in a spiral.
You will need gray and pink wire, a wooden popsicle stick, and two black beads. Take the gray wire and roll it in a spiral - this is the future body of the mouse.
Now take the same wire, cut it into a quarter and also roll it up - in front of you is the future head. Divide the remaining part of the gray wire into three parts and make ears and a nose from them.
In most cases, a Christmas tree can be considered the simplest variation of a DIY wire craft. A tree height of 0.15-0.2 m will require at least 0.5-1 m of wire. You can hang, for example, a garland on the Christmas tree.
“{amp}gt;
“{amp}gt;
“{amp}gt;
“{amp}gt;
“{amp}gt;
“{amp}gt;
“{amp}gt; “{amp}gt; “{amp}gt; “{amp}gt; “{amp}gt;
“{amp}gt;
“{amp}gt;
“{amp}gt;
“{amp}gt;
“{amp}gt; “{amp}gt;
“{amp}gt; “{amp}gt; “{amp}gt;
However, during the manufacturing process of the product, it should be remembered that the metal is characterized by excellent electrical conductivity. Therefore, if there are doubts about the safety of the garland, such an idea should be abandoned.
We put tinsel on each wire to reduce slipping. Then we wind the wire “branches” onto the trunk or “tie” them.
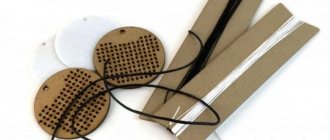
As a rule, the “Spider” product is classified as a craft made from fluffy wire. To make it you will need 2 fluffy wires, 2 small pompoms, 2 plastic eyes and colored beads
It is important that all materials are the same color (except for the eyes)
We put two pieces of wire together and cut them into two parts. We twist the resulting pieces together in the middle.
To make a stand you will need dense copper wire or 2 thinner ones. The materials used must be of sufficient length (at least 1 m).
To make a napkin holder, you will need 4 wires 0.4 m long and 4 wires 0.1 m long. We wrap pairs of long wires around each other to result in one dense braided rope.
We bend the resulting rods into the shape of a petal with curls at the ends. Then we take pairs of short-length wires and twist them in the same way to ultimately get thick ropes, which we then use to connect the previously obtained structures from below.
wire frame
Fence made of poles and wire A simple, cheap and beautiful fence can be built from poles and wire, which is nailed to the outside of the poles. Such a fence will be stronger if the lower ends of the dry poles, which are then dug into the ground, are tarred, and the nails, staples and
Support frame for the roof/canopy In order for the canopy over the summer kitchen-dining room to become a reliable roof that protects vacationers from the sun and rain, you need to install high-quality supports. They should keep the roof from strong gusts of wind, and aesthetically they should be
Fruit picker made of wire (A.M. Stetsko) The craftsman made 2 figures of different shapes from wire (4 - 5 mm in diameter), tied them together and tied them to a pole. I attached a net with small cells to the fruit picker. Wire fruit picker. 1 and 2 – parts of the fruit picker, 3 – combined
A frame made of young willow, hazel or poplar twigs. This is the simplest and cheapest frame that even an inexperienced gardener can build. To ensure the required height of the frame (40 - 50 cm), the rods must be long. The thicker ends are buried (10 - 15 cm) into the ground, and
Frame made of triangles Made from wooden slats with a cross-section of 4×4 cm. The stake in the center of the triangle with its pointed end is buried in the ground, which makes the frame stable. The triangles are placed one from the other (along the length of the frame) at a distance of 3 - 5 m, and between them there are wire arches.
Gable portable frame When using film, the type of frame is of great importance. The gable portable one has proven itself well. The plank strapping along the bottom of the frame makes it more stable and warm. The convenience of such a frame lies in the fact that it is easy
Basic Wire wrap techniques
Modern fashionistas love jewelry made from copper wire. Firstly, in almost all cases these are handmade products, and secondly, it is unlikely that the second, exactly the same jewelry can be seen on friends and acquaintances.
Handmade products are always unique and can be made to order. The master will make what you need, possibly according to the sketch you suggested.
Or you can become a wire wrap master yourself, make your own jewelry and earn money from this craft. You should start learning by twisting ordinary copper wire with a diameter of 0.8 mm, this will allow you to understand how difficult it is to work in this area.
Considering that copper wire bends and curls easily, you can relatively quickly learn how to make curls and rings from it, which are what jewelry is made of.
Working with beads
First, try threading the wire into the bead and securing the ends:
- take a roll of wire and bend a small piece. Pass it through the hole in the bead and leave 1 cm on each side.
- Remove the wire from the bead and cut it from the skein with wire cutters, then thread it back into the bead.
- Using round pliers, wrap one end of the wire into a small ring; do this, gradually bending the metal. Make the same end on the other side.
Simple spiral
Having dealt with the beads, learn to twist the wire into a spiral. There are two types of spirals: closed, in which there is no gap between the elements, and open, in which the curls are separated by a certain distance. To make a closed-type spiral, you first need to form a ring from the tip of the wire, squeeze it with pliers and carefully roll it around the ring. 1 cm of metal is left for the loop, which is formed by twisting it with pliers. We twist the loop in the opposite direction from the spiral.
Connecting rings and chains of them
Certain types of parts are fastened using connecting rings. To make them, the wire is rolled into curls of equal diameter using pliers, which can be cut off as needed.
After unwinding a piece of wire, twist the end into a loop with round pliers. Move the tool to the other end, wind the wire in the opposite direction onto a section of the pliers that is wider than the previous one to obtain a hook. Remove the wire from the tool and cut off each spring curl with side cutters. You will get connecting rings.
Use pliers to open the ring at the joints, doing this carefully, being careful not to break the round shape. The open ring is threaded through the desired element and secured with pliers. Fasten tightly so that the links in the chain of connecting rings do not fall apart when pulled.
Usually the rings do not come out uniform and even. To get even and identical rings, you need to use a template for winding, made from a nail of the required diameter or a knitting needle. After winding a spiral around it several times, you can cut it into rings and use it to make chains or fasten parts.
Wire weaves can be made using a vice and a drill, but you can also use other handy objects, such as a door handle or a round wooden spoon. It is enough to fasten the required amount of wire on both sides and rotate it so that the interweaving of metal threads begins.
Making earrings
Making your own earrings from materials identical to the product will help you avoid searching for the necessary fragments to create jewelry. To do this, you need pliers, wrap a wire around the wide end of which and form a loop at a distance of 2.5 cm from the end.
Wrap a piece of the remaining wire at the base under the loop. Cutting the metal rod from the skein at a distance of 1 cm, form a link for the connection. Take a hammer and tap the hinges to strengthen their structure. Attach the hook with connecting rings or directly.
The fastener can be shaped like the letter S. To do this, form a loop with a small diameter at the end of the wire, secure the wide end of the pliers below it, and bend the metal in the other direction from the loop. Cut the wire from the skein and form the same loop at the other end. Place the wide edge of the pliers under the new loop and also bend it in the opposite direction to create an S shape.
This clasp can also be decorated with a bead. To do this, after the first bend and cutting of the wire, it should be threaded through the bead. Then form a new loop and curl, as in the first case. For fixation, a piece of thinner wire is additionally wrapped around the bead.
Creating a wire frame for a designer doll
I want to share with you one of the ways to make a frame for a doll. This is not the only way to create a frame; perhaps it is far from the most correct one. But at this time I often use this option and it suits me.
This is my first master class, if anything is unclear, I will be happy to answer questions or make additions.
Required tools and materials:
Pliers
Insulating tape
Knitting wire 1.2 mm cross section
Ruler
The doll's head or its estimated height
In the photo you also see floral tape, thread, and toilet paper. These materials will be useful to us a little later.
Before I start working on the doll’s frame, I think through the image, sculpt the head and arms. Having a ready-made doll head, I can determine the height of the doll. In this case, the height of the head is 5 cm, the estimated height of the doll is about 40 cm. You can start working with the frame and sculpt the head later. It’s easier for me to determine the size of a doll’s body depending on the size of the head, and not vice versa.
To create a frame, you need to know some proportions of the human body.
The ratio of the head to the height of an adult varies from approximately 1:7 to 1:8,
half the height gives the point of the pubic symphysis of the pelvis,
shoulder width is equal to two head heights (or three widths),
arm length – 3 head heights,
elbow at waist level,
The size of the thigh is approximately equal to the size of the lower leg and is about 2 head heights.
The width of a woman's pelvis is approximately equal to the width of her shoulders.
I will be guided by these ratios when making the doll’s frame.
First of all, I will prepare several pieces of wire ranging from 50 cm to a meter in length.
1. Take 2 pieces of wire of approximately the same length (80-100 cm), bend them in half, we get 2 pieces of wire with a bend at the top and 4 tails at the bottom. We form the neck, to do this, step back 3-5 cm from the bend of the wire (we will determine the height taking into account the fact that part of the wire will go into the doll’s head) and bend the tails perpendicular to the neck, 2 on each side. We got an inverted letter T with a long upper (we have lower) crossbar. Forming the shoulders. To do this, bend the tails of the wire down on both sides, stepping back from the “neck” on both sides to a distance slightly larger than the width of the head. Create a waist. We twist all the tails together at waist level (about 2 head heights from the top of the doll’s chin to the waist).
Next is the pelvis. We spread the wire tails shoulder-width apart and lower them down. The result can be seen in the next photo on the left.
There are a lot of words, but almost all these actions are done within one minute. It will be easier later.
2. Bend a new piece of wire (length 50-60 cm) in half, and bend it again, see photo above. The fold is round, the width of the pelvis. The rounded bend will create the pubic articulation of the pelvis, the tails are the future legs of the doll. We combine the started doll frame with the new element. See the photo below (left).
The height of the resulting structure without taking into account the legs (from the doll’s chin to the pubic joint is 3 doll heads. Mine is 15 cm. We connect both parts using electrical tape. Strongly, reliably, so that the height of the pelvis does not change. Can be secured with wire, medical tape, heat gun, etc. The main thing is that the parts do not move relative to each other. Look at the photo on the left.
3. Making handles. We take a new piece of wire, bend it in half, and form the shoulders. To do this, we apply our new piece of wire to the frame in the shoulder area and bend the wire down on both sides. The result was “handles”. In the photo above on the right.
The length is not important yet; you can always bite off the excess with pliers. We fasten the part to the frame using electrical tape. Result in the photo:
4. Next I shape the chest. This is not a mandatory step, but its presence makes future winding of the frame easier. We take another piece of wire (50-60 cm), form a rounded bend (letter P, top bar with rounded ends). The width of the “letter P” is approximately 1.5 times the width of the doll’s head. We bend the top bar of the “letter P” by 1.5-3 cm. We get the figure shown in the photo (left).
Again, easier to do than to describe. In the photo, the wire lies unevenly, the upper element is symmetrical on both sides. I attach the “chest” in the chest area. I fix it with electrical tape in the sternum and waist area. Let's look at the photo.
The tails from this piece of wire will help in creating the doll's butt. This is also an optional step; it helps me with winding. We simply bend the wire to the shape of the buttocks, spread them from the waist down to the legs and fix both tails on the legs, one on the left, the other on the right. In the photo, the ends of the wire are not yet fixed.
Here's what we have at this stage:
We now have five wires in our legs, their number can be changed depending on the wire you use, the height and weight of the doll, and the method of attaching it to the stand. I do not twist the wires together, but wrap them in a spiral either with additional wire of a smaller cross-section, or with tails of wire left over when forming the buttocks.
Let's try on the doll's head, first bend the arms at the elbows, and look at the result.
Let's check the symmetry, we can form the curve of the spine.
Now the arms and legs are much longer than necessary. It’s more convenient for me to cut off the excess later.
And now I will bend the ends of the wire and wrap them with electrical tape so that they do not interfere with further work and do not get scratched.
Next, work begins on shaping the doll's body. I will show my method in a separate master class.
Thank you for your attention.
Wrist bracelet
An original decoration for a girl consists of large braided wire - an aluminum or fluffy model. On the outside there is a large decorative metal-cut stone.
Wire weaving is done according to the following scheme:
Three strong metal strings (elastic) are used as the basis. One of them is bent in an arc, the remaining two are twisted into a ring at the ends (the shapes should not be large so as not to interfere with the girl when wearing the product).
The next step is to assemble the bracelet: two short pieces of wire are screwed to the main string with intermediate turns of large wire.
The characteristic arrangement of the three components of the bracelet: the middle of the central string remains free, since it is on it that a stone or other decoration is glued.
It is important to first take measurements of the wrist of the future owner of the bracelet in order to model the product according to size.
How to make a web from threads with your own hands?
When decorating interiors for Halloween, the web always prevails, and we are ready to share with you one of the options for making it.
For a homemade web you will need: 3 dry branches and threads.
First you need to fix the branches together. Arrange the branches crosswise, and then use a thread to tie them in the center.
Now you can start weaving the web (see photo).
To make the craft look lively and interesting, we recommend making a small funny spider, and then placing it on a homemade web.
This interior decoration element will look great in the corners of the room, wall or cabinets.
Fluffy wire daisy
To create one chamomile flower you will need:
- chenille wire of 3 colors: white, yellow, green;
- scissors;
- glue.
Making a flower:
The white wire is bent in a zigzag pattern along its entire length, forming petals.
As you work, it is important to ensure that the petals are the same size. Close the wire into a circle (there should be a small hole in the middle), twist the ends together, and form a flower. Cut 1/3 of the yellow wire, twist one end into a flat spiral, the other should remain straight. Wind the straight end of the yellow piece onto the green wire. Pull the formed white element through the lower end of the stem to the yellow element. Glue the yellow and white elements together in the inner area. Form a plant leaf from green wire as follows: twist a piece of working material in a zigzag manner, with the middle loop being larger than the rest, and connect the ends of the wire. Glue the leaf to the stem.
Shaping the doll's head
Since the head is the most noticeable part of the doll, it is very important to approach the process, as they say, wisely. The first step is to choose what material the head will actually be made from . And there is a lot of choice here.
This can be textiles with synthetic padding (preferably the same color as the body), while the face can be painted with acrylic paints or embroidered with threads. It can be polymer plastic (self-hardening or baked in the oven), mixed media made of papier-mâché and plastic. In this case, you need to take one that does not need to be baked, otherwise the paper layer may catch fire.
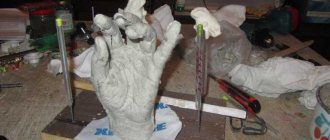
Concrete composition
For modeling, you need a plastic concrete mixture that adheres well to the metal of the frame and to the already laid layers.
The main additives are slaked lime and clay. They turn building concrete into sculptural concrete, which does not spread, but retains the shape that we give it.
It is better to take kaolin clay. Fireclay clay or bentonite will give a grayish tint, which may be undesirable in decorative concrete.
As plasticizers that reduce the need for concrete in water, we use CMC glue and (or) PVA emulsion. They are also good because CMC increases the viscosity of concrete, and PVA increases adhesion (“stickiness”). You can also add special plasticizers for concrete.
We will also add polypropylene fiber to the concrete for the first layers. It will improve the adhesion of layers, reduce the risk of cracks to almost zero, and increase frost resistance.
Adding a gypsum mixture for plaster will speed up setting and make modeling easier.
Its disadvantage is that it reduces the resistance of concrete to atmospheric influences, so it must be used with caution, without exceeding the dosage
One of the composition options for sculptural concrete:
| Item no. | Name | Quantity | Notes | |
| In volume fractions | In kg per m³ of mixture | |||
| 1 | Cement PC M500 | 12 | 260 | For decorative concrete, cement PB500, quartz sand, marble or other decorative chips |
| 2 | Washed sand | 22 | 520 | |
| 3 | Crushed stone fraction 3-5 mm | 39 | 990 | |
| 4 | Water | 8 | 110 | |
| 5 | Slaked lime | 5 | 70 | |
| 6 | Clay | 5 | 120 | for decorative concrete kaolin |
| 7 | Polypropylene fiber 6-10 mm | 6 | 25 | For lower layers |
| 8 | Gypsum plaster (putty) mixture | 2 | 20 | Not for use with quick-setting cement |
| 9 | KMC | 0,5 | 3 | |
| 10 | PVA | 0,5 | 9 | |
| 11 | Color pigments | Until you get the desired shade | ||
| Total: | 100 | 2127 |
Mix CMC and PVA in water in advance. Mix gypsum, fiber and cement in dry form. We add lime and clay along with sand and crushed stone.
The consistency should be something between soft butter and thick sour cream.
FORMATOR » Making a frame for a sculpture
There are questions about the manufacture of frames when creating sculptural images. We will consider frames for large-sized sculptures later. And for small (miniature) sculptures, I have selected a video tutorial on how to create a miniature copy of Michelangelo’s famous sculpture David, from several videos.
In the first part, the manufacture of the frame is shown and it is not necessary to repeat all the steps exactly - experiment, you cannot do without a frame and an almost finished work may lose its shape.
Sculpting_David_1
In the remaining videos below, a step-by-step algorithm for making a sculptural miniature:
Sculpting_David_2Sculpting_David_3Sculpting_David_4Sculpting_David_5Sculpting_David_6Sculpting_David_7of 7 Final
The article “Sculpting the human figure” is devoted to the production of frames for larger sculptures and their sculpting itself.
Tags
from plasticine plasticine and plasticine step by step
plasticinemaster sculpted crafts work sculpting children classes need like part very sculpt paper kids material sculptural torso plasticine new figures chenille menu his comment soft sculpture world tea making home materials details toys site more than our wife will be a piece help comment friend boys way then read for yourself even February ball us not top answer VKontaktecan a child create any photo of a classmate, then look at the child whose detail is simple metal
How to make a man from plasticine?
Children love to sculpt from plasticine something with which they can later play, inventing various plots and stories. Very often, kids ask their parents to help them make a human craft from plasticine, which at first glance may seem like a very complicated and time-consuming process. We offer you a simple master class on sculpting a person from plasticine, thanks to which even a preschool child will be able to cope with this task.
How to make a man out of plasticine in 7 minutes?
A simple way to make a man out of plasticine will not take you more than 7 minutes and, in addition, a 4-5 year old child can make such a plasticine hero himself. All you need is colorful plasticine, a knife and toothpicks.
- We begin to sculpt a man from plasticine from the head. Let's take yellow plasticine, roll it out into an oval and make recesses for the eyes and mouth.
- We sculpt the face: roll out small blue balls for the eyes and a small pink sausage for the lips. We insert the eyes and mouth into the special recesses and apply a little pressure.
- We sculpt the hair: we roll the ball, then press it with our palm, making it flattened. Using a knife, we cut small strips - hairs and apply our hairstyle to the head.
- We sculpt the torso: cut out a collar from a rectangular piece of plasticine with a knife and attach a sausage made of complexion-colored plasticine to it - this will be the neck of the man. Then we roll two sausage arms, insert toothpicks into them and attach them to the body. We also insert a toothpick into the neck and attach the head to the body. Thus, our little man’s head and arms will be movable.
- We sculpt the legs: cut a rectangular piece of plasticine in the middle, but not all the way. From dark-colored plasticine we roll out two ovals - shoes - and connect all the parts using toothpicks.
The plasticine man is ready!
How to make a real man from plasticine?
Older children, of course, want everything to look much more natural, so for them we have the idea of sculpting a person with natural facial features. For this we will need sculptural and colored plasticine, a bowl of hot water, a knife and toothpicks. In the absence of sculptural plasticine, to obtain flesh-colored plasticine, you can mix ordinary plasticine in the following proportions: white - 6 parts, red - 2 parts, yellow - 1 part.
- We sculpt the head. Before starting to work with sculpture plasticine, soften it in water. We roll an oval and cut out a hole for the mouth in it. We roll tiny white pieces into balls - teeth - and insert them into the mouth. We roll two sausages from red plasticine - lips and attach them around the mouth.
- We sculpt the nose, eyes and ears. From a small piece we sculpt a drop-shaped nose, roll two small white balls for the eyes and attach it all to the head. We put a blue iris and a black pupil on the whites of the eyes. We make eyelids from thin strips and partially cover the eyes with them, giving the eyes the correct shape. We roll black eyebrow sausages and attach them above the eyes. We make the ears from flattened small balls, and also attach them to the sides at the level of the nose. The facial expression of a person made of plasticine can be different: for a sad person, lower the corners of the mouth and make the eyebrows a “house”, a cheerful person can smile joyfully, a surprised person will have eyebrows set high on the forehead.
- We sculpt legs and boots. We roll two flesh-colored sausages - legs, then coat them with colored plasticine, getting pants. We make shoes from two ovals, flattened on the sole. You can use a stick to draw seams and laces. We insert toothpicks into pants and shoes.
- We sculpt the body. We sculpt an oval body from flesh-colored plasticine and coat it with colored plasticine. We sculpt the arms in the same way as the legs and connect all the parts with toothpicks.
- To make the plasticine figure look even more natural, mold the man’s hands: cut out the fingers on an oval blank using a knife and connect the hand to the hand using a toothpick.
What kind of heroes can be molded from plasticine? Using the techniques shown above, you can sculpt almost any cartoon or fairy tale character. It will be interesting to mold a few little people and set up a plasticine theater at home. These are the little people that can live in your home:
womanadvice.ru
How to make a funny man from chenille wire
Simple and funny toys often attract children more than technically complex store-bought ones. Therefore, it’s worth spending a little time to make your child happy with the new crafts you make. Moreover, you can make it together with your child. We propose to make a funny little man from chenille wire, whose arms and legs can bend. Step-by-step creation of such a toy from easy-to-bend fluffy wire is given in this master class.
To make a funny little man, we will prepare the following materials: - chenille wire of light green color (3 pcs.); - cocktail tubes (2 pcs.); - scissors; - large wooden bead; - green beads with a large hole; - black marker. For the frame of our little man's body we use chenille wire. Twist all 3 wires in the middle. In the future, we will distribute them as follows: 2 pcs. will be needed for the arms and legs and 2 wires are needed for the head of our little man. We string a wooden bead on top. To form the limbs, we will need to cut the cocktail tube into equal pieces of approximately 3 cm. We string 2 pieces onto each hand. For the body of the man we use 3 green beads. We string them onto the central part of our workpiece. We begin to form the legs. First, put on one piece of tube at a time. After this, we string green beads, which will serve as the knee joint. Then we put one more piece of tube on the chenille wire. Forming the feet. To do this, fold the protruding ends of the chenille wire as follows. We make hands for our little man in a similar way. We shape the tips of the chenille wire protruding from the wooden bead in the form of hair. Our little man can already bend his legs and arms. All that remains is to draw his face. We use a black marker for this. Our funny man made of chenille wire is ready.
at-last.ru
Patterns that won't melt
The most common type of decorating objects made of metals is creating patterns using hot and cold forging methods. They look great both in the design of house facades and garden products.
The details of the drawing are made separately, assembled according to a pre-prepared template in full size. Fastening is carried out using welding or clamps.
Metal patterns for decoration are chosen from various motives. Architects distinguish the following styles in forging:
- Gothic - represented by figures with sharp silhouettes. It is characterized by trefoils, thorns, lilies, precise geometric shapes, as well as notches when one rod pierces another.
- Romanesque - dense patterns of curls and curving branches, square cross-section. The most recognizable detail is the wide trunk from which branches diverge.
- Renaissance - rounded shapes combined with cast figures. It distinguishes two independent styles - Baroque and Rococo.
- Baroque is for kings. Pompousness and intricacy. It contains flowers, spirals, curls.
- Rococo - does not have large elements. The patterns are transparent and airy.
- Classicism - broken lines intersect at right angles. The designs are restrained and symmetrical. No curls.
- Modern – abstract forms predominate. May include oriental ornaments. Contains a large number of curls.
- Hi-tech is the youngest style. Characterized by geometric strict shapes and lack of smooth lines.
Finished forged products are coated with metal paints, highlighting individual elements in different colors. Today, craftsmen have learned to paint them using heat treatment during manufacturing.
Read also: Double switch connection diagram
Various metal patterns
A scale of tarnish colors from yellow to violet is used by blacksmiths when determining the heating temperature of a metal. The manifestation of color depends on a very thin, several molecules, oxide film on the surface. Modern craftsmen have learned to control the colors of metal and use this when designing a product.
Heated steel colors
Temperature will also help in creating frosty patterns in pewter. The principle is based on its allotropic forms. Under normal conditions it is white and is called the β form. When heated to a temperature above 160 ºС, it transforms into a substance with a different crystal lattice – the γ-form.
In practice the following happens:
- a sheet from a tin can, covered with a thin layer of tin, is brought to the flame of a candle and heated;
- in places where the temperature rises, streaks appear that diverge in different directions in curls.
There are nuances to this process:
- uniform heating of the entire sheet will lead to a change in its entire color without streaks;
- Spot heating is enough - streaks form independently in any direction;
- overheating of the surface will lead to tin dripping - its melting point is about 232ºС.
However, the effect is beautiful and easy to do at home. A sheet painted in this way can be used to create crafts from tin with your own hands.
Paper art
Let's take a closer look and analyze, as they say in terms of “spare parts,” these interesting creations. First, we make a product out of wire with our own hands. This wire frame forms the basis of this author’s sculpture.
Here, apparently, a rigid wire is taken, and the connection points are soldered. An ordinary soldering iron is suitable for these purposes. But I think you can make the work easier and take, say, for small figures, softer wire, for example copper. Then, at the intersection of the lines, it can be fastened simply by twisting it together.
It’s worth starting to master the process with simple forms. And in order to start complex ones, it is better to draw them first or take pictures from the Internet. In both cases, you will need profile and full-face pictures, preferably life-size. Then draw the main lines of the future wire frame on the drawings. Using these drawings it will be more convenient to check the sizes of lines and connections between opposite points in the form being built. Just measure the distance with a centimeter before fixing the next intersection lines, check the shapes so you won’t make a mistake with the proportions.
In general, the main part of the work is done if the frame is ready. The next thing will be to master the creative process with paper. As always, everything is simple. You can take designer paper, rice paper, etc. or regular tracing paper.
We also need PVA glue and pattern making skills. Don't be alarmed. The edges of the cut paper pattern are the shape of the cells of the resulting skeleton. Moreover, you can combine nearby cells into patterns if a piece of paper is placed on them without creasing.
I use the following technology: We attach a sheet of tracing paper and see which cells can be combined. Then you can eyeball this shape with allowances on paper with a pencil. Let's cut out our basting. We apply glue to the wire where we will attach the piece of paper, and put it on top in a stretch, not paying attention to the protruding edges. When the glue has set, the edges can be carefully trimmed with a paper knife and brushed with glue, wrapped around the wire.
To sculpt a human head or figure, frames are usually made to support plasticine and clay.
Frame for head and bust.
The modeling of the head model is carried out on a wooden frame: for this, a light shield is knocked together from several boards, and a vertical rod is attached to it, the height of which should be 1 cm below the expected height of the head. The rod should not be attached strictly in the center of the shield: in this case, the front part of the head will protrude and the sculpture will lose stability.
Head frame. Option 1
If the head model is sculpted with a tilt or rotation, the rod is made half as long as the expected size of the portrait and a flexible metal wire is attached to the top to fix its position. The wire can be replaced with an appropriate equivalent. It is recommended to tie thin hanging wires with small wooden crosses at the ends to the metal part of the rod.
Head frame. Option 2
The bust frame differs from the previous frame only in that a horizontal rod (in a cross) is attached to the vertical rod to support the shoulders. This rod is needed if the bust size is close to natural size. Small busts are held well on a frame with one vertical rod. For small human and animal figures (less than 10 cm), the frame does not need to be made.
Position of the head frame on the shield
Frame for the figure.
Modeling a figure begins with preparing the frame. A frame is necessary if the figure is sculpted in a vertical standing position and exceeds 20 cm in height. Work that does not exceed 10-15 cm in height can be done without a frame.
The frame for the figure is made taking into account the proportions and location of the figure in space. This is like a wire diagram of a figure to be sculpted.
Verb. Option 1
For the frame, a “verb” is first made, which in appearance resembles the letter “G” with the tip curved upward rather than downward.
Verb. Option 2
A “verb” is bent from steel wire, the diameter of which is selected depending on the size of the figure, which consists of a large vertical rod, a horizontal one and a small vertical one, to which the frame is attached.
The figure below shows the possible dimensions of the verb for a figure 1 m high. They are given with the assumption that the plinth is about 10 cm thick and that the horizontal arm of the verb will fit into the figure approximately at the level of the sacrum. For a figure of a different size, the height of the horizontal shoulder should be proportionally changed. On the verb for a meter figure, if you apply a thicker plinth, you can sculpt the figure in full life.
Verb. Dimensions based on a meter figure
At the bottom, the verb has screwed, riveted or welded legs, bent at a right angle. In the figure below, one paw is shown bent twice, in different planes. If you use paws of this shape, the frame will have more rigidity in the lower part of the verb, where it is most needed.
Verb for small figures
The verb is never installed directly on the rotary panel of the machine. It is tightly attached to a separate shield in such a way that the figure falls more or less above the middle of the shield. The verb is attached to a wooden shield in such a way that the figure is located in its middle.
A loop of rather thick (4-6 mm) wire is attached to the verb, supporting the torso. It looks like a triangle with the base up. The downward-facing ends of the wire are bent horizontally and tied to the horizontal arm of the verb. The loop is tied not only to the vertical, but also to the horizontal segments of the verb so that it is protected from rotation around the vertical axis.
The head rod is also tied to both the horizontal shoulder and the vertical end of the verb and connected to the torso loop. The knot where the rod for the head is tied to the torso loop is a place in the frame that most often “crawls out” during subsequent sculpting - somewhere in the jugular fossa or nearby. Therefore, let this entire “insidious” knot be securely hidden in the depths. The upper edge of the loop is placed a couple of centimeters below the expected level of the collarbones, the head rod is passed not in front, but behind the torso loop. Do not wrap excess wire around the binding site. The length of the rod for the neck and head should be enough for the full height of the figure, which will soon make it possible to use a piece of clay attached to the resulting rod to mark the height of the top of the head while the frame is still completely bare. Even if the end of the wire subsequently sticks out a little from the positioned figure, then in this place it will hardly interfere, and if it interferes, then it will not be difficult to “bite off” the excess with pliers.
Frame for the figure
The wire for the legs needs to be longer. It should end at the bottom not in the trace, but in the mass of the plinth, almost touching the wooden panel. The lower end of the leg shaft will be quite securely fixed with clay, and at the same time it will not be difficult to move it if necessary.
Using the same method, you can sometimes fasten the lower end of the arm shaft. It is bent, and after laying it, it turns out to be concave into the clay. When tying the wire to the frame, the wire for the arms must be bent in such a way that it cannot rotate, but is tightly fixed. For the frame of the brush, a bundle of five wires is tied to the end of the main rod. If the hand is adjacent to the body, then there is no need to make a frame for it.
Snakes for holding clay
In some cases, depending on the pose, the frame is built so that the verb enters the body not as usual, but from the side or sometimes into the back of the thigh.
The wire for the frame should be soft. Hard, springy or brittle wire is pre-burnt. If there is no wire thick enough, then it is folded in half or three times or a thin one is twisted. In general, it is selected so that any part of the frame does not bend under the weight of the carried clay and does not wobble from pressure during sculpting, but at the same time it would be obedient to the applied efforts in the event that it is necessary to bend it differently. The frame parts are tied together with wire.
If the sketch is made of clay, parts of the frame for a long study cannot be made of aluminum wire or tied with aluminum wire - it collapses in clay over time.
Cross for holding clay
The supporting base of the frame must be thoroughly supplemented with simple devices for holding clay: crosses and “snakes”. Without this, the clay will fall off in pieces during work. Crosses are hung where there will be significant volumes of clay that threaten to fall down (or to the side). “Snakes” are most often wrapped around the shafts of the arms and legs. Where space allows, any scraps of wood can be tied to a metal base in order to reduce the amount, and therefore the weight, of the required clay, and to increase the adhesion of the clay to the frame.
Frames for small figures are made in principle the same way or even simpler. The smaller the mass of clay, the lighter it is and the less likely it is to collapse. Plasticine, from which it is very convenient to sculpt small figures - from the smallest to a size of 50-60 cm - sometimes does not require crosses and “snakes” at all.
Frames for large figures - life-size and slightly larger than life-size - are also, in principle, no different from those described. The main thing is that they are strong enough. The iron from which they are bent should be thicker (but not so thick that it cannot be remade or bent in a new way), the crosses should be larger and more numerous. Too large volumes can be filled with pieces of wood. They try to place crosses, “snakes”, and in general any support for clay closer to the lower boundary of the volume. It is better when most of the clay lies on its support, rather than hanging under it.
A figure is molded from the plinth gasket, then a general laying of the entire figure is done, specifying the proportions and mass ratios. The last stage is the concretization of the surface relief of the form.
Framework for relief.
For sculpting relief sculptures, slightly different frames are used. In them, a shield with a wooden frame is upholstered with shingles on the inside. Instead of shingles, nails with protruding heads are sometimes driven in to hold the clay. To work with such a frame, you need a special easel that allows you to fix the frame in a vertical position. The entire structure is installed on the machine (rotation in this case is not necessary).
Easel for relief sculpting
The listed equipment, including frames, is used for large-sized sculptures. Other sculptures can be sculpted on planks without shingles and nails, especially if plasticine is used instead of clay. But in this case, it is necessary to have wooden supports - the planks lying on them will be at right angles to the children’s field of vision.
Making mastic figures for a cake as a decoration is actually as simple as working with plasticine or salt dough (as taught in labor lessons at school).
At the same time, there are difficulties in working with fairy-tale characters or little people created in full (cartoon) size from mastic.
So, when transporting the dessert, there is a possibility that the mastic man will fall over and damage or break itself.
For the frame of a man made of mastic, you can use thick floral or frame.
As a rule, if we talk about desserts, and in particular about cakes, then confectionery masterpieces decorated with figurines and other various decorations immediately come to mind. Previously, only cream was in great demand and popularity. A little later, marzipans began to be used.
Unfortunately, it is simply impossible to create truly exquisite cakes by using cream and marzipan. This deficiency was corrected by the appearance of confectionery mastic in cooking.
In the 16th century, mastic was better known as glaze, and it was then that it began to be used to create complex decorations. Then it was just as flexible and elastic, but when dried it crumbled and could not be stored for a long time.
When finished, the mastic can be stored tightly closed in the refrigerator for about 2 months. If you place the mastic in the freezer immediately after preparing or working, you will preserve the product for almost six months.
Mastic in its modern form is characterized by a long shelf life and accessible flexibility for recreating a wide variety of designs and forms for decorating desserts.
powdered sugar
wire (flower or frame)
Money Tree
Familiar objects sometimes become boring, you want to refresh the interior, add new interesting things to it. The money tree seems complicated, but in practice it is easy to create if you have basic skills in working with wire. You will need:
- copper wire of the required diameter;
- large and small beads;
- decorative coins;
- needle nose pliers;
- needle file;
- silicone-based glue for covering cuts.
There is no specific algorithm for creating a money tree. Everyone creates it the way they like. The common part is the barrel. Branches and curls with stringed beads are attached to it. The type of tree depends on the fantasy and imagination of the master.
How long does it take to make
It depends on the mood and enthusiasm. When you have the desire and enthusiasm, a large sculpture - 2-3 meters - can be made in two weeks. I return from my clinic and immerse myself in the creative process.
I made this lizard from thin wire in just a few hours
If the work is complex, then even small figures take a lot of time. For example, I wove one of the fairies for about a month. And sometimes the work takes six months or more, of course, with interruptions. You take on an idea, start implementing it, put it aside. Time passes and you return to the idea again.
Some small works seem to be in a hurry to “jump” out of my hands. For example, I made a 50-centimeter lizard from thin millimeter wire in just a couple of hours.
Butterfly
The Christmas tree and the flower were flat figures. The butterfly is considered a craft of a more complex level; in it you need to fill the void of contour details. The master class includes steps:
- Starting from the body of the butterfly, form the outline of the upper wings;
- By laying the wire along the body, they create the outline of the lower wings;
- The wings are strengthened by wrapping the body in a double fold;
- They move on to filling the voids inside the contours with beautiful curls;
- Pull the ends of the wire from above, cut off the excess, and twist the antennae.
The butterfly is ready. Using the same algorithm, you can create figures of animals, flowers, and people. The filled space inside the contour provides the product with a finished look.
Types of wire
Wire surprises with its plasticity and great potential for use in the design of jewelry and decorative souvenirs. It is widely used to create costume jewelry. In rare cases, material is taken from noble metals. Basically, simple, inexpensive wire is used:
- copper;
- aluminum;
- costume jewelry, sold in creative goods departments.
Jewelry wire is created specifically for creative works. Its alloy contains metals that have valuable artistic properties - softness, strength, ductility, beautiful appearance. The cross-section has a round, semicircular or square shape. On sale you can find copper wire with a silver coating with a flat section, aluminum with a shiny coating. Aluminum creative material resists corrosion and negative environmental influences.
They also work with technical materials consisting of pure copper and stainless steel, but the process is complicated by the need to clean it of insulation.
Brief conclusions
It is better to train your hand and dexterity on copper wire when making simple hairpins, rings, and barrettes. If you don’t have specialized equipment and tools, don’t despair. Use your imagination. Instead of a burner, use a gas stove to create droplets (and you can’t do without borax, it creates a perfectly flat surface). Replace Wigjik with sleight of hand, pliers and a paper diagram. The crossbar can be replaced at the initial stages by knitting needles of different diameters.
To avoid patination of wire jewelry, use non-oxidizing wire. You can coat the decoration with varnish for durability. If you need to create a patina, wash the wire well in a lemon solution. Then place it in warm water, apply a thin layer of sulfur ointment (pharmacies sell it) on your fingers, and wash the material under water. Without removing it from the water, wash off the sulfur with regular dish soap and wipe it dry.
Or you heat the wire over a fire, and then lubricate the warm wire with baby cream and rub until the desired result is achieved, then wash it off with soap. Again, patina is an acquired taste and is created through trial and error. You can do without the antique color. Some people simply paint with gold or silver acrylic paint and varnish.
There is no exact information on how to make a wire decoration. Each master finds something of his own, talks about it in his master classes or simply offers his creation. Try your hand at simple products, practice on finished products from masters: mentally divide the decoration into its component parts and reproduce it in practice.
How to make a pipe cleaner Butterfly – EP – simplekidscrafts – simplekidscrafts
Fancy Creative. Chenille wire and pompoms
Fancy Creative. We make puppets ourselves (DIY)
Master class - DIY frame doll
The master class is taken from mnogominoga LiveJournal - if the author names himself, his name should be added. In my opinion, this master class is very detailed and very, very interesting! DIY frame doll .
«Stage 1
Creating a small doll with hair from plastic material in stages looks something like this: 1) sketch 2) frame + stand 3) sculpting - head - hands - other open parts of the body + modification (grinding) 4) extension of the body 5) painting - faces - other parts of the body 6) hair 7) suit 8) details It is not necessary to do everything in this order - at your discretion.
Stage 2
We make the frame - this is the basis of the doll, and shortcomings in its design lead to further problems, so this point must be approached very responsibly! When making a doll, you should never forget about your beautiful idea. But what a shame it can be when you have to redo everything all over again just because a couple of days ago you were in a hurry to move forward and did not tweak or provide for something here and there and your doll does not stand on the stand, the center of gravity outweighs it and it falls to the side or back, and the arm falls off, and a wire sticks out of the neck, which you thought would not be visible under a layer of plastic or cotton wool...
1) First you need to select a wire that will be both flexible and durable. Let me remind you that our doll is 30-40 cm high, that is, it is not very small and ordinary copper or aluminum wires will not work.
— Option 1 — the so-called “knitting” wire. I found it at a construction site (but it is also sold in some specialized stores for builders), its cross-section varies, but the best option is 2.5-3 mm - it is flexible enough for you to have enough strength to tighten it in the right places, but not springy or brittle. — Option 2 — thick copper wire with a diameter of 2.5 mm. It does not break even with great effort, it is quite flexible, but its trouble is that it is springy. This may cause the plastic top layer to break. But in general, this option is quite suitable.
2) Next we knit the doll’s skeleton. Personally, I make the whole doll at once. According to classical standards, a doll is made according to its details, the head and arms definitely come separately (many puppeteers make a doll as if from a construction set). But since I’m telling you my version, perhaps you’ll tell me another one yourself))))
Next, look at the photos, and I’ll tell you briefly: we knit the knots stronger, because if the wire arms and legs are movable. the material you apply on top will crack. The immobility of the fasteners is also important for the overall stability of the structure. Whether your doll is sitting, standing, or even hanging, its center of gravity must be thought out to the smallest detail. Because a beautifully made doll that doesn't want to stand is a sad sight :). Therefore, remembering that a doll is a toy man, let’s remember where the center of gravity is for a real man? In the pelvic area. This is where it is worth making the doll heavier, as well as enlarging the feet if the doll is standing without a stand. And even if your doll is attached to some kind of platform, the head should still not be too heavy. And all the heaviness of the doll should flow downwards. The stability of the doll can also be enhanced with the help of some additional elements (a tree trunk, a staff in the hand, another figure nearby).
I additionally wrap the knots with a narrow strip of copper sheet. This holds them together completely tightly. Make hands. I especially love this thing, although many people shake just at the thought of this complex element of the doll. But I will tell you about this in my next message to you. The stand had to be very heavy to hold the doll in this position firmly on the plane, so I made it from several layers of drywall glued together. For now, the doll is only inserted into the drilled hole for ease of work, and later it will be glued there with strong glue (I use Poxipol).
I can immediately say that as a result of further work, the following problems emerged in the given frame: the left arm turned out to be longer than the right, which was not noticeable when the arm was bent. I also had to extend the foot of the left leg and move the doll relative to the stand, so the pose became more correct.
Stage 3
Hands - we make a frame: an aluminum or copper plate (as in the embossing kit), tin of beer cans is also suitable - for the palm.
And the second element for the fingers is a thin but very strong wire, which I take from steel cables. Steel cables (sold in hardware stores, hardware stores, fishing stores)), if you look closely, consist of many thin, very strong wires, these are what we need. We assemble the structure as in the photographs, give the desired position to the fingers and the hand itself, coat it in critical places with some super-glue for strength, and tie it to our main frame with a thread using one of the protruding wires. Now, if you did everything carefully enough, then after we go over the top with PVA glue, the unevenness and roughness, joints and seams will be smoothed out so that they will be completely invisible. PVA will also give elasticity and “rubbery” to the fingers, and even if the doll falls on them, nothing bad will happen to them. What will happen next: PVA is liquid and if you apply it right away it will flow down in ugly drops. Apply, wait until it thickens a little and spread again. After drying, the PVA becomes transparent. The top of the doll still has to be painted with acrylic using the technology that I use. The porcelain effect is due to the varnish. You can paint over PVA using PVA and gouache of the desired color (shade). Stage 4
Extension of the body - I extend it with cotton wool, although it is always recommended to use padding polyester everywhere. I tried synthetic winterizer, but it is too springy and does not give the desired density. I use a synthetic padding layer on top of the cotton one, last but not least, to give it a neat appearance. I simply apply cotton wool in the required volume to the right places and stitch it with thread (sometimes I just wrap it), here and there coating it with Moment glue, where special precision is needed in shaping the silhouette. I simply wrap the arms, legs and other thin parts of the body carefully with thread so that the plastic material on top fits better, since it will slide along the wire. In some places you can increase the volume with a thicker thread.
Stage 5
- sculpting the head and other open parts of the body (+ processing and painting) The plastic material in my doll is paper glue, but you can just as successfully use other self-hardening materials, as well as those baked in the oven, since it has been experimentally verified that even with the carcass already wrapped, the plastic can be fired in an oven: the cotton wool may only darken a little, but it does not have time to heat up to such an extent as to flare up and burn (and if it is also wrapped in foil, then in general, I think, it will be completely protected).
Paper glue is convenient because even after it has completely dried, you can build up countless layers, bringing your facial features to the ideal (in your mind), and also diluting it with water to a paste-like state to smooth out irregularities and smooth out sharp corners. That is, paperclay is for those who love smooth and round silhouettes; small details are practically impossible for them to sculpt. But paperclay needs to be sanded, especially if you diluted it with water and smoothed out unevenness, since after drying it is not at all smooth, but rough (although this also turns out beautifully and is quite suitable for some effects). You need to sand it with zero sandpaper, and for final processing nail polishing (drip) is perfect, it brings it to a perfectly smooth state, but this requires hellish patience. The result can be seen in the photograph. Coloring
Some paint only the eyes and tint the face a little, personally, I paint the entire face and other open parts of the body because I love decorativeness in the doll. I like to apply acrylic from a spray can as a preliminary layer; it further smoothes the surface and strengthens it, and also evens out the color. But here you need to be careful so that there are no streaks, otherwise you can ruin the entire doll, since these streaks are difficult to scrape off. Next, you can use any paint, especially for paper glue. And watercolor, and gouache, and acrylic, and oil paint, whatever you like. I use acrylic, sometimes I complement it with delicate shadows and blush from ordinary cosmetics, I like glitter for even greater decorativeness)) The last layer is varnish, which, again, is for everyone’s taste. I found a very interesting matte acrylic varnish. It is water-soluble, non-smelly and dries quickly, unlike the pistachio varnish that I have used so far, and also does not give off unpleasant yellowness and streaks. Its strength is not so high, but it is enough to protect against moisture and dust.
My result is this:
I make the eyes in a stupid way, I think it looks funny, but I like it, but for now I’m not going to deviate from what I like, although I think I fall out of all the classical requirements))) I just insert colored transparent beads with a drop of color inside , and I draw the pupil. But before that, I glue a loose ribbon into the eye socket, like eyelashes. And so, in general, eyes are the basis for imagination and the easiest way to the originality of your images. They can be drawn directly on the plastic formed under the eye. You can first make a base from a mother-of-pearl bead, which will play with highlights like the real white of the eye, and draw an iris with a pupil, you can insert ready-made store-bought eyes, glass and plastic, or you can make your own eyes from Fimo. Well, after coating with varnish, when everything is dry, I cover the carcass with nylon (you can use supplex, but it seems rough to me))) and that’s it, the basis for further creative work is ready. I sew the clothes directly on the doll; you can’t take them off or put them back on. The so-called monofilament (and essentially a thin transparent fishing line) is very easy to use; the rest is up to you. Your skills and accuracy, and, most importantly, do not forget about imagination and the image that you would like to create. I make hair from all sorts of threads... I tried making it from doll hair, from 100% human hair, and I also tried those for dreadlocks. But due to the fact that the doll is decorative - the real hair does not fit in any way - it looks alien. And the varnish is from the German company Nerсhau (their logo is with a multi-colored elephant with a brush on its tail), in Russian it is called silky-matte transparent acrylic varnish (Klarlack seidenmatt), very pleasant! Although pistachio dries quickly, it still has stickiness for another month!!!
Watch other master classes in this section: Making a textile doll - master class Clown bag Little angel Sock dolls The process of making dolls and accessories Sculpture - video Several soft dolls - we sew ourselves Making a doll - Summer fairy: master class Knitted doll Marisha do it yourself - knitting pattern DIY knitted doll How to sew hair on a soft doll