DIY notebook using scrapbooking technique
A notepad is as common in everyday life as a lamp or an apartment key. The good old guardian of our thoughts, experiences, daily assistant in business, he needs a decent design. Scrapbooking is that unique type of creativity, thanks to which you can turn the most ordinary thing into a work of art.
Today it is impossible to imagine a time when a person did without a notebook. It is mistakenly believed that only business people need a diary. Housewives, students, schoolchildren are no less busy, so an elegant and beautifully designed scrapbooking notebook will be a welcome gift.
DIY miniature notebook
If you need a small notebook, you can make it in ten minutes. No staplers are needed to work. Required:
- sheet A4;
- scissors.
We work as follows:
(Step 1)
- Fold the material in half. We repeat the action. The sheet should be folded in four.
- Unfold the paper. Now you need to fold it in half, but across it. We repeat the action and unfold again. The result is a base divided into 16 rectangular sections. Miniature Notepad (Step 2)
- Take scissors. Make 3 cuts to the nearest fold. Let's add them up.
- Fold the bottom of the material up and the top down. We fold these parts and iron them with the palm of our hand.
(Step 3) - Place the resulting workpiece on its edge so that a hole is formed in the center. We fold the product so that we get two additional pages. If necessary, all pages can be additionally secured with glue. (Step 4)
As you guessed, we told you how to make a notebook out of paper using the origami principle.
Method one
For the notebook you will need: a pack of paper, scissors, glue, thin cardboard for the cover, 2 rulers, paper clips, a stationery knife, thin colored paper.
How to make a notebook without stitching with your own hands?
1. Take a stack of paper, it is best to use several shades, this will make the notebook more interesting. Using a ruler, measure the format that is supposed to be needed for the future notebook. Next, use a knife to cut off all excess, leaving only the required size of sheets. You should have an absolutely even stack of paper in the amount of 30-60 sheets.
2. Place a stack of sheets on a cardboard with a beautiful ornament in a corner and outline its shape 2 times. Now cut out and place the cover under and on top of the stack of paper.
3. Apply glue to the end of the sheets and covers. There should be enough glue, but not too much. It shouldn't drain.
4. Place one of the rulers under the notebook, flush with the top of the notebook with glue. And the second one is in front. Then, taking a large clamp, grab the two rulers and the stack itself so that the sheets become closer to each other. This is necessary so that the notebook takes the required shape and the paper does not move.
5. Cut out a rectangle from thin colored paper, the length of which should be equal to the width of the notebook, and the width should be approximately 6-8 cm. Apply glue to it and glue it to the end of the stack of paper so that the same number of centimeters is obtained in front and back. In the same way, you can make a large notebook without stitching for both notes and drawings, but if you want to make a notebook from a notebook, you can see an example here: https://fb.ru/article/276396/kak-sdelat-bloknot -iz-tetradi-svoimi-rukami.
Fast and easy notepad
In a quick way you can make a classic notebook with any thickness. This booklet is used for personal purposes and as a gift. Before making such a notepad out of paper, prepare:
- paper (the number of sheets depends on the expected thickness of the product);
- strong threads and a thin needle;
- PVA glue (if possible, it is better to use Moment glue);
- thin gauze or bandage for making binding; select the width of the material depending on the thickness of the future notebook;
- knife for office work;
- thick cardboard;
- material for decorating the cover.
There are many instructions on how to make a classic notebook out of paper. We recommend following these steps:
- We cut the prepared sheets to get future pages. The standard size is 10 by 15 centimeters. You can select other parameters. Fold the sheets in half and place under the press. This will make further work easier. Keep the sheets in this form for several hours, it is better to leave them overnight.
- We combine the resulting blanks into miniature notebooks. For each, take 3 sheets. Make holes in them for firmware. The distances should be identical on each of the workpieces, so use a ruler.
- The resulting sheets need to be stitched. For this purpose, you need to use a thread, a needle and a “needle forward” stitch. Leave the end knot outside.
- Each subsequent stitched workpiece must be connected to the previous one using the remaining thread. When all the parts are connected, we fasten everything with one tight knot.
- From the outside, you need to thread gauze under the seams. We coat the entire spine with glue. Place the product under the press and leave until completely dry.
- While the workpiece dries. You can work on the cover. Cover it with fabric or decorate it using the technique you like. We connect the blank to the cover using glue and place it under the press again.
The notepad is ready. If you handle the product with care, it can serve you for a long time.
If desired, the notebook can be made larger or smaller in size. It can also be created in the form of a diary if you first print the pages on a printer. And if you want to give the product an aged look, soak the prepared sheets in coffee or wipe with a tea bag. Dry the workpieces and iron with a warm iron without steam.
Ideas for beautiful notebook design
There are a huge number of different ideas on how to decorate a handmade notebook. Each method will make the product unique and inimitable.
To decorate a notebook, you can use a lot of different materials - stickers, stickers, three-dimensional decorative elements, etc. If such ideas are not to your liking, you can simply draw something.
Drawings
The simplest and most original way is to decorate the pages of a notebook with various thematic drawings. Here you can give freedom to your imagination and draw whatever your heart desires.
If the notebook will be used as a diary, then it has several headings. So, each of them can be supplemented with drawings corresponding to the theme.
Stickers
Using decorative strips, stickers can add originality to your notebook. Multi-colored stickers will not only look great as bookmarks and notes, but also as decoration or a colorful composition.
By using your imagination, you can use them to create an original drawing that will stand out perfectly on the pages of your notebook. You can also use them to make a regular frame.
Stickers
An excellent decorative material that allows you to not invent anything yourself. Using a variety of themed stickers, you can simply and tastefully decorate your “brainchild.”
In addition, if desired, each sticker can be supplemented with some pattern or other decorative element. With their help you can even make something like a collage.
Magazine clippings
Every home has a bunch of old, unnecessary glossy magazines, but this is a great find for those who like to create and experiment. After flipping through a huge number of glossy publications and selecting what you liked, you can start decorating your notebook.
The most important thing here is also to use your imagination. If a problem arises with this, you can use the options provided by the Internet.
From celebrity clippings or pieces of furniture or fruit. You can easily create a beautiful collage, which, thanks to the brightness of the photographs, will give your notebook its own zest.
Yarn
By using textiles on the pages of a notebook, you can achieve its original, unusual appearance. With its help, you can create a variety of figures and glue them inside.
Also, using yarn, you can make edgings for drawings made there, photographs and other elements. In addition, you can make a beautiful keychain from yarn, which can serve as a bookmark.
There are many ideas for decorating the pages of a notebook, we have looked at the most basic ones. If you wish, you can create your own masterpiece using other decorative elements.
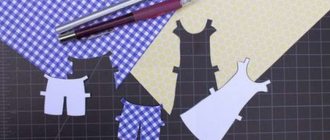
Notebook for girls
Before you make a paper notebook for girls, you need to carefully think through all the work. The most original design should be used.
The finished product can be decorated with:
- sequins, sparkles, rhinestones, glue;
- multi-colored paper;
- a mandala or pattern printed on a printer;
- multi-colored backing.
The last method requires a creative approach; be patient before making a paper notebook for girls.
You will need:
- cover made of strong cardboard;
- wax colored chalk;
- shower gel;
- acrylic paints.
How to make a paper notebook step by step for girls:
- We color the cardboard. To do this, use crayons and draw lines or shapes in a scattered manner. You can paint cardboard with circles of different diameters.
- Mix acrylic paint and shower gel in a one to one ratio. Apply paint to the surface of the previously made drawing. When the first layer has dried, apply another one.
- Take a sharp wooden stick and scratch out the designs. This will give the cover some volume.
It is more convenient to use stencils for drawings in this work. It is acceptable to draw any other drawings that the girl likes.
And, to make inner sheets for a notebook, you can use the methods already given for making notebooks above, or those that will be discussed further.
You can decorate your finished notebook with a homemade bookmark. We described how to make them in one of the previous articles.
Making a notebook without stapling
The simplest and most time-consuming option. To create a creative notebook without using thread, the following will come in handy:
- thick paper (for example, for watercolor);
- multi-colored paper;
- cardboard (for the front side of the notebook);
- glue;
- office clips;
- ruler.
Get started:
- Stack the sheets of paper. Glue them together and secure them with clamps.
- It is necessary to compact the workpiece. To do this, glue a piece of gauze to its back side.
- The cover size should be 5–7 mm larger than the pages. Cover the base for the cover with decorating paper.
- Attach the cover to the blank of the made pages using glue. Hold it down.
To get pages with an aging effect, you can soak them in dissolved coffee and wipe with a wet tea bag. Then you should iron the paper with a barely heated iron, without the steam function.
View this post on Instagram
A post shared by ALBUM AS ART? (@alla_artcard) on May 11, 2022 at 3:16am PDT
Notepad made of A4 paper
Basically, notebooks are not made from large formats. But if there is a need for this, we suggest using any of the methods given below.
How to make your own notebook from A4 paper:
- The first method does not require stitching. You need to fold all the sheets, glue them with glue, seal the workpiece with gauze and cover with a cover.
- You can stitch a notebook using a hole punch and a spiral. This method is more convenient than the previous one, since the sheets move freely in a spiral and do not need to be bent. The cover of such a notebook can also be punched with a hole punch. The whole job takes several hours.
- Choose large sheets. Fold them in half to form a notebook. Now use one of the methods suggested earlier.
You don't have to use regular office paper. You can use multi-colored material, cardboard or checkered/line sheets. The cover is decorated depending on creative skills and preferences.
Benefits of a homemade notepad
If you want to keep a diary or need to take a lot of notes, you can't do without a notebook. Many people prefer to record their thoughts in gadgets. However, this is not always appropriate. In this case, a notebook comes to the rescue. Girls love to share their secrets with a diary, so they will be happy with a cute notebook.
Of course, it is easy to purchase it in the stationery department. But it’s much more interesting to make a notebook with your own hands with your own design. Such a unique thing can become a gift or an addition to it. Your loved one or child will certainly be pleased to receive an exclusive gift about you.
Making a notebook without stitching
At home, you can make a notepad that will not be inferior to a factory-made one. The product can be decorated the way you want based on your creativity.
Materials you will need:
- watercolor paper, you can use other paper, but it is desirable that it be thick;
- high-quality glue;
- clothespins or stationery clips;
- multi-colored paper;
- ruler;
- cardboard for the cover.
Now let's look at how to make a durable paper notebook with your own hands:
- Bend each sheet and stack them. We divide the folded material into small notebooks. We secure it with a clothespin on each side.
- We coat the future back of the notebook with glue and apply a bandage. It will help hold the sheets together.
- Making the cover. It should be different in size from the inner sheets. It is enough to take more cardboard 5-10 millimeters larger than the inside. Glue the inside of the cover with colored paper.
- We attach the cover to the block of made pages. Place the product under the press and wait until it dries.
The quality of the finished notepad will depend on the materials and glue used.
Mini notepad
Making a mini notebook will require the least amount of effort and time, and the result can be a nice little gift for a child or a book for recording innermost thoughts.
Tools and materials: checkered paper, scissors, ruler, pencil, matching floss threads, stationery clips, needle, decorative cardboard.
First, the sheet is prepared for work: incomplete cells, red margins and typographic curves are cut off. Preparation also includes calculating the number of pages. Since a mini notebook is being made, the possible number of spreads are cut out of the sheet, provided that the size does not exceed 10 cm.
Note!
DIY medical mask: TOP-140 photos of the best DIY options. Instructions for making a mask at home
- How to make a piggy bank with your own hands - the best ways to make a piggy bank with your own hands. Detailed master class for beginners with photos and videos
Cold porcelain: features and methods of making it at home. Reviews of the best recipes + 120 photos
Then each rectangle is folded in half and 3 punctures are made at equal distances with a needle onto the resulting folds. Sew 2-3 spreads into a stack, after which they collect all the contents of the notebook and sew all the stacks using the existing loops.
The spine is treated with glue, and the side is fixed with clamps for a while. The folding part of the spine should be slightly wider than the notebook, but the same length, and also have cuts for the exact number of stacks. After the spine on the stacks has dried, the bending part of the spine is glued to it.
The cover is cut out in one piece, from decorative cardboard, based on the correspondence: “cover-spine-cover”. It is glued to the notebook blank along the first pages and the spine and fixed for a while with clamps until it dries completely, but carefully enough so that the marks from the clamps are not noticeable and the thin cover retains an even texture, just like in the photo of the homemade notebook.
Notepad without glue
If for some reason you cannot make a product with glue. Use other manufacturing methods. The assembly principle can be chosen from one of those proposed earlier. The only difference is the method of binding the pages.
Which method can you choose:
- Use a spiral and hole punch. Detailed instructions on these devices have been described above.
- Using thread and needle. In this case, one or more sheets are folded in half and fastened on the folded side. This method has one drawback. It will not allow you to fasten more than 24 leaves. But it depends on the thickness of the paper.
- A quick and easy way is to use a hole punch and a binder. You can even make your own folder from cardboard. And the cover itself can be decorated to your taste. All that remains is to make holes in the sheets and insert them into the binder.
If we talk about the most convenient manufacturing method, it is stitching using a spiral. The work is very simple, the notebook comes with a large number of sheets. The cover of such a product can be decorated at your discretion.
Scrapbooking
This method involves decorating the product using improvised means to achieve a bold combination. Old beads, pieces of ribbon, frayed fabrics, and even printed materials can be used here. By making intricate combinations of different materials, you can create a unique cover design.
The only limitation is that you should choose thick paper for this method of decoration, since thin paper will not be able to maintain an attractive appearance and shape if it is overloaded.
Leather cover
To make a leather book cover, you need to prepare the following materials:
- a piece of leather;
- glue and scissors;
- cardboard;
- Ruler and pencil.
So, we make a leather cover, following the following sequence of actions.
Initially, you need to remove the old cover and endpapers. New endpapers are made from paper by folding it into two parts. It should be the same size as the book. Next, the endpapers are glued to the initial and final pages of the printed product.Then we cut out rectangular pieces from cardboard. We get the base of the cover. The size of the rectangles should exceed the size of the book.
Additionally, you need to cut out a rectangle from cardboard that matches the size of the book spine. Then you need to fasten all the blanks with tape, leaving a little space between them.
The next step is gluing the skin. We apply glue to the cardboard blank, and then glue the skin to it. The remaining material must be cut off, leaving a distance of 2-3 cm from the edge.
The corners are removed with scissors, and the allowances are folded into the inside and glued. Next, attach the cover to the endpapers and press down with something heavy. Job is done!
Thus, you can make the cover yourself without the help of outsiders. This way you can give your personal item a unique look.
DIY notebook: tools and materials
- genuine leather (you can take artificial or thick plain smooth fabric), size about 30x45cm
- paper, A4 size - 52 sheets (it is better to take a few more sheets in reserve). Plain white printer paper will do.
- loose cardboard for endpapers and spine
- thick thick cardboard for the cover
- 2 strips of non-thick fabric, 3×15cm
- glue “Moment Crystal” (1 small tube of 30 ml is required per notepad)
- the threads are black (not so dirty) or beige. Better synthetic, No. 40-50
- ruler, pen, scissors, awl
- file or needle file
- thin brush for acrylic paints
- acrylic paints for fabric
- instant coffee
- newspapers
DIY notebook from old floppy disks
If you have old floppy disks lying around, you can use them to make a notepad. The result is an unusual small-sized notebook that is convenient to keep at hand. For work you need the following materials:
- floppy disks - 2 pcs.;
- small-sized note paper (you can take a multi-colored block);
- cotton thread – 1 meter;
- large needle;
- scissors;
- hole puncher.
Operating procedure:
- Punch two holes parallel from two edges throughout the entire block of paper.
- Place the paper on the floppy disk and thread the thread through the holes. The ends of the thread should be at the same level.
- Thread the thread a couple more times, first from the paper, then from the floppy disk.
- Tighten the thread and make a knot.
- Pull one end of the thread through the side perforation of the floppy disk and thread it into the hole of the second floppy disk.
- Thread the thread through the side loop.
- Pass the thread through the two side loops on the spine side of the notebook.
- Tighten the thread, make a knot and trim the ends.
Making a leather notebook organizer in A4 format
We have long wanted to share with you how we create notebooks. It’s a free day and it’s time to implement our plans.
I would like to immediately say that in this master class we tell you how we make our products. We do not claim to be the author of any theories and do not want to say that others are doing something wrong, no, of course not :) Each master has his own techniques, most studied from the same literature, but this is what is unique - everyone chooses something different and hones this skill. Each master has his own style and I respect the masters, both those I know personally and those whose work I simply view on various trading platforms.
So, let's get down to business :)
We tried to make this notebook with a minimum of tools that can be purchased for very little money.
Tool:
- A line punch (we use a round one, since given the total thickness of all layers of leather, it makes a beautiful seam (in our opinion)).
- Mallet or hammer.
- Matrix button installers.
- Installer of 2-sided holniten (we use 2-sided ones, because, in our opinion, it is more aesthetically pleasing, but no one forbids using simple ones and then you won’t need this tool).
- Needles.
- Knife (the most convenient for us is a construction knife).
- Ruler (preferably metal).
- Awl.
- Pen.
A girl wrote to us who wanted to buy a notebook, or as we call it, an A4 notebook organizer. But she said right away that she didn’t want a monotonous notebook. We took out all the leather we had and started thinking about what colors would go together best. Photos of the skin were sent to the client and in a joint vote they chose 2 colors of stunning crazy horse skin. I’d like to point out right away that we mostly work with crazy, and why? It's simple, in OUR opinion this is the coolest skin :) Many craftsmen do not like this skin for many reasons, but it won our hearts :)
And here are the contestants who won that skin fight:
:
This is a cool leather, about 1.5 mm thick, medium hardness. This is the perfect stiffness for creating a notebook.
Stage 1.
First you need to admire the skin and choose the best places on it for the future notebook :) Of course, it’s easier to work when you have all the necessary templates at hand, but if you don’t have such luxury, then it’s not scary at all, since the notebook is rectangular in shape :) If there’s no template , then you just need to measure the width of the paper block and add the same amount, plus (in my case) 7 cm for the future valve and 3-4 cm just in case. Also measure the height of the block and add 1 cm on each side. Next, using a ruler, we draw the rectangle we need on the skin.
You should also immediately decide on the ring mechanism and the paper block, since everyone has different lengths and widths.
We use a variety of blocks, some we make ourselves, some we order or buy ready-made checkered blocks. The girl chose a checkered block with a ring mechanism with 4 rings (diameter of rings 25mm), based on the size of the block we made a notebook.
We make all marks on the leather with an awl (Important: you need to make them without much effort, so that in case of an error you can erase this mark). You can also mark with a specialized pen or even a simple ballpoint pen.
Also at this stage, all the pockets that you want to make are cut out. This notebook has 1 - 15cm, 1 - 10cm, 1 - 5cm, a back tab 8cm wide, a strip 1cm wide and 6cm long (pen holder), and a bookmark 1cm wide and 5-6cm long longer than the length of the notebook.
E step 2.
We collect the cut out parts and see what we cut :) At this stage, we need to insert a block of paper with a ring mechanism and make an imitation of the future notebook to understand whether we made a mistake in the calculations.
If everything is in order here, then we put the pockets and see what happens there.
If the pockets turn out to be a little larger, then it doesn’t matter, we apply a ruler and cut off the excess, but if the pockets turn out smaller than necessary, then you need to scratch the back of your head and cut out a new pocket :) Well, or reduce the width of the main part to match the width of the pocket, if there are no reserves skin.
Wisdom: If you doubt the calculations, always take with a small margin :)
Once everything is trimmed and looks decent, you need to figure out which layers you want to sew together. This notebook only has divisions on the smallest pocket. We decided to make 3 compartments, which means that we take the smallest pocket and use a ruler to divide it into 3 equal parts and put marks on the pocket. Then you need to glue the smallest pocket with the middle one (the edge of the skin that is glued to the face must be sanded). Scratches appear on the skin and will allow the layers to stick together better.
For convenience, we will immediately make a hole for the pen holder, stepping back 5 cm from the top and 7 mm from the edge. We also make a hole in the holder; I rounded the cut one for decoration.
Stage 3.
Next we glue them together and install the pen holder.
After gluing, don’t forget to tap the glued parts, this will help and let off steam :) Just don’t overdo it! The skin is very easy to damage. If you don’t have a mallet, just tap it a little more carefully with a hammer.
Stage 4.
Glue the pockets to the main part of the notebook. At the same stage, the back strip is glued, which in the future will hold the documents attached to it. After gluing, we also tap everything around the perimeter of the glued area. By the way, we use “super glue gel” (in a blue tube), it is transparent and glues very well, I tried many different glues and settled on this one.
As everything is glued and tapped, we look again and look for elements that have again begun to stick out. If you find them, then cut them without sparing! We put a ruler, hold it very tightly and cut off all the excess (you need to cut off as little as possible, since cutting off the excess does not take long, and this can ruin the entire product).
Stage 5.
After everything is trimmed and looking at the notebook you have a slight smile of satisfaction for the work done, we begin to mark the future seams. It’s good if you have a parallel marker in your arsenal, then set it to 4-5 mm and draw it where there are elements that need to be sewn. If there is no such tool, then a ruler and an awl come into play; it’s just as easy to make markings with it.
Stage 6.
And then comes the most exciting stage - punching the seam! Now let's be thankful that this is not a video, since this process took about an hour. It is important to take your time and align the punch strictly along the line and keep it strictly perpendicular! We start punching from the corner to the end of the seam. We make the first punch, and to make the next ones, you need to insert 2 teeth of the punch into the last 2 holes. Many people teach to insert only 1 tooth, but at such a length of the seam there is a high probability of error; if the seam goes away, we will lose all aesthetics :)
Stage 7.
Let's start stitching! Choose the thread you like, both in color and appearance :) This model used twisted black thread 1mm thick. Lay the stitches evenly and take your time - this is a very important step, as the aesthetics of the seam will always be evident.
Stage 8.
After stitching, you need to remove the tension from the seam and tap it gently with a mallet. Next, we check the quality of the edges; if something begins to stick out, then you need to carefully trim it using a knife and a ruler, and round the corners using the same knife and go through the seam and corners with sandpaper (I use No. 200-500). And we remove the chamfers (cut corners) either with sandpaper or a specialized tool.
Stage 9.
We begin preparations for installing the ring mechanism. We install the block of paper on the rings and place it on the base, then close the lid of the notebook and make sure that there is enough of it to close and adjust so that everything is even. We mark the future holes (you can immediately mark the hole for the future bookmark). Next, we punch holes and insert holniten (we use 2-sided ones, as they look more aesthetically pleasing). And if all is well, then install them!
At the same stage we make the endpapers (the first and last cardboard page for rigidity). We use sheet beer cardboard, it is both thick and beautiful :) We apply it, cut it out and slightly round the corners. We make holes according to the pattern of the leaf!
Stage 10.
If the previous stage was successful, then we move on to installing the buttons! Trim the corners of the valve as you want. Next, we need to close the future notepad with the future valve. There is no need to tighten the valve too much, as it will be difficult to close later. Make sure that everything is tight, but without fanaticism :) At the same stage, we select the color of the fittings and its size; in this notebook, nickel buttons with a diameter of 15 mm were used. Make symmetrical marks on the valve, close the valve and carefully use an awl to mark the future buttons. Pierce the valve skin with an awl so that these marks are imprinted on the layer of leather where the second parts of the buttons will be installed.
Stage 11.
Next, we make holes for them and install them with the tools you have.
Stage 12.
Well, we've reached the finish line! Hurray, now you need to wipe down the product, since during the manufacturing process the crazy leather was a little scratched, and there was wax left on the threads that needs to be polished! For grouting we use felt (you can use any soft fabric).
That's all! Thanks to those who made it to the end :) All that's left is to do a photo shoot and enjoy your new notebook!
We hope that we have helped or answered your questions. Of course, there is no universal way to create any notebook model, because each model has its own flavor!
If you have any questions, we will be happy to answer them
PS we might have missed some steps, please don’t judge too harshly, this is just the first experience!
A little history
The current century is marked by innovation and technology. They allow all information to be entered into the memory of electronic gadgets. But you should not rely on chance, because as a result of a malfunction of the device, you can lose extremely useful information.
That is why the demand for notepads does not fall; the elegant paper assistant is a classic. The creators of the first copies were romantic, loving French. During the reign of the “Sun King” Louis XIV, a fashion for secret notes was introduced at court.
Particular attention was paid to exclusive design, which emphasized refined manners and excellent taste. For the convenience and safety of romantic and secret behind-the-scenes messages, small books were invented, which were the first prototype of the modern notebook.
Later they began to be used for important records and information. To keep the notebook pages safe, they were “packed” under a thick black cover called moleskine.
Literally translated, it meant “mole skin.” Small functional books were loved by bohemians and prominent statesmen. Talents such as Picasso, Van Gogh and Matisse were fans of notebooks. They entered not only reminders of important matters, but also sketches of their artistic masterpieces.
Today, at the famous Sotheby's auction, sketches of famous artists on the pages of a notebook are valued at tens of thousands of dollars! The tear-off notepad was invented by none other than the author of the famous “The Adventures of Tom Sawyer,” writer Mark Twain.
Only a person with creative thinking could come up with the brilliant idea of perforation for ease of turning pages. Often precious thoughts elude us, and in the fast pace of life we often forget about important events.
The art of scrapbooking is a great opportunity to make an exclusive notebook with your own hands, which will become a relevant holiday gift.
Scrapbooking: handicraft stories
Some decorating tips
The process of design using the scrapbooking technique requires not only a creative mood and imagination without boundaries. The art of decoration is subject to important rules. Knowing the secrets, you can turn your favorite pastime into a profitable business.
Tip #1
Materials needed for work
The choice of materials and decor for scrapbooking is important at any stage. Beginners should know that any decorations, chipboards, brads and even scrap paper can be easily made with their own hands. The most unusual objects are often used as materials; the main thing is not to be afraid to experiment, using the ideas of experienced designers using the scrapbooking technique.
Tip #2
Composition - composing, linking elements of an artistic form into a single whole
Follow the rule of composition. It doesn’t matter whether we are making an album cover, a postcard or decorating a notebook, the composition must be consonant and balanced in style, color scheme, and semantic content.
- Errors and inconsistencies that seem insignificant at first glance are the first to catch your eye, disrupting the aesthetics and overall impression of the appearance of the product.
- It is important to learn how to combine decorative elements, bringing the composition to a single style, achieving integrity in meaning and color palette.
- Tip #3
In the composition, the decorative colors and background color should correspond to the theme of the product
Using the rule of the semantic center. When designing a product using the scrapbooking technique, it is important to place the accents correctly.
The semantic center is always the same in the composition; other elements are just a beautiful addition. For example, for album pages this is a photograph. It is on the semantic center that we will first of all focus our attention.
The main mistake of beginners is the lack of a semantic center, chaotic, illogical decor.
Basic rules for composing a composition in scrapbooking
How to choose the right palette for a composition
Types of notepads
By decorating a notebook with your own hands, its purpose is initially determined. Popular types of notepads are rightfully considered:
- Image. In business, creativity is valued no less than in the creative world. Uniqueness and personal approach are often the key to financial success. An exclusive scrapbook can be presented to colleagues and business partners by decorating the cover with the company logo.
Scrapbook for business
- For records. A great gift for anyone who likes to record their train of thought, new ideas and suggestions on lined pages. A notebook made with love by your own hands will be an excellent gift for a friend.
DIY diary for a girl
- Organizer. For a business person, organization is one of the success factors. The organizer notebook successfully combines the functions of a directory, calendar, and diary for planning future meetings and events. The organizer pages are lined, each contains calendar dates, and there is a separate section for recording telephone numbers and addresses.
DIY organizer
A notebook made with your own hands using the scrapbooking technique is a welcome gift in any situation.
Stationery stores today are filled with goods. Notebooks vary in internal content, design, and number of pages. The cover of the notebook is of decisive importance.
Factory notebooks are framed in leather or textile bindings. A homemade notebook is superior to a store-bought one. In terms of aesthetics and theme, such products have no equal.
We offer several step-by-step master classes, thanks to which even a beginner can easily cope with the work.
Blank notepad from scratch
In stores you can buy blanks for a notebook, using the scrapbooking technique to decorate the pages and cover for the holidays. It is much cheaper and more interesting to create a notepad from scratch.
Essential materials for beginners
To work you will need:
- a simple stationery set (scissors, glue, ruler and pencil);
- standard printer paper (office) A4 size;
- several office clips;
- thick sewing needle and thread;
- silicone sealant;
- sheets of binding cardboard.
Many of the materials can be replaced with more familiar ones; more about this in the process.
This notebook will become a good memory of your travels.
Step-by-step algorithm:
- Determine the required number of sheets.
If you took A4 sheets as a basis, remember that the notebook will have exactly twice as many pages. All sheets are folded in half.
Each sheet can be pre-lined. It is difficult to do this manually; you can use a computer.
- We fold the notepad sheets like a book. To prevent them from opening, you can carefully iron the fold line.
- We put the whole pile of books under the press for a while. Can be secured with office clips. If such devices are not at hand, you can simply put something heavy on top, for example, several volumes of books.
- When the stack of sheets has been pressed, remove the press, carefully align it and fasten it with a clamp at the top and bottom.
- Using a ruler, we measure the spine, divide its length into several equal parts, making marks with a pencil.
- Using a stationery knife, a thin file or a simple sharp kitchen knife, make shallow cuts in the places marked on the spine with a pencil. We work with caution, but until each of the sheets is cut.
- Let's start stitching. We will sew the sheets together so that they do not fall out during use. For work, it is recommended to use lavsan sliding threads. The main criterion is excellent strength. We sew each booklet separately, connecting them together using fabric tape.
- We glue the spine. You can use glue for the job, but practice shows that silicone sealant provides elasticity. We generously coat the spine, filling all the cracks and voids, fasten with clamps and leave for several hours until completely dry.
- Preparing the endpaper. To do this, cut out two identical blanks and one small one for the spine from sheets of durable cardboard. Cut out two more smaller squares from craft paper.
- Assembling the cover. First, we glue the craft blanks on both sides and secure them with two strips of fabric on top. Next you can attach the main cover.
Master class on creating a notepad from scratch
Experienced craftsmen recommend wrapping the cover first with a thin layer of fleece, and then with fabric on top. Only then attach it to a notepad. A simple and inexpensive notepad preparation will become the basis for decoration using the scrapbooking technique.
Vintage musician's notebook
An unusual gift for a music fan in the form of an antique music notebook.
The notebook is a great gift for those who play music.
To work, you will need office paper, sheets from old music notebooks, or a printed picture with notes.
One sheet origami notebook
A fun little origami notebook is perfect for a child. The baby can draw in it or use it for games. The notebook is made from one sheet of paper and turns out very cute. Can be done with children.
You will need:
- A4 sheet of paper – 1 pc.;
- scissors;
- markers.
How to do:
- Fold the sheet lengthwise. Bend the resulting workpiece in half lengthwise again. Expand.
- Fold it in half again, but now not along the length, but along the width of the sheet. Bend the sheet folded in half again in the same way.
- Unfold the paper completely. There were 16 rectangles obtained from the fold lines.
- Take the workpiece in a horizontal position and fold it in half lengthwise again.
- Turn the folded sheet of paper towards you and make three cuts up to the first line.
- You will get two half-cut rectangles. Cut them down the middle.
- Unfold the resulting workpiece completely.
- Bend the rectangles to the sides.
- Turn the workpiece over and connect the top and bottom parts of the rectangle in the middle of the sheet. Fold in half again.
- Take the resulting folded rectangle and move its extreme ends towards the middle.
- Fold the resulting pages in any direction.
- Iron and decorate the cover with drawings. The book is ready!
Useful video on the topic:
Master class on creating a cover for a notebook or diary
Let's figure out how to make a notebook cover with your own hands. To do this, prepare the following set of tools:
- photographs or pictures from the Internet;
- decoupage glue;
- brush;
- notebook.
First of all, you need to print images or photos selected from the Internet. It is advisable that they are not large. Next, carefully cut them out and place them on the surface of the notebook in the desired order.
Then we glue the photographs to the notebook, having first applied glue to their back side.
To make the glued photos shine a little, you can lightly grease their front side with decoupage glue, moving in one direction.
When the glue dries, you can additionally attach a bright ribbon with any inscription to the notebook.
Thanks to this experience, you will know how to make a diary cover with your own hands. The technology of action in this case is similar.