Making a bunny and other animals from cotton wool
Today, buying any toy is not a problem, but if you want to really have exclusive things, you should start making them yourself.
Moreover, many crafts are quite easy to do with your own hands. And very detailed and step-by-step master classes will help you with this. For example, for the New Year, figurines of various animals made from cotton wool will become very relevant: a hare, a bear, a sheep or a lamb, any other fairy tale characters or symbols of the coming year.
You can use such toys with children for simple games (stories and fairy tales about a bear, bunny, sheep, ram and others) or play out entire stories with them in a puppet theater.
Face design and clothing
A hare's nose.
Naturally, everyone who sews such a toy wants to dress it up to their own taste. You will see for yourself what exactly suits your hare as soon as he is ready. Many craftsmen write that each tilde doll has its own character, and if the clothes that were originally planned do not fit (this happens!), you have to redo everything.
Cotton wool as a malleable and wonderful material for creating interesting crafts
Due to the fact that cotton wool is an excellent “building material”, you can make toys of any complexity from it with your own hands. However, to make certain parts of crafts you will need different types of cotton wool:
- You can create very small parts from cotton pads (for this you need to prepare them a little: coat them tightly with paste and dry, and cut out the necessary elements only when the material becomes like soft, thick cardboard);
- the main material used in any master classes and from which any kind of crafts are made are cotton balls;
- You can get non-standard, that is, non-round parts if you take ordinary cotton wool in a roll - if you wish, you can sculpt any shapes and figures from several layers of cotton wool.
To make the cotton wool more pliable, you will need a paste. With its help you can create anything you want. It must be cooked as follows:
- dilute one tablespoon of starch in a small amount of water;
- then boil 250 ml of water;
- and pour the diluted starch into this boiling water, stirring continuously;
- bring to a boil, but do not let the solution boil and remove from heat;
- cool.
The preparatory stage of the master class consists of preparing a paste and “bathing” cotton balls and disks in it, and then laying them out on the board. When they are dry enough, they will come off easily. You can help yourself with a wooden stick so as not to get your hands dirty.
Necessary materials for a bunny costume for a boy (girl)
The list of necessary materials and tools will depend on the image.
The standard list of required materials includes:
- threads of white and black shades;
- thick white or gray fabric;
- faux fur tone suit;
- thick cardboard;
- linen elastic;
- pattern on paper;
- marker;
- padding polyester;
- felt for decoration.
To create a girl's outfit, you may also need a satin ribbon and beads. For decoration, you can sew a beautiful carrot.
To do this you will also need orange fabric and wire.
Also, costume attributes can be made from thick Whatman paper.
Advice! If cotton or satin fabric has been chosen, it is best to decorate the garment with fur, cuffs or wadding to complete the look.
Let's start making animals
In fact, this preparatory stage is practically half of the whole process, since the dried cotton parts will look like a construction set from which you can assemble any figures. They can remain white (thematically this would be suitable for a sheep, winter coats of bunnies, or a polar bear), or paint the crafts with gouache.
The bunny is very easy to make. First you need to roll up the body (from two or three balls, depending on how big you want your bunny to be), and then take cotton pads and draw on them all the small details - ears, tail, paws. Then cut them out and glue them to the body. All that remains is to paint the bunny’s face.
Other animals are made using the same principle. If you invited many guests to the New Year, then such crafts can be used as small souvenir gifts.
Lumps of cotton wool are also great for creating another type of product: using cut out templates-figurines of various animals - the same hares, bears, sheep and others, you can make wonderful crafts. You just need to distribute the cotton wool over the template and glue it tightly. Muzzles and other details can be completed.
And, of course, cotton wool remains the same material for stuffing homemade fabric toys, which can be easily made from anything - even gloves. Your imagination will definitely tell you where to start and in which direction to move. And the result will certainly please you and your loved ones.
How to make a Christmas bunny with your own hands
The Christmas bunny can be made from scrap materials. There are options for any level of difficulty, including for children.
DIY Christmas bunny tilde
It is better to sew a Christmas hare tilde from flannel or fleece in white, gray or sand colors. For clothes, you can take any fabric. Choose a combination of red and green; a checkered pattern works well.
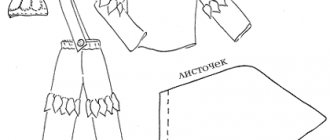
The Christmas tilde bunny can be sewn using the pattern below.
The algorithm is simple:
- Transfer the pattern to the fabric and cut it out.
- Sew the parts from the inside out, leaving holes for the filling, turn them inside out and stuff them.
- Sew the legs and arms straight into the body, add ears.
- Make clothes according to suitable patterns.
- Fix the beady eyes.
- Draw blush - acrylic paints, pastels, crushed colored pencil lead.
Advice! The inside of the tilde hare's ears can be colored. For Christmas, red, a checkered pattern or with snowflakes and stars are more suitable.
The ears can be made longer and drooping - they need to be sewn directly to the body
Tilda the girl can sew a dress or jacket with a skirt, and the boy can be dressed in pants with a shirt or sweater
DIY Christmas bunny from foamiran
Foamiran is a plastic material and is quite easy to work with. The Christmas bunny can be made using the template below like this:
- Cut the chest, tail and nose from white foamiran.
- Make the carrot from orange material, and its tail from green - it’s convenient to use a figured hole punch.
- Cut out the inner parts of the ear from pink foamiran.
- The remaining parts can be made from silver or golden beige foamiran.
- Gently heat all the parts from the inside out, applying them to the iron so that they bend. Round the back further
- Glue the breast and back so that the latter overlaps the edges of the first.
- Glue paired parts together - head, ears, paws, tail.
- Connect the main parts of the body with glue.
- Glue the mouth, nose and eyes, carrots to the paws.
- Tie a red or green scarf - a suitable ribbon or cut it out of felt.
- Attach the suspension to the straight ear.
Comment! Using the pattern below, you can make both ears straight or one ear and the other curved.
Instead of cutting out the eyes from foamiran or paper, you can draw them or buy decorative plastic parts
DIY Christmas bunny on a pompom tree
You can make pompoms yourself or buy ready-made ones - you will need three pieces, it is better to take one with a diameter 1.5-2 times smaller.
Instead of a bow, you can make a scarf - cut it out of red or green felt, attach it to a ring made of paper or cardboard
It's easy to create a Christmas bunny:
- Cut out the outer part of the ears from silver foamiran, and the inner part (smaller in size) from red or pink foam. The optimal length is 7 cm with a pompom diameter of 4 cm, the width is half that.
- Bend each ear inward and secure it at the base with glue.
- Glue the ears together at the base, placing the ends of the hanging thread inside.
- Glue two pompoms together to create the cheeks of a hare. Fix the remaining ball on top, which will be the upper part of the muzzle.
- Glue decorative plastic eyes.
- Cut out a white oval from felt or other suitable material, glue a black nose-bead and mustaches made of thread to it.
- Glue the ears to the head.
- Make a tongue from a piece of pink felt and fix it on the muzzle.
- Make a bow from foamiran or other red or green material (you can use a ready-made one) and attach it to the bottom of your head.
Instead of the third pompom, the top of the head can be formed from a satin ribbon, as in the video:
A little history
Previously, not many glass toys were produced due to a lack of raw materials, and toys made from cotton wool turned out to be the most affordable. They were made by masters of their craft, depicting not only New Year’s characters, but also various animals, cartoon characters, and Soviet-themed toys. These were polar explorers, skiers, pioneers and border guards.
In the creation of cotton toys, the experience of hereditary craftsmen who were engaged in their manufacture even before the revolution was used. Then, in the thirties of the last century, they tried to launch mass stamping of products, mainly animal figurines. The toy was glued together from two halves and covered with nitro varnish.
Despite this, until the fifties, cotton toys were made by hand. Then the mechanization of production completely displaced such toys from the mass market. Only a few folk craftsmen made them at home. The beauty of a cotton toy is that it has a soul. The soul invested by the master.
Recently, there has been increasing interest in this type of creativity. After all, the new is the well-forgotten old. Artists and decorators make not only cotton toys, but also various interior items, introducing new elements into the technology.
How was the cotton toy made? The wire frame was wrapped with strips of cotton wool soaked in starch paste, and sometimes pieces of paper were added like papier-mâché. After drying, the toy was painted, adding mood. Today we will create a cotton toy - a hare. Only instead of paste we will use PVA glue. So, what is needed for production.
How to make ears
Not a single New Year's bunny costume will be the same if you don't put on the baby's ears. You can buy them or make them yourself. There are several options:
- cut out of paper in one piece with a headband or even a mask;
- make it from white fabric based on a cardboard frame (also with a rim or elastic band);
- sew a full-fledged hat with ears and a muzzle or a hood, if this is appropriate in a costume.
The latter option is more suitable for a warm suit, since a fleece muzzle hat will not always look appropriate with a thin transparent guipure or delicate satin dress. But the easy-to-make ears on the headband, like in the next photo, will look good with any outfit.
Painting the hare
1. To get a warm gray, dilute white with black and add a little yellow (photo 7). Apply paint to the product using a foam rubber swab (photo 8). Dry until the glue and paint are completely dry. The product will be covered with a thin crust, on which it will be possible to apply small strokes (photo 9).
2. Tinting. Dilute a creamy shade of brown (white, black, red). Apply to the edges of the paws and nose. White - on the abdomen, chin, inner parts of the legs.
3. Draw a face. To make the eyes more expressive, first we apply white ovals (ellipses), then the iris circles with warm olive green (black, green, yellow), and we enliven the black pupils with a white dot (photo 10). We draw the nose with a thin brush No. 1 (photo 11). We outline the eyes with it along a line slightly smaller than the white oval. You can paint on the eyelashes (photo 12).
The cotton bunny is ready. You can use this toy to decorate your home for Easter by placing it in a basket and giving the bunny a spring bouquet. Or give as a gift to friends and acquaintances. About the traditions of Easter arrangements and composition design in the next article.
Hare by Tone Finnanger
Pattern 1
Pattern 2
Such a rustic bunny with a carrot hem - I really like it!
Fat hare Tilda
Patterns and visual assembly of the toy.
Necessary materials
When starting work, you should prepare the tools and necessary materials in advance. In addition to the cotton wool itself or cotton pads, you will need:
- Scotch tape or foil.
- Glue.
- Hair fixation spray.
- Scissors.
- Wire.
- Paper, newspaper or unnecessary wallpaper.
- Paints.
- Colored cardboard and paper.
- For decoration: beads, seed beads, sequins, braid and pieces of fabric.
And of course, it’s worth stocking up on creative ideas to make a cotton wool craft truly unique and inimitable.
Hare mask
How to make a hare craft in the form of a mask? Such a craft can be interesting and unusual for a child. After all, children love to dress up and imagine themselves as the hero of fairy tales. The mask can be used for home theater or as a New Year's costume.
Making such a mask is quite simple; for this, prepare:
- Cardboard
- Glue
- Rubber band or ribbon
- Scissors
- Colored paper
- Felt pens or markers
On cardboard we draw and cut out an oval of the hare's muzzle so that it fits the child's head in size. On a separate sheet of paper, draw and cut out the ears. Determine where the eyes will be on the part and carefully cut them out with scissors.
When performing this part of the work, adults must help their children. Make the middle of the ears pink; to do this, color them with a felt-tip pen or glue pink paper.
We connect the ears with the hare's muzzle. Cut out a nose from pink paper and glue it to the mask. Draw a mustache or make one from strips of black paper. All that remains is to attach the ribbon or elastic band to the mask. Your mask is ready and your child will be happy to transform into his favorite character.
Volumetric figures and applications
Hand made toys are very popular now. Experienced craftsmen and craftswomen, using the simplest materials and tools, create real masterpieces: from original cotton panels to three-dimensional toys.
DIY cotton wool bunny
Making a cotton wool hare is not as complicated as it seems at first glance. This technology came to us from those times when there were no telephones or televisions; in the late evenings after work, people made their own Christmas tree decorations and voluminous decorations from cotton wool.
- So, to make a bunny, you need to decide on the shape and size of the future toy. Then the frame is created.
- The frame can be made from ordinary wire . The next step is to wrap the wire with a thick layer of newspaper. To strengthen the workpiece, you need to carefully wrap it with tape or foil.
- Then the adhesive solution is prepared. To do this, glue is mixed with water in proportions 4:1. You need to roll balls of different sizes from cotton wool, moisten them in the prepared solution and paste over the model of the future bunny.
- Usually one layer of cotton wool is not enough, so after the first layer has completely dried, it is worth applying a second one - this will give the craft additional volume. The toy must be sprayed with hairspray, thanks to which it will become more resistant to external influences.
- You can paint the bunny's face with paints or use ready-made plastic parts.
- The bunny is almost ready, all that remains is to decorate it as your imagination dictates.
Using the same technology you can make a polar bear or a cute kitten, as well as many other funny toys. Such crafts are easy to make, but at the same time they look very original.
Making a cat from cotton wool
Another interesting option for cotton wool crafts, but more complicated than the first:
- Just like in the first option, you need to make an adhesive solution. The consistency of this mass should be slightly thicker than kefir.
- Next, take a small piece of cotton wool and soak it in this solution.
- Then the body is formed from it.
- Using the same pattern, you should “blind” the muzzle, paws, tail and ears.
- All components of the cat must be dried thoroughly with a hairdryer or on a radiator. This will take no more than half an hour.
- After the blanks have dried, they must be assembled like a construction set and then glued together.
- The finished cat figurine is again covered with PVA glue.
- When the toy is completely dry, you can proceed to decorating it. For this, various decorations are used: beads, bows, beads or braid.
But paper crafts don’t end there.
Hare applique made from cotton pads
Cotton pads are also great for creating appliqués. Materials you will need to create this craft:
- Cardboard.
- Paints.
- Brush.
- Bunny stencil.
- Glue.
- Colored paper.
- Trifles of decor.
- Using a stencil, you need to transfer the bunny onto the cardboard. The picture is carefully smeared with glue. Then cotton pads are spread over the glue. The thinner the layer, the better the picture will look. You can fluff the cotton wool a little to make the application more voluminous.
- A nose, mouth and eyes are cut out of colored paper.
- Then the picture is colored with paints.
- The bunny is ready, the picture should also be diversified with the sun, grass and clouds, which are also made from cotton pads.
Using this technology, you can make a fluffy lamb, a dog, and even an exclusive panel. It is enough to show a little imagination.
Air tree made from cotton pads
It is also possible to make an unusual tree from cotton pads:
- To do this, petals are cut out of cotton pads. You can come up with the shape and size yourself, or you can take a ready-made template from the Internet.
- The finished petals are stitched with thread. You need to make at least 35 of these flowers.
- Then the cotton wool blanks are fixed to a special foam ball using glue. The ball should be placed on a small stick.
- For stability, the tree is placed in a flower pot and filled with plaster.
- The craft can be decorated with green threads and also painted with paints.
Felt hare craft
Felt crafts can be a good gift for a loved one. Mom or grandma will definitely love this soft felt bunny.
To make it you will need:
- A piece of felt (color can be chosen as desired);
- Hare template or piece of paper;
- Thread, scissors and needle;
- Sintepon.
During work:
- Print out or draw a hare template yourself (parents should help the child here) and make a pattern.
- Transfer the pattern to felt and cut out 2 identical parts.
- Sew beads to both halves (eyes and nose).
- Paws, cheeks and the inside of the ears are made from felt of a different color. The mustache is drawn with a marker.
- Sew both halves together, leaving a small hole for filling the toy with padding polyester. Then it is also stitched up.
You can attach a thread to the hare and hang it on the wall. These are just a few ways to make children's crafts.
In addition to the proposed materials, you can use any other materials - fir cones, toilet paper rolls, threads, cotton wool and even vegetables. There are a lot of options, you just have to choose the right one.
Bunny hat with ears
Materials:
- fabric for hat and ears;
- satin or satin fabric for the inside of the ears;
- wire;
- elastic band.
Progress
- To sew a hat, you first need to make a pattern of the desired size.
- We take a measurement of the circumference of the child's head.
- The cap will consist of four wedges. The bottom of the wedge is calculated using the formula: OG measurement + 1cm: 4 = AB.
- We draw segments AB and find its middle. Up from the middle we lay a perpendicular equal to the length AB.
- We connect the top and bottom of the wedge with a smooth curve.
Using this pattern, we prepare four parts, not forgetting about seam allowances of about 1.5 cm. Next, using the technique described above, we make bunny ears without a rim.
Assembling the hat:
- fold the wedges with their right sides inward, pin them together;
- We put the ears in the opposite seams, sweep away the details;
- We sew the wedges on the machine, turn them inside out and remove the basting.
We sew a strip of the main fabric to the bottom of the product. The length of the strip is equal to the child’s OG, and the width is 3-5 cm. Fold the strip in half and sew it to the bottom edge of the hat. We turn the finished product right side out and sew an elastic band on the sides so that the cap stays in place during the performance.
Preparatory stage
First of all, you should carefully consider the image you are creating: what it will consist of, what color it will be, how warm the fabric will be.
The next step is choosing the material. Also at this stage you need to decide on the size. A two year old will require significantly less fabric than a six year old.
If you are planning to make a sun bunny costume for a girl with your own hands, then it is worth considering that sewing a fluffy skirt will require more material.
For greater clarity, experienced craftswomen advise searching the Internet for patterns of bunny costumes for both boys and girls.
Not every mother can make an outfit “by eye”. And ready-made diagrams can be easily adjusted to the desired size. In addition, their use will help to avoid many mistakes during the sewing process.
Mandatory elements of the costume are ears and a tail. When creating them, it is better to combine the base material with fur. Moreover, the latter can be used to decorate the main costume.
But it is worth remembering that it is preferable to use fur in limited quantities. In an overly warm outfit, a child will quickly become steamed.
A bunny costume for a little fashionista can consist of a skirt, sweater and vest. There is also an option in the form of a dress or jumpsuit. A DIY bunny costume for a boy can be one piece or divided into shorts, a jacket and a vest.
dav
As for color and decorations, everything is simple here:
- For girls - delicate pastel shades with bright accents in the form of red or orange bows, bead inserts, etc.
- For boys - gray and white tones. As decoration - colored fabric inserts - pockets, tie, collar.
Step-by-step instructions for creating ears
Manufacturing process step by step:
- Draw ears on paper and cut them out.
- Transfer the sketch to the fabric.
- Cut four pieces for the base from the compacted plush material. From satin - two smaller sizes.
- Sew or glue the pink parts to the base of the product. Iron the seams.
- Connect the parts of the base with the outer sides inward and stitch.
- Turn the resulting workpiece inside out and use an iron.
- Using wire, attach the finished ears to the headband.
- Wrap a piece of fabric around the headband and secure with glue.
