Among the numerous crafts made from pine cones, flowers probably take first place in beauty. Here are 12 examples of amazing DIY bouquets of pine cones. The popularity of crafts is not only due to the ease of production, it is an opportunity to feel like a real florist designer.
The examples of the master classes presented will help you make a bouquet of pine cones , even if you have never done crafts in your life. Be imaginative; remember, no two identical bouquets simply exist. However, like ugly flowers.
With the addition of other fruits and nuts
A bouquet of spruce branches can be made not only from tangerines, but also from dried orange slices with nut kernels and persimmons. Thanks to this, the composition turns out to be spectacular and very healthy with a rich aroma of fruits and hazelnuts.
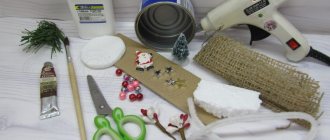
To make the composition you will need to prepare the following materials:
- peanuts along with walnuts and hazelnuts;
- decorative thread balls;
- decorative cotton flowers;
- spruce branches;
- dried orange slices;
- glue gun;
- tangerines;
- sticks;
- scotch;
- persimmon;
- bumps.
When arranging a bouquet, you are allowed to exchange some fruits for others. However, tangerines must be present in the composition, because they are characterized by a rich aroma. Dried orange slices are used in the design as decorative elements, so they are not allowed to be eaten.
Step-by-step instructions for creating a New Year's bouquet are shown in the steps below:
- Using tape, the spruce branches need to be fixed on sticks.
- You need to insert sticks into the base of the walnut kernels.
- Apply a small amount of glue to the dried orange slices, attaching sticks to them. Similar actions must be carried out with thread balls by inserting sticks inside the workpieces.
- You will need to pierce the peanuts with chopsticks. On decorative cotton flowers, pine cones and hazelnuts, sticks need to be fixed with glue.
- Tangerines with persimmons must be pierced with chopsticks. If the fruit is small, one stick will be enough. If they are large, you will need 3 pieces.
- When making a bouquet, you should always fix the sticks together with tape.
- The composition must be wrapped in wrapping paper, tied with twine. The arranged bouquet will remain fresh for 3 days.
What tools and materials will be needed
By using different cones, you can make anything!
There are many decorative compositions that give a cozy atmosphere to the interior and refresh it. Let's include here decorative New Year's wreaths, topiary, autumn fruits, bouquets of pine cones and autumn leaves. Crafts can be anything, even figurines of animals - bears, hedgehogs, penguins, owls. No child can remain indifferent and watch the process from the sidelines!
For work, collect all the necessary material and prepare the tools:
- Several cones of various sizes.
- Tree branches.
- Acorns, nuts.
- Leaves.
- Pliers.
- Wire.
- Glue gun.
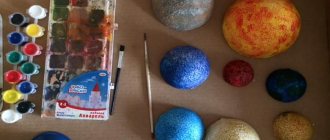
- Acrylic paints.
- Tassels.
- Container for placing a bouquet.
- Varnish for covering pine cones (you can do without it).
Preparing cones and leaves for work
Preliminarily inspect all the collected trophies to create a bouquet of pine cones with your own hands - the craft cannot be sloppy. They may need additional processing.
If the buds are very dirty, it is advisable to wash them carefully and then dry them in the open air. For cleaner ones, just dry them thoroughly and brush off the dust.
Each unripe and unopened cone will need to be placed in an oven heated to 200 degrees. Do not close the door - the cones will open.
If you just need unopened scales, lubricate the cone with glue and dry.
Use sprays with dyes and glitter. Artificial snow will also come in handy.
The collected leaves will also need to be prepared, otherwise they will dry out and warp, and then crumble into small pieces.
“Preserve” them in a glycerin solution. For the composition, the ratio of parts is 1 to 2 - glycerin and water, respectively. The leaves are placed in the solution for 4-6 days and then air dried. The result is beautiful glossy leaves.
There is also a quick way to prepare them. To do this, you will need to melt wax or paraffin and dip each leaf into it, immediately remove and dry. Place dried leaves on foil or newspaper.
What and how to paint
How can you color the pine cones?
There are many tools and methods that are suitable for this purpose:
- Sprays. Any aerosol enamels will do. We put newspaper under it and paint at a distance of 15-20 cm. It is better to paint on the balcony or street, aerosols have a very strong unpleasant odor.
how to spray paint pine cones - Sponge. If you plan to decorate a lot of material, this method is quite justified. It's best to put the sponge in a container. Saturate it with paint. Dip the cones, press and twist on the sponge on all sides.
- Glitter and hairspray. To fix the glitter, you can use hairspray with a strong hold. Spray the cone and immediately sprinkle it with glitter. It's too much to chicken out. You can do this several times until you achieve an even (or desired) coating.
- Glitter on PVA glue. Glue and water are mixed in a deep container. Pine cones are lowered and dipped several times. Then let the glue drip and leave to dry. You can apply glue with a brush and apply glitter on top.
Cover the cone with PVA glue and sprinkle with glitter - Acrylic paint or gouache. Apply with a brush or sponge. Just keep in mind that the sponge will only touch the edges. The brush will reach much deeper.
Paint the cones with acrylic paint using a brush - White. Fill the cones with white. Close the container tightly and place in a dark place. After 18 hours the material will noticeably turn white. Don't be alarmed, the cones will close; This is their reaction to moisture. But then they will open again. And one more thing I’ll warn you about. Often in the photo you can see completely white shoots. But don't expect to get these results quickly. To do this, it is worth doing the procedure several times. And each time the cones should dry well.
- A tin of paint. Yes, yes, this is the simplest, but most expensive method in terms of paint. We dip the lid on a string into a can of paint, take it out, and hang it so that the excess paint can drain off.
- Palm, stearin wax or candles. But this remedy is special. I'll show you a master class on how to work with it. They look unusual and pretend to be Christmas tree decorations. Another advantage is that they can be flavored.
A flower collected from individual scales
To make this flower, you will have to work hard.
It’s better to take a large cone, because we’ll take it apart into separate pieces and then glue it back together!
To work, cut out a circle from cardboard and start gluing the largest scales along the edge. Once the entire circle is filled, start the next row - and thus fill the entire cardboard base to the center. You can glue a round nut or a wooden bead into the middle.
Flowers created in this way are good for the panel “Bouquet of Pine Cones” - a craft for school or kindergarten should not fall apart the next day! Here the cardboard bottom will allow you to securely attach them with glue or thread.
Beautiful photo ideas
Fantasize, come up with your own original New Year's bouquets and delight yourself and your loved ones with handmade gifts. Happy upcoming year everyone!
- November 5, 2018
- Crafts
- Alexey Potyomin
Golden autumn with warm sunny days is a wonderful time of year. It's time to get ready for a walk with the children and start collecting natural materials for various crafts. Pine, spruce, juniper, larch cones - this amazing variety will come in handy for interesting evenings with the kids. Take some time and create a masterpiece for kindergarten, school or just for home.
New Year's bouquet of different fruits
A bouquet of tangerines and other fruits is a good gift or decoration for any room. One of its shortcomings is its fragility - the product is so appetizing that you want to eat it right away.
What will we prepare for work?
For a DIY New Year's bouquet you will need the following materials:
- apples of different colors;
- tangerines and oranges;
- hard pears;
- green bananas;
- skewers;
- plant branches;
- extension cords from a flower shop;
- wide tape;
- flowers;
- grape.
If the sweet gift will be eaten in the coming days, you can add kiwi and persimmon. They will decorate the composition. Fruits must be fresh and undamaged, preferably with a waxy coating.
Manufacturing process
- Prepare components for a winter bouquet.
- Cut off the tops of the pomegranate and orange. Cover the cut of the latter with film to protect it from weathering.
- Place fruit on skewers. Secure them with wide tape. Place plant branches between the fruits.
- Insert flowers into extensions and add them to the arrangement. Pack the product in craft paper.
What New Year's bouquet can you buy:
A gift should be selected individually for each person. To make it easier to find it, you can look at winter bouquets photos for inspiration:
For woman
For the New Year, you can give women a bouquet of tangerines and sweets. This option is better than the classic colors. A set of pine needles and a bottle of lemonade or your favorite alcoholic drink would look good. Romantic people will like products made from toys, as well as New Year's compositions with candles.
For a man
A man will appreciate a bouquet with champagne or other alcohol. The gift should be practical and contain useful products. Popular options include sausages and other meat products, smoked and pickled foods. Dried fish products with snacks and New Year's compositions with candles look interesting. The most important thing is to take into account the interests and preferences of a man.
For a child
The child will love a sweet gift or one made from toys. The most original is from the kinders. You can combine toys and sweets to please your baby.
