Any thing made with your own hands is considered not only exclusive, but also “alive” because a piece of soul, warmth, and energy was sewn into every detail. Interesting toys Tilda cats, bunnies, bear cubs, chickens will decorate any home and will serve as a wonderful gift.
Creating a tilde with your own hands will not take much time, but the result will delight you for a long time. Many magazines and the Internet present a large selection of life-size tilde cat patterns; you can easily sew a toy with it.
Pattern of a fat hare tilde
To create a bunny toy, many needlewomen use a life-size tilde cat pattern, adjust the ears - enlarge them to the desired size, or take a ready-made bunny pattern.
The pattern is pressed tightly to the fabric, outlined with chalk, and allowances are taken into account when cutting. Sew along the drawn line; the places on the cat pattern marked with a dotted line are left unstitched; through them the parts are turned right side out. The next stage is to carefully iron all the seams. All parts are filled with filler so that each element is soft; you should not stuff it too tightly; the toy may tear. Next, the unstitched areas are carefully sewn by hand. All parts are assembled into one product. Sometimes clothing patterns for tildes of a cat, a hare and others are added to the main toy patterns.
It is not necessary to sew outfits according to the proposed patterns; you can come up with an original costume yourself.
Tips for using tilde patterns
Before you take the tilde cat pattern, cut the fabric and sit down at the sewing machine, you should read the recommendations of people who have experience in sewing tilde, perhaps many tips will help you avoid problems when creating a toy, while others will encourage you to create, for example, clothes for cats, interesting registration
All seams are made only from the wrong side, otherwise the toy will look sloppy.
It is necessary to leave allowances along all seams; if you are sewing a garment for the first time, it is recommended to leave 0.5 cm, for more experienced ones - 0.3 cm. If the allowance is large, at the end of the work the excess fabric is cut off, leaving 0.3 cm to the seam.
From all the variety of types and forms of tildes, choose the one you like best, they have almost the same complexity. The tilde cat pattern can be downloaded from the Internet, which opens up the opportunity to adjust the size of the future toy. Using graphic editors on a computer, you can enlarge, compress, or stretch the pattern to the required size.
Material for cats and their clothes are washed and ironed before cutting.
You should strictly follow all the recommendations for the pattern, tucks, darts, they must be laid as indicated, otherwise when assembling the toy, the joints may not match.
When sewing a cat with your own hands, in places where parts have a fold, in rounded places, you should make notches in the allowance, this allows you to avoid the formation of folds and irregularities.
The finished part is turned inside out using a long object with a blunt rounded end (pencil, pen); if you take a pointed long object, you can tear the fabric.
For the filler, choose one material for all parts; it has proven itself well for these purposes - padding polyester, padding polyester, alpolux, holofiber.
When decorating the face, choose small black beads for the eyes, and dark embroidery threads for the nose and mouth. In principle, the face can be drawn with a thin black marker or fabric paint.
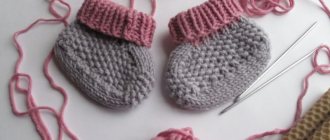
Knitted
You can knit cute sofa pillows with your own hands. All over the world, things made by hand are valued. Things keep the warmth of the hands of the person who made them.
These original sofa pillows in the shape of cats can be knitted.
For work we will need:
- Knitting needles of medium thickness.
- Any threads, leftover threads (you can take threads of two colors and combine them).
- White threads for paws.
- Synthetic padding for stuffing pillows, hands and feet.
- Two buttons for the eyes, a piece of fabric for the nose.
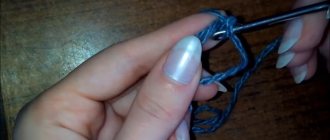
We knit either two squares, or a rectangle, which, when we fold it, will turn into a square. The size of the pillow can be any, the smallest is 35/35 centimeters, you can make it larger. The paws are approximately 28 centimeters. How many loops to cast on: knit a little on the knitting needles and look at the number of loops in 1 cm. Multiply by 35 cm.
Knitting pattern
Option 1: stockinette stitch.
- Row 1 - knit only,
- Row 2 - purl only.
Option 2: confusion.
- Row 1 - knit - purl - knit - purl, etc.
- Row 2 - purl - knit - purl - knit, so that the knit is always above the purl, and vice versa.
The front and back paws and tail are knitted using stockinette stitch. We knit the required length, first we make decreases (we knit two loops together and tighten the rest with thread).
On the other side, we knit the paws: we knit three from each loop with white threads to make a white paw. You don’t have to stuff the length, but stuff the hand and foot with synthetic padding and embroider the fingers. We decorate the face with applique. We sew the pillow, leaving a slot for the padding polyester. We stitch the ears and stuff them with padding polyester. The cat is ready.
Two-legged cat tilde
It is an excellent option for those who are afraid to start sewing. The cat pattern is simple, even a child can do it.
All parts are paired, except for the nose. They cut, sew, and in all tilde-style patterns leave an unsewn space for turning and filling.
To obtain a neat nose, the part is pulled together at the edges, forming a “bag”, filled with stuffing, the threads are tightened, and the part is closed. Sewn to the head. Unlike a standing cat, the tilde two-toed cat does not stand; it is usually hung on a hook or door handle.
Beads are sewn on the eyes with black thread and a mustache is embroidered. At the stage of designing the face, you need to show your imagination - eyes, nose, mustache can be made whatever you want, to suit every taste.
Creative ideas for inspiration
Just look!
Simply gorgeous cats from “art group YOY!”
Cute primitive cats from JuliaWine
Interesting composite pillows from ItsTimeToDream
All sorts of different things
If you don’t like working with photo master classes or want to see with your own eyes the creation of another delight, then this section is especially for you! Here are the best video master classes on creating cat pillows (both in Russian and English). Enjoy!
Pattern of a fat cat tilde
A fairly simple product to make, well suited for beginner needlewomen. The cat pattern is adjusted to the desired size of the future toy. Patterns are cut out of thick paper.
The pattern is transferred to the wrong side of the fabric, seam allowances are taken into account, and cut out. When sewing a cat, they start with paired parts, iron them, fill them with filler, and carefully sew open areas by hand. Collecting a toy. You can complement the cat tilde with various items and homemade decorations.
Master class on making tilde cats
When cooking, the toy looks very cute, pleasant to the touch, and will serve as a wonderful addition to the interior. A small master class will help you create crafts.
The tilde cat pattern consists of a small number of parts.
To sew a toy you will need: basic plain fabric, colored fabric for clothes, lace, ribbons, black beads for the eyes, black fishing line for the mustache, dark threads, 4 buttons to match the main material, filling.
Cut out a paper pattern from thick paper or cardboard. The cat pattern is transferred to fabric folded in half, secured with needles and outlined with chalk. Taking into account seam allowances, cut out. They begin work on assembling the toy from the head, sew it together, leaving a small hole unsewn for turning it inside out and fill it with filler, after which the hole is sewn up by hand. The same operation is carried out with the ears.
A distinctive feature of this Tilda cat doll toy is that all its legs move as if on hinges. This effect is achieved in this way: using buttons, the legs are sewn to the body, poking it right through, and the upper or lower legs are sewn at the same time.
The tail is made similarly to other parts, sewn to the back of the body.
The eyes are decorated with beads or simply painted, the nose is embroidered with thread, the cheeks are painted with special fabric paints, the antennae are drawn with fishing line, pulled through the muzzle, their length is limited only by imagination.
The way to make a dress pattern for a cat is to measure the required length and width of the dress from the doll. A rectangle is drawn on paper based on the data obtained. At this stage, you should reduce the top part of the dress - you get a trapezoid. Transfer the pattern to colored fabric, cut out two parts and fold them face to face, sew them together with your own hands or on a machine, leaving holes for the arms and head. A hole is made for the tail using scissors. Decorate the dress with lace, ribbons, bows. Tilda is ready.
Chestnut cat
We will need:
- two round chestnuts;
- four flat chestnuts;
- plasticine of different colors;
- toothpicks;
- awl and scissors;
- feather;
- thin wire.
Before making the “cat” craft, make sure that the chestnuts are clean and without holes.
Make holes in flat chestnuts with an awl and insert toothpicks into them. These are cat legs.
Take two round chestnuts (medium for the head, large for the body) and connect them with toothpicks. Use an awl to make a hole for the tail and legs.
At this time, the child sculpts eyes, nose, and mouth for purring. Carefully glue the plasticine onto the face of the future cat.
We connect the legs and body, make antennae from thin wire, and insert a feather into the hole for the tail. Playful Barsik is ready.
Selection of schemes
#462 Salomon