Nowadays it is fashionable to decorate your living space with handmade items. Often this does not require special expenses, if only you have the time and desire to create. Materials for arts and crafts can be easily purchased in stores or ordered online. Natural materials are widely used, you just need to see their capabilities: what is hidden under the intricate bottle gourd, what do the cones look like?
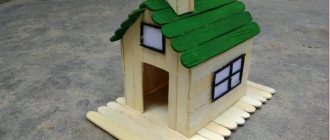
You can get down to business with your children, making houses from polymer clay. They can be of various shapes and sizes - round, square, in the shape of a teapot, fly agaric, strawberry or apple.
What types of houses are there?
If there is a house, then someone must live in it. A dwelling for gnomes is installed in the front garden of a private house. Often mice or frogs choose it for themselves if there is a bowl of water nearby, representing a lake. In the evening, you can light a fire in such a mansion by placing a candle inside. If the house is made in such a way that a hand does not fit into it, this will be difficult to do. Therefore, you should take care in advance about how to get out of it objects or animals that got there.
Small houses made of polymer clay are hung on trees to attract birds. Then they act as a feeder. They are also used in flower beds. It is very convenient to put them in place of already faded daffodils or dug up tulips.
In an apartment, such houses are placed between flower pots, in the kitchen tea bags are placed in them, and very small ones can serve as salt shakers or needle beds.
My bottle houses
I want to show my new works. This bottle is decorated with salted dough.
I made salt dough (flour and fine salt in equal proportions), coated a bottle with PVA, glued the dough and “cut” the bricks.
And then the problems started. The brickwork had to be baked. I forgot about the “seven times unfinished” bottle, it was drying on the windowsill (draft and +35).
Then she “laid out” the pipe and, again, dried it over the burner. I painted the bottle with acrylic ocher and painted the “cement” between the bricks with a brown tint. The roof and cork were painted with acrylic paint (carmine color).
The cornice above the window and the roof were painted with colored varnish. The masonry and door were covered with yacht varnish. There were nails and a handle on the door, and the window was pierced with a copper outline. I'll probably rip off the window. If you don't like it, it's crooked. It was necessary to draw the frames on the window, and then make the roof and canopy. Next time I'll do that.
Cell phone photo and quality... Sorry.
I popped 2 more bottles. Again my favorite zyuzies. That's what happened
The neck was sealed with salt dough
This is what happened.
And I made this house from homemade cold porcelain.
I came across bottles of our Uzbek vodka (2 large 0.7 l and 1 smaller 0.5 l).
At first I thought of making a house out of salt dough.
But I didn’t really like something (the same as the previous round bottle). I decided to try cold porcelain. I studied MK from Marino. True, it only works with clay and leather. There was no clay, no leather, so I decided to try homemade cold porcelain.
Porcelain recipe:
-starch 2 tbsp.
- Vaseline oil or petroleum jelly (I found only petroleum jelly at the pharmacy) 1 tbsp.
- baking soda on the tip of a knife
- PVA.
I made a double portion. Pour starch (potato starch) into a bowl, add baking soda and petroleum jelly. I ground it with a spoon (as much as possible). Only a small piece got wet. Probably, if there was Vaseline oil, it would have been mixed. Then I started adding PVA 1 tsp at a time. and rubbed it again until it turned out to be a dough-like mass. She smeared her hands with Vaseline and began to knead. Knead (according to the recipe) until the mass holds its shape (poke your finger and see whether the print is deformed or not).
I took about half of the mass, and rolled the rest into a ball and put it in a plastic bag. The main thing is that there is no access to air, otherwise some kind of fungus may grow there.
From what I took, I rolled it into a ball, made a hole in it and dripped brown color into it. Knead again until the color becomes uniform. The first drops gave a fairly light shade. I added more. In general, at your own discretion.
I kneaded the mass a little (as for a pie), put it on the bottle and rolled it out with a rolling pin (I greased it with vegetable oil). I drew bricks. For the lower part of the house, I also added color to the mixture to make it darker. I kept it in the oven for a bit (I didn’t know how long it should have been dried). Then the bottle dried by the open window. I carefully picked out the masonry, lubricated a bottle of PVA and glued the front part to it. In some places I brushed the bricks with an almost dry brush (brown color). I took a small piece from the bag, added red color and made a door. I painted the window in light gray (acrylic paint for walls and ceilings + black ink).
I made a frame for the window. Somehow it didn’t seem very good to me. I decided to make bars on the window. The outline would be very rough (the window is too small). And then an idea came to me. I glued black cotton threads to the back side of the window.
I cut off the tails and glued them to the façade using PVA.
I carefully dripped NC varnish inside the window and pressed down the threads. After about 5 minutes, more dripped. The grate sat tight. Painted it with yacht varnish.
When the varnish had dried, I began to cover the entire remaining space with fabric (an old bedspread). I glued it on PVA.
When dry, I covered it with colored varnish (2 layers) and then with yacht varnish.
A crown was glued using Moment glue (bought in a store).
And this is the view from above.
Thank you for your attention.
Pumpkin houses
Natural materials always find their use in the craftsman. Decorative bottle-shaped lagenaria can become the basis for a round house with a removable roof. You can store food in such a pumpkin; previously it was used as a container for butter or milk. It does not allow light to penetrate inside, but retains natural humidity.
For one house you will need two small pumpkins. One will be the roof. Procedure:
- Cut the fruits, remove the pulp, and dry the resulting containers.
- Trim spruce or pine cones - their scales will be used to make tiles.
- The base pumpkin is filled with something to give it stability.
- On the part that will be the roof, tiles made from cones are glued. Start from the bottom row and work your way up.
- Windows, doors, roses, and leaves are made from polymer clay. All parts are baked in the oven according to the instructions included with the package.
- Glue the clay parts using a glue gun.
- Paint the house with acrylic paints.
- Cover the work with water-based varnish and sealant.
If the roof is made permanent, then it can be glued. But you will still have to use two pumpkins and scoop out the pulp from them.
Craft, house for Santa Claus
We will make an interesting craft from an ordinary tin can. Although we will use a small one, which was previously used to store caviar, you have the right to take any one. Please note that the larger it is, the higher the consumption of any other material. We will wrap the jar in burlap and make something like a roof out of cardboard. As a result, we will get a house in which Santa Claus will live. His image can be taken from a set of stickers, or cut out from a postcard. There are a lot of options for this. Cardboard is present in large quantities in shoe boxes or some household appliances.
The main emphasis will be on decorating the home of a fairy-tale character. In this case, you can use an unlimited amount of material. You may have some glitter, unnecessary tinsel, or decorative ribbon that has long been torn and you were planning to throw it away. All this will go to work in different proportions. We will make snow from ordinary cotton wool, although if you don’t have it, you can get by with simple makeup remover discs. In any case, we hope you enjoy this tutorial. Exactly the same as what we received when preparing it for you.
Houses made from cans
Didn't find the right pumpkin? No problem! You can make fairy houses from jars and polymer clay. To do this you will need a jar with a screw cap. You can take half a liter. You will need more polymer clay than for a pumpkin house. You will need stacks for applying texture and foil.
Procedure:
- Roll a volumetric ball out of foil.
- Press it forcefully into the jar with the lid on. You will get a depression.
- Glue the foil ball to the lid.
- The ball is molded into the desired shape of a mushroom cap - pointed, round or with curved brims.
- Unscrew the lid and cover the mushroom cap with a thin layer of polymer clay, making the structure of the mushroom on the inside of the cap in stacks in the form of plates or sponges.
- Roll out the clay and apply it to the jar, completely covering it. If there is not enough for the bottom, they make a patch.
- They cut through the window in stacks, draw shutters, a door, and a house number. They mold a pipe and imitate brickwork on it. A canopy is made over the door, but not attached.
- Pour water into a jar and put it in the oven. The roof of the house and small parts are placed nearby. Bake according to instructions.
- They assembled everything and glued the canopy and pipe. The finished house is painted with acrylic and, after drying, coated with acrylic varnish.
If you use gouache, it will spread under the varnish. Some watercolor colors too. If there are no acrylic paints, PVA glue is added to the gouache.
List of materials
List of materials for creating crafts
- Small caviar tin;
- Sackcloth;
- Cardboard;
- A piece of foam;
- White fluffy wire;
- Cotton wool or cotton pads;
- Scissors;
- PVA glue;
- Brush;
- Gouache or brown oil paint;
- Glue gun;
- For decoration: a Christmas tree branch, a small Christmas tree, stars, Santa Claus, beads, stamens.
How to bake polymer clay in the oven
Beginners are hesitant to bake the product. But unfired clay is a fragile thing; in order to securely fix your work, you need to keep it at high temperatures. At first there may be a defect - if the clay is overbaked, it will burn and become covered with bubbles. If you take the product out ahead of time, it will not bake inside and will become fragile.
For the process to be successful, all parts should not be thicker than one centimeter. It is better to then glue the product together from many elements. They are burned by placing them on a toothpick. Spread crumpled foil on the bottom of the baking sheet and simply stick toothpicks into it. Large parts are laid out on paper, which is lined with a baking sheet. A regular A4 office paper size will do.
Baking temperature depends on the brand of clay. For Fimo it is 110 degrees and a time of 30 minutes. To know exactly what the oven temperature is, you should purchase a thermometer. They also bake prototypes and check them for fracture. After that, the temperature is increased for fragile products, and reduced for burnt ones.
How to make houses from polymer clay
Nowadays it is fashionable to decorate your living space with handmade items. Often this does not require special expenses, if only you have the time and desire to create. Materials for arts and crafts can be easily purchased in stores or ordered online. Natural materials are widely used, you just need to see their capabilities: what is hidden under the intricate bottle gourd, what do the cones look like?
You can get down to business with your children, making houses from polymer clay. They can be of various shapes and sizes - round, square, in the shape of a teapot, fly agaric, strawberry or apple.
Master Class
Houses made of polymer clay are a fascinating form of not only creativity, but also relaxation. In the video, the arts and crafts master talks about his dreams while working. After several successful experiments with clay, the skill will come, and while sculpting, only pleasant thoughts will come to you: about your dream house and how to live well in it. Positive energy will definitely appear in the finished work.
This work can be done together with children. Entrust them with simple details.
Making a fairytale candle house
My MK is for beginners, for people like me two years ago, when you want something, but don’t know which way to approach this “something”.
Not long ago I watched a program with a famous person. The personality was impenetrable and resistant to the attacks of the presenters; she answered everything: “Me and my creativity, I accumulate light in myself and give it to people.” I liked it so much that I also decided to accumulate light and give it to people. And so what was accumulated was expressed in the form of a candle, no, not a factory, but a house. And in order to finally convince you of the breadth of my soul, I will share the accumulated light with the help of a master class on making a house from self-hardening clay. First, a few photos of the finished house.
Just in case, this is a nest with chicks.
The house doesn't look bad without a candle either.
So, if you liked the house and you wanted to, if not make it yourself, but at least see how it was created, then stock up on popcorn - there are a lot of photos ahead.
To begin with, we will need: - Self-hardening clay (a large piece) - Rolling pin - PVA construction glue - Container with water (wet dried parts, rinse brushes from glue) - Knife (can be a stationery knife, maybe an ordinary kitchen one) - Brushes - Wooden board (namely on it we will torment the clay before it turns into a house)
Here is something that was not included in the first list of necessary things, but will also come in handy.
Somewhere in our minds we imagine a house that we would like to create and draw its details on paper. The size is at your discretion.
We tear off an impressive piece of clay, and carefully pack the rest into a bag. It is very important to seal the opened clay well; at the end of the work, it is generally advisable to spray the bag with clay a couple of times from a spray bottle of water. This way you will maintain the moisture content of the clay for the entire period of work. And you will have to work for several days, because... Each stage of the house must be thoroughly dried.
Roll out a piece of clay evenly, the thickness should be at least 5-7 mm, because As the clay dries, it becomes thinner. So don't be greedy. Next we apply the details and cut out the walls of ours, i.e. your future home. We remember that the house has four sides, so there should also be four parts - two for each part.
We immediately begin to decorate the cut out parts with basic elements, such as doors, windows (we cut out windows) and curtains. We attach all decorative elements with PVA glue, after drying everything will hold very tightly.
We add flowers and make a pattern on the door that imitates wood.
For a curtain, you need to roll out the clay quite thinly and glue it, slightly gathering it.
Here I wanted to show how thick the walls should be for a house in its raw state. This is an arch for a candle.
The first stage is completed, the parts are in the required quantity, decorated and dried. I sand all the unevenness, roughness and sharp parts with regular sandpaper, the finest sandpaper, mine is zero. It is better to sand the clay over the sink, otherwise the entire table will be covered with dust.
The house assembly stage is very simple. We roll sausages out of clay, grease the edges of the house parts with PVA glue and connect them. We rub the clay sausage onto the walls using wet brushes or a stack.
The house was connected, the corners were dried out and the roof was worked on. I made the roof without a preliminary pattern on paper. We simply roll out a layer of clay, cut out a not-so-even rectangle, apply it to the house and trim off the excess. We make a hole for the pipe.
Using PVA, we glue the pipe into the roof at an angle.
To prevent the roof of the house from falling in, we roll a clay sausage and stick it on the protruding parts of the house. To prevent the sausage from collapsing while it dries, we strengthen it with improvised means. Dry well.
We decorate the roof like a tree, as we previously did with the door of the house, dry it slightly, giving it a shape, but not until a whitish coating appears. If the roof is too dry, it will no longer be possible to attach it to the house and it will break. We try the dried roof on the house, lubricate it with PVA and finally glue the roof. Let's dry it. After about a day, you can proceed to the next stage. Dry clay becomes light and ringing.
Glue stones, moss and sand
First, we attach the stones to the shoulder of the bottle using plaster, but do not touch the previously drawn door. It is enough to apply a thin layer of plaster on it.
Pour moss into the spaces between the stones and press it down firmly with your fingers.
On March 20 they launched a burning wheel: rituals on the day of the spring equinox
In Russia they are asking to cancel the mandatory fee for choosing a seat on an airplane
You can make a pet bed with your own hands. It is soft and very comfortable
Cut out the inside of the paper plate so that only the edge remains.
We put this edge on top of the plastic bottle.
We cut a round window on the shoulder of the bottle and use plaster of Paris to secure the stones, sand on the edge of the paper plate, around the window and on the shoulder of the plastic five liter bottle.
We mask the neck with plaster so that it looks like a chimney.
When to collect birch sap in 2022 and how to choose the right tree
Alexandra Shoua's eldest daughter grew up without him, but forgave him all his insults
Why hysteria is a stage of development, and how to help your child survive it
