Volumetric figures of cars
Many people use paper. It forms volume perfectly. As a result, jewelry is made from pliable material.
- The product can be used as a toy in the future.
- An important aspect of inventory is density.
- A fake car is made from paper and cardboard. Stock up on glue to fit the pieces together.
- Using scissors, according to the template that needs to be placed on the canvas in advance, cut out the figure.
Volumetric model
A miniature truck made using individual elements of origami techniques will look very impressive. The work will require a relatively large amount of materials and tools:
- tape, glue;
- scissors and compasses;
- thick texture paper;
- plastic bottle;
- pin and thin wooden sticks;
- pencils or paints.
Manufacturing instructions
- Step No. 1. For the future truck cabin, four squares are cut out, three rectangles of the same size.
- Step No. 2. You need to prepare two squares for the car body.
- Step No. 3. Two boxes are assembled from the cut out parts and connected with tape.
- Step No. 4. Pieces are cut out of the bottle, which, installed in the cabin, will imitate the windshield and side windows.
- Step No. 5. The “glasses” are secured with tape.
- Step No. 6. Eight circles are drawn with a compass and then cut out - the future wheels of the car.
- Step No. 7. Using thin sticks, wheels are attached under the desired parts of the truck.
- Step No. 8. The outer sides of the car are painted.
All that remains is to fill the truck with the things being transported, write out a waybill and send the truck to its destination.
Step-by-step implementation of a paper machine
- The first step is printing the parts. There are a lot of diagrams and templates on the Internet and other sources. Finding a photo of a fake car diagram is not difficult;
- If you don’t have a printer, you can draw the drawing by hand. Then use a pencil, ruler and eraser. A fake car turns out to be made entirely with your own hands. Refer to plans and drawings.
Making a car out of plasticine
Making a police car with your own hands is very simple. To do this you need to find red, white and black plasticine. It is better to work on a special board, using the tools that are in the kit. Brief instructions:
- two balls of small diameter are made;
- With your finger, each one is flattened into a rectangle;
- one is left whole, a triangle is cut out of the second, and a cabin is formed.
This is enough to create a foundation. The child can make small details in the form of wheels and flashing lights independently at his own discretion. Children really like crafts made from plasticine cars; you can choose any 2D model.
Note!
Crafts for February 23: master class on creating interesting DIY crafts for Defender of the Fatherland Day
- DIY crafts for February 14th step by step: a master class for beginners, with a description of how to make a craft for St. Valentine's Day. Valentina (140 photos)
Crafts made from jute: 100 photos of beautiful options. Easy instructions with photos and descriptions on how to make a craft with your own hands
Correct addition
For successful results in counterfeiting a car for a kindergarten or home, you must adhere to clear rules.
- Perform all actions according to the given steps.
- First, cut out the parts and glue the ends.
- Pay attention to the large elements first, then the small ones.
Master class on applique “Truck” for children 4–6 years old
Elena Chuvilina
Master class on applique “Truck” for children 4–6 years old
Topic: "Truck".
Master class for children of middle and senior preschool age.
Application is modeling on a plane. The applique can be made from different materials. This type of activity develops children's attention, fine motor skills, perseverance, memory, and imagination; teaches you to finish what you start. But when you see the result of your work, there is even greater interest in this type of activity. Simple work can be performed by children 4 years old, and more complex ones by 5-6 years old.
Applique "Truck" made of geometric shapes.
1 step. For work we will need the following material: colored cardboard, scissors, glue, white cardboard, “Truck” sample.
Step 2. Let's prepare blanks for appliqué: two rectangles (large and medium) of different colors; two black circles; two squares (large and small) of different colors.
Step 3. Glue the truck cabin (red rectangle) onto the cardboard.
Step 4 Glue the body (blue rectangle) to the cab.
Step 5 Glue the front part of the cabin (yellow square) to the cabin.
Step 6 Glue two wheels (two black circles).
Step 7 Glue a window to the cabin (one small white square).
Our “Truck” is ready.
Step 8 Based on the sample, you can make other (by color) trucks. Let's prepare blanks for appliqué: six rectangles (large and small) of different colors; six black circles; four squares (large and small) of different colors.
Step 9 The trucks are ready.
Children's master class on application for Children's Day “Gray the sun, so that the friendship of all children is stronger” Every year, June 1 is celebrated as International Children's Day. Officially, this holiday was first celebrated on June 1, 1950. Organizers. Photo report on the productive activities of older preschoolers using the application “Grain Truck” Goal: To develop creative abilities when working on the application. Objectives: Continue to introduce different types of grain transport. Develop. Notes on drawing in the middle group “A truck is rushing along the road” Objectives: teach children to draw a truck from several parts (cabin, body and wheels, learn to draw straight lines, teach children to draw in. Notes of the labor lesson “Truck” for second-grade students of the correctional school schools Goal: To form students' ideas about freight transport Objectives: Educational: To teach schoolchildren to work with geometric ones.
Lesson notes for February 23rd on Lego construction. Gift for dad “Truck” Purpose: To teach how to create a complex construction of a truck from Lego - a designer; teach correctly, connect parts. Equipment: Design kits.
Master class “Truck with flowers” I would like to offer you a master class of a truck that the guys and I did for my grandfather. Of course, you can give it to someone else as a gift. This work. Master class on the “Chicken” applique for children 4–6 years old Topic: “Chicken” Master class for children of middle and older preschool age. Application is modeling on a plane. Application.
Source
Paper fire truck
The sale of this vehicle will teach the child knowledge about company cars.
A fake fire truck requires the following materials:
- Glue,
- Two miniature boxes
- Colored paper
- And cardboard.
Use scissors as a tool. The cabin is created from a narrow box.
- It must first be divided into two parts.
- After this stage, you need to cover the parts with red cardboard. It is necessary to connect the body to the cabin.
- What's a car without wheels? Make them and add them to the fire truck.
- The staircase can be made of silver-colored paper. Foil will also work.
- A simple pen cap will serve as a flasher.
- The result is a toy that is educational in nature and suitable for many games.
Simple crafts machines
When doing joint creativity with your child, it is important that the technological process does not last very long. Otherwise, the child will simply get tired and lose interest. Therefore, a little time should pass from the start of work to the appearance of a new machine.
In this case, a toilet paper roll can help out. A racing car model can be made from it in a few steps.
- You need to cut an oval-shaped hole in the cardboard sleeve. This is the driver's cabin.
- The sleeve must be painted, covered with colored paper and stickers. A racing car must be bright!
- The wheels must be attached to the hub. They can be made from cardboard or plastic bottle caps. You can take an axle with wheels from a toy car.
- Place a pilot in a racing car. This can be any small figurine.
Another version of the simplest truck model is also simple and can be made from scrap materials in a few minutes.
You will need a small juice box and a container of baby yogurt or cottage cheese.
- The juice box must be cut so that about half remains intact (this is the future cabin) and a platform for attaching the body.
- Glue a small yogurt tray to the platform.
- Make wheels.
- Paint the truck or cover it with colored paper.
The entertaining toy is ready. If instead of a tray you attach a small bottle of drinking yogurt, you will have a car with a tank.
In a similar way, you can make a bus, a fire truck, or a van from a juice box.
Matchboxes can also serve as an excellent material for quickly making simple but entertaining cars.
Racing car
A racing car is the dream of many children. With due diligence in work, you will turn out to be a real participant in high-speed traffic.
- Use diagrams and drawings. There are a huge number of them on the Internet.
- Models vary in complexity.
- The car requires cutting parts and patience in assembling the structure.
- First, create a color version of the drawing. Cut out the necessary elements.
- The joints themselves must be glued.
- The car looks better using cardboard rather than paper.
Origami machines made from colored paper
Origami is a popular Japanese art that is even taught in schools in the East. The essence of the work is simple, you just need to have a diagram at hand. You can find it in the public domain of any complexity and age. Simple models:
- Up to 5 years, it is better to use 2d forms.
- Using 15*15 cm square bases. Parents need to measure and cut a piece of paper in advance.
What kind of car it will be, everyone decides for themselves. The use of scissors and glue is not allowed in origami, so you don’t have to worry about the child’s safety.
Military vehicle
As children, boys want to become soldiers. Delight your child by creating a car together.
There are two variations of a military car:
- According to the finished scheme,
- Fire truck method.
The materials are still the same - boxes of various sizes and cardboard or paper for pasting the frame. Please refer to actual images for realism.
DIY car ideas for children 2-3 years old
Such children already want to do everything themselves, and even if something doesn’t work out for them, such actions discipline them and develop a desire to achieve results.
You can craft from all possible materials: from scrap materials available in every home or specially purchased ones.
There are many reviews and videos of ready-made machines on the Internet, made with your own hands from kits that contain everything you need, even wet wipes.
Try to use different textures and materials, give your child simple instructions to prepare for the lesson.
Paper buses
Paper construction is a great hobby for a child. There are many free plans available online. For children, there are options that are easy to glue and cut out. People prefer Soviet models of this type of car.
- Print the drawing on thick paper or whatman paper.
- When printing in black and white, you should add color to the details yourself.
- Carefully cut out the elements.
- Then, using a ruler and a pen that does not write, you need to create the curves.
- They will serve for easy gluing.
- It is carried out with any type of glue, be it a stick or PVA, which must be applied carefully and slowly.
- Check that all parts of the future bus are thoroughly dry.
Machine made of plasticine and boxes
Plasticine tends to become softer at high temperatures. Therefore, you won’t be able to play with a product made from it. Moreover, the work risks not making it to the competition. This situation can be corrected by using a matchbox for the base. The parts of the cabin and the main part are cut out separately, then secured with ordinary tape or using PVA.
Plasticine is placed on top and small parts are formed. Using this trick you can make any stable model. You can find out how to make a fire or police car craft below.
Sequencing
- Prepare cardboard, glue, diagrams and scissors in advance;
- According to the drawing, cut out the elements and glue them onto a cardboard template;
- To complete the picture, you need decorations in the form of the sun, grass or bushes...
As a result, a unique fake appears that will delight parents and their baby. You can fit several machines into work at once, creating entire storylines. To detail the wheels, improvised means are used: buttons, bottle caps.
Moving model
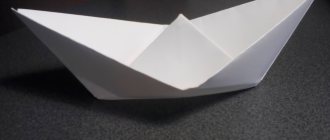
Using the origami technique, you can make a paper car that can drive. To do this you will need a sheet of A4 size paper.
Stages of work
The production of a working car model will take seven stages.
- Stage No. 1. The sheet is folded in half.
- Stage No. 2. By bending the upper right and lower left corners of the paper, we outline the fold lines.
- Stage No. 3. In the upper part of the workpiece we form bends in the form of triangles.
- Stage No. 4. The triangles are bent again in the central direction.
- Stage No. 5. The sides of the “race” car are formed by bending the outer sides of the workpiece towards the center line.
- Stage No. 6. The lower part of the craft is folded so that the triangles are at the top.
- Stage No. 7. The workpiece is bent in two, and the corners are tucked into the resulting “pockets”.
The racing car is ready to start. All that remains is to place the car on a smooth surface and blow. Under the influence of air flow, the car will move, thus simulating the movement of a real car.
Paper cars
They will not require a lot of money to implement. The nerves during creation will also be preserved. Children train their imagination and can constantly create new copies. There is nothing better than a car made by yourself.
It is also important that there are no absolutely identical models. Each car is filled with special features and style.
Translating means of transport into reality with paper is a great way to organize leisure time. As the child gets older, he will be able to make more complex models without any help.
For the kids, realizing their dreams with the help of paper, cardboard and other equipment will be remembered for a long time. Parents will also enjoy participating in machine engineering. According to the plan, interesting figures are obtained. Ready-made stencils make the process much easier.
Combine several types of activities at once. When working with your hands, conduct an oral conversation about the specialization of different types of machines. Explain to your child the basic rules for crossing pedestrian markings. It is necessary to discuss the correct use of scissors in fakes, so that the baby does not get hurt when doing it on his own.
There are a huge number of positive aspects to creating fake cars. Of course, fine motor skills and perseverance develop.
It is not for nothing that such activities are carried out by kindergarten workers in groups to train children’s memory. In the future, children will show interest in studying the structure and operation of machines.
Materials from which a machine can be made
- Paper, cardboard, thin plywood
- Waste material
- Edible materials
- Fabric and padding polyester
- From ready-made parts. Modernization of an existing machine
The answer to the question of how to make a children's car with your own hands varies depending on the age of the baby.
