Let's make an openwork lace crown: tips for craftswomen
A crown made of openwork lace will look very beautiful and impressive. This royal crown is very easy and quick to make. Even a novice craftswoman can handle this process.
For work, prepare all the necessary materials and tools:
- lace ribbon of the required length (depending on the circumference of your child’s head);
- starch or special spray to stiffen your royal crown;
- acrylic paints;
- sharp scissors;
- needle and thread;
- glue "Moment";
- brush;
- three-liter glass jar;
- decorative elements: beads, rhinestones, seed beads, sequins and much more.
First, cut the openwork lace to the length you need and roll this strip into a circle. Stitch very carefully so that the threads are not visible on your crown. After you have sewn the frame of the product, you should starch it well. After this, straighten your crown and put it on a three-liter glass jar. Leave your structure in this position until it dries completely.
After the entire crown structure has dried, begin painting it with a brush and paint. The paint can be applied only to the edges of the crown or to its entire surface.
When the paint is completely dry, use glue to attach beads, rhinestones, sequins, stones or beads to the crown.
Your lace lace crown is ready.
What to make a decoration from
So, your task is to create an accessory for a carnival costume. What can it be created from? The Snow Queen is a heroine of folklore with a luxurious dress equipped with a high collar. Task number one is to create a product that can last in a standing position at least until the end of the holiday.
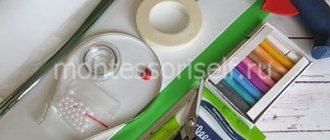
For these purposes, you can starch the fabric or use a wire frame. An equally effective way to add rigidity to a product is a corsage tape or a corset mustache. These materials are easy to purchase at a sewing store.
Having decided on the base, you can select the appropriate material. It must certainly be light and delicate, but at the same time have a special density. An excellent option would be to use tulle, floral mesh, even ordinary polyethylene or a piece of openwork lace will do. A little work on the decor of the accessory, and it will turn you into a real fairy-tale heroine.
Crown for the snow queen for carnival
At the New Year's carnival celebration, girls often play the role of a snowflake or snow queen. If for the first case it is not difficult to choose an outfit, then in the latter case the problem of finding an appropriate headdress may arise. Unfortunately, a beautiful crown for the snow queen is rarely found in stores. Therefore, you usually have to make it yourself.
Quick option
Advice! It is quite possible to make a crown faster if you do not cut out each tooth of the product separately, but use the continuous pattern technique.
To do this you should prepare:
- cardboard;
- fabric packaging for flowers;
- scissors;
- elastic band;
- silver braid;
- silver paper;
- threads;
- glue;
- sequins in the shape of snowflakes.
Read this: Wall Note Board: Functional Decor
A crown template is drawn on cardboard. The workpiece is cut out. The pattern is placed on the fabric and traced taking into account the allowances.
The fabric part needs to be cut out, then placed on a cardboard mockup. The allowances are folded over to the reverse side and glued to the cardboard.
Glue is applied to the underside of the workpiece, after which the crown is glued onto silver paper. This hides unsightly allowances on the back of the product.
The crown is carefully cut out. The product is decorated with large sequins in the shape of snowflakes.
The outline of the crown is framed with silver braid. Depending on the quality of the braid, you can glue it with hot glue or sew it on yourself.
The crown is ready. If the holiday is just around the corner and you urgently need to acquire a “snow” crown, then you can try a simplified version – a product made from cardboard. To prevent the crown from looking like a “hurried craft,” it is advisable to replace the cardboard with a piece of light wallpaper with a pattern.
A model of the crown is drawn on it. The template needs to be cut out.
Then the workpiece is painted with silver spray paint. Since the aerosol tends to be sprayed in all directions, it is recommended to provide for this moment and carry out painting in the corridor, having previously covered the floor with newspaper or polyethylene.
First you should paint the back of the product. On the front side you need to carry out two stages of staining. After applying the first layer, you need to dry the product and repeat the coloring.
The final step is to sew a wide elastic band along the edges of the product. You need to measure the elastic so that the crown fits tightly around your head.
The carnival headdress is ready to delight its owner. Any proposed master class will allow you to create an accessory not only for a child, but also for an adult. This is especially true for kindergarten teachers and directors of theater clubs.
Where is a throne made from a chair useful?
This throne will be ideal for unusual photo shoots using appropriate royal accessories. It will also look beautiful at any festive event. You can make, for example, a throne for Father Frost or the Snow Queen. It should be decorated with snowflakes cut from thick white and blue cardboard, as well as using cotton wool and foam plastic.
The throne is indispensable for various theatrical events, holidays, masquerades, concerts and matinees in kindergarten. In general, it can be used at any cultural event.
ATTENTION! It is also often done to diversify the interior of an apartment. If the existing furnishings are quite boring, then you can refresh it by decorating ordinary furniture
How to draw a crown step by step
- Step one. We draw a horizontal rectangle on a piece of paper - this is the base.
- Step two. Add two curved lines in the middle and above the shape.
- Step three. Let's draw five triangles across the top line to the middle. At the tops of the figures there are circles (these are future precious stones). They can also be depicted on the very basis of our crown.
- Step four. Let's draw the contours. Erase all unnecessary sketch lines!
- Step five. We paint our royal (or princess) headdress: the body is gold, the stones are red, blue, green (rubies, sapphires, emeralds). Ready!
Now you know how to draw a crown. You can also cut it out and attach it to your child’s head. But to do this, you initially need to take a large sheet of paper so that it is well secured around. You can also decorate the headdress with beads, gluing them around the perimeter, or with New Year's rain. This makes an excellent fancy dress costume for little princesses.
How to beautifully draw the Snow Queen with a pencil step by step for children?
Let's make the contours of the Snow Queen's face. Her face should be clearly defined.
- Let's draw her a straight nose, expressive large eyes and a closed, emotionless mouth, eyebrows slightly shifted towards the bridge of her nose.
- We won’t draw the queen’s hair: she will have a crown on her head that covers her hair.
- The crown can be drawn in different ways as you like.
Portrait of the Snow Queen in pencil: stage 2.
Portrait of the Snow Queen in pencil: stage 3.
Portrait of the Snow Queen in pencil: stage 1.
Portrait of the Snow Queen in pencil: stage 5.
Portrait of the Snow Queen in pencil.
Next we will draw the Snow Queen in full growth, so she will look more representative and impressive. She should have a floor-length fur coat, on which snowflakes and diamond pieces of ice sparkle. Let's also make her a fur trim from white fur.
Full-length Snow Queen: stage 1.
Full-length Snow Queen: stage 2.
Full-length Snow Queen: stage 3.
Snow Queen in full growth
Building a castle
First, cut out the conditional entrance to the palace with two vertical contours, and on top, using scissors, click notches of different sizes, like hanging icicles. Then turn the cake pan upside down.
Along the contour of the lid, cut out a “floor” in the castle from polystyrene foam, cover it on top and sides with “ice” in the form of a sheet of food-grade aluminum squeezed by hand. Glue the floor. This is how the craft of the Snow Queen's castle began.
An ice coating in the form of PVA glue, popular with children, also appeared on the entrance side. Part of the “building” was doused with it. A hint on how best to do this, this glue is snow-white, but its drawback is its very liquid consistency.
The way out of the situation is quite simple, at home: mix part of the adhesive mass with white flour, then it will not drain. But add the flour in small portions and mix it with the glue very vigorously to get a homogeneous mass without lumps. As you can see in the website photo, our imitation was a success.
To give our ice an even greater and natural shine, we had to sprinkle the hardening white mass with regular glitter. And the texture turned out completely icy. You can buy this tinsel at any store or stationery kiosk.
Icy Splendor
This decoration turns out to be truly royal. Here are the step-by-step instructions:
- We make teeth. For the base we take PVC film or a thin plastic sheet (unnecessary covers for documents). We make the central element relatively high, and all the side ones are slightly lower than the previous one. As a result, there are 7 of them.
- We glue fabric with a silver pattern onto these teeth.
- We reinforce the edges with wire to keep the structure straight. This can be achieved by sewing the frame with a wrap stitch.
- We glue it with beads and rhinestones.
- We decorate the outline with pebbles.
- Several more opaque teeth should be assembled using the same type. This solution allows you to achieve a 3D effect.
- We measure the circumference of the child's head - this will be the length of the strip. Add 1 cm to the gluing.
- We hook the first triangles onto an elastic strip.
- We add additional details along the back surface. For convenience, sewing pins are used.
DIY foamiran crown
It’s easy to create incredible low openwork tiara crowns from foamiran. A wide range of colors will definitely allow you to choose the most suitable one. Silver and shiny are suitable for the role of the ruler of winter. The raw materials are dense, high quality, and easy to process.
Popular articles Cheerful snowman made of cotton wool
The process of creating such beauty is very simple. A pattern will be needed. You can simply draw it or print a diagram. Then cut and apply the shape directly to the raw material. Then, using thin-tipped scissors, carefully make a shape.
As a fastener, you can take a rim or bend it yourself from copper. If the second option is chosen, then the metal should be disguised by wrapping it with satin ribbon or bright wrapping. The length depends on the size of the child's head.
We fasten the parts with glue or “put them on a gun”. When it dries it's time to start decorating. We cover the edges with braid and jewelry. We attach large glass or beads to the main element. This will become a colorful accent. Adding a few small details.
The charming crown for the girl is ready!
Peculiarities
The main feature of the throne chair is its incredibly luxurious design. In comparison with standard options, these products are used in the interior as decorative components. The design of such chairs is quite complex, since the base contains many details that are created by hand. Most often this concerns thread elements.
Working with small parts requires a certain approach, skills and knowledge. It is almost impossible to produce such elements under industrial conditions.
Many modern designers actively use armchairs to create harmonious interiors. Most often this applies to such directions as Rococo and Baroque. This is due to the fact that these styles are the embodiment of pretentiousness and luxury.
The throne chair will fit perfectly into an expensive setting thanks to its unusual design.
Ice accessory
This crown has a “candy” effect due to the use of non-standard material.
To work on the product you will need:
- transparent PVC film or plastic (you can take old document covers);
- tulle with silver pattern;
- cardboard;
- shiny fabric (silver look);
- thread, needle;
- scissors;
- thin wire;
- silver braid;
- elastic band 2 cm wide;
- hot glue;
- decorative elements (for decoration).
First of all, the circumference of the head is measured. Based on the obtained measurement, you need to calculate the width of the base of the vertices of the future crown. There are seven of them in the product.
The height of the triangles is selected individually. You just need to take into account that the central triangle will be the highest. The parts adjacent to the central part are cut 2 cm shorter than the main part. The next two triangles are 2 cm lower than the previous ones, etc. Based on the principle described above, 7 triangles are cut out of PVC film. The same parts are cut out separately from tulle.
A corresponding tulle detail is applied to each workpiece. A wire is sewn along the edge of the blanks using an overcast stitch. All triangles are framed with silver braid. It is advisable to bend the figures slightly so that they hold their shape better. The finished transparent parts are assembled with elastic. The most convenient way to do this is on a sewing machine. The ends of the product are connected into a ring.
To create a volumetric effect, you need to complement the crown with opaque elements. To do this, two triangles are cut out of cardboard. Since these parts will be located on the front of the crown, their height should be slightly lower than the transparent triangles.
Cardboard blanks are covered with shiny fabric and secured with safety pins to the front “ice pieces” of the crown, as in the photo.
Dense and transparent parts are attached to each other. All that remains is to decorate the crown to your own taste. You can use rhinestones, beads, sequins, and lace elements in your work.
The royal ice accessory is ready.
Materials for making a wooden chair
To make a wooden chair with your own hands, you need to select high-quality raw materials.
Main requirements for wood composition:
- the humidity level should be no more than 9-12%;
- cracks, deformations, branches, fungus on the surface are unacceptable;
- strength, dense structure, ease of processing are important;
- The amount of resin should be small.
It is recommended to buy raw materials with a small reserve, because During the furniture manufacturing process, chips and waste are possible when defects are detected.
To create a solid wood structure, the grade is important. When creating chairs for the street (gazebo, recreation area), varieties with a dense structure are recommended. An array of elm, pine, oak, walnut, ash, larch, and rowan is suitable.
For furniture intended for heavy loads, linden and alder wood is needed. Furniture made of yew looks impressive due to its red hue and texture with an original pattern. The dense structure of the array is difficult to process, but is more durable and resistant to mechanical damage.
Country furniture is made from willow, alder, and rattan. To use the chair in warm climates, grape vines are used, complemented by rattan. Beginning craftsmen are recommended to use bird cherry, because... The material is plastic, easy to bend, durable.
When preparing furniture for rooms with high humidity or installation near a pond, it is recommended to choose wood with a fine-pored structure. Oak, larch, and solid pine are optimal.
Spruce chairs are lightweight, easy to process, but have low resistance to mechanical damage and are not resistant to chips and deformations.
Quick option
To do this you should prepare:
- cardboard;
- fabric packaging for flowers;
- scissors;
- elastic band;
- silver braid;
- silver paper;
- threads;
- glue;
- sequins in the shape of snowflakes.
A crown template is drawn on cardboard. The workpiece is cut out. The pattern is placed on the fabric and traced taking into account the allowances.
The fabric part needs to be cut out, then placed on a cardboard mockup. The allowances are folded over to the reverse side and glued to the cardboard.
Glue is applied to the underside of the workpiece, after which the crown is glued onto silver paper. This hides unsightly allowances on the back of the product.
The crown is carefully cut out. The product is decorated with large sequins in the shape of snowflakes.
The outline of the crown is framed with silver braid. Depending on the quality of the braid, you can glue it with hot glue or sew it on yourself.
All that remains is to try on the crown and calculate the length of the elastic band on your head. The elastic is sewn along two edges of the product.
The crown is ready. If the holiday is just around the corner and you urgently need to acquire a “snow” crown, then you can try a simplified version – a product made from cardboard. To prevent the crown from looking like a “hurried craft,” it is advisable to replace the cardboard with a piece of light wallpaper with a pattern.
A model of the crown is drawn on it. The template needs to be cut out.
Then the workpiece is painted with silver spray paint. Since the aerosol tends to be sprayed in all directions, it is recommended to provide for this moment and carry out painting in the corridor, having previously covered the floor with newspaper or polyethylene.
First you should paint the back of the product. On the front side you need to carry out two stages of staining. After applying the first layer, you need to dry the product and repeat the coloring.
When the crown has completely dried, you can begin decorating it. The edges of the product are decorated with edging with rhinestones or any silver braid. The crown is decorated with additional elements corresponding to the theme of the carnival costume.
The final step is to sew a wide elastic band along the edges of the product. You need to measure the elastic so that the crown fits tightly around your head.
The carnival headdress is ready to delight its owner. Any proposed master class will allow you to create an accessory not only for a child, but also for an adult. This is especially true for kindergarten teachers and directors of theater clubs.
Table decor
And, of course, what is a holiday without a feast? Even if the hero of the occasion does not sit with everyone at the festive table, table decor is an important component of the holiday design. Prepare an elegant tablecloth and cutlery in advance. And you can read about the beautiful details of table setting in our article “
Even from an ordinary chair you can make a real throne with your own hands. And its main feature is its chic and catchy design. Such chairs are used as interior decoration, for special events and holidays. Many details of these chairs are made by hand. It can be either bright fabric or carving. Styles with elaborate designs include Baroque and Rococo. Transforming an ordinary chair into an armchair in this style will not be difficult.
DIY snowflake crown step by step instructions
The image of a winter miracle is quite easy to convey. Ball gown and fluffy tiara. It is better to make the accessory yourself, so you guarantee originality and unsurpassedness.
Required:
- Scissors
- Gypsy needle
- White rain with short spines (approximately 3 m)
- 1.5-2 m copper wire
- Threads in the color of rain
Light or transparent hairband.
First, we create the frame of the future tiara from wire. It should look like the letter "P" with three long arms that end in three short antennae.
Let's turn everything into rain
It is important that it does not jam; Bald patches will appear. Use a semicircular needle to release the snowball if necessary.
We screw everything to the hoop. If the rim is not very beautiful, you can decorate it with rhinestones or a suitable ribbon.
Crown for the Snow Queen
Among girls, such characters as the snow queen, snowflakes or princesses always remain popular.
However, after the release of the animated film “Frozen” on the big screens, almost all the girls wanted to feel like the mistresses of snow, frost and ice.
A hand-made crown for the majestic and formidable Snow Queen will be an excellent and bright addition to the fairy-tale image of your little ice queen.
Let's look at a quick and easy way to make a crown for the snow queen
The simplest crown for an interesting snow queen character is made with your own hands from a minimal set of materials and tools. To work on the snow crown you will need the following equipment and materials:
- ready-made plastic snowflakes, generously covered with bright sparkles;
- a strip of white fabric measuring approximately sixty by eight centimeters;
- elastic band two centimeters wide, approximately sixty centimeters long;
- sharp scissors;
- white threads;
- a sewing machine, if you don’t have one, you can sew by hand;
- glue gun or clear craft glue;
The work must be very careful, so you may need a three- or two-liter jar (depending on the size of the planned crown, which is definitely needed for the snow queen - large or small). It will be convenient to put jewelry on it and calmly work with a needle or glue.
To begin, apply the elastic band to the head so that it fits snugly to the limb, but does not cause discomfort. Cut off the required amount. Then measure the circumference of your head and make a strip of fabric of the required length.
Sew it into a tube of such a size that the elastic fits evenly in it. Don't make the common mistake of cutting the fabric as much as the elastic, because it will stretch.
Glue snowflakes around the circumference, taking into account the future tension of the fabric.
A beautiful and simple DIY crown is ready.
To work you will need the following materials and tools:
- copper wire of thin and medium thickness;
- pliers;
- various shades of beads;
- ruler.
Take a ruler and measure how big the teeth on your royal crown will be. Cut the wire to a length of twenty-five centimeters. In order for the frame of the crown to be strong enough, it is necessary to make it from wire folded in three times, and do not forget to twist another layer of copper wire on top.
You now have a large wire ring. Divide the completed frame into eight equal parts. Select the locations on the copper wire where the bases of the teeth will be attached. Beads must be secured to the peaks of the crown. Large beads are suitable for this task.
They can also be secured using thin copper wire - the wire is threaded through the bead and secured to the peak.
Popular articles Newspaper basket
For work, prepare all the necessary materials and tools:
- lace ribbon of the required length (depending on the circumference of your child’s head);
- starch or special spray to stiffen your royal crown;
- acrylic paints;
- sharp scissors;
- needle and thread;
- glue "Moment";
- brush;
- three-liter glass jar;
- decorative elements: beads, rhinestones, seed beads, sequins and much more.
First, cut the openwork lace to the length you need and roll this strip into a circle. Stitch very carefully so that the threads are not visible on your crown. After you have sewn the frame of the product, you should starch it well. After this, straighten your crown and put it on a three-liter glass jar. Leave your structure in this position until it dries completely.
After the entire crown structure has dried, begin painting it with a brush and paint. The paint can be applied only to the edges of the crown or to its entire surface.
When the paint is completely dry, use glue to attach beads, rhinestones, sequins, stones or beads to the crown.
Your lace lace crown is ready.
A selection of videos on the topic of the article
In conclusion, we present to your attention a small selection of videos on the topic described in the proposed article. We hope that after viewing this material it will be much easier for you to make your own crown for the snow queen.
Wood as the main material
Making a wooden chair can be quite easy if you choose the appropriate method. You can use an old armchair or stool if it is not possible to purchase individual parts. Even from a banquette you can make a small chair that any child will like. To create a classic chair, boards, bars, and logs are usually used. A solid wood product has a number of advantages over other pieces of furniture, because wood is an environmentally friendly material that is absolutely harmless to health.
Natural wood is not a cheap material, but it is the key to the quality of a homemade chair. Once you are confident that the wood is of high quality, you can begin creating a work of art. There should be no knots or cracks on solid wood or bars. All parts must be carefully polished, and only then proceed to assembly. A special coating will protect the material from insect attack and drying out.
To make a chair, it is better to use oak, birch, ash or alder, because they have a unique beauty. These materials allow the product to serve for a long time without squeaking or cracking. The beauty of the product can be emphasized by high-quality textiles that will be used for its upholstery.
Wood is very durable and can compete even with metal. It does not lend itself to plastic deformation and withstands shocks and loads well. It is easy to work with, and therefore you can make a chair from wood yourself. The disadvantages of this material include intolerance to moisture and high temperatures. When exposed to water, wood swells and crumbles, so you need to first coat it with varnish.
Elsa's crown from Frozen
After the release of this Disney cartoon, almost all the girls fell in love with the incredible sorceress Elsa. That is why on New Year's Day charmed little girls choose her heroine as a role model. But what is a princess without a crown?
The easiest way is to download a ready-made crown template from paper, cut it out and glue it according to the diagram. It's easy to find all the information you need on the Internet. Then decorate with different sparkles or glue glass.
For crafts, you can also use foamiran, cardboard or plastic. The decoration will be stronger and more expensive in appearance. This raw material holds its shape better.
DIY crowns
A crown is a chic head decoration. It emphasizes the image, adds effectiveness and, of course, gives a feeling of triumph. Factory crowns are undoubtedly luxurious, but you want to make such an attribute exclusive, unique and unique. In this article we will look at: how to make a crown with your own hands.
Shiny Crown
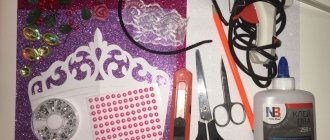
You will need: shiny cardboard in purple, cherry and white colors, a crown template, scissors, a stationery knife, PVA glue, a glue gun, a simple pencil, a hairband, decorative elements - lace, shining stones, rhinestones, flowers of different shades, stamens, leaves ...
Master Class
- Draw or print the crown template on A4 sheet, then cut it out.
- Transfer the template to glittery purple cardstock, then cut out the crown blank.
- Cut out circles of glitter cardstock and glue them to the stones as shown in the image.
- Glue the lace to the bottom of the crown.
- Glue rhinestones to the openwork top of the crown.
- Glue a row of flowers onto the lace, alternating them by color.
- Glue the stamens and leaves next to the flowers.
- Glue sparkling stones to the center of the crown.
- Glue the crown to the headband.
The shiny crown is ready! conveys the incredibly sparkling brilliance of the shining crown.
Luxury crown
You will need: wooden board, soldering iron, 2 medical clamps, rosin, soldering flux and fat, lead-free solder, soldering iron cleaning sponge, glue gun, instant glue, gloves, wire, dishwashing liquid, towel, headband, filigree, combs , metal ovals, decorative elements - crystals, Swarovski stones, beads of various colors and sizes.
Crown on the rim
You will need: shiny pink foamiran, white felt, tulle, crown template, wooden skewer, scissors, glue gun, Moment-Crystal glue, superglue, ruler, white threads, needle, headband, pieces of textile elastic, 7 rhinestones.
Lace crown
You will need: wide lace ribbons, scissors, a centimeter, PVA glue, a glue gun, spray cream, gloves, wax paper or film, a glass, rhinestones and crystals, glitter.
Wooden crown
You will need: a thin wooden board, a pencil, a knife, paper clips, a bucket and a saucepan, hot water, glue.
Crown made of beads and wire
You will need: thick and thin wire, 8 large beads, beads of different colors and sizes, ruler, pliers.
Edible crown
You will need: chewing paste or sweet dough, rolling pin, knife, ruler, sheet of paper, pencil, jar, baking paper, pastry spray paint, pastry glitter.
Royal crown
You will need: foam board, stationery knife, corrugated paper or newspaper, red velvet, beautiful fabric, candy, double-sided tape, decorative ribbons, needles, beads, foam plastic, threads, glue gun, skewers, cross, decorative stones.
How I found the chair
A few weeks ago, while walking through a local thrift store, I found this rather sad and boring office chair. I'm not sure if it was left in the rain too long or if someone had a lot of wet parties. But this poor thing has definitely seen better days. When I brought this find home for pennies, my husband was skeptical about my idea.
But I knew that even a boring office chair can be turned into something unique and unusual. This chair was the perfect starting point for what to do next with it.
DIY paper crown
A paper crown is a budget and lightweight option. There are many ways to bring it to life.
First. To make it, you will need non-adhesive colored square stickers, sold at any stationery store, as well as glue for fixation.
Instructions:
1 step. Fold the square of paper in half diagonally, fixing the upper corners with glue. We make the required number of blanks, depending on the size of the head.
Step 2. We insert one piece into the other approximately until the middle and fix it with glue until we reach the end.
For the second method you will need a stencil, scissors and materials for decoration. It's simple: cut out the stencil, glue the ends if necessary and decorate the top. If you cannot connect with glue, you can use a stapler to fix the thread at the edges.
The third method allows you to create a real masterpiece. To make it, we will use the technique of twisting strips of paper - quilling.
Tools:
- scissors;
- quilling paper - strips;
- pencil;
- ruler;
- glue.
Instructions:
- We measure the circumference of the head and cut out a strip of cardboard. For now, let's put it aside and take the strips for quilling. If you don’t have ready-made ones, you can simply make them at home: draw colored sheets into strips of equal width and cut them. If the desired color is not available, but you want it, take white and use paints, markers or a color printer to give it different shades.
- We make the main element: tightly wind the strip onto an awl or needle. Then you can give the resulting spiral any shape by simultaneously pressing different corners: triangle, square, eye, arrow, etc. Fix the end of the tape with glue.
- We make a lot of such elements. Volumetric parts are pulled out and coated well with glue from the inside. It will take some time to dry.
- Let's form a pattern by connecting and fixing the pieces together. It can be like a chaotic drawing, there is also an ornament thought out in advance: a flower, lines, stars.
- Once the top is ready, cut out a strip of cardboard for the base and glue the resulting base to it.
- We place the remaining blanks in the free spaces.
- Give the product time to dry.
The royal symbol using quilling technique will look like jewelry work
It is important to fix all the parts inside and among themselves so that the structure does not collapse. If connected correctly, the decoration will last a long time
Step-by-step instructions for manufacturing
The manufacture of the throne will depend on where it will be used. You can consider the manufacturing process of the most common product for New Year's celebrations. For decoration you will need white wallpaper, fabric or cardboard, a ruler, a regular pencil, scissors, glue, foil (metallic or blue), and tinsel. You can also add ready-made New Year's rain to the decorations. The work process itself will not take much time:
- We take thick cardboard, measure the corners and cut them.
- Next, we assemble the “pattern” of the product.
- On the top side of the “pattern” we cut out the corners. The corners will resemble pointed ice floes, as in the fairy tale about the Snow Queen.
- Additionally, you can cut out patterns inside the top of the “pattern”.
- We glue all the pieces of cardboard together and put them on the chair.
- Next, we decorate the back using white wallpaper, cutting out the patterns prepared in advance.
- We glue the back of the product with tape to the chair.
- We decorate the product with tinsel, rain or colored paper. Additionally, you can glue snowflakes or sparkles.
You can also consider another decoration option, a more complex one. It will take about three days to make it, but the result itself will exceed all expectations if you do everything according to the instructions. In this example, we use a regular wooden chair without upholstery. Follow the following sequence of actions:
- We sand the chair with medium-hard sandpaper.
- Fill the holes from the screws if they are visible.
- Prime the surface of the furniture. For simplicity, you can use a diluted solution of PVA glue.
- When the solution has dried, cover the chair with dark brown enamel.
- After the enamel has dried, rub it with wax.
- Next, we cover the surface with two more layers of white enamel.
- We decorate the chair using stencils. You can, for example, use roses or any other flowers. The paint color can also be chosen to suit every taste. Absolutely any color looks beautiful on a white background.
- The final touch is to varnish the chair. Now it looks like a real throne.
We hope that this article will be useful for creating new interior solutions. After all, with the help of the simplest and most inexpensive materials and tools, you can revive any furniture. Even an ordinary chair can easily turn into a throne.
