Flowers in a box - is it possible to think of a more sophisticated, delicate and at the same time unique gift for loved ones? But, it’s true, the finished gift isn’t cheap! If you want to please someone dear to your heart with such a surprise, do not rush to run to the nearest flower shop, because the editors of WomanSovetnik have prepared for you three unique master classes on creating a gift box with flowers, choose which idea you like. The main thing is to arm yourself with a good mood and positivity, because they say that such a gift should only be given with love - then the flowers will live much longer.
Idea No. 1: “Spring mood”
The coming spring inspired us to create such a masterpiece. Such a homemade box with flowers can be an ideal “gift packaging” for perfume with floral motifs. But even without perfume, she will look very original and fashionable!
What we need:
- 1 empty box (gift, hat or shoe box). We took a small box measuring 11x11 cm;
- 2 tape;
- 3 several types of colors that will harmonize. You can ask the florist for advice on which flowers are best to combine, or choose according to your taste. We have pink roses, miniature hydrangeas, gypsophila, live grass for decoration, white carnations;
- 4 dry floral foam, also called floral sponge (sold in the same flower shops);
- 5 paper pots (they will protect our gift box from moisture), they can also be found in the same flower boutique;
- 6 scraps of paper;
- 7knife;
- 8water.
What do you need to collect a bouquet?
At the stage of preparing to assemble a flower box, it is important to decide what the future composition will look like. For a standard bouquet you will need:
- Box. You can make it yourself from thick cardboard, or you can buy it ready-made at a supermarket or flower shop.
- Flowers, sweets, fruits, greens.
- Floral sponge.
- Flower food.
- Wire.
- Stationery knife.
- Scotch.
- Transparent polyethylene.
- Decor: stickers, toppers, photographs, feathers, ribbons, lace, etc.
Depending on what elements the gift is planned to consist of, the list of materials needed for needlework may change. If you decide to complement your flower bouquet with sweets or fruits, it is better to purchase a box with partitions in advance.
DIY flower box step by step:
- don’t look for a stencil to form identical pieces of foam that will fit perfectly in the pot. Use the same pot instead of a stencil! If the block does not fit, you can simply cut off the excess part;
- already cut pieces of floral foam need to be moistened with water (this can even be done under the tap in the bathroom). There is no need to immediately pull the block out of the sink; leave it there for a minute or two so that the foam absorbs the maximum amount of water;
Secret: How do you know when the foam is wet enough? It should not float on the surface of the water, but be completely immersed in it. You should not help her and force her into the water, the result of such actions will be disastrous - there will be dry areas in the middle of the foam and the flowers will simply die without receiving the necessary moisture.
— preparing the flowers: all stems should be the same length, immediately get rid of withered petals and leaves so that they do not spoil the beauty of the bouquet;
- place scraps of paper at the bottom of the cardboard pots, they will also be able to absorb excess moisture and will not allow it to “escape” into the gift box;
— place moistened floral foam into each cardboard pot;
— we also cover the bottom of the gift box with newspaper, or even better, with sheets from glossy magazines so that the box does not collect moisture;
- We begin to place flowers in floral foam. We offer you two options - chaotic (so the flowers in the box will look more like the bouquet we are used to), or in rows (it will also turn out very beautiful and fashionable);
- carefully ensure that there are no empty spaces or gaps between the flowers, otherwise the bouquet in the box will look sloppy, and a florist sponge peeking out between the buds will ruin all the beauty;
— we place our gift on a bouquet of flowers in a box;
- the ribbon that will be used to tie the box with fresh flowers can also be decorated with several sprigs of greenery or a bud.
Master class Flower Box
Before collecting flowers in a ready-made flower box, let's prepare:
- box;
- metal ruler or floral knife;
- floral sponge piaflor “oasis”;
- container with water for piaflora drinks;
- composition for cut flowers;
- a roll of transparent plastic film;
- narrow tape;
- adhesive tape;
- wooden skewers to strengthen cotton bolls;
- scissors;
- pruner;
- pistache greens;
- greenery eucalyptus parvifolia;
- lotus stems 2 pcs.;
- white large-headed hydrangeas 5 pcs.;
- white bush roses of the Snow Flack variety;
- light lilac roses of the Lulabai variety;
- agastache blue-lilac color;
- white eustomas;
- limonicum lavender shade;
- silver brunia;
- stems with slightly open cotton bolls.
Instructions with step-by-step photos on how to assemble a bouquet in a round box yourself:
Floral boxes are often sold with lids that slide on top or bottom. With their help, it is convenient to measure the size on a floral sponge. We take two oasis bricks and put a lid on them, pressing it with our hands. The sponge is soft and gives in under pressure, leaving a clear imprint on it.
We cut through the sponge blank using a flat metal ruler or a floral knife. We place the oasis in water with a nutritious powder for cut flowers, such as “Crystal”, dissolved in it. We do not push the sponge into the water, but carefully place it on the surface. When it is soaked correctly, it will sink to the bottom on its own. This will take 15-20 minutes.
Cut a square from a roll of transparent film. In the middle we place pieces of piaflora soaked in water. We wrap it and insulate the place of the bundle on top with tape.
We cut off the part connected with the tape with scissors. We try to take it closer to the place of the bundle; the long edges are useful for insulating the cardboard sides. It turns out a “pie” of nourished oasis isolated in film. Carefully put it into the box.
We start assembling the composition with pistache greens to give primary volume.
Next we install the largest flowers - hydrangeas. We trim the stems of all plants at an acute angle to increase the moisture-absorbing surface area.
Add white Snow Flack roses to the composition. We remove excess foliage and thorns from the stems.
Let's prepare half-opened cotton bolls. They have short stems, so we will strengthen them with a long wooden skewer. We wrap the boxes to the skewer with adhesive tape.
We place reinforced cotton stems in several places in the composition, adding softness and sophistication to the overall look.
Let's diversify the bouquet with green lotus stems, which will soon turn into dried flowers.
We introduce colored elements. We start with soft lilac roses of the Lulabai variety. They harmonize with the shade of the prepared box.
Add stems of blue-lilac agastache and lavender limonicum. Besides roses, they are the main color spots in the overall bouquet.
We add silver accents with brunia sprigs. We fill the voids with white eustoma flowers. We complete the assembly with eucalyptus greenery, placing it slightly higher than the rest of the plants.
Idea No. 2: “Snow-white bouquet in a box”
The second master class will teach you how to make a bouquet in a box that can be placed on a table in the living room or bedroom. White flowers in a box are a classic option that will suit any interior, so let’s get creative.
We will need:
- 1 small gift box (this can also be a hat box). If you don’t have one, you can beautifully decorate any box you find in your home with gift paper;
- 2 cellophane film;
- 3 scissors;
- 4floral foam;
- 5 flowers: we used ash eucalyptus, populus, Avalange roses and Akito roses, phlox, daffodils, St. John's wort, decorative lilac;
- 6knife;
- 7water.
Origami technique
Gift boxes folded from paper will require care and even skill. But you don’t need to bother with glue and the decor you will need is very simple. The main thing is to choose the right paper. The box will turn into a bundle if you choose too thin a material. However, the paper should bend easily, without creases. Therefore, very thick cardboard will also create difficulties in work.
This is a traditional box from the famous master Fumiaki Shingu. To work you need an even square sheet. It bends and unbends as indicated by the arrows in the figure.
To pack a gift in it, you need to make 2 of them: a larger one for the lid, a smaller one for the base.
And for an origami box made of paper strips you will need ten shaped parts. Alternation of colors is at the discretion of the author. The first two are connected at both ends without glue. The rest are added one by one. During the assembly process, a small souvenir or candy is hidden inside. An open package will crumble into a handful of colorful ribbons.
How to make flowers in a box with your own hands:
- and again our creation process begins with soaking floral foam. Leave it in the water for at least a minute so that it absorbs a sufficient amount of moisture;
— cut a piece of floral foam to the size of the box. The bouquet in the box will be more magnificent if the foam rises slightly above the level of the box. We cut off the excess edges to make the bouquet uniform;
- cover the bottom and walls of the box with cellophane, it will prevent the gift box from getting wet;
— prepare flowers and greenery: the stems of all should be approximately the same length, cut off excess roots and foliage with scissors;
— first, place the greenery evenly over the floral foam. Make sure that the stem penetrates the foam at least 5-6 cm. This will be enough for the plant to draw moisture;
— after the greenery we place roses and lilacs. They will make the bouquet more lush. Subsequent order: phlox, St. John's wort, daffodils. If you find a plant such as soft cuff in florist shops, be sure to take it too, it will add romance and lightness to the finished bouquet;
- twirl the finished box of flowers in front of you to make sure that there are no gaps or places without a flower.
Advice from florists
Floristic art experts recommend adhering to the following rules when choosing flowers for an arrangement in a box:
- The stems should be dense and inspect them for signs of damage and plaque.
- You should choose half-opened buds - this indicates their freshness.
- You need to make sure that the leaves are elastic and not flaccid.
- A rotten cut indicates that it has been in the water for a long time - such flowers should not be taken either.
- The color scheme depends on who the bouquet is intended for. So, for a young girl it is better to choose pink flowers, for an adult woman - burgundy and red, for a man - dark flowers.
- The color of the box should match the selected oasis or be lighter. This will highlight the charm of the entire composition.
Those who want to see the entire procedure for creating a bouquet in a box with their own hands are invited to watch several videos:
Idea No. 3: “Flower heart in a box”
Flowers in a heart-shaped box probably look most original. This is the perfect gift option for your other half! Well, if there is no other half, creating such a masterpiece will turn your time with your close friend into a real adventure that you will definitely remember for the rest of your life.
We will need:
- 1 flowers: we chose roses, peonies and carnations. They are fluffy, the bud takes up a lot of space and the finished “flower valentine” will look very delicate;
- 2hard heart shaped box. Of course, you can try to make it yourself, but if you are lazy, then such copies are sold in souvenir shops. Choose a box that is not too tall;
- 3floral foam. For this bouquet in a box we will need a low piece of foam, preferably round;
- 4 scissors;
- 5 foil;
- 6knife;
- 7water.
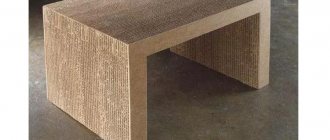
Box making master class
More often than others, a round shape is chosen for packing a bouquet in a box; the second most popular shape is a heart. But it’s easier to make a round one with your own hands. Before starting assembly, select cardboard. It should be easy to bend and at the same time keep its shape well, with a density of 180-250 g/sq.m. These options include:
- white or colored cardboard;
- thick Whatman paper;
- designer cardboard;
- thick cardboard for needlework;
- poster cardboard.
We take into account that the bottom and lid require thicker cardboard than the walls. Or we strengthen them with the number of layers. Tools for making a DIY bouquet box:
- thick cardboard;
- ruler at least 30 cm;
- PVA glue;
- glue moment;
- stationery knife;
- fabric for pasting on the inside and outside;
- glue brush 2 cm wide;
- pencil;
- iron;
- a round container approximately the size of the future box;
- thin hair bands 3-4 pcs.;
- coarse nail file;
- spray bottle with water;
- scissors.
Detailed video instructions for creating a box with textile design can be viewed on the channel:
You can cover the box not only with fabric, but also use decoupage techniques or packaging and decorative paper. An original design approach will come in handy when decorating a finished shoe box or other container of suitable size.
Box with flowers in the shape of a heart:
- another way to protect the box from getting wet is to cover it inside with foil;
- using the box as a stencil, we form a heart shape from a round piece of floral foam;
Secret: you can add “food” for plants to the water in which you will moisten the floral foam. This will make the water more nutritious and the flowers will live much longer.
- mix water with fertilizers for flowers and soak the foam in this mixture until completely absorbed;
— flowers should be inserted into the foam so that the length of the stem from the foam to the bud is within 2 cm. It is better to start with carnations and peonies. We fill the “gaps” with roses.
Box with a surprise
Small trinkets, packed in beautiful boxes, made and decorated with your own hands, are sometimes valued much higher than regular bouquets and sweets
To show attention and respect, it is better to spend more time than money
This is one of the most wonderful gift ideas. The box opens on its own, you just have to lift the lid. There is some small surprise attached to the bottom: a cake, a folded banknote, an ornament or a decorative composition.
Several parts for the box are cut out (the internal ones are slightly smaller). The ribs are not connected by anything, only the lid is glued. Since the product will be quite fragile, the lid should be easy to remove. You should take this into account when decorating the box.
A bow or picture is glued to the top. Three-dimensional decorative elements, photographs, and cards with wishes can be attached to multi-layer walls. Even tea bags will come in handy if there is a sweet present inside. You can place small decorations in the center on springs or strips of hard plastic. Flowers, butterflies or confetti will fly up and out when the lid is lifted.
Popular articles Interior decor with butterflies
This box is called a magic box, it is a bright representative of products using the scrapbooking technique. The magic box can be themed for any holiday
The main thing in this work is attention to detail and maintaining the overall style. And, of course, a sense of proportion
Sweet and floral gift
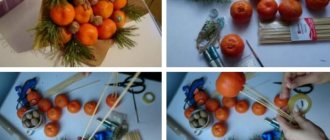
If you think that flowers in a box are also too banal, we recommend that you pay attention to the “modernized” version of such a gift - flowers in a box with macaroons .
Why macarons? It’s just that this delicacy is really popular, loved by many representatives of the fair sex, but the main thing is that macaroons can be made or purchased in a variety of color interpretations. A box with flowers and macaroons looks very nice, where both sweets and plant buds are the same color! Such a gift cannot be called banal.
A good idea for a first date is to give a box of flowers and macaroons as a present. This will be a kind of symbol of the beginning of your candy-bouquet period in a relationship.