Creating a salt dough panel is an incredibly original way to surprise others or simply update one of the corners of your home. The woman is the keeper of the hearth. In order for it to be truly cozy, warm and simply beautiful, housewives come up with various ways to make it so. We will now tell you about one of them.
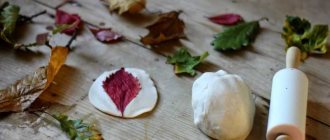
Even in Rus', products were baked from dough not only for consumption, but also for various decorations, jewelry, amulets, and amulets. At that time, women tried to place such compositions of salt dough in the kitchen, as they considered it a talisman and guardian of comfort. In foreign countries, dough crafts were created for the New Year and Christmas, which was considered a tradition. After all, such decorations bring success, prosperity and happiness to the home.
Crafts made from testoplastics are now mainly made in Eastern Europe.
Small recommendations
This composition is chosen taking into account the aesthetic features of the room where the future panel will belong. In a well-lit room, it should be 1-2 shades darker, otherwise the architecture of the room will merge with the work of salt dough. If the room is poorly lit, the panel should be made from a brighter color scheme. The interior color should also be taken into account. Even the prevailing mode, style and decor plays an important role in the manufacture of the product.
It is also not a good idea to place the work on a windowsill in direct sunlight; when heated, the paint or the material itself from which we will sculpt may leak. All ingredients used should be looked for in advance! You need to choose dishes that you won’t mind getting dirty in the future.
Have you ever thought about the fact that such a large amount of salt is added to the dough? You can just knead a lot of flour. Since ancient times, it has been the case that salt repels rodents and other unwanted animals. And this tradition has been preserved to this day.
Article on the topic: Flowers from foamiran. Instructions and templates
Recipes for products in the style of focaccia art
Puff pastry zucchini pie from Elzbieta Monkiewicz
Zucchini pie in focaccia art style by Elzbieta Monkiewicz before baking, #focacciaart
To prepare for 4-6 servings you need:
- 6-7 zucchini
- 1 layer of ready-made yeast-free puff pastry (200-250 g)
- flour for rolling out dough
- egg for brushing the edges of the cake
- 70-80 g creamy curd cheese
- If the dough was frozen, defrost it by transferring it from the freezer to the refrigerator or placing it on the table.
- Preheat the oven to 200°C.
- Cut the zucchini into as long and thin slices as possible, using a housekeeper knife or a special grater. Blanch the vegetables and dry with paper towels.
- Roll out the puff pastry a little on a table dusted with flour. I like to make a very thin layer. Make a frame and place it on the base. Prick the base repeatedly with a fork.
- Brush the edges of the dough with beaten egg.
- Grease the base for the picture with cream cheese.
- Roll the zucchini “ribbons” into tight rolls and place them in random order, filling the entire base. Make sure that the rolls do not unwind; to do this, press them together.
- Reduce heat to 180°C. Bake in a preheated oven for 30-35 minutes. Cool and serve cold.
Zucchini pie in focaccia art style by Elzbieta Monkiewicz after baking, #focacciaart
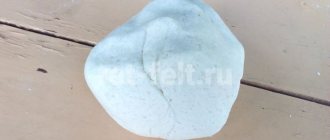
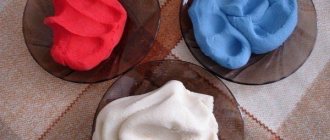
Knead the dough
We will need:
- two glasses of flour;
- a glass of salt (preferably medium-sized);
- a tablespoon of dry glue;
- a tablespoon of any cream;
- a tablespoon of vegetable oil;
- 200 g of water.
Mix everything in a large container, constantly adding flour, and the main thing is that there is as much of it as possible.
Painting
Before you start, be sure to learn how to make colored salt dough for crafts. There are the following methods for this:
- Coat the workpiece with acrylic dyes.
- Dilute food coloring in water and knead the mass, and then sculpt your plan.
After drying, everything should be treated with furniture or manicure varnish in several layers to give expressiveness and prolong the life of the created creation.
For example, for any holiday, and for the New Year too, you can prepare magnificent toys. There are very easy Christmas tree decorations that even preschoolers can do.
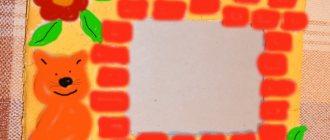
Panel "Cat"
The image of a cat is often used in various crafts. Therefore, we propose to perform it using another very interesting technique - testoplasty.
Accessories:
- ready dough;
- plastic fork;
- paints;
- frame with background 10*15.
Let's look at the instructions for implementation. Prepare the dough in advance. Draw a cat on a separate piece of paper.
Sculpt the parts of the cat separately, but at the same time fasten them together as you work.
Place a plastic fork in the dough piece itself.
Allow the finished figurine to dry thoroughly.
Color the animal to your liking. Cover with varnish. Glue it onto the background with the frame using durable glue, preferably “Moment”.
Ready!
Forest mushroom
You will need: a test mixture of brown, green, white, acrylic paints, a brush, varnish, stacks, toothpicks, waterproof glue.
- Sculpt the stem of the mushroom.
- Form a cap and attach to the stem. Dry the fungus.
- Model the base and mark the cuts.
- Make eyes, a nose, a mouth and arms and glue them to the leg.
- Make a caterpillar from green round pieces and, bending it, place it on the hat. A kind of ear is formed - a pendant for the Christmas tree.
- Paint the face of the fungus and caterpillar after drying.
- Open the boletus with several layers of varnish and let dry.
Summer theme
For a panel of sunflowers you will need the same things as for all other works.
Let's look at the implementation step by step. First we prepare a textured frame with a background. Glue the surface with PVA and prime it. Paint it with paint.
Paint part of the dough green. These will be the stems of the plant. The rest is yellow.
On a dried background, draw a sketch of a design in the form of sunflowers.
Please note that you should draw what you like; it is not necessary to use exactly the same image as shown in the master class.
Roll out the stem, petals and other details in advance.
Cover the background with an adhesive solution (glue + water in proportions 1:1). Then carefully apply the figures separately.
To prevent the dough from sticking to your hands, you should use dry flour, as in normal cooking.
After each application of a layer, dry the parts well and for a long time. Paint over all the spaces between them. It should look something like this:
Related article: Elegant crochet tablecloth. Scheme
If your result is not similar enough to this composition or is bad in your opinion, don’t be upset. This technique is mastered over the years. Every time you do it, you will get better and better!
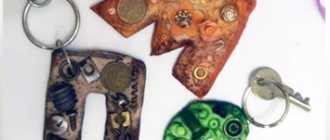
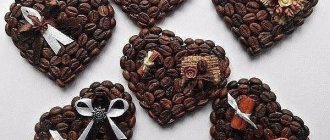
Gift fridge magnets
To create original souvenirs in the form of a magnet you will need the following kit:
- Dough.
- Cutting board.
- Rolling pin.
- Felt.
- Glue and magnet.
- Cardboard, pencil, scissors.
- Toothpicks.
For decoration, acrylic paints, brushes, varnish and coloring samples will be useful (if desired, the master can use his own ideas for decoration). How to make a craft from salt dough with your own hands:
- Prepare a template in advance. You choose a drawing or figure yourself, and then draw the outline of the future image on cardboard. The shape is cut out with scissors.
- In a separate container, knead the dough using one of the well-known recipes.
- On a cutting board, roll out the salted dough into a thin layer using a rolling pin.
- Place the prepared mock-up on the dough, lightly pressing it into the soft mass.
- The template is removed, leaving an imprint of the future magnet on the surface of the dough.
- Using a sharp knife, cut out the figure. Using a toothpick and other auxiliary objects (tweezers, sticks, buttons), highlight the relief and small details on the surface of the magnet.
- Dry the product in the oven.
- Focusing on the sample, paint is applied to the surface of the magnet.
A piece of felt is glued to the back surface, on top of which a magnet is placed. It is quite difficult for a novice master to choose the right design, and therefore you can use ready-made projects and ideas.
Create a warm mood
Agree, daisies are little suns. They always delight us when they appear with the summer season of the year. According to legends, these flowers grow where a burnt star falls and new life is born in the form of white small plants. Making such a large bouquet will definitely not be difficult for you. Let's get started!
We use the same ingredients, but prepare the frame in advance. First we sculpt a vase of any shape. We sculpt the heads: make a circle, cut out the petals with scissors or a cutter.
Roll the cores into very small balls.
One by one, mold everything together against each other in the background.
You can color it like this.
Ready!
Even more ideas in the photo:
How to make a picture with flowers from salt dough
“Daisies in a Vase” is the name of this painting, and it is done quite simply.
You will need:
- cling film or cellophane;
- salty dough;
- cardboard sheet or wooden strip for background;
- matter (optional) for background;
- toothpick;
- brush;
- knife;
- nail scissors;
- water.
Step by step process with photos:
- The salt dough is prepared according to the standard recipe and is divided into three parts: one larger one for the flowers, the second for the base for the flowers and the third for the vase. Cling film or cellophane is spread over a wooden background;
- A vase is formed from a piece of dough. It can be whatever the needlewoman wants. Here it is formed from 3 parts: the base is made from a large piece (it is rolled out and shaped like a vase), the stand and handle are made from two smaller pieces;
- Using a knife, a design was made on the vase;
- Next, flowers are made;
- An oval is rolled out from the second part and placed on top of the vase - flowers will be attached to it;
- A small piece of dough is rolled into a slightly flat ball;
- It is “cut” into petals with nail scissors;
- Then, using your thumb and index finger, the “square” petal is slightly compressed and shaped. These steps must be repeated with each petal;
- The result is voluminous petals;
- Using a toothpick, veins are made on the petals;
- The place where the flower should be located is slightly moistened with water and the flower is placed there. It needs to be pressed down lightly using the back of the brush;
- Roll a small piece of dough into a ball - this will be the core of the flower;
- The core also needs to be slightly pressed down;
- And lightly prick the petals at the junction with the base with the sharp end of a toothpick so that they connect;
- Repeat this procedure with all the flowers;
- Once the painting is ready, it must be left to air dry until completely hardened;
- As soon as the dough dries, turn the picture over with the dough facing down onto a soft surface and carefully peel off the film;
- The background is covered with coarse fabric (burlap, linen) on both sides;
- Spread the back surface of the work (i.e. dough) with glue. It is best to take "Dragon". And, without lifting the product, attach it to the fabric. Those. the lubricated surface itself sticks to the fabric;
- Then the work is painted or varnished as desired;
- After the paint has dried, you can attach a frame to the background.