Now the number of decorations offered for any occasion is simply off the charts. During the season they are sold everywhere, they cost pennies and it is difficult to surprise anyone with them. But what is actually valuable and costs many times more are designer items.
There is no need to spend crazy amounts of money on such products. You can make designer jewelry yourself. The article provides step-by-step instructions with photos: how to make a Christmas tree from satin ribbons with your own hands and what you will need for this.
Herringbone
Let's start our crafts according to tradition with the symbol of the New Year - the Christmas tree. Some people prefer to put up a large Christmas tree, while for others such a pleasure is an unaffordable luxury (pets or small children consider it their duty to knock over a forest beauty decorated with lanterns and New Year’s garlands). It’s okay, you can decorate your apartment with a miniature Christmas tree, which can be made from satin ribbons.
#1 Making a Christmas tree from ribbons with children
If there are small residents in the house, they must participate in the decorating process. Plus, creating together is a great time! Every child can make such a simple Christmas tree from a dry stick and various ribbons.
#2 Miniature Christmas tree made of ribbons
And here is a more complex version of the Christmas tree made from ribbons. This craft can be used to decorate not only your home, but also, for example, your desktop. To make it you will need ribbons, a foam cone, a lot of safety pins and a bow for the top. See the picture below for a step-by-step master class.
The second option for creating a Christmas tree using the kanzashi technique
A miniature Christmas tree using the kanzashi technique can be made in one more variant. For a mini Christmas tree you will need:
- felt for the cone;
- fabric for making petals;
- thread and needle.
For the Christmas tree, you can use various fabrics or satin ribbons.
Petals should be made in the same way as in the previous master class, only from fabric. When you have made a sufficient number of petals, you will need to string them on a thread - like beads
.
You should have as many rows as you need to decorate the cone. We sew the finished rows to a felt cone and decorate them at our discretion. Mini-Christmas trees can be used as Christmas tree decorations.
For fans of the video format, we invite you to watch Anastasia Kulikova’s master class - the girl creates a beautiful forest beauty in miniature from a green satin ribbon before her eyes:
Your Kanzashi Christmas tree is ready! The main thing now is to put it in a visible place: on a desk or coffee table, on a TV or refrigerator, so that it brings joy to you and your loved ones.
A Kanzashi tree surrounded by garlands is a real New Year's holiday!
A miniature kanzashi-style Christmas tree made from satin ribbons with your own hands is an excellent gift for friends or family or a nice souvenir for home that will add more joy on the eve of the New Year.
New Years is soon! A Christmas tree is a must! There are many ways to make it yourself. “Forest beauties” are made from so many things - from paper, feathers, threads, sesal, cotton pads, fabric and even pasta! There is another interesting option - a Christmas tree made of satin ribbons. This affordable material allows you to create an original and beautiful analogue of real spruce.
To make a “satin” Christmas tree you will need:
— Satin ribbon (width 2.5 cm, for a Christmas tree 15 cm high you need 6-7 meters of ribbon); — Ribbon for decorating the “trunk”; — A roll of toilet paper; - Scissors; — Stapler; — A sheet of cardboard; - Beads; - Compass; - Glue; - Candle; - Needle with thread.
Master class - DIY Christmas tree
| №1 | DIY Christmas tree made of nuts and cones. Master class with step-by-step photos. |
| №2 | Christmas tree made of pine cones |
| №3 | DIY Christmas trees |
| №4 | Winter crafts. Christmas tree made of pine cones. Master Class |
| №5 | Handmade soap. Carving Christmas tree with stars. Master class with photos |
| №6 | DIY Christmas tree using the tsumami kanzashi technique. Master Class |
| №7 | The Christmas tree is a pyramid. Master Class |
| №8 | Christmas tree made from pasta. Master Class |
| №9 | Christmas tree made of fabric. Master class with step-by-step photos |
| №10 | |
| №11 | Winter crafts. Christmas tree made of corrugated paper. Master Class |
| №12 | New Year tree with tangerines for children. Master Class |
| №13 | Crafts from pasta. Christmas tree. Master Class |
| №14 | Crafts from bottles. “Christmas tree - cone” with your own hands. Master class with step by step |
| №15 | Coffee Christmas tree. Master class with step-by-step photos |
| №16 | Silver Christmas tree made of pasta for the New Year. Master Class |
| №17 | DIY decorative Christmas tree made from buttons. Master Class |
| №18 | Soap making. Herringbone. Master Class |
| №19 | DIY New Year's paper crafts. Herringbone. Master class with step-by-step photos |
| №20 | DIY woolen Christmas tree. Master class with step-by-step photos |
| №21 | Beautiful Christmas tree made of pine cones. Master class with step-by-step photos |
| №22 | Knitted Christmas tree. Master class with step-by-step photos |
| №23 | DIY New Year's cards. Herringbone. Master class with step-by-step photos |
| №24 | Holiday crafts. New Year tree. Master Class |
| №25 | New Year's paper crafts. Christmas tree. Master Class |
| №26 | New Year's paper crafts. Painting - Santa Claus and Christmas tree. Master Class |
| №27 | Quilling paintings. New Year tree. Master class with step-by-step photos |
| №28 | Christmas tree made of paper using quilling technique. Master Class |
| №29 | |
| №30 | DIY Christmas tree from a champagne bottle. Master Class |
| №31 | New Year's crafts. Christmas tree made of plush wire. Master Class |
| №32 | Crafts for schoolchildren for the New Year. Christmas tree using scrapbooking technique |
| №33 | |
| №34 | |
| №35 | Winter paper crafts. Christmas tree from a magazine. Master class with photos |
| №36 | Crafts for the New Year. DIY Christmas tree. Master Class |
| №37 | Winter crafts from shells. Herringbone. Master class with step-by-step photos |
| №38 | Origami - Christmas tree for children |
| №39 | Christmas tree made of napkins. Master class with step-by-step photos |
| №40 | Christmas tree made of tulle with a wonderful ringing of bells. Master class with step-by-step photos |
| №41 | |
| №42 | Christmas tree made of paper. Master class with step-by-step photos and detailed descriptions |
| №43 | |
| №44 | |
| №45 | DIY New Year's souvenir “Christmas tree” made from cereals. Master class with step-by-step photos |
| №46 | DIY Christmas tree toy “Christmas tree” made of paper. Master Class |
| №47 | |
| №48 | New Year's paper crafts. Golden Christmas tree. Master Class |
| №49 | Origami Christmas tree. Snowy. Master class with step-by-step photos |
| №50 | Christmas tree made of modules. Master class with step-by-step photos |
| №51 | DIY New Year's crafts. Christmas tree made of sisal. Master class with step-by-step photos |
| №52 | New Year's crafts. Christmas tree made of yarn and ribbons. Master class with step-by-step photos |
| №53 | New Year's crafts. Christmas tree made of sisal. Master class with step-by-step photos |
| №54 | New Year's crafts from natural materials. Herringbone. Master Class |
| №55 | Christmas tree toy made of sisal. Master class with step-by-step photos |
Popular articles Making Valentines: 16 ideas
| №56 | Christmas tree made of beads. Master class with step-by-step photos |
| №57 | DIY New Year's toy “Green Christmas tree”. Master Class |
| №58 | New Year's crafts with children. Christmas tree. Master Class |
| №59 | Christmas tree made of ribbons in artichoke style. Master class with photos |
| №60 | DIY New Year's toys. "Herringbone Bordeaux" Master Class |
| №61 | DIY Christmas tree decorations. Christmas tree with roses. Master Class |
| №62 | Handmade soap. Christmas tree in a heart. Master Class |
| №63 | The Christmas tree is a pyramid. Master Class |
| №64 | DIY Christmas tree using the tsumami kanzashi technique. Master Class |
| №65 | Modular origami. Herringbone. Master Class |
| №66 | DIY crafts for the New Year. Christmas tree with roses from notes. Master class with step-by-step photos |
| №67 | DIY New Year's soap. Herringbone. Master Class |
| Comments to the news “ DIY Christmas tree. Photos, ideas, 100 master classes
"It's already 11:
Snowflakes
From ribbons, especially using the kanzashi technique, incredibly beautiful snowflakes are obtained. You can decorate not only a room with such a craft; a snowflake made from ribbons can be hung on a New Year tree or used as a decoration.
#1 Simple snowflake using kanzashi technique
It is best to start your creative journey in Kanzashi with simple crafts, such as this snowflake. You can master two types of sharp petals without much difficulty. By the way, you can glue the petals in your own way. Well, look at the author’s version on the step-by-step MK.
#2 Another simple kanzashi snowflake
And one more option for a not-so-complicated snowflake using the kanzashi technique. By the way, such a craft can be attached to a headband or hairpin and complement the New Year's image with an unusual handmade decoration.
#3 Snowflake kanzashi on the headband
Need to complete the look of a little snowflake? A snowflake using the kanzashi technique on the headband will cope with this task with a bang. Step-by-step MK in the picture below.
#4 Snowflake using kanzashi technique with several types of petals
This craft is more suitable for experienced needlewomen. To make a snowflake, a large number of petals are used, the production of which requires special skills. Well, if you are confident in your abilities, then watch MK and create!
#5 Snowflake made of ribbons and beads
And here is a version of a kanzashi snowflake with bead decoration. In addition to painstaking work with ribbons, you will also have to work with beads and weave a small flower. Please note that this craft includes several types of petals, each of which has special manufacturing features. See the picture below for a step-by-step master class.
#6 DIY snowflake made from ribbons
Snowflakes made using the kanzashi technique look unique, but a snowflake made from pieces of ribbon looks no less impressive. To make it you will need tape and a lighter (you can use a candle) to solder the parts.
#7 Christmas tree toy Kanzashi Snowflake
#8 Double-sided Snowflake made of narrow satin ribbon
#9 New Year's snowflake kanzashi with curls
#10 Headband Snowflake kanzashi made of satin ribbons
For more snowflakes, see the article:
Herringbone
Let's start our crafts according to tradition with the symbol of the New Year - the Christmas tree. Some people prefer to put up a large Christmas tree, while for others such a pleasure is an unaffordable luxury (pets or small children consider it their duty to knock over a forest beauty decorated with lanterns and New Year’s garlands). It’s okay, you can decorate your apartment with a miniature Christmas tree, which can be made from satin ribbons.
#1 Making a Christmas tree from ribbons with children
If there are small residents in the house, they must participate in the decorating process. Plus, creating together is a great time! Every child can make such a simple Christmas tree from a dry stick and various ribbons.
#2 Miniature Christmas tree made of ribbons
And here is a more complex version of the Christmas tree made from ribbons. This craft can be used to decorate not only your home, but also, for example, your desktop. To make it you will need ribbons, a foam cone, a lot of safety pins and a bow for the top. See the picture below for a step-by-step master class.
#3 Christmas tree made of ribbon and beads
You can make a Christmas tree from ribbon, combining it with large beads. This craft can be hung on a real Christmas tree or given to someone as a souvenir. See step-by-step photo instructions below.
#4 Christmas tree in kanzashi style
And here is a mini Christmas tree made using the kanzashi technique. You will have to tinker with such a craft, because Japanese technology is for patient needlewomen. This craft will take a lot of effort and time, but the result will be truly impressive! Petals made from satin ribbons are glued onto a paper cone using glue. Additionally, the finished tree can be decorated with beads. By the way, the Christmas tree does not have to be monochromatic; you can combine colors to your taste.
#5 Christmas tree made of flowers using the kanzashi technique
But here is a very similar craft to the previous one, but there is only one difference: Christmas tree No. 4 is made from individual petals, and this Christmas tree is made from flowers. First you need to make petals from ribbons, then glue the flowers (5 petals each), and only then glue the flowers to the paper cone. See step-by-step instructions with photos below.
#6 Christmas tree hairpin using kanzashi technique
Using the kanzashi technique, you can make various decorations, in particular hair clips. For such a hairpin you will need: hairpin, ribbons, beads. See below for how to make a hairpin.
#7 Herringbone ribbon hairpin
Here is another original way to decorate a hair clip with ribbons. The result is a miniature Christmas tree that will perfectly complement the New Year's image. How to make a hairpin, see the picture below.
#8 Herringbone hairpin
You can also decorate a hairpin in this simple way: with an ordinary narrow ribbon and a star-shaped bead. It’s so easy to make ordinary hair accessories truly festive, and our step-by-step master class will help you with this.
How to make a Christmas tree in boots using the kanzashi technique
A Kanzashi style Christmas tree is made using the same technology. But decorative boots, made by hand, are attached to it from below. You need to do this:
- Make a similar craft (as in the previous section). For variety, the elements can be glued in a different direction so that the petals open upward. Also, when making fragments, you can use two ribbons - green and golden.
- The result will be a tree like this.
- Make a model of a boot from two cases for a kinder surprise, as shown in the photo.
- Trace along the outline on cardboard.
- A similar blank is made from shiny material, and then both parts are glued together.
- Attach the model based on the Kinde Surprise case using glue.
- Glue the red felt.
- Sew the top of the boot.
- Wrap it up and attach it with glue to the plastic base.
- Decorate with shiny braid.
- Add a bow.
- Make a second boot and glue it to the base of the cone.
- You will get something like this.
Master class: Christmas tree made of ribbons and beads
Another very simple option for Christmas tree decor. Even a child can cope with such work in a matter of minutes, so I recommend that you stock up on a large number of different ribbons and beads; these supplies for needlework are not at all expensive.
Let's collect a lot of Christmas trees with our own hands to decorate everything possible: curtains, refrigerators, chandeliers, mirrors and just walls. In order to make it bright and elegant, it is good to place them next to each other when purchasing materials. Beads and ribbons should be contrasting. I also used beads in my Christmas trees.
- To create such Christmas trees with your own hands, take a beading needle, tie a knot at the end of the thread, and begin beading.
- To hang the future Christmas tree with your own hands, we prepare a loop from a narrow ribbon of a contrasting color.
- We collect beads, beads and tiers of ribbon from the bottom up. As you progress, the ribbon loops of the herringbone narrow.
- When the Christmas tree triangle is finished, cut the ribbon and sew on a loop. The DIY Christmas tree is ready.
See similar master classes: Christmas tree made of paper.
Tapes on a plane
A good idea is to use Christmas trees made from ribbons, which are easy to make yourself - Christmas trees on cards and gift boxes. You can wrap the ribbon around a triangle of cardboard or fabric, or use pins or glue to secure the zigzag ribbon on a flat surface. The silk or metallic sheen of the ribbon makes the packaging elegant and stylish. In addition, a triangle made of it puts everyone’s favorite Christmas tree accent on a gift or card.
INTERESTING: Making crafts from threads
You can sew a Christmas tree on the wall from gathered ribbons. It is very convenient if in a small room it is difficult to allocate a corner for installing a regular Christmas tree. A DIY wall Christmas tree made from ribbons doesn’t look as flat as others. Ruffles, multi-tiered designs and satin shine create the effect of volume and splendor.
New Year's composition.
To make a New Year's composition, in addition to a Christmas tree and a snowman, I needed:
- polyurethane foam (dried) - for the base;
- ceiling tiles - for the base;
- padding polyester - the basis for snow;
- foamed polyethylene foam - for snow;
- shaving machine - for snow;
- polystyrene foam - for gifts;
- paints - for gifts;
- glue “Titan”;
- toothpicks.
Popular articles How to make cards for the New Year 2022 with your own hands - ideas for kindergarten and school
First the basics. I needed a “piece of snow-covered forest.” In principle, there are many options for how to do it. I used what I had available.
After foaming the door jambs, a piece of dried foam remained. She didn’t let her husband throw away the scraps of foam and in time she dragged a large piece of foam into the hole. I knew that sooner or later it would come in handy in needlework.
This piece of foam was used:
- I trimmed the foam. This will be a bump.
- I glued the foam to a piece of ceiling tile.
- I glued a piece of padding polyester on top and cut it off.
- Turned everything upside down. I folded the edges of the padding polyester and glued them to the ceiling tiles.
The question that remained was how to make artificial snow from scrap materials? After searching the Internet for information, I found the article “Snow in scrap.” The author of the article, Svetlana, gave wonderful advice on how to make snow from polyethylene foam.
It seems to me that this is the best way to make artificial snow from scrap materials. Svetlana, thank you and special thanks to your husband!
Here is the link to the article: https://wwwmyblogcdtnkfyf.blogspot.ru/2011/11/blog-post_13.html?m=1 (copy the link and paste it into the search bar of your browser).
The essence of this method is simple: shave the polyethylene foam. And it turns out to be very realistic snow. Below in the final photos you can see that this snow is very similar to real snow.
Having prepared the amount of snow I needed, I glued it to the base. To do this, I applied a thick layer of “Titan” glue to the padding polyester. And on top, I sprinkled snow on the glue and pressed it lightly.
After covering the entire base with snow, I installed the Christmas tree. To do this, I inserted three toothpicks into the cork of the Christmas tree, and then pierced the base with them. I added more glue in the gap between the cork and the snow and pressed the cork to the base.
Separately, I would like to say that when assembling the New Year's composition, I had to give up my favorite hot-melt glue. Since this glue is hot, and the base of the composition is all synthetic and warps and melts due to temperature.
All that remains is to make beautifully “wrapped gifts” under the Christmas tree.
To do this, I cut foam cubes with a sharp knife.
I painted the foam cubes in different colors. And tied ribbons like holiday wrapping.
I pierced the “gifts” with toothpicks and stuck them in the snow, just like the Christmas tree.
Finally, the New Year's composition is ready!
This is what I got - a Christmas tree made of ribbons, a snowman made of cotton pads, gifts and snow!
I photographed the work on real snow. Look how homemade snow looks little different from the real thing.
Now, this snowman by the Christmas tree will decorate our New Year holidays.
And if you put white tinsel around the New Year’s composition, it will be even more interesting.
This is the New Year's fairy tale I came up with.
Click on the social media buttons!
Christmas tree souvenir on a magnet
Materials:
- Satin and brocade ribbons,
- Half beads,
- Chain,
- Felt,
- Magnet,
- Thermal gun and other tools.
We will make a Christmas tree on a magnet from satin and brocade ribbon. To do this, take brocade 4 cm wide and, without cutting it, begin to fold it into a triangle. We wrap the rest of the tape back and bend it so that the top of the triangle is above the bend.
We insert a piece of satin ribbon and bend it.
Now we tuck the corners on the left and right inward and fold the petal.
We cut the tape, melt it and trim the edges. When we melt the base and bend it, we will need petals bent to the right and left. And also slightly smaller straight lines.
Let's start assembly. Glue petals on the sides of a small straight petal, on the left - curved to the left, on the right - curved to the right.
We glue a small straight petal to the center, and glue the curved petals to the curved ones, shifting them slightly from the center. The Christmas tree can be made of any size by gluing 1 more petal to each row in the center, and also adding curved petals along the edges. All that remains is to level the Christmas tree at the base.
We will make a star on the top of the head from gold-colored brocade. From a 5x5 cm square we fold a triangle and make 3 folds, the result is a part similar to the ray of a star.
For the second row of the star we will make other blanks. We will make petals from brocade 2.5 cm wide, which we will glue between the rays of the first row.
Let's glue the star to the top of the tree and start decorating. Half beads imitate Christmas tree decorations, and a thin chain imitates a New Year's garland. We use felt as a base and cut it into the shape of a Christmas tree. Glue the magnet. Our New Year's souvenir: a Christmas tree made of ribbons, ready!
Christmas tree made of sisal, threads and flower mesh
Next come even more interesting Christmas trees, because unusual materials are used to make them.
First, sisal and oasis for dried flowers. You can make very cute trees from them in just 1 hour.
Watch the master class on Christmas trees made of sisal
Secondly, to make a designer Christmas tree, you can use threads that are wound on a paper cone using the technology of making openwork balls.
Thirdly, flower net and bouquet net.
The technology for making these three trees is very similar, so the process of creating them is shown in one master class: Making a Christmas tree with your own hands.
Ideas for making various figures
There are many options for New Year and Christmas trees made of satin, nylon, and lace ribbons. Christmas trees for cards or panels can be flat, vintage, of any size and color.
Christmas tree made of ribbons and beads
It's easy and quick to do. You can then hang it on a Christmas tree or wall, or make it part of a garland. You need to prepare:
- Large beads.
- The tape is at least one and a half cm wide.
- Threads with a needle.
Procedure:
- Thread the first bead onto a thread and needle. You can take a cylindrical bead that looks like a tree trunk.
- Lay the ribbon layer by layer, alternating with beads. Start with 6 cm.
- Gradually reduce the width of the loops to create a cone-shaped tree.
- Finish with a large curly bead and sew on a loop for hanging.
Flat miniature craft made from ribbons
You can use it to decorate a New Year's card or a poster with congratulations.
To make it, just prepare a small brown trunk from cardboard and cut three pairs of segments for loops of different sizes.
Glue the loops onto the trunk of the tree, starting with the largest one, alternately on the right and left. You will get a miniature Christmas tree with three green branches located at an angle to the trunk.
Tree on a stand
It's so easy to make that kids can make it themselves. What do you need.
- White and blue ribbons.
- Wooden spool of thread.
- Cocktail tube.
- Scissors, glue, candle.
Manufacturing procedure:
- Cut into 8 cm pieces. Connect the ends, make loops, burn and glue on a candle.
- Make a cone out of white cardboard or paint it with white acrylic paint.
- Glue 3 rows of white loops and 2 rows of blue ones.
- Glue a tube stem to the base of the cone and insert it into a spool of thread. Decorate the coil like a snowdrift.
- From a silver strip of fabric, make a flower of eight petals with a bead in the center to decorate the top. Glue or pin to the top of the tree instead of a star.
Popular articles Pencil holder
You can make a Christmas tree from ribbon with your own hands in any color. A delicate shining Christmas tree is made from white ribbons. The lace ones are used to make a vintage beauty.
Christmas tree
After the glue has dried, they begin to decorate the holiday tree. The decoration of the resulting Christmas tree depends entirely on the imagination of the author. You can hang ready-made decorations or make them yourself. Tiny toys, tinsel, and rain will do. Bright beads glued to the tips of the petals look impressive. They can be arranged in “artistic disorder” or according to strictly thought-out geometry. In any case, the Christmas tree will turn out elegant.
It is convenient to imitate snow using white acrylic paint or pieces of cotton wool. A star can be made from wire and beads. The top is also decorated with a regular bow made of silver, gold or scarlet ribbon or a shiny ball. The New Year's composition will be decorated with a homemade snowman, Santa Claus and miniature boxes with surprises.
Homemade thin bows look beautiful. And to keep them neat, tie them using a regular kitchen fork with four teeth. The easiest and most budget-friendly way to decorate is to use paper snowflakes. You can cut them out of shiny or plain white paper. The shapes and patterns of snowflakes are varied, since it is known that there is not a single repeating crystal in the world.
For the Christmas tree, you can make a beautiful stand out of foam plastic and sprinkle it with artificial snow.
A Christmas tree made from satin ribbons will be an excellent New Year gift. The product will be guaranteed to be exclusive and designer and will allow you to show your creativity.
Why do they want to ban lace panties in Russia?
How to iron a sheet with an elastic band correctly?
Conical Christmas tree made of ribbons
You can make a cone out of cardboard and cover it with ribbons. It is convenient to attach them to the foam cone using sewing pins.
It is better to take silk ribbons for the Christmas tree; they look very elegant, are opaque and are sold in various widths. If necessary, they can be cut from fabric.
When combined with lace ribbons, you get a DIY vintage Christmas tree.
Decorating a cone-shaped Christmas tree can be divided into 2 ways:
Winding: serial or spiral. Large pieces of tape are used, but their total consumption is usually not large, since they fit tightly onto the surface of the cone or with slight gathering.
Attaching many small parts of the same shape to a cone. It is the variety in shape that determines the style of the Christmas tree. You can attach multi-colored simple loops, as if taken from the remains of ribbons. Or you can make complex petals and roses with your own hands and attach them to the base of the Christmas tree with pearl pins.
How to make a Christmas tree from satin ribbons
The fluffy branches of the New Year's beauty can be made from double kanzashi petals. This popular silk origami technique originated over 400 years ago in Japan. Today it is actively used in hand-made technology.
For a Christmas tree 15 cm high, you will need to prepare approximately 190 sharp petals. The shorter the segment, the more rows you will get, and the tree will be more luxuriant.
Materials
To make work convenient, prepare everything you need in advance. You will need the following materials:
- green ribbon 5 cm wide (length depends on the dimensions of the future product);
- sheet of cardboard;
- glue gun or glue;
- green paint;
- cork;
- decorative star;
- sharp scissors;
- tweezers;
- candle or lighter;
- various beads and bows for decoration;
- Ruler and pencil.
Step by step instructions
Follow the following sequence of actions:
1. First you need to make the base of the tree. To do this, make a cone from green cardboard. It is convenient to glue it together with paper tape. If you have cardboard of a different shade, it is better to paint it. Colored paper or felt will also work.
2. The Christmas tree can be placed on an improvised trunk. An ordinary wine stopper is useful for this purpose. Its base needs to be made even, and then glued to the center of the base of the cone.
3. Next, you need to take a piece of satin ribbon along the length of the base of the cone and cover it with tape so that the edge runs along the inside of the cardboard form. Bias tape works well for this purpose. You can also carefully roll the tape and iron it with an iron.
4. You can start creating needles. Next, the ribbon is cut into 5 cm squares. The number of petals will depend on the size of the product and the author’s idea. You need to think about the number of tiers in advance.
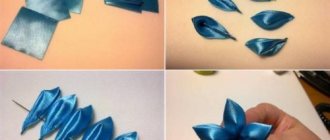
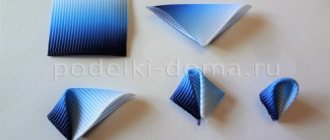
5. The petals are folded in half diagonally with the shiny side out. The fold line should be at the top. It turns out to be a triangle with the base at the top and the apex at the bottom. Next we connect the right and left corners. The edge of the fabric must be singed. The petal is ready for further work.
6. You need to glue the petals onto the cone, starting from the lowest tier. It is important that they lie flat and do not fall to the sides. The accuracy of the future craft will depend on this. Glue the petals one to one as tightly as possible. Glue is applied to the melted edge of the petal.
7. If the cone is made of foam plastic, then it is more convenient to prick the petals with pins. It is more comfortable to pick them up with tweezers, since all the parts turn out small.
8. To make it more convenient to fix the petals on the cone, you can outline the rows in advance and not deviate from the plan. Each next row will be shorter than the previous one by a petal. The second and subsequent rows are glued in a checkerboard pattern relative to the previous one.
9. To shape the crown, you need to glue four petals together.
The corners of the workpiece are not cut: they must be sharp. This technique will help make the tree fluffy.
History of kanzashi technique
The kanzashi technique came to us from Japan. Initially, this technique was used to make hair jewelry worn by Japanese and Chinese women. Sometimes such decorations turned into real works of art.
Due to the fact that Japanese traditional attire did not allow any bracelets or necklaces, hair ornaments played a very important role. Sometimes the cost of decorating a hairstyle was equal to the cost of an expensive silk kimono.
This technique is still popular today. With its help, they create both simple decorations and entire flower arrangements. Very beautiful and...
The tsumami kanzashi technique has also found application in the creation of New Year's accessories, Christmas tree decorations and, of course, a decorative mini-Christmas tree. It attracts the eye with its precision, accuracy and beauty.
Christmas trees made of threads
Using threads, you can decorate a regular paper cone, as in this master class:
Video about an openwork and simple Christmas tree made of threads and glue:
"Preparing for Christmas." Rybakov Anton. Anton has been studying at the Macrame association for three years. Over the years, Anton has participated in exhibitions and competitions many times. Today he brings to your attention his new work called “Christmas Tree”. This is a panel woven using the macrame technique. The Christmas tree on the panel is woven using twisted chains from single flat knots. Several weeks and about a hundred meters of cord were spent to achieve the result. The angel on the tree symbolizes the good news that people received on the day of the Nativity of Christ. The angel is woven with rep bridles, and a bead is used for the head. Anton is pleased with his work and hopes that you, the audience, will like it too. And if this is the case, then Anton and I are ready to prepare an MK for this product.
Wreath
The Christmas or New Year's wreath is an exclusively Western tradition that came to our homes from Hollywood films. Well, for those who accept Western values, we have prepared several master classes on creating wreaths from ribbons.
#1 New Year's wreath made of bows
A very simple ribbon wreath for the lazy. To make it you will need a base and ribbons of different colors. Tie the ribbons into bows around the base and the wreath is ready!
#2 Braided ribbon wreath
You can weave a wreath from ribbons. This product looks very impressive, but in fact there is nothing complicated in its manufacture. Follow the step-by-step instructions and you will succeed!
#3 Miniature New Year wreath using kanzashi technique
A mini wreath can be made from kanzashi petals. You need to make basic petals from ribbons, glue them in threes and connect them into a circle. The finished wreath can be decorated with a miniature bow.
#4 Miniature wreath made of ribbon and beads
A miniature wreath made of ribbon and beads can be hung on a Christmas tree as a decoration, or you can give it to someone as a handmade New Year's souvenir. To make it you will need fishing line, ribbon and beads. You can also use additional decorative elements, such as a pendant and a bow.
#5 Ribbon wreath for kids
Surely in kindergarten they gave me the task of doing some kind of New Year's craft with the children. Take note of this simple Christmas wreath. You will need: a base for a wreath, many pieces of different ribbons, glue.
#6 Christmas wreath of satin flowers
And here is a version of a New Year's wreath made of satin flowers. The flowers turn out to be very realistic and it seems that making such a wreath will take a lot of time. Actually this is not true. Making such a craft from ribbons is quite simple. You can verify this through MK.
#7 Ribbon wreath: making New Year’s crafts with children
Here’s another great option for a New Year’s craft that kids can handle. You will need: a base, many ribbons of different colors and sizes, scissors. Cut the ribbons into strips of equal length and tie in knots around the base. The wreath is ready!
#8 Simple wreath made of satin ribbons
a very simple wreath made of satin ribbons. To make it you will need: a foam base, tape, safety pins or glue. Wrap the piece with ribbon and decorate it as you wish: with a bow, a snowflake, or leave it like that.
#9 Christmas Wreath Kanzashi
#10 New Year’s wreath “Snowman” made of ribbons
You'll like it:

