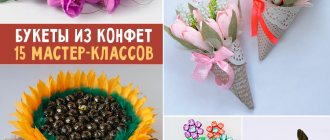
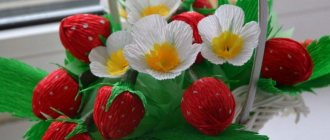
Bouquet of roses
Necessary materials:
- Candies 15-20 pieces
- Long skewers
- Corrugated paper in two colors for buds and green for petals
- Glue gun
- Scotch
- Threads
- Organza
- Satin ribbons
We cut blanks from corrugated paper for petals measuring 8*12 cm, fold the blanks in half and round the ends, forming petals. We secure the candies on the skewers with tape. We tightly twist the candy into the petal and secure it with thread at the base. We stretch the edge of the corrugation, forming petals.
From green paper we cut out small pieces 0.7 cm wide, about 10 cm high, round the ends with scissors. For each flower you will need 4-5 leaves, glue them to the base of the flower so that the leaves are slightly higher than the petals. For realism, slightly curl the ends of the leaves. We wrap the skewers up to the middle with green paper and secure them with glue.
We collect the resulting flowers into a bouquet in a spiral and tie them with ribbon. We turn the bouquet over and decorate it with corrugated paper, and tie the packages with thread. We decorate the bouquet with organza on top and tie it with satin ribbons.
Additionally, the bouquet can be decorated with beads and bows made of satin ribbons. Candy flowers can be placed in a basket.
Champagne Christmas tree
It’s not a shame to go on a visit with such a gift, so let’s do it.
For work, prepare a bottle of champagne, sweets, narrow tape, tinsel, and rain. Candies preferably in green wrappers.
Note!
- Christmas crafts - how to make them yourself? 150 photos of the best themed crafts
Crafts made from stones: creative options for crafts made from stones + step-by-step instructions for making your own, methods and schemes of work
- Crafts from disks: a step-by-step master class on how to create them yourself, creative ideas for crafts of varying complexity + simple patterns for beginners
We start gluing the bottle from the bottom. We glue the tape onto the candy so that 1 cm of tape remains free on both sides of the candy wrapper. Stick it on the bottle. So, candy by candy, row by row, we gradually rise to the neck of the bottle.
In each row, we slightly move the candies, imitating the branches of a Christmas tree. When you reach the traffic jam, decorate it with rain, serpentine and other New Year's attributes. The gift is ready and there is no shame in going on a visit with it.
Candy heart
- To make it you will need:
- Styrofoam
- Skewers or toothpicks
- Candy flowers
- Glue
- Jewelry (beads, ribbons)
We take foam plastic 3 cm high to make the base, draw a heart on it and cut it out. We make flowers from candies according to the previous master class. Instead of long skewers, you can use toothpicks.
Glue corrugated paper to the resulting heart on both sides, use an awl to make holes and insert candy flowers. We decorate the edges of the heart with corrugated paper and organza, or tie it with a wide satin ribbon.
How to make a poster?
It’s not difficult to make a poster with chocolates and inscriptions with your own hands. To create such a presentation you need:
- a sheet of Whatman paper – inscriptions, treats and pictures will be placed on it;
- stationery - scissors, tape, pencils, glue, markers, paints, pens;
- colored paper and cardboard - they are needed to separate zones on the craft and give volume to the created image;
- various sweets;
- beads, petals, ribbons suitable for decoration.
You need to carefully think through the idea and create a layout, after which you can begin to design the presentation. There are a lot of options for making gifts on whatman paper and each of them is absolutely original, since it is created taking into account the personality of the recipient and the reason for the celebration at which it will be presented.
A poster with chocolates is made like this:
- First of all, you need to decide for what purpose the postcard is being created and, based on this, choose the appropriate design option. For example, you can make a comic poster as a gift for a friend, but a more strictly designed congratulatory poster is suitable for presenting at an anniversary.
- Then you need to draw up a diagram - mark the locations of the goodies, inscriptions, decorations, and think about what will be located in the remaining free space. If you have no experience in creating such collages, then you need to practice first so that in the final version all the elements are arranged harmoniously and combine with each other.
- Next, draw the desired phrases on whatman paper using multi-colored paints, pencils, and felt-tip pens. It is important to do this carefully, since any blemish on the Whatman paper will be noticeable, which will ruin the appearance of the gift. If the creator of the poster cannot boast of beautiful handwriting, you can not write the phrases yourself, but print and cut them out, and then attach them to double-sided tape - such actions will add volume to the craft.
- Using glue or double-sided tape, sweets are secured to whatman paper.
- The remaining free spaces can be filled with pictures, drawings, or simply painted in a tone that matches the overall concept of the craft.
- Lastly, decorative elements are attached to the poster - bows, voluminous stickers and others. Don’t be afraid to experiment and be original - this will only make your sweet poster better and more unique.
Sweet card
Necessary materials:
- Glue
- Thick cardboard
- Sweets and chocolates
- Colored paper
We select the size of the postcard ourselves, fold the cardboard in the shape of a book. For the base, instead of cardboard, you can use the cover of an old book. We write wishes on two sheets of paper of the required size and glue sweets; you can use white or colored paper.
We wrap the card-book with colored or wrapping paper, secure everything with glue, and paste sheets of wishes and sweets inside the card. We decorate the outside with beads and appliqués.
A postcard can be given not only for birthdays, but also to coincide with a themed holiday. Candies can be wrapped in colored paper, then they will resemble gift boxes.
Handmade gifts always delight the heart and eye; they speak of a special reverent attitude.
Animals “Hugs” with candy
Today I will introduce you to an amazing master class. These are “Hug” animals with candy in their paws. Detailed description with step-by-step recommendations and cool photos. This is what awaits you. You will get fun crafts for kids from 3 to 6-7 years old.
Materials and tools
What you will need for work:
- printed templates;
- double-sided colored cardboard or colored cardboard and colored paper;
- (optional) beautiful paper for scrapbooking (it’s quite possible to do without it);
- wrapped sweets;
- pencil;
- scissors;
- glue (PVA or glue stick).
Let me explain something right away. The finished animals will have to have their faces made. This can be done in several ways:
- Use a hole punch to pierce the places in the blanks where the eyes will be. The holes will turn out very cute.
- Using gouache on a thin brush, draw the eyes, mouth, and nose.
- Use a regular or colored pen to draw the details of the faces.
- Cut out small details from colored paper for the animals' faces. Stick on the faces in the form of an applique.
Choose the way you want to decorate the animals. The master class will have an option with paints and a brush.
Master Class
Steps for making candy huggable animals:
First of all, cut out the blanks from the templates. Attach to cardboard. Circle. Cut it out. Make as many blanks as you like.
My colored cardboard is not double-sided. Therefore, I glue colored paper and pieces of scrapbooking paper to the back side. I also use a floral mesh for bouquets for this.
The master class presents preparations for a gnome, an owl, a chicken, a lamb, and a bear. Additional cutouts include a bow and egg for the chicken, a scarf for the bear, and a suit and beard for the gnome.
When the PVA dries well, I draw the details of the faces. As stated earlier, you will be able to do this in several ways. In this version, a semi-dry brush with white and red gouache is used. How to make these faces is up to you. The easiest option is to draw faces from templates. I did so.
The muzzle for the lamb is drawn with a bright black pen.
Pay attention to the candies. These are the ones taken here. You take whichever ones you want. I turned the candies over because I don’t advertise logos. Although it’s clear what brand the sweets are in the photo