Decoupage of candles using geographical maps - a luxurious idea for an interior in boho, rustic and eco style
Decoupage is a great way to transform even such an ordinary piece of furniture as a candle. You can give the craft to a friend or leave it at home for the enjoyment of yourself and your household. Your efforts will be rewarded with a completely unique home accessory. Every year new ideas for decoupage techniques . Christmas drawings look especially fabulous on candles. In this article you will find simple and easy-to-follow decoupage master classes, as well as ideas for more experienced needlewomen!
Types of decoupage techniques (photos and examples)
Several methods are currently used. You can make decoupage using any of the following techniques:
- Cold way.
- Using a spoon.
- Using a hairdryer.
Each technique has its own subtleties and secrets
On the Internet you can find a large amount of video material on how to make such candles, but first we will provide step-by-step instructions and consider each technique step by step. Looking ahead, let's say that in each of these methods you do not need glue at all.
1
7
Decoupage candles for the New Year: do it yourself
Winter holidays are a great opportunity to show your imagination and realize your inspiration. You can realize almost any idea for decoupaging a candle for the New Year with your own hands, using various elements and designs for decoration.
New Year is one of the most favorite holidays of every person.
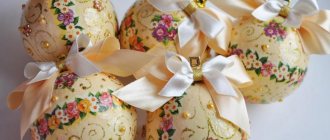
Wax products decorated in red, gold and silver colors, decorated with sparkles and decorative braid will look original and stylish.
- In the first case, you will need a white candle, a napkin with red, yellow and green shades, a small sponge and an acrylic golden outline. Prepare and glue the drawing using one of the above methods. Apply acrylic paint to the background using a sponge and let it dry. Draw the outline of the Christmas stars and leave the craft to dry for 5-6 hours. To create a festive atmosphere, use scented products with orange, cinnamon or pine scent.
- The second option differs in color scheme - replace the gold outline with a silver one, choose a thematic picture in cool colors and add a little sparkle upon completion of the work. Fix them with varnish and let the entire structure dry for 6 hours.
- To implement this idea, take a decorative braid and two colors of acrylic outline - white mother-of-pearl and white with gold glitter, a suitable pattern, a sponge and a simple white candle. The principle of drawing a picture remains the same. Create a background using a sponge and glitter outline and let it dry for 20 minutes. Decorate the top of the candle with white mother-of-pearl stars and outline the stars with a gold outline. Set the piece aside for 2 hours to allow it to dry completely. Decorate it with decorative braid along the bottom of the picture, gluing it with special glue.
"Cold" decoupage
This technique can be used to transform thin-walled candles. In this case, the pattern will fit almost perfectly to the surface. This type of decoupage is suitable even for beginners. Below is a master class on making.
Decoupage is a great way to make a decorative candle with your own hands without putting a lot of effort into it.
To decorate using decoupage technique you will need the following materials:
- candle;
- napkin;
- sharp scissors (can be manicure scissors);
- stick (preferably glass, but you can use any stick with a smooth surface).
- First, measure the length of the napkin. Leave a small allowance (about one centimeter in length and width).
- Attach the design to the candle and align it with the top edge. Iron gently.
- This is best done with a glass rod, moving carefully from the center.
- Press the tool lightly for better adhesion to the napkin.
Candle decor idea with animal images
Candles of any size and thickness can be used in decoupage
Advice! If you glued the design to the entire surface of the candle, then the resulting seam must be carefully processed. First glue one side of the picture, then the other, after cutting off the extra piece (if there was one, of course).
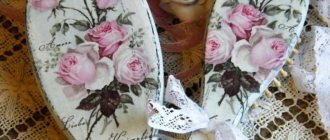
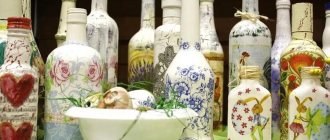
Delicate floral ornament and butterflies. This can be found on ready-made decoupage sheets
Advice! Do not overlap the seam, otherwise the final result will look sloppy.
- Finish the top and bottom edges and carefully trim off any excess paper. The design will stick to the candle even without using glue.
- Apply decorative elements on top, for example, glitter, depending on your idea. And you will get a small masterpiece, as in the photo. If you still do not understand the details of decoupage, watch the detailed video at the end of the text.
In this type of creativity you can use a variety of motifs.
How to choose a candle for decoupage?
The secret of beautiful and effective decoupage is the correctly selected wax blank. It is recommended to give preference to thick and white candles with a smooth surface. The color is considered neutral and is well suited for implementing any creative ideas.
When choosing it, you should pay attention to a number of the following nuances:
- Density of the top layer. The denser and smoother it is, the less likely it is that the paper fragments will quickly heat up and ignite.
- Work surface color. To work with colored products, you should choose prints or cards that are close to their tone. The colors of the picture transferred to them will be less bright than on a napkin or card.
- Thickness of candles. Thin and small wax objects will be difficult to use for their intended purpose, since they heat up immediately and completely. For them, you should choose a small pattern, small figures or notes.
What is
Decoupage is an application made with a thin layer of paper intended for a wide variety of different surfaces and subsequent application of varnish. Its historical roots go back to China in the 12th century.
Local residents decorated various interior items using thin paper with ornaments as a material.
First of all, select a napkin with an image, cut it with scissors and glue it to the surface.
After the glue has dried, it is necessary to coat it with colorless varnish. Decoupage technology makes it possible to create absolutely unique original interior items and decorate almost any surface.
Creating a candle: where to start
Making your own candles is much easier than you might think. And the main advantage of such an activity is that the necessary materials are easily accessible. If you look hard enough, you can even find them in your home.
Materials for a homemade candle
Wax, stearin or paraffin are best suited for the job. Moreover, it is better for beginners to start getting acquainted with the latter; it is the least demanding to use. You can buy paraffin at the store or use leftover old white candles.
Wick
It is best to use natural threads as a wick, ideally thick cotton ones. Do not try to use synthetic wicks: such wicks will burn quickly and leave behind an unpleasant odor. To check if the thread is natural, simply set fire to its tip. If it melts, forming a hard ball at the end, you have synthetics.
If you have an unusual candle in mind and are thinking about how to make an original wick for it, then use colored floss threads.
This is an excellent and natural material.
Remember an important rule: the thicker the candle, the thicker the wick should be. If you find this process tedious, carefully remove the wick from the finished household candle and use it
If this process seems tedious to you, carefully remove the wick from the finished household candle
and use it.
Candle mold
First of all, decide on the configuration of the desired candle, and then try to find a hollow object of the same shape. You may find it useful:
- cardboard bags for milk and juices;
- plastic cups for yoghurts and desserts;
- egg shells;
- silicone baking molds;
- glass goblets, wine glasses, glasses and glasses;
- baby beads;
- shaped ice cream molds;
- tin and glass coffee jars;
- empty tin cans.
The only requirement is that the mold material must withstand heating up to 100°C.
Another interesting option is to pour candles into beautiful transparent glasses. You won’t be able to get them, but they will look very stylish and unusual.
Dyes
A white candle is elegant but boring. Naturally, the question arises of how to color paraffin in order to obtain bright interior decorations.
For lovers of candle making, the best and cheapest option is to take wax crayons for children's creativity. Want to get a special candle? Look for pearlescent crayons - your creation will be unique.
Do not try to use water-soluble gouache or watercolor - you will fail. The dye will inevitably settle to the bottom or fall out in flakes. The finished product will look very unpresentable.
Paraffin melting utensils
In order to melt the paraffin, you will need a small saucepan for a steam bath and an iron bowl. Experienced craftsmen recommend heating paraffin in a steam bath, considering other methods, including the microwave, to be fire hazardous.
To begin with, we recommend that you also use this method, proven over the years: place a bowl of paraffin in a container of boiling water. If you plan to have a colored candle, add the chalk immediately and stir the melted mass several times to obtain a uniform color.
Flavors and decor
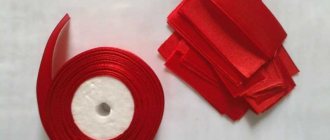
Any available materials are suitable for decorating candles. First, decide on the topic of your work. Pebbles and shells will effectively complement marine-style candles. For a New Year's theme, use beads, small cones, small decorative balls, ribbons and bows. Decorate Valentine's Day candles with hearts, sparkles, bows, dried flowers, coffee beans, etc.
Preparatory work
First you need to delaminate the napkin. We will only use the top layer - the one that contains the drawing. We will not need the remaining parts in our work.
Next, you need to attach a napkin to the candle and decide on the size of the design that will be transferred to the product.
Then carefully cut it out with small scissors. Having made all the necessary preparations, we will decoupage the candle. For beginners, this technique may not seem entirely clear at first glance, but there is nothing complicated about it. All you need is patience, perseverance and a great desire to create an exclusive item for yourself or a unique gift for friends and family.
Hairdryer
Candle decoupage can also be done using a hair dryer.
- You also need a candle.
- You will need a napkin.
- You will need parchment paper and a hair dryer.
Just as in the first case, the layers of the napkin need to be separated. Plug in the hairdryer, and place the picture on the candle, smoothing it out very well. Parchment paper is placed over the design, wrapping the candle, but you need to look carefully, creases are unacceptable. Now you need to turn on the hairdryer and point it exactly at the picture.
The candle will slowly begin to melt, and you need to turn it so that it warms up evenly. Then leave it for a while to cool down.
This candle decoupage is simple and quick to do, especially if you practice. Take a cloth and wipe the candle to remove excess wax or paraffin. The candle will level out a little. Next, take wax markers, stained glass paints, acrylic paints, glitter, and so on.
Additional decoration
If you are satisfied with the result of the work you have done, you can leave everything as is and put your creation in a place of honor, or go to your friends and present it as a gift. But this is not the end of the candle decoupage. The master class you are studying will introduce you to other ways to decorate your work.
For example, you can paint a candle the color you like best, or the color that best matches the design. You can also use stencils to apply ornaments or use your artistic skills. It is best to use acrylic paint. It is the least toxic and does not dissolve in water after drying.
You can also use other materials for decoration: ribbons, rhinestones, dry leaves, flowers, lace, spices, beads, fabrics, and indeed anything that your imagination suggests. Such decorations will make your creation even more unique and inimitable.
In order to consolidate the result, you can coat the candle with a special varnish. But check with the seller and make sure that this varnish does not release toxic substances during combustion.
That's it, you have made a decoupage candle. We hope that the MK you just got acquainted with helped you simplify this process and make it as enjoyable as possible. In conclusion, I would just like to add that although using this master class it is not at all difficult to make works of art, it would be a good idea to practice on a smaller candle, grasp all the subtleties of the process, and then start creating a masterpiece.
Required Items
- We will need the candle itself. Now there are a lot of different ones on sale, there are round and square, triangular and so on. Therefore, you can choose any one.
- Next you will need a napkin.
- You need some kind of rag, preferably a waffle towel.
- You also need contour and glitter.
- If you want three-dimensional details, you will also need a 3D gel.
- In addition, you will need acrylic varnish to glue the glitter.
Master class 1. Quick and easy
In order to make a classic version of homemade candles, you will need the following:
- Molds. They must be made of a material that does not absorb wax/paraffin. Rubber, metal, plastic or glass containers are ideal for this. You can use iron boxes (such as tin candy boxes) or thick plastic cups. Also keep in mind that if you still can’t get the candle out of the mold, you will have to break it or cut it.
- Material. Candles can be made from paraffin, wax or stearin.
- Wick. You can get it from factory candles melted in a steam bath or weave it yourself from any cotton threads.
- Small metal container. This will be needed to melt the wax.
- Tools. You will need pliers (or something similar to them in order to reach the hot container), tweezers and a thin wooden stick.
- Foil. We will cover the table with it to protect it from fire or grease stains appearing on the surface.
- Wooden stick. With its help we will mix the wax.
- Pigments. They can be very different: wax-based crayons, leftover colored candles, decorative cosmetics, acrylic or gouache paints. You can buy colored pigments in specialized stores.
- Baking soda. It is usually used to extinguish paraffin if it catches fire. So, we hope you won’t need it, but you still need to have it just in case.
- Pot.
Have you collected everything you need? Then let's get started.
- Paraffin candles need to be broken into pieces and the wicks removed from them.
- Then the paraffin must be placed in a container for melting (a little of this material must be left).
- The jar in which you will melt it (for example, a coffee tin) needs to be slightly flattened on top so that you get a “spout” for pouring out the melted paraffin.
- We make a hole in the middle of the bottom of the mold for the wick, and grease the inside surface with vegetable oil.
- When choosing a wick, you need to take into account the size of the candle: the thicker it is, the wider the wick should be. A thick thread is suitable for wax, but for paraffin or stearin it is better to use a thinner wick. It should be slightly longer than the finished product.
- Now you can start preparing the dyes. If you bought wax crayons, rub them on a grater.
- Then you can do the water bath. It is prepared as follows: put the jar in which we melted the paraffin in a pan of water and heat it over low heat. The contents of the jar must be stirred during the process.
Popular articles Wedding envelope
After this, you need to soak the wick with melted paraffin, holding it with tweezers. Next, you can add paraffin and dye. When mixing these ingredients in a jar, you need to make sure that they do not boil. Let's start installing the wick. We thread it through the hole in the bottom of the mold, pull it tight and secure its upper part to the stick. How evenly you position the thread will determine how long the candle burns. When the paraffin has cooled a little, it can be poured into the mold. In this case, you fill the mold in parts, each time adding paraffin of a different color into it. This way you can make a colored multi-layer candle.
After your product has cooled, you can remove it from the container. To do this, the bottom end of the wick needs to be cut off. Do not pull the thread itself, because the central part of the candle freezes last, and you can damage it.
You can see a similar method in the video of making a multilayer candle with vertical colored layers.
In this case, a cardboard form is used. The good thing about this method is that it’s easy to find suitable milk or juice boxes for candles of different sizes.
If you made a single-color candle, then you can choose a different decor option. You can apply a layer of uncolored wax to the candle and attach glitter, beads, grains and other decorative elements to it.
More details about decor ideas are written at the end of this material.
First things first
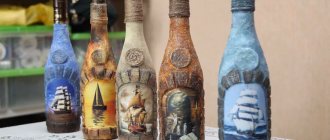
In general, the first thing to do is to figure out in which direction the drawing of your candle will be. Let’s say it’s something nautical, which means you’ll need a white or blue candle, napkins with anchors, ships, and so on. Or, for example, something floral - a green candle with sunflowers. And so on.
That is, you need to think in advance what color the candle itself is needed, what pattern to choose. Well, then you can decoupage the candle. You need to try the napkin on the candle, maybe there is something extra, if you find it, you need to cut it off or tear it off.