Knitting is an interesting hobby, but it is also an additional opportunity to get a unique item in your wardrobe that cannot be found in anyone else.
Before you start making any model, you should not only acquire a suitable pattern and yarn, but also learn the intricacies of the technology.
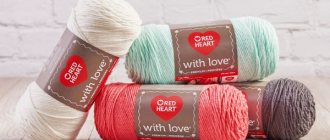
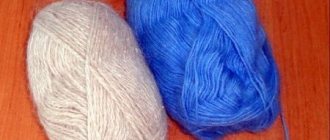
Yarn for knitting a sweater
To knit a children's, women's or men's sweater, you need to choose and buy yarn first. Completely different types of thread are suitable for different models and for different age groups:
- For winter men's models, use pure wool or wool mixture. The latter option is more profitable; products are subject to less change in size and shape.
- For women's sweaters, there are practically no restrictions in terms of yarn use. For classic sweaters, you can use wool; for original models, angora or alpaca are suitable; mohair will allow you to create fluffy products.
- For summer and demi-season sweaters, linen, cotton, bamboo and other natural or synthetic fibers are used.
- When you need to crochet or knit a sweater for a child, especially a small one, you should still prefer types of yarn that are hypoallergenic and will not irritate the skin. They have special markings on the label, so it will be easy to navigate. The only subtle point that is important to consider is to choose yarn from trusted manufacturers so that it does not dye and retains its shape during wear.
Selecting knitting needles
To choose the right knitting needles or hook for making a product, you need to pay attention to the skein label. Here is the number of hook or knitting needles recommended for knitting.
A subtle point that not everyone takes into account is the individual knitting density. If the knitter places the stitches close enough to each other, it is worth taking a hook or knitting needles 1 or 1.5 sizes thicker than indicated on the thread label.
Also, it is worth taking into account that wool, alpaca, and natural mohair tend to mat, so it is better to take knitting needles or a hook 0.5 sizes thicker than for cotton threads.
Calculating the size of the future sweater
Before you start knitting, you need to accurately measure your own size or take it from the person for whom the product is intended.
To do this you need to remove:
- Chest circumference.
- Waist circumference.
- Arm circumference at the shoulder.
- Sleeve length - measured from the shoulder joint to the wrist bone.
- The length of the shelf is from the midline of the shoulder to the desired bottom of the product.
Taking into account the obtained parameters, determine your own size from the table. Such a table can be found in any knitting magazine.
Using ready-made models in which the thickness and number of threads for each size is calculated is an ideal option for beginners. In this case, there is practically no chance that there will not be enough threads or the knitted product will be small or large.
Working with the sole
Before sewing slippers from old sheepskin coats, you need to take into account that the comfort and ease of use of indoor shoes largely depend on the functionality of the sole. This part of the slippers should be non-slip, warm and moderately hard. Of course, you can make it only from natural fur, but to create an additional thermal insulation layer it is best to use felt. The tops from old felt boots work well . If you don’t have them at home, you can buy thick shoe insoles at the market. Their size is adjusted to the sole, from which the excess allowance will be cut off.
The part must be attached to the workpiece before sewing the slippers; to do this, both elements should be glued together with waterproof glue. The composition should be applied along the edges and in stripes in the middle to leave space for ventilation.
It is recommended to take into account the property of felt to release small fragments of wool. To prevent home-made fur slippers from leaving debris on the floors, the insole should be covered with dark-colored cotton fabric.
Sole made from felt boots
Sweater knitting patterns
When it is difficult to decide which model you want to knit, you should pay attention to the following patterns:
- Braids can be complex or simple. They are performed on the front or back surface or combined with openwork.
- Various openwork patterns consisting of a combination of holes.
- Multicolor patterns. They can be different - geometric, plant, animalistic. Scandinavian patterns are especially popular on both women's and men's sweaters. most often they are performed in a bicolor solution - that is, they combine 2 colors.
- When fluffy threads are used, it is worth taking into account that it is better to use a minimum of patterns, both in the knitted pattern and in the openwork. This must be taken into account, since knitting an attractive mohair sweater is quite simple. You can use regular satin stitch - the beauty of such a product will be that it is fluffy.
New life for old things: 10 warm and cozy things from an old sweater - 2
A familiar situation - the closet is packed to capacity, there’s nowhere to even stuff socks, but all you can wear out of it is a pair of jeans, an oversized cozy sweatshirt, two simple sweaters and a T-shirt bought a hundred years ago? Because, no matter how beautiful and elegant a thing is, we will always be drawn to coziness and comfort.
And that is why some new clothes, after their only release, lie untouched for years, and some are worn out to holes. Then they become “household”, patched, trimmed and worn a little more... And then more or less “living” flaps are cut out of them and used as potholders, kitchen towels, etc.... Conclusion - with your favorite thing as with It is very, very difficult to separate from a loved one! So I suggest reviewing your wardrobe for “no five-minute throwaway items” and giving them a second chance! After all, how many useful, beautiful and original things can be made from the same sweater!
Bag
Unusual knitted bags can be easily made, even if you don't like to knit! You can use a ready-made knit of an unnecessary sweater - just cut out two pieces of the desired size and shape, sew them together, attach the handles, make an inner cover with pockets for your favorite little things, and the new thing is ready!
A soft and cozy winter bag is very easy to make.
We cut out the sleeves slightly larger than the armhole and the neckline - as shown in the picture
Place the material so that the side seams of the sweater meet at the front. Pin the bottoms of the sweater together and sew in a straight line to join the two sides. We make a hem along the top and on the handles. Turn the bag inside out. Ready!
Unusual knitted bags can be easily made, even if you don't like to knit! You can use a ready-made knit of an unnecessary sweater - just cut out two pieces of the desired size and shape, sew them together, attach the handles, make an inner cover with pockets for your favorite little things, insert a zipper or button if necessary, and the new thing is ready!
To prevent the bag from looking like a shopping bag, decorate the bag.
Warm leggings
These bright and warm socks are sewn in one sitting from the sleeves of an old sweater. You just need to cut a piece of the sleeve to the desired length and carefully hem it at the cut site so that the edge does not fray.
The most affordable way to use an old sweater. Cut off the sleeves and you're done. Can be worn under or over clothes and shoes.
These socks look very stylish under high boots or on top of ankle boots.
Warm socks
As you already understand, you don’t have to know how to knit to have warm wool socks at home. You can, of course, buy them.. But a real needlewoman is used to correcting the imperfections of life on her own, using improvised means. Warm socks can be easily made from the sleeves of an old sweater.
And an old sweater that no one wears anymore, as a rule, is in every home.
Let's add scissors, safety pins, yarn and a large needle - a “gypsy needle”.
Take your measurements.
Resolutely, without sparing the sweater, we cut out the insoles of future slippers according to the template. The main thing is not to touch the sleeves yet. Because we will need them for the upper part of the slippers.
Cut to the required length. Now we fasten the sole and the “boot” with safety pins so that our parts do not move when sewing.
Now we need a large needle. Using it, we sew the “sole” to the upper part using an overcast stitch. For beauty, we add a similar seam along the upper edge of the slippers.
Ugg slippers:
Using the patterned sleeves of an old sweater will help you make another cute winter socks for cold days.
How to make socks from an old sweater
4. Snood scarf You can easily and quickly sew a snood with your own hands from an old sweater. For this we need:
- 2 unnecessary sweaters (you can take scarves)
- scissors
- sewing machine
Everything is done extremely simply:
- Cut off the bottom of each sweater. Choose the width you want to get the snood.
- Cut one side of each piece to create long strips.
- Now sew all the sides together, leaving a small opening.
- Turn the snood out through the remaining gap and sew it to the end.
Another option on how to make an original designer scarf with your own hands.
You will need:
- An old sweater made from acrylic yarn (try to avoid 100% cotton materials, because they are poorly suited for these purposes due to their properties)
- Scissors
- Sewing machine or thread with a simple sewing needle
- Measuring tape
Step 1: Start by cutting the sweater just below the sleeve line on all sides. Tip: The original size of the sweater will determine the size of the finished scarf. The larger the sweater, the larger the scarf you can make.
Step 2. Decorative finishing of edges Use a sewing machine or hand-hemm the edges of the product with beautiful decorative stitches.
Step 3. Cut out pieces from the sweater and form blanks for the future scarf
Step 4. Finish altering the clothes with your own hands. The scarf is almost ready. Now sew all the sweater pieces together. You can leave small shreds at the ends by cutting the edges into strips with scissors. This way you can create the effect of a real scarf.
Dickey
The obvious thing that can be made from a sweater is a bib by simply cutting off the neckline. If you know how to knit, you can tie the shirtfront around the edge. By making a hat from the same sweater and decorating it with beads, you will get a stylish set.
Socks-slippers
If you washed a sweater and it came down to child size, then don’t be upset. Armed with scissors and a needle, you can make beautiful new slippers that will keep you warm in winter.
As popular wisdom says: your feet need to be kept warm. These stylish slippers are the perfect solution for those who hate cold floors.
What we need:
- sweater
- pattern paper
- scissors
- sewing threads
- needle
- hook
- Knitting thread
Make patterns for the leg. Patterns should consist of 2 parts for each leg - one solid, the second with a hole in the middle.
Cut taking into account the seams. Sew together, turn inside out and crochet the edge.
Soft slippers
Excellent warm soft slippers made from an old sweater will warm your feet
You will need
- unnecessary sweater
- felt (20 cm x 30 cm) or ready-made insoles
- A4 cardboard sheet
- pencil
- scissors
- double sided adhesive tape
- needles and threads
- tailor's chalk
- sewing machine
Progress:
It is cheaper and easier to buy ready-made insoles. But, if anything, they can easily be made from felt. To begin, trace the contours of your leg on cardboard. Then cut out a template from cardboard.
Lay out the template on felt or other dense material (leather, thick batting, etc.), trace and cut out. You will need 4 identical insoles. Next comes the sweater! Transfer the patterns to the knitted fabric, but do not forget to make an indent of approximately 3 cm. Trace 2 identical contours, then cut out along the lines. Apply double-sided tape to the first insole and apply it to the right side of the fabric. Do the same with the other insole and apply it to the wrong side of the fabric. It is necessary that the edges of the felt insoles match as much as possible. Now you need to sew the insoles and fabric. You can do this manually, although a sewing machine will still save your nerves and time! Let's work on the upper part of the slippers! Measure approximately 13 cm, starting from the sleeve cuff, and cut. Sew up the cuffs and round the opposite side of the piece as shown in the picture.
Now you have a piece of knitted fabric with insoles sewn on both sides and a cap. And there should be two such blanks! So finish it and get to the fun part - stitching the fragments together!
Place the cap, which is also the future top of the slipper, on the front side over the sewn insole. Its top should coincide with the center of the rounded side. Sew the pieces at this point.
Next, you need to move the top of the slipper down 3 cm and sew the corners of the part in the cuff area and the sides of the knitted fabric with insoles to each other. Make a few stitches as shown in the photo.
Sew both pieces in the round, moving from left to right and evenly taking excess fabric around the insoles into the stitch. Thanks to the stitches already made, this will be easy to do.
Turn the resulting structure inside out so that all the seams remain inside the sneaker, and make two cuts on both sides of the heel. It is necessary that the cuts end a few millimeters from the insole.
To make the heels of the slippers, you need to form them from these three pieces of fabric. Then sew the part - you should get two vertical seams. Then sew the part - you should get two vertical seams.
Finally, the slipper cuffs! Trim the bottom edge of the sweater. Fold the raw edge so that the width of the strip is approximately 5 cm. Cut it into 2 parts. Attach the tape as shown in the photo.
Wrap the resulting knitted ribbon around the slipper, glue and secure with stitches. Do the same with the second tape. Made!
These are such cute house slippers!
Three new things from one old sweater
If you have an old sweater lying around in your closet that has long gone out of fashion or is simply boring to you, then do not rush to throw it away. Resourceful craftswoman Olga Volkova claims that you can make three stylish new things from one old sweater.
Firstly, you can make an original and stylish knitted bag. Such unusual bags have become very fashionable this season.
Secondly, from the neck of a sweater you can make a very fashionable and original decor for a cup, which will give the interior more coziness, warmth and comfort. Moreover, in this case it is better to use a sweater with an ornament. If the sweater is plain, then you can decorate the cup with embroidery, beads, buttons, and bows - whatever your imagination inspires. When you make this decoration, do not forget to step back about 1.5 cm from the edge of the cup to make it comfortable to drink.
Thirdly, you can use the sleeves of an old sweater to make stylish, but fun and warm knitted home boots. In this case, the sleeve cuffs will be at the top, and where the sleeve was sewn to the base of the sweater, there will be a sole. You can use ready-made insoles as soles or cut them from felt and felt. Don't look at the fact that your favorite sweater is already old. He's still wow! The opportunity to give it a second life is in your hands. I really hope that at least one thing from this top was useful to you!
Based on materials from treasurebox.ru, lady-antikrizis.ru, www.liveinternet.ru, koketkat.com
https://www.liveinternet.ru/users/elenaslava/post378402373/
https://marrietta.ru/post194610562/?upd
For needlewomen:
10 warm and cozy things from an old sweater - 1
Making a fashionable vest out of old jeans
DIY fur mittens
Original post and comments on LiveInternet.ru
zirina479.livejournal.com
Calculation of the number of loops
To calculate the correct number of loops, you need to knit a sample on the selected knitting needles or hook. It is made at the rate of 1 report for the pattern or is made in size 20 by 20 rows.
The loops are closed, the sample is washed, dried in a straightened form, and only after that its size is measured.
Based on the resulting size, you can accurately calculate the number of loops that need to be cast on the front or back of the product. This way the future sweater will correspond to the size range.
Woman pullover
To make a female model, you must adhere to the following steps:
- Cast on the required number of loops to make the back.
- Tie with an elastic band, if provided by the model, to the desired height.
- Next knit the fabric in accordance with the pattern of the model. If necessary, loops are added as indicated in the sample.
- Knitted to the armhole. Start decreasing the loops for the sleeve part. Please note that in the first row 3 to 4 loops are closed, then in each subsequent row the number of closed loops decreases until a rounded armhole is formed.
- The upper part of the product is knitted, taking into account the depth of the neckline and shoulder bevels.
- The back is knitted in the same way. Sometimes more loops are cast on it.
- Start knitting the sleeves. Here it is important to take into account the number of loops we add and distribute them symmetrically on both sides.
- The increase is carried out to the end of the sleeve. Then you need to implement decreases so that the “head” of this part of the product is knitted.
Method 2
To make socks from a sweater with your own hands in another way, you must follow the following algorithm:
- First you need to test the sleeves of a woolen jacket for suitability for further work. For this purpose, you need to pull the sleeves over your legs - the elastic should not pull.
- Cut off the sleeves completely, then cut them obliquely so that an accordion does not form on the heel when you pull the future sock onto your foot. The heel should be located on the side where the seam is located.
- Cut out the sole. This is very easy to do if you have some kind of insole.
- Cut the sole from some part of the jacket.
- Turn the sock and sole inside out. Sew a stocking with the bottom of a sock.
Important! It is recommended to start stitching from the heel.
- Turn the resulting sock onto your face, then put it on and see where you need to collect the excess fabric at the front. Make a fold of fabric there and sew with thick thread.
- Sew a decorative button of the required size to the ends of this seam.
The product is ready!
Men's sweater
A men's sweater is made similarly to a women's sweater. But, you should take into account the large volume. For the first time, it is better to knit an oversized sweater for a man, as it will be easier to navigate the principle of decreasing and adding stitches.
In men's garments, it is better to add additional loops for a loose fit or not to knit too tightly.
When making women's or men's sweaters, the difference in technique can only lie in the following steps:
- Standard products with sewn-in sleeves are made in the bottom-up direction. Each element is made separately and then sewn in using a needle and the same thread that is used to make the sweater.
- When it is necessary to knit a sweater with a raglan top, it is recommended for beginners to carefully calculate the number of loops. Choose high-quality knitting needles that will allow you to distribute all the stitches without crowding.
- In this case, the sleeves, back and front front panels are knitted immediately. Then only the side seams of the product and the bottom seam of the sleeve are performed.
When making men's sweaters, you can make a rounded or triangular neckline. Reducing the loops in this case is performed differently.
It is important to correctly calculate the depth of the cutout. It should be a little larger than needed. This is done because later the neckline is tied off with an elastic band, which will reduce not only the height of the neckline, but also its volume.
How to sew fleece socks? Pattern
Don't be upset if you don't know how to knit, but you really want warm socks. You can sew such a product yourself, spending only 15 minutes of your free time. We offer you a simple version of the pattern that even the most inexperienced seamstress can make. For work, we used fleece fabric, which has a small pile on one side and just a soft surface on the other.
The sock pattern consists of the following elements:
- The upper part is 1 piece.
- Heel – 1 piece.
- Outsole – 1 piece
- Cuff – 1 piece of fabric.
Important! On the pattern, be sure to take into account seam allowances (5-6 cm).
Sewing technique:
- We need to sew two parts: the sole and the heel. To do this, you can use both a sewing and overlock machine, or simply make a continuous seam with your own hands.
- Now we can connect the finished sole with the upper part of our future sock.
- We begin to sew the cuff parts. To do this, we pick up a previously cut rectangle, where the length is your leg circumference, and the width is at your discretion. Fold it in half along the fold line and connect it to the top of the sock.
- We thread all the protruding threads and turn the product inside out.
- We do the same actions with the second sock.
That's all the manipulation! Our new socks are ready to use!
Important! When cutting, it is very important to follow the thread. Before sewing, we recommend pinning, basting and trying on the sock, so that if the size is unsuitable, you can still correct the situation.
Children's sweater
When making a children's sweater, it is better to sew the sleeve in a straight line. A child, especially a small one, does not need an armhole, as it reduces mobility in the shoulder joint.
Therefore, it is best to knit a straight back and front, and increase the sleeve to give it width. And after reaching the desired length, all loops are closed in one step.
It’s easy to sew it in – just:
- Measure the middle of the sleeve.
- Sew shoulder seams.
- Sew the middle part of the sleeve to this seam.
- Separately sew the left and right halves of the sleeve to the front and back.
- Afterwards, sew the seam of the body part and on the sleeve.
This assembly technology is suitable for all types of sweaters, with the exception of raglan. In this case, there is no need to sew in individual parts, but only make the central seams.
Oversized jacket for girls
Sweaters, blouses, oversized jackets are always fashionable and practical. Such sweaters can be combined with any clothing. Jacket sizes: a) 2 years, b) 4 years, c) 6 years, d) 8 l., e) 10 l. The simplest knitting is stocking (knit rows). Pattern: 22 r./11 p. in stocking stitch equal to 10/10 cm.
To work you will need:
- Yarn Rapido. (25% wool, 75% acrylic), 50 g./40 m. – 6,7,9,10,12 skeins.
- Knitting needles 7 mm thick.
- 3 large buttons diam. 22 mm.
Back
Cast on 36-39-42-45-47 sts and knit in stocking (garter) stitch. We knit: 19.21.23.25.28 cm and begin to make sleeves, increases on both sides:
- Once 10 p.
- Once 13 p.
- Once 16 p.
- Once for 18 sts.
- Once for 20 p.
We will get: 56-65-74-81-87. Then we continue working directly. At a distance of cm: 30-34-38-41-45 from the initial knitting, make a neckline, close off 4-5-6-7-7 stitches for this, then knit each of the halves separately, closing in every second row: 1 time for 2 p. and 1 r. 1 p. each
At a distance of cm from the beginning of knitting: 32-36-40-43-47 it is necessary to close the rest of the loops: 23,27,31,34,37 sts. Close the other side in the same way.
Right shelf
We cast on the knitting needles 21-22—24-25-26 sts and knit in stockinette stitch (knit). When we reach the height: 19-21-23-25-28 cm, we begin to make a sleeve, followed by an increase on the left:
- Once 10 p.
- One r. 13 p. each
- One r. 16 p. each
- 1 rub. 18 p. each
- 1 rub. 20 p. each
As a result, we got: 31-35-40-43-46 sts. Next, knit straight.
We reach the height: 28-32-35-38-42 cm, make a neck, closing each one. second row:
- Once for 4 p., once for 2 p., twice for 1 p.
- Once for 4 p., once for 2 p., twice for 1 p.
- Once 5 p., one r. 2 p., two r. 1 p. each
- Once 5 p., one r. 2 p., two r. 1 p. each
- One r. 5 p., one r. 2 p., two r. 1 p. each
Knit to height: 32-36-40-43-47cm. and bind off the remaining 23-27-31-34-37 sts. Knit the left front in a mirror image.
Assembly
Sew the shoulders, side seams and bottom of each sleeve. We make three loops, moving the p. Sew buttons at the same distance.
conclusions
Knitting a sweater for summer, winter and demi-season is easy if you follow the instructions. They use different types of yarn and knit elegant or playful products that will be great for relaxing in nature.
If you have pets, you can knit a sweater for your dog. This element of a pet’s wardrobe will be relevant in cold weather, when the animal must stay warm even in bad weather.
Some breeds, such as the Sphynx, will need a cat sweater. The fabric should be soft and hypoallergenic; yarn is suitable for small children.