A cluttered closet negatively affects everyone. Necessary things get lost, searching for them takes time and makes you nervous. It’s impossible to find the right item, your mood deteriorates, and this affects your work and relationships with people. In such a situation, an organizer will help. For storing any small items, an organizer is the best solution.
Previously, women's underwear was of a respectable size, it was easy to store it in the closet and it was difficult not to notice it there. Now the underwear is miniature, in the chest of drawers, no matter how you fold it, it gets mixed up, hooks cling to each other, the straps intertwine. That's why we came up with laundry organizers. Don't buy them from the store; they are expensive and may not be the right size for your cabinets. your own underwear organizer .
DIY drawer partitions
Good day.
I will make partitions for drawers, be it a chest of drawers or a closet for underwear.
A very convenient and irreplaceable item in your wardrobe.
It’s very convenient when you open the drawer and it’s in order)), especially for girls. The panties are in their place, the socks are in their place.
So don’t hesitate to call, we’ll make it and ship it. All you need is exact dimensions.
If you want to purchase in Yekaterinburg, there is an installation option.
For those who are not interested in ordering, but are interested in the manufacturing process, read below.
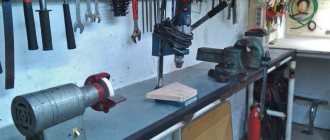
In principle, there is nothing complicated here, knowing the dimensions of our niche, in this case it is a linen box 480 mm by 370 mm and the height of the walls is 80 mm.
We buy 4 mm plywood, choose one that is more or less even and of high quality.
We draw a sketch of the proposed cells on a piece of paper. Divide the length and width by whatever your imagination allows. There is something for everyone here according to their needs.
After you have drawn your rectangles and squares on a piece of paper, we mark the connections. In our case, the thickness of the joints, since the plywood is 4 mm, we make 4 mm.
And immediately we begin cutting the plywood.
One, two, three and you're done. We are trying to connect, if there is a mismatch somewhere, straighten it out.
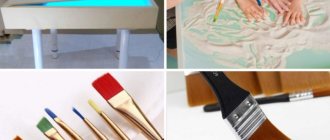
The next stage was sanding, you don’t want your girlfriend or you yourself to find a thorn in your panties))). So, treat the edge and surface.
Then we coat it with colorless acrylic varnish, in one or two layers. If small burrs appear, after drying, use fine sandpaper. And the surface of the plywood will become smooth again. And it will be possible to cover it a second time.
I use clear acrylic sauna varnish. It dries quickly, and in general everything is great.
I go to the customer and install partitions for the boxes. Everything fit as well as it could.
That's basically all the work. It took me 4 hours to do this. Everything can be done faster and easier.
What can it be made from?
Dividers can be bought at the store, but, unfortunately, they do not always have suitable sizes. So the easiest way is to make them yourself according to the parameters of the desired box. So, you can make separators from:
- cardboard;
- plastic;
- metal;
- tree.
Do-it-yourself drawer dividers
In addition, materials such as fabric, paint, oilcloth, paper, etc. can be used. They are necessary to decorate the surface of the dividers if necessary.
The easiest way is to make cardboard dividers, but they cannot be used in the kitchen. But in the room they will fit just right. For the kitchen, you will have to make these storage systems from wood, and even cover it with a protective varnish. You can also try making them out of plastic.
Wooden cutlery organizer
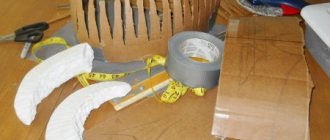
As auxiliary tools you may need:
- scissors;
- scotch;
- glue;
- wood hacksaw;
- brushes;
- Ruler and pencil.
Let's look at a couple of examples of creating dividers with your own hands. We will use wood and cardboard.
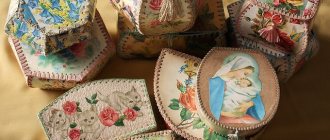
Master class on making a box with dividers for small items
Master class on making a box with dividers (for small items).
- 5 cardboard boxes for medicines 7*7 (you can take milk, kefir, cosmetics, etc., just so that they are the same);
- the fabric is dense (I chose upholstery fabric, it doesn’t wrinkle, it’s easy to glue);
- glue (I use “moment gel”, it is suitable for textiles);
- scissors;
- strong threads, needle, thimble;
- lace - for decoration.
So here's how I made the box with dividers.
We’ve been on sick leave for a month now, there’s a lot to do and we can’t get around to our hobbies. But I still snatched an hour for myself.
At least I took a little break from household chores.