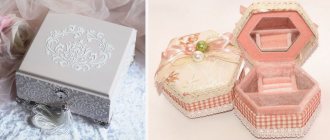
Our grandmothers and mothers found the pleasure of home creativity in making boxes from scrap materials. Moreover, the materials for such crafts are simple, and they are found in every home. And the finished products can be used as a handmade gift or simply to store various necessary little things in them.
Postcards always remind you of the holiday and the people who presented them.
Therefore, they can be made not only for a special occasion, but also as an interior detail, choosing materials and decor accordingly. How to make boxes from postcards with your own hands with step-by-step instructions will be of interest to many.
If you have a lot of postcards accumulated in your house, don’t rush to get rid of them, but rather give them a second life.
How to make boxes from postcards with your own hands
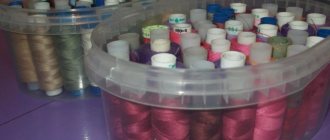
Open your closet and you're sure to find materials for a card box. These beautiful, bright, multi-colored cardboard masterpieces of printing that accumulate around the household are no longer needed, but you can’t just throw them away.
In this article we will look at how to make a box from postcards with your own hands.
With a reasonable approach, they can still serve. And they will become the basis for boxes of postcards made by yourself. Lovers of home crafts will especially appreciate this opportunity for home creativity. Using ready-made patterns, needlewomen can make exquisite boxes or beautiful gift boxes.
It will give a special flavor to the entire room where it will be located.
You can choose cards that match the style so that the box fits harmoniously and becomes an integral part of the interior.
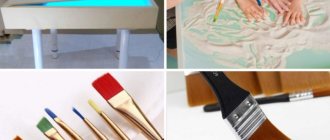
Postcards should be selected approximately the same size and the themes of their images should be similar to each other. You will need scissors, regular sewing needles and different types of thread depending on the options for the future product.
These cute little things bring comfort and joy to your home.
Many families have accumulated whole mountains of postcards.
Crafts from postcards
To make a box, it is not necessary to look for signed or collected postcards left over from the times of the Soviet Union. You can buy them at your nearest store if the price doesn’t bother you.
For simple needlework you will definitely need scissors, a ruler, multi-colored threads and needles. When creating a more complex and beautiful product, an awl, PVA glue, transparent film, and glitter with sparkles can be useful. Beginning craftswomen, before sewing a box from postcards that is different from an elegant box, use diagrams. Experienced needlewomen make simple calculations on paper and immediately cut out the parts.
Crafts from postcards created using mixed techniques look very beautiful. The boxes are decorated with lace, sequins, beads, and additional designs. Instead of threads, twisted cords or ribbons, sometimes even metal chains, are used. You can attach buttons to the boxes, hang all kinds of keychains or locks.
Children love to make crafts from postcards. They rejoice at a colorful container for their treasures or the chance to please loved ones with a handmade gift. Parents see this as an additional opportunity to develop their child’s creative abilities, perseverance and fine motor skills.
A simple do-it-yourself box
The eye of the selected needle should be wide. Choose the motives of the drawings at your discretion. We choose threads to match the patterns on the postcards, or vice versa in contrasting colors.
You can make a beautiful box from postcards with your own hands.
Note! Instead of regular threads, use cotton floss yarn, which is made by hand or machine specifically for needlework.
By following the instructions step by step, the craft can be made by those who have not yet had time to get involved in needlework.
Let's proceed step by step.
- First, let's decide on the sizes.
- Making a box with your own hands will require a diagram. It will allow you to clearly see the order in which the work is performed. All panels, the bottom, side inserts in the form of diamonds, the upper component of the lid with side segments are schematically reflected.
- After cutting out the two bottoms, they should be aligned with their back sides.
- Lines are drawn along the perimeter of the postcard inside the box, retreating from the edges by a centimeter. Using these actions we designate a line.
- Using decorative stitches, we sew the resulting two-layer part along the edges. For this we use floss threads folded several times. To avoid knots sticking out from the outside, we begin the stitching process from the side that will be inside the finished product.
- We use the same technique to connect the remaining parts with a double layer.
- At the end of the process, we sew the blanks by hand and sew them together.
Make holes on the parts, stepping back half a centimeter from the edge. This process can be done with an awl or a sewing machine without thread.
Carefully sew all the parts together in the following sequence: the bottom and legs, then the slices and all the front parts, the inside of the box.
Here's how to make a box with your own hands quickly and easily.
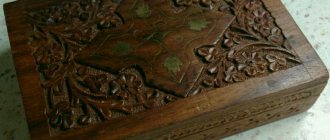
The royal box of postcards is ready!
Methods and their implementation
There are a variety of ways to sew a box from postcards. This master class will demonstrate some of them.
First option
Such a box is feasible even for the smallest creator, and it will take very little time - literally a couple of hours!
Select postcards: old used ones or purchased new ones. It is advisable to stick to one theme or color scheme. Let's say, if you want to give a gift for the New Year, then choose New Year-themed drawings. And if you are decorating a craft using a floral motif, then use no more than three shades.
For this work we will need: 8 postcards, floss threads, a special embroidery needle with a long eye. The color of the floss is selected according to the color of the selected cards. The threads should contrast slightly with the overall palette, but not stand out too much.
Let's prepare the parts that make up our future product. This is done in this way: draw an even oval on the postcard according to the type of drawing, then cut along the contour with scissors. Using this stencil, cut out several more similar ovals. There will be four figures in total: two for the top of the box and two for the bottom.
Related article: DIY winter house crafts: cross stitch with photos
The sides of our box are strips measuring 2-2.5 cm. Measure the length of the oval with a ruler. The total length of the strips should be the same. The best option would be to connect the strips to make one whole piece, or cut them from a large, long postcard.
The foot for the box is 3.5 cm long and 2 cm high. Prepare four similar elements.
Fold the prepared parts in pairs, with the images facing up, then sew them with thread around the perimeter.
The elements are sheathed using a loop seam with frequent stitches. Hide the remaining thread and knots on the back side of the piece.
Cover the legs, leaving the image on the outside. To do this, make three stitches, inserting the needle into one hole.
Sew strips for the sides. And then combine the three elements into one.
The thread should pass through the edge loops of the seams of both parts.
The finished sides are sewn to the bottom part, applying it to it.
The main part of our product is already ready.
It is better to leave the stripes whole, since if you sew them separately, then when they are connected to the lower part, you will get a lot of unevenness, which is not at all appropriate here. And this will make our work much easier!
Next, sew the legs to our box.
Sew the lid, and on one side of the product connect the loops of the side and the lid.
Although our box is made from seemingly ordinary paper postcards, its construction is quite strong and stable!
Second way
The second master class is also very simple, and the box looks very elegant and impressive!
This is not just a box, it's a box with a surprise!
You will need the following materials: colored cardboard (20cm x 9cm in this case, you can choose the size you need), colorless transparent plastic, double-sided tape, scrapbooking paper, paper butterflies (drawn yourself, printed or purchased in a store), materials for decoration of your choice (it can be sparkles, rhinestones, ribbons, flowers (any: ready-made, paper, embroidered, nylon, etc.)
So, how to make a box. First we need to build a box. It all depends on the desired size of the future box. Take a square of cardboard, stepping back from each edge, draw parallel lines. Cut out the corners. Now we are left with the center of the future box in the form of a cross.
Related article: DIY kitchen panels made from salt dough and cereals
Bend the structure so that the bottom is smooth and square, just like the sides. The lid is made in this way: we step back from the edge (about 2 cm in this case) and get the side of our lid.
According to the diagram plan, we cut out small corners.
Now the lid needs to be glued. As a result, the box will look something like this:
We decorate what we got with multi-colored paper, various clippings, images and other things. You can not use paper at all, as shown in the original, but decorate the box with glitter. It will also turn out very unusual, unique and beautiful.
If you choose paper, then cover everything except the middle with it.
Now let's take on the stripes on which the butterflies will be located. Colorless transparent plastic is best. Make sure that the strips bend, fit and open smoothly after opening the lid. In fact, it is not at all necessary to specifically buy materials. As mentioned earlier, everything can be found in old things if you take the proper interest.
Cut out strips (19 cm or other length, according to the size of your box).
Now we attach the butterflies themselves. To do this, make cuts in colored paper, which should then be attached to the bottom, insert plastic there and secure it. Beautiful butterflies sit on the other end of the stripes and are secured with double-sided tape.
We glue everything to the bottom of the box.
This template will tell you how to make butterflies:
You don't have to use butterflies at all. Make any alternative box. Here are some inspiring photos:
How to make an oblong box
In this case, you can decide on the size and theme yourself. We use fairly thick threads. For a box of postcards with our own hands, we develop a diagram with dimensions - 80x165x55 (standard in millimeters).
You will need: postcards, floss threads, a needle with a wide eye, a ruler, a simple pencil.
We cut out three blanks 80x165, two of which are needed for the bottom. We use the rest together with another 165x100 rectangle for the lid. Next, we will prepare 2 parts for the inner box (50x80 and 50x165) and 2 for the outer box (80x70 and 165x70).
Redraw the drawing and make patterns of parts.
We move on to marking with a pencil and ruler and then cut out the parts. Under the base and for the lid we will cut out 8 and 2 side flaps, respectively. All postcard details will be duplicated with cardboard ones to give the future product strength.
Create the bottom of the box in this way: take 2 postcards and connect them together with the sides without a pattern.
Now it's a matter of technique. Using a sewing machine without thread, we go along the edges of all the cut out parts, putting together postcards and cardboard to create holes. Now we sew everything together by hand using a blanket stitch. You can experiment with the shape of the seam.
Make the first puncture from the wrong side so that the knot remains inside between the cards.
We connect the sheathed parts. We use a simple seam for two parts of the bottom. We sew on the short and long sides, bend them into an arch and sew them together, securing them with a flap. We alternately process the straight and semicircular sides.
Place adjacent pieces one on top of the other and pull the needle and thread through the horizontal stitches between the stitches to create a weave.
After the frame has emerged, we sew in the bottom and tighten the corners. The cover is sewn to one of the selected sides. If desired, you can add legs.
The classic box is ready!
Classic box
You will need: postcards, floss threads, a needle with a wide eye, a ruler, a simple pencil.
Master Class
- Redraw the drawing and make patterns of parts.
- Create the bottom of the box in this way: take 2 postcards and connect them together with the sides without a pattern.
- Draw a rectangle, 1 cm from the edge. This should be done on the side of the card that will be inside the box.
- Sew two layers of cards using a looped edge stitch, following the marked lines. In this master class, the floss thread is folded 5 times. Make the first puncture from the wrong side so that the knot remains inside between the cards.
- Sew all the parts of the box in this way.
- Place adjacent pieces one on top of the other and pull the needle and thread through the horizontal stitches between the stitches to create a weave.
- Assemble the entire box in this way.
The classic box is ready!
DIY postcard vase
Making a vase from postcards is very similar to making a box. To make such a craft we will need 14 old postcards, glue, an awl, a crochet hook, iris thread, and glue. First, we cut out the blanks: 6 pairs for the sides and 1 pair for the bottom. Glue all pairs together and let the glue dry. Then, using the same principle as when making a box, we first hole all the parts around the perimeter and then sew them together.
How to make surprise boxes
Despite the simplicity of the manufacturing process, this product will contain cute surprises. We will need sheets of colored cardboard, made ourselves or purchased paper moths. You will need paper for scrapbooking, double-sided tape, and transparent colorless plastic.
Both on a holiday and on a weekday, each of us will be pleasantly surprised by a box with a surprise made of paper.
A surprise box (Magic Box) is a unique gift that is suitable for all holidays.
The pattern is simple. We take a square sheet of cardboard according to the size of the box. Stepping back from each edge, draw parallel lines. We cut out the squares at the corners and get a cross. We bend the structure along the sides of the central square, getting a box. We draw out the lid according to the dimensions of the bottom (plus a few millimeters) adding two centimeters on each side. Fold along the lines and glue.
Making a surprise box with your own hands does not take much time and brings a lot of pleasure.
The outer sides can be decorated with anything you want (drawings, cutouts, glitter, etc.). We attach butterflies to strips of colorless plastic with tape to the ends, and glue the other end to the bottom of the box.
An original postcard-box with a do-it-yourself surprise.
Note! The surprise could be other insects, plants or mythical creatures.
Literally anyone can make gift boxes with their own hands.
When the lid is opened, the box splits into four parts, releasing the creatures hidden inside.
You can make boxes with surprises with your own hands in honor of a romantic holiday.
Original box
You will need: postcards, scissors, thread, needle, pencil, ruler.
Master Class
- Redraw the drawing and make patterns of parts.
- Take 2 postcards (parts) and connect them together with the sides without a pattern.
- Sew all prepared templates with a buttonhole edge stitch, leaving 1 cm from the edge.
- Attach adjacent pieces one to the other and pull a needle and thread through the horizontal stitches between the stitches to create a weave, thus sewing 4 side walls, a bottom and a lid.
- Decorate the box to your taste.
The original box is ready! I recommend watching this video!
I recommend viewing a photo gallery of ideas for creating boxes from postcards with your own hands!
Boxes made from postcards are created using almost the same principle. The basis is the shape of the pattern and dimensions. The type of postcards plays a significant role; they create a special style. A box of postcards will be a wonderful and useful handmade gift. You can store jewelry, candy and other small things in it... Imagine and create your own masterpieces with your own hands!
A box of old postcards. Master Class. | SCRIBBLE
We all have old postcards piling up in our homes over time. These could be greeting cards or views of cities and natural beauties brought from travel.
We suggest making a box for small items from such postcards.
If the postcards from which you make such a box were associated with something dear to you, then it will remind you of these wonderful moments every time you pick up the box.
In our master class we will show you how to make a pattern for a box so as not to throw away the most beautiful parts of your pictures. That is, we will not go from the pattern, but from the picture. And you will learn how to make such a cut yourself.
Making a box of old postcards is quite a complex and painstaking job for children. But a teenage girl of 11-12 years old will be able to master such a craft.
How to make a pattern for a box from old postcards
Look at the available postcards at home and select them in approximately the same color scheme. We decided to make a box with city landscapes.
For inspiration, we took this box of postcards. The shape will be preserved as far as the material allows: slightly puffed sides of the box and a trapezoidal shape of the lid.
Basically, we have postcards measuring 14.7 x 9.7 cm. We will use them to make the inner walls, bottom and lower part of the lid.
For the outer wall of the box, choose postcards of the same width and slightly higher. The greater the difference between the heights of the inner and outer walls, the greater the “bloat” of the box. You need 2 of these postcards, and keep in mind that one of them will be the most spectacular. Our postcards are 10.5 cm high.
Let's take 2 of these postcards and additionally cut out the walls for the outer sides from vertical postcards - they have the width we need 9.7 cm.
We cut out the inside of the chest (take ready-made ones) from standard postcards: bottom and 2 sides 14.7x9.7
We immediately make a template for the corners of the box. Place the tall card on a piece of paper, shrink it to the size of the short card (9.7 cm) and trace the side. The result was a convex line with a length of 10.5 cm and a base of 9.7 cm. It is better to make this tab a little smaller, about 1-3mm
Mirror the convex line symmetrically to the base - you have the corner of the box. We cut out four petals for the corners according to the template.
We make a pattern for the lid for the box from postcards.
The bottom of the cover is equal to our standard postcard. We make the height as desired, even if it’s very sharp. We will make 3cm.
Cut out 2 strips of 3x9.7 cm and 2 strips of 3x14.7 cm from postcards
Use a pencil to draw an arbitrary bevel line. And we cut it - this will be our pattern.
We connect the strip together with the pattern and cut off the corner.
This is how we make trapezoids from all the strips.
We measure the length of the short sides with a ruler and cut out a rectangle from the postcard using these dimensions - this will be the upper side of the box lid. I don’t give my sizes, because yours will turn out different.
There should be 19 parts in total: 6 for the lid, and 13 for the box itself.
We prepare all the parts of the postcard box for assembly
When preparing, you need to sew all the parts of the box with a buttonhole stitch.
At this stage, choose which seam you will work with. We chose the simplest one - the basic buttonhole stitch - it takes the least time.
How to make a loop stitch with a wrap
But you can choose, for example, these. You can find out more about the different types of buttonhole seams in our article: “Buttonhole seam. Options and decorations."
We chose gray iris threads for lining and assembly. You can also sew it with 6-ply floss threads or other thick cotton threads.
Before plating, mark the line where the needle will be inserted on the postcards; to do this, step back 0.5 cm along all edges of the box parts and draw a line with a sharp object - the blunt side of the needle or a non-writing ballpoint pen (this is ideal). We outlined with a sharp pencil, because our cards are glossy and the pencil does not leave marks.
Sidewall inserts with curved edges can be traced along a second similar sidewall, using it as a pattern.
Start stitching the postcard parts from the corner; your first stitch will be at an angle, but that’s okay. We will fix this at the end of covering the part.
Pierce the card from the front to the back, insert the needle into the resulting loop - the stitch is ready. Continue sewing the box piece.
The corners of the parts can be sheathed as follows. The penultimate stitch on the side you insert the needle at the intersection of the drawn lines, the last one - pierce it back from the edge 2-3 mm, as in the photo.
Turn the work 90 degrees and make the first two stitches in the same holes.
Continue sewing the box piece.
If you run out of thread, then insert the needle into the next hole and, without threading the thread through the loop, pull the needle out. Cut a new thread. Tie the ends of both threads on the wrong side with a regular knot. Thread new thread through the needle.
And with a needle and a new thread, finish the previous stitch by threading the thread into the loop.
Having hemmed the piece in a circle, finish the work by hooking the thread onto the first stitch. Without making any more stitches, take the thread to the wrong side and make any knot.
- Here is the finished trimmed piece from the card, front and back.
- We make the corners of the convex parts in the same way as in a regular postcard.
- So sew all the details of the postcard box.
Assembling a box from postcards
We assemble the box using a regular seam over the edge, catching the loops along the edge of each part.
First, we assemble the inside of the box by connecting the inner sides and the bottom of the box. Our front side of the card for the bottom of the box faces the outside. At the end of the work, so that the inside of the box is beautiful, we will simply put another standard postcard on the bottom.
Next, we connect the sides of the inside of the box with the same seam.
We make another seam around the circumference of the bottom and attach the outer (inflated) parts of the postcard box.
At this stage, immediately take care of the elements of the fastener and limiter for the lid. Strengthen it and glue a piece of postcard with regular glue to the places where the fastener and stopper are attached. We used satin ribbons.
We will insert the tape for the limiter at the very end, and the clasp can be made on the box itself right away: pass the satin ribbon through the hole made, tie a knot on the inside, singe the edges of the ribbon over the fire and additionally glue the end of the tape with tape on the inside.
We continue to assemble a box of postcards. Sew the “petals” into the sides of the box. The top of the box can be sewn, leaving only the side open where the limiter is.
Now the box of postcards looks like this. We put another card in the bottom, which is not attached anywhere.
Assembling the lid for the box from postcards.
Make a handle for the box right away. To do this, strengthen the top part of the lid by gluing a piece of postcard to the back.
Gather several beads onto a double thread and thread it through the hole in the top of the lid. And tie the thread in a knot from the wrong side.
- Connect the top of the lid to the sides with the same seam over the edge.
- In the same way, make a receiving tie on the lid and insert the tape for the limiter.
- Assemble the lid to the end, attaching the bottom part.
- The lid for the postcard box is ready.
Types of collages
The biggest advantage of collages is that they can be dedicated to absolutely any topic. If we talk about the most popular types, then it is immediately worth noting family collages. The ideal material for such work, of course, is photographs depicting all family members.
Family collage
Just as popular are “romantic” collages, which clearly illustrate the story of a couple. Such a collage is not only an original way to cheer up your other half without a good reason, but also an excellent gift for another significant date - an anniversary or a wedding.
Romantic collage
It is impossible not to mention the collages compiled “hot on the heels” of trips. Such works are both an aesthetic pleasure and a kind of report that can effectively combine all the photos on one sheet and become a creative decoration for the living room or bedroom.
Collage about vacation
Wish collages also remain invariably popular; they will help you create a list of goals and tasks for the year, and will also be an excellent motivation for achieving them.
Collage of wishes