Idea 1. Tablet stand made from a cutting board
Watching your favorite TV series on your tablet or peeking at a recipe book while cooking will become easier if you make a special stand for this from... an ordinary cutting board. Making this kitchen craft with your own hands will take no more than two hours, and it will be used every day.
To make a holder for a recipe book or tablet you will need:
The angle of inclination of the holder will depend on the inclination of the hypotenuse of the triangular bar
Also, the craft can be further decorated - for example, by artificially aging it as in this master class, by drawing inscriptions, by burning a design, or by covering it with slate paint. In the following selection of photos you can get ideas for decorating original cutting boards.
Cardboard coasters
Cardboard is often used as a material for making homemade crafts. Almost every family has an unnecessary cardboard box. It is suitable for making a holder for a mobile phone or tablet.
You can also make a photo stand. To make such a wonderful thing you will need a few supplies - cardboard, scissors.
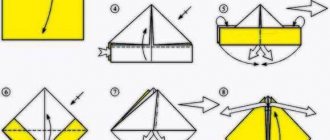
The manufacturing process will not take much time. A strip of 10*10 cm should be cut from a cardboard sheet folded in two parts.
Boiler gorenjeTypes of mining and processing equipment and conditions for quality repairs
How to prepare for moving and protect furniture from damage
Then you need to draw the desired product template on the strip and cut it out. You can take this stand with you everywhere and use it as a holder.
The next stand can be used for a book or tablet. The essence of manufacturing is similar, all that remains is to note the size of your gadget. When working, you need to use cardboard that bends well. The cardboard stand is very convenient to use and easy to take with you.
Idea 2. Jute coasters
If your kitchen (or, for example, a country or summer kitchen) is decorated in a rustic, Mediterranean, rustic or nautical style, then you will probably love this kitchen craft idea. In just a couple of hours you can make coasters for plates for the whole family and guests with your own hands.
To make one substrate with a diameter of 33 cm you will need:
Just start rolling the rope in a circle, applying glue to small sections one by one and fixing them for a while. Once the mat is formed, cut the end of the rope and glue it down.
Placemat Ideas
The stand for different cutlery can be presented in any shape and color. The main thing is that it satisfies the wishes of the owner, is spacious, moisture-resistant and anti-corrosion. There are a lot of ideas for creating it on the Internet. Thus, a cutlery stand can be made in the form of a wooden barrel or basket, pre-treated with an anti-corrosion compound and varnish.
It can be made from plastic or metal cups joined together, ceramic and glass vases for different flowers. It can be created from a wicker cup, a plastic cereal jar, a hard plastic box with cut-out cells for knives, forks and spoons. It can also be made from a metal basket, reminiscent of the cells in a washing cabinet for storing plates.
A good option for creating a stand would be to use rubber containers, paint cans, and plastic yogurt cups. An original way to decorate the interior with a cutlery stand would be to use a plastic or ceramic flower pot for spoons, forks and knives.
An interesting, but not the most practical option for creating a stand would be to use cardboard boxes and paper. To make the resulting item more practical, you can only decorate the finished product with paper.
A great idea for creating a cutlery stand would be to use a pepper shaker or flour sifter for this purpose. The most interesting option, especially if the kitchen or dining room is decorated in a marine style, would be to decorate or create a glass from sea stones, shells or small sea pebbles.
Idea 3. Organizer for cutlery and kitchen utensils made from cans
Tin cans cost nothing, but they are durable, easy to clean, and their shape is just right for storing all kinds of spatulas, ladle, forks, spoons and other utensils. If you put in a little effort and creativity, you can make a convenient and cute organizer out of them, which, even if it doesn’t fit into the interior of a city kitchen, will definitely fit in at the dacha. You can also use an organizer made with your own hands from cans to store tools, brushes, felt-tip pens and other small items.
Stand for spoons and forks made from cans
To make such a stand for spoons and forks, you will need:
Tip: To make this process easier and not damage the paint layer, place a small block on the table using a clamp, then wrap the block in felt and only then put a jar on the block (see the picture in the lower left corner in the next photo collage)
Here are a few other deco ideas and modifications to the design of cutlery stands made from cans.
What to make a stand for devices from
Manufacturers offer ready-made stands made of wood, plastic, metal, ceramics, or combinations. You can also make your own kitchen accessory from these materials, but only if you have the skills to work with them, special machines and tools.
Simpler options are made from scrap materials: tin cans, wooden boxes, kitchen boards. Additionally, you may need: acrylic paint in aerosol cans, jute thread, thick fabric, pieces of leather or suede.
Idea 4. Topiary for kitchen or home decor
Topiary is a small decorative tree that is used to decorate a dining or coffee table, chest of drawers or mantelpiece. And topiary is an excellent addition to a gift, especially if you decorate its crown, say, with candies or flowers. Making such a craft with your own hands does not take much time, does not require the use of expensive materials, and even beginners can do it. Once you master the basic principle, you will be able to create topiary for any occasion, any shape and design. Take a look at our selection of DIY home decor photo ideas, you're sure to find something you'll like!
Idea 5. Serving board-tray
But the idea of an unusual serving board-tray, which, although not a cutting board (intended for displaying food only in dishes), can nevertheless be very functional. For example, it can be used to beautifully serve snacks, drinks (olives, pistachios, nuts, chips, etc.), sauces, honey, sour cream, jam. Thanks to the slate part, while the board is not being used for its intended purpose, it can simply be hung on the wall and used for writing.
To make this DIY kitchen craft you will need:
You can replace furniture handles with leather straps, paint the board a bright color, burn a design onto it, or attach two “legs” to the back of it.
Idea 6. Stand for mugs and glasses
If you're the type of person who collects wine corks (either for fun or in the hopes of one day making something useful out of them), then you'll love this craft idea.
To make one mug stand you will need:
Step 1: Lay out your corks in pairs in a square format as shown in the photo below. Using hot glue, apply a bead of glue between the two corks and press them together for 30 seconds. Repeat the procedure with all other pairs.
Step 2. Cut a square from sheet cork (board, rug) corresponding to the size of the future stand. Next, apply thermal glue on it, wait 15-20 seconds. and glue your blanks.
Step 3: Fill the gaps between the corks with glue and let it dry. For better adhesion of the glue to the corks, you can put some kind of press on the workpiece.
Step 4. Wrap the craft with twine and tie a knot.
Handmade coasters for mugs, glasses and glasses can be beautifully packaged and given to a friend
If desired, the stands can be made round, triangular or hexagonal by cutting off the excess with a knife.
Using the described principle, you can make such a hot stand with your own hands. By the way, an old CD will work as a basis in this case.
Two in one - stand for pan lid and spoon
During the cooking process, it often becomes necessary to remove the lid for a while and cook in an open container. Where should I put the lid during this time? There are special holders for them. But why clutter the kitchen with unnecessary items if you have already come up with a universal stand for a lid and a spoon.
There is nothing tricky about the device. On one side there is a recess for a spoon or ladle, and on the other there is a holder for the lid. Stands from different manufacturers vary in design and size. It is important to pay attention to what size lids the holder is designed for, and to examine the principle of fixation.
The most important thing is that the structure is stable and does not weigh down from the weight of the lid. To check in the store, you can take the lid and check it. The stability of the stand depends on the correct design and material.
Two-in-one holders are made of plastic, ceramics and stainless steel. The stainless steel spoon and lid stand is attractive due to its practicality and durability, but it is not always stable. The plastic is lightweight and also does not guarantee stability. You need to check or study reviews if you plan to purchase from an online store.
To buy a beautiful and comfortable kitchen spoon stand, take the time to explore the range of online stores. The assortment online is much wider than offline, and prices are usually even lower.
Idea 7. Wall panel
Another craft idea for the home and kitchen that you can make with your own hands from wine corks is a wall panel for decorating the interior and storing notes, memorable photos and postcards.
Framed cork panel from Ikea
To work, you will only need a beautiful frame (from a picture or a mirror), paint of the desired color, hot glue and a large pile of corks. Corks can be laid out in a herringbone pattern, in a checkerboard pattern, in even rows, and in other ways that you like. If necessary, for example, if there are not enough corks, they can be cut lengthwise or crosswise. To make the corks easier to cut, you need to soak them in hot water for 10 minutes.
Find other interesting ideas for making wall panels with your own hands here.
Do-it-yourself knife stand: what is needed for this
To make a knife stand with your own hands, first prepare the tools and material. If this is a tree, then you will need:
- boards of different lengths and widths;
- screwdriver;
- wood glue;
- insulating tape;
- glue gun (“hot”);
- ruler, tape measure and simple pencil;
- sandpaper;
- impregnation for the finished product;
- varnish for final decoration.
Screwdriver Tape measure, pencil and paper Boards Wood glue
When making a stand from plastic or polypropylene pipes, you will need a different set of tools:
- glue "Moment";
- tassels;
- sandpaper;
- spray paint;
- hacksaw;
- tweezers;
- scissors.
If you plan to make a wall holder, then in addition to the source material and tools you will need neodymium magnets.
Method for making a wall holder
Drawing
First, a drawing is made on paper and in full size - it will become clear how much material is needed and what to provide for the tool (for example, a cutter for cutting out recesses). You can get creative and come up with the shape of a knife stand yourself, but it’s much easier to use ready-made solutions.
For example, here is a drawing for a classic type of wooden stand that can stand on a desktop or be mounted on a wall:
How to make from wood
The simplest version of a wooden stand is the classic model with holes, and it is made as follows:
- Prepare the frame - cut out 2 walls (sides) with curved edges.
- Make 8 identical blanks, make a recess on each, the width of which will be 5 mm larger than the knife inserted into it. Be sure to check that the edges of the notches align exactly with each other.
- Secure each part of 2 blanks with recesses with electrical tape. Then coat with “hot” glue and leave for 24 hours to dry completely, after which remove the electrical tape.
- Sand the finished product with sandpaper.
- Cover with impregnation to protect against moisture - this can be a professional material or sunflower oil, drying oil.
- After drying, coat the wood with varnish in 2-3 layers, waiting for each previous one to dry.
The design of such a stand is elementary - the blades of the knives are inserted into the recesses, the handles remain outside. The product is very practical to use because it allows you to store 6-8 knives, is hypoallergenic, and does not even cause accidental injury from the blade. But there is also a significant drawback - moisture accumulates in the recesses over time, and this is an ideal environment for the growth of pathogenic bacteria.
Watch the video on how to make a knife stand with your own hands:
What can be made from plywood
It is best to make a human figurine from plywood - such a knife stand will be original and unique. What materials you will need:
- pieces of plywood;
- “chopiki” 6 mm – 9 pieces;
- hot glue;
- end mill;
- cutter for rounding corners (smoothing);
- varnish
How to make it correctly:
- Cut out a human figure from a piece of plywood in two copies (they must be perfectly identical).
- Make holes for knives in convenient places along the figures.
- Fasten the parts with glue and clips, leave for 24 hours to dry completely.
- Cut a rectangular stand from plywood in 4 copies.
- Glue the plywood for the stand together and clamp it in a vice until completely dry.
- Clean all the workpieces from glue, smooth the corners - this is done with a milling cutter and sandpaper.
- Connect the human figurine and the stand with glue and leave it alone for 24 hours.
- Cover the stand with varnish.
You can “turn on” your imagination and make a shield for the little man, and insert small knives into it.
How to make with filler
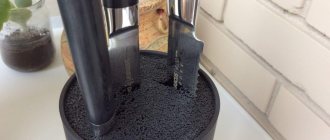
It’s easiest to make a stand with filling, because for this you will need a wooden box, a plastic cylinder, a glass made of thick glass - to choose from according to your own preferences.
The most difficult thing is to make a wooden box, because you will need:
- Prepare 5 rectangular pieces - the walls and bottom of the stand.
- Clean them thoroughly and connect them together using wood glue or small metal corners.
- Wait until the parts adhere tightly and clean them again.
- Cover the wooden box with impregnation, then varnish and polish.
You can decorate a wooden box using a burner, drawing with ordinary paints/brushes, or decorative napkins, but these manipulations must be performed before coating the product with varnish.
Watch the video on how to make a stand for kitchen knives yourself:
Preparing the magnetic holder
The magnetic holder can be made of wood:
- Take a small board of such length that all existing knives can fit on it (the distance between them should be 2-3 cm).
- On the reverse side, make recesses for magnets in the amount planned for knives.
- Using Moment glue, fix the magnets in the recesses.
- Clean the wooden board, cover it with varnish or paint, or self-adhesive film.
- Attach the holder to the wall - it is convenient to do this above the desktop.
The magnets are located at a distance of 3 cm from each other.
Make the required number of holes. Drop a drop of wood glue into each hole and, pressing down, place a magnet circle. Wait for the glue to dry. Step back 2-3 cm from the top of the board and attach the metal holders. Result
Decorative with decoupage
Any stand can be turned into a decorative item with decoupage; to complete the work you will need:
- PVA glue;
- napkins with the desired pattern (choose holiday ones that are easy to layer);
- transparent varnish.
First you need to decide on the pattern and color of the napkins. If the pattern is complex, then you will need to combine it and cut it out in advance. And then the work is performed in the following order:
- The surface of the stand is cleaned and degreased with acetone, solvent, and alcohol.
- Cover the product with a layer of PVA glue over a small area.
- Immediately glue the napkin, having first removed the bottom paper layer from it.
- Smooth out the napkin with your hands and fingers so that there are no uneven spots or bubbles left.
- Cover the entire stand in the same way.
- After drying, coat with varnish in 2-3 layers, waiting for the previous one to completely harden.
Such coasters are quite delicate and capricious: napkins with glue are an excellent environment for the development of mold, so with high humidity, dark spots may appear on the surface over time.
From old books
The fastest option for making a knife stand is from old books: from the material you will need to prepare 3-4 books in interesting thick/hard bindings and a volume of at least 300 printed pages, as well as bank “money” rubber bands to connect them together (can be replaced knitting threads or household cord).
You need to place the prepared books vertically close to each other, secure them together with rubber bands, which can be decorated on top with twine, a beautiful lace or a wide braid. The knives are inserted from above, the blades simply stick into the paper sheets. The disadvantage of such stands is their very short service life: book pages are quickly damaged by sharp blades, and they do not tolerate moisture. Therefore, they are more suitable for souvenir knives.
You can leave the book covers, tear out all the pages and fill the free space with any material - cereals, pasta, bamboo sticks. But in this case, you definitely need to think through the bottom of the stand so that the filler does not spill out when moving the product from place to place.
Technological map for making a sugar bowl from wood
For preschoolers and students in grades 1-11
Record low registration fee 25 RUR.
Why teenagers want to work and how teenagers can earn money correctly: psychological and legal aspects
March 2 – 4, 2022 19:00 (Moscow time)
Certificate for each participant
Discount on courses for all participants
Material number: 83312042508
Didn't find what you were looking for?
You might be interested in these courses:
Leave your comment
Responsibility for resolving any controversial issues regarding the materials themselves and their contents is taken by the users who posted the material on the site. However, the site administration is ready to provide all possible support in resolving any issues related to the work and content of the site. If you notice that materials are being used illegally on this site, please notify the site administration using the feedback form.
All materials posted on the site were created by the authors of the site or posted by users of the site and are presented on the site for informational purposes only. Copyrights for materials belong to their legal authors. Partial or complete copying of site materials without written permission from the site administration is prohibited! The opinion of the administration may not coincide with the point of view of the authors.
Source

