The Nutcracker, the hero of Hoffmann's fairy tale and the ballet of the same name by P.I. Tchaikovsky, is proposed to be made from an ordinary juice box. Dressed in a uniform with epaulettes decorated with gold trim, the Nutcracker will be an excellent accessory for New Year's decorations, an attribute for a children's theatrical production, the main character of a thematic lesson “P. I. Tchaikovsky's ballets” or a pleasant gift.
Step by step making a nutcracker from a box
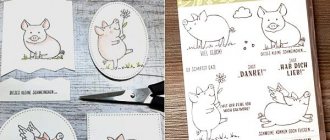
- On the template cardboard we outline a small cardboard box. This can be done using a marker or pencil.
- We draw a cocked hat for the future nutcracker and do not forget to leave a margin of 1 centimeter. We will use it to cut out our sketch.
- Cut out the first slouchy cocked hat template and trace it again. As a result, we should have two cocked hat blanks, both with an overlap. We cover the blanks with red paper.
- Cut a wide strip of red paper to make the top of the cocked hat.
- We cut out 4 wide strips from white paper, twist them and place them inside the bobbins so that they take shape, from which we will later make a wig for our nutcracker.
- On the box we measure the part on top on which the face of the craft will be located.
- We cover the back and top sides of the box with white paper, from which we will also have curls. We cover the front upper part with beige or pale pink paper, this is where the face will be. We completely cover the bottom with red colored paper. And we seal the bottom part of the box on which the craft will stand with white paper.
- We cut out a wig with a pigtail from white paper and glue the blank in the right place.
- We also make small pieces for the front part to create the effect of hair falling onto the face. Glue it. We cut out small regular circles from white paper and cut them in a spiral. We glue these curls along the hair that falls onto the face.
- We glue two parts of the cocked hat to the craft and cover the top of the headdress with the red stripe that we cut out earlier.
- We decorate the headdress with a rope and other details.
- On the sides near the cocked hat we glue the previously prepared curls of white paper.
- We make two small bobbins from loose cardboard, glue them in the color of the suit and glue them below the curls, these will be the hands.
- We also cut out small elements from white cardboard that will represent hands and glue them to the previous element.
- We complete the nutcracker costume with small details from colored paper, making his nose and eyes.
- We use toilet paper reels to make legs for the nutcracker, cover them with colored paper and glue cardboard elements to make the craft stable. Let all the glue dry and decorate a room, Christmas tree or exhibition with the craft.
The working process
Our character's figure will be based on matchboxes. Therefore, we advise you to immediately decide on the size. To do this, decide where the finished toy will stand or hang.
- We take six matchboxes and connect them together. The result is a rectangle. This is the body of the Nutcracker.
- We cover the boxes with paper. The base is ready. Let's start decorating it.
- You need to make a nose from a small triangle and glue it.
- For the face, select the third part of our rectangle. Paint it with beige paint. Acrylic is better.
- We cut out clothes from red felt and dress the character. The material is also attached with glue.
- We make bangs from cotton pads and form four curls on each side.
- We glue an improvised white felt tail to the back of the head and tie it with a black cord.
- We put on the headdress and attach the feather using a hugger, which can be taken from the accessories department. This will be replaced by a regular piece of colored paper covering the tip of the pen.
- From straws we cut out handles along the entire length of the body and legs.
- We cover the parts with red felt.
- Draw a big mouth on paper and glue it onto the red uniform.
- A golden-colored satin ribbon can be tied on the body or glued again.
- This is our character's belt. The smallest buttons or sequins act as buttons. Attach the arms and legs.
- We sew shoes from black leatherette.
- Finishing touches: draw a face, decorate the costume with sparkles and insert a skewer into the satin belt.
If you plan to hang a toy made by yourself on the Christmas tree, then make a loop from a lace or thick thread. Our Nutcracker is completely ready.
How to assemble correctly
Since the entire structure is based on the use of a matchbox, the foundation will depend on this item. In order to carry out all manipulations with maximum accuracy, it is recommended to adhere to the algorithm described below, and precisely in the sequence in which it is presented.
- So, in order to prepare a neat base for a DIY “Nutcracker” toy for the Christmas tree, you should connect all the available packs together. This is done with glue. This should create one large rectangle, which represents the body of the Nutcracker. However, such an invention cannot be left without further processing. That is why it is worth arming yourself with paper and sticking it over the part. And only after that you can start decorating.
- To start, you can grab the face of the toy. That is, one third of the part should be left to represent the eyes and nose. Thus, you need to take paints (it is better if they are acrylic) and paint over the selected side. Next, make a nose from a small piece of paper, first folding the part into a triangular shape and fixing it on the surface. As for the eyes, it’s a matter of your imagination. Here you can use a pen to draw any variety you want.
- Moving on to the stage of creating clothes, you should take red felt and glue it to the rest of the invention. This is also done thanks to glue.
- Now all that remains is to make a hairstyle for the Nutcracker. It’s not for nothing that you armed yourself with cotton pads. They should be twisted and fixed on the toy’s head. At this step, you can also experiment, creating different options.
- Using white felt, a tail is made on the back side of the part. To make it neater, you can tie a small rope in the same place. It will serve as a hair tie.
- From the fabric that was left in the end, you need to make handles. To do this, twist it and glue it to the body. The same must be done with the legs.
Nutcracker toy - A child, having watched enough of the cartoon, asks...
The child, having watched enough of the cartoon, asks to write a letter to Santa Claus and order the Nutcracker. Does anyone have any ideas on where I can buy a Nutcracker toy? I haven't seen it anywhere.
I was puzzled by the same thing last year. I found a luxurious painted wooden one on one of the educational children's sites (such as razvivalki.ru). But you ask the nutcracker in the search engine, there will be links (I did that). The toy cost about 1300 rubles. 11/30/2006 10:01:53 PM
I saw it in Multi today, about 700-800 rubles... Quite big :) And in DM on the 4th floor there are small handmade ones, last year I bought them for 80 rubles :) There were also large ones, I don’t remember the prices :) 11/30/2006 15:23 :20
List of sources
- 1igolka.com
- kastrubin.ru
- quilling-life.com
- yamuzykant.ru
- www.7ya.ru
- setafi.com
- handmadebase.com
- litfest.ru
How to make a DIY Nutcracker craft
For this craft I needed a cardboard pill box. I drew the Nutcracker in such a size that I could cover the box with this drawing, and I also drew his arms, headdress and saber separately.
Rita and I colored everything with shiny gel pens, pencils and a red felt-tip pen, and laminated it with wide transparent tape. Individual parts were glued onto cardboard and cut out.
The box was pasted over with a pattern, the parts were glued to the right places (the saber and headdress decoration were glued to double-sided foam tape for volume). The wig was made from a white napkin, cut into strips and rolled into tubes. All that remains is to attach the string, and the toy can be hung on the Christmas tree.
I suggest looking at others or.
Happy creativity! Especially for readers of the blog “MORE creative ideas for children”
(https://site), with sincere respect, Yulia Sherstyuk
All the best! If the article was useful to you, please help the development of the site by sharing a link to it on social networks.
Posting site materials (images and text) on other resources without the written permission of the author is prohibited and punishable by law.
- Bullfinch - a Christmas tree toy made from...
- Christmas tree made from pine cones - a simple craft...
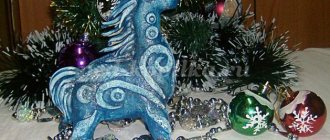
Hello, my dear fellow citizens of our doll country)). I want to show today my new creation - the Nutcracker. The doll was ordered urgently (3 days) by Father for the Orphanage. Here's what I got. The order was unusual in that I had never made such forms of dolls before. Naturally, there is no way to refuse Father, especially for orphans. Therefore, I pushed all my affairs aside for 3 days and began to get inspired)) - I found a suitable picture on the Internet with the image of the Nutcracker... I opened all my closets, boxes and caskets... and my soul flew to Heaven)). There was no time to take photographs, so there are not many photos. This is what I managed to capture and present to your attention. The doll was 50 cm long. For the frame I used thick corrugated cardboard (from boxes) in several layers. I covered it with foam rubber (backing under the laminate). Inside there are foam tiles for density. Finishing with fabric (velvet, suede, knitwear), leather, plastic, decor. elements. In short, I used everything that was at hand at home at that moment))
This is how my fairy-tale character turned out. Tomorrow Father will tell you how the children reacted to such a toy. Thank you all for showing interest in my topic! Good luck and inspiration to you!
Coming soon! We are preparing gifts for the children, and we also need packaging for sweets. Such an interesting Nutcracker packaging that the baby will not just throw away, but will be able to play with it is a very good idea. It can really be made in a few evenings from scrap materials that are usually thrown away (except for glue - 3 types of glue are used here: PVA, universal transparent and the same transparent “liquid nails”). This Nutcracker can be made for a Christmas tree or simply as a toy.
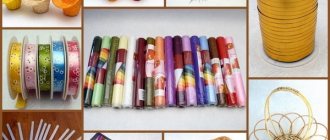
Here's what I used to make my own Nutcracker:
1. A box that is the most suitable size for the Nutcracker toy. If there is no such box, then you can make it yourself.2. Rolls of used toilet paper and foil. They are of different sizes, large for feet, small for hands.3. Silver candy wrappers4. Corrugated paper, which is usually found inside boxes of candy, you can take paralon.5. Braid, rhinestones, fluff and feathers for a hat.6. Some cardboard, bottle caps, pebbles for eyes.
The angular hero with kind eyes and a noble heart is remembered by everyone who has read the fairy tale about the Nutcracker, watched a cartoon or theater productions. A master class on making crafts will introduce children and adults to the classics and create a festive atmosphere. You can make the Nutcracker with your own hands using a variety of materials and using different techniques. If you are a master in a certain direction, you can safely use your skills in practice to create an exclusive toy. Can you crochet? Great. Do you work with wood? Amazing. Do you want to make toys out of paper? As easy as pie. The main thing is to remember all the distinctive details that characterize the character. Crocheting a Nutcracker is a little more difficult and requires some skill. We decided to make a Nutcracker from felt.
DIY nutcracker Christmas tree toy. Nutcracker based on box
It’s not difficult to make a Nutcracker out of a box with your own hands.
For the work you will need various materials. Experienced craftsmen plan the Nutcracker out of wood, children happily assemble a paper toy, older people will enjoy knitting a fairy-tale hero, and if you have experience in needlework, you can easily contribute to the creation of a doll in the form of an interesting design solution. First you need to figure out how to make a nutcracker with your own hands from a box.
You will need the following materials:
- The simplest version of the toy would be a cardboard Nutcracker craft. For this option you will need cardboard, but better - an empty cardboard box of any size. It all depends on what exactly you want to make: a small toy can be made from a pill bottle, a large one from a shoe box, and a very tiny one from a matchbox.
- It is recommended to laminate the drawn parts with thick tape so that the drawing does not wear out or lose its brightness. Next, parts of the Nutcracker's body are cut out and glued onto a cardboard blank - the body. If you suddenly have difficulty drawing the elements of the hero’s clothing, you can find a template on the Internet.
- After the box is covered with various elements of the craft, all that remains is to attach the string.
Once the box has been selected, you can begin designing the toy. A DIY nutcracker costume can be sewn, or maybe drawn. The second option is the easiest - just draw the clothes of a fairy-tale hero on paper: a face or mask, torso, suit, shoes, hat. Hands can be drawn separately. You can color with anything: pencils, paints, felt-tip pens, gel pens. The mask will look interesting if you add multi-colored sparkles to it.
How to sew a dress for Marie with your own hands?
If the girl has a dress that looks like a princess dress, then you can use it. If not, sew such an outfit from a suitable fabric. It would be nice to use gold brocade. It holds its shape perfectly and looks chic. The dress has a seam at the waist and a zipper at the back. A full skirt is sewn down. To keep it in shape, use a petticoat. Sew it from taffeta.
To prevent the petticoat from becoming fuller at the waist, it is better to sew subsequent tiers of the petticoat below the waist.
Marie’s outfit from the Nutcracker fairy tale also implies the presence of long trousers. After all, this is exactly how they dressed in rich houses at that time. They are made from light fabric with elastic. It needs to be sewn to the bottom of these wardrobe items and to the top at the waist. And additionally decorate the bottom with a frill of braid.
All that remains is to do our heroine’s hair. To do this, you can tie your hair with a satin ribbon to match your outfit and make curls in advance.
Her brother will dress the same way boys dressed at that time. But you can use the child’s existing suit and wear a white shirt underneath.
Watch a master class on creating a Pinocchio costume
Master class on children's crafts “Nutcracker” with step-by-step photos:
1) Measure 5 cm from the top and cover it with tape in a circle, measure 13 cm from the bottom and also cover it with tape. We do this in order to paint the hat and jacket with a smooth edge, and leave the face untouched.
2) Using acrylic paints, paint the smaller part black and the remaining part red. We do this with acrylic paints because they dry quickly and are non-toxic. You can replace it with any other paints, for example gouache, but dilute it with PVA glue, or use colors.
3) Remove the tape. And this is how it turns out.
4) Next we need to use a hot gun. Do not trust children to use a hot gun themselves; burns may occur. And so we need to glue all our fittings. For the handles, we use a champagne cork; after cutting it in half, we glue the half from the narrow ends of the block. We take the buttons we like and glue them in the center in a row, these will be the buttons on the jacket. We will also decorate the headdress with a golden ribbon, attaching it to a hot gun.
5) Next we need to make hair blanks. We take paper with a width equal to the narrow ends of the bar, approximately 5-6 cm long. We wind the paper onto a skewer, remove it and glue it along the black edge. It turns out that the hair sticks out from under the hat. You can make two levels of curls, you can vary their number.
6) When everything is glued, draw a face. The eyes can be drawn or glued from sewing accessories (sold for 10 rubles a pair). And we paint the cork handles in the color of the jacket.
7) Having painted the face, we return again to the decor of the jacket. Let's make decorative green buttons. Pin buttons will help us with this; they easily fit into soft pine. If you do this craft with a child, then it will be very interesting and fun for him to hammer such buttons with a hammer (BUT remember!!! This should only be done under adult supervision, in order to avoid child injuries).
Maria Panteleeva
Dear colleagues, on the eve of the New Year, my children and I watched the cartoon
“
The Nutcracker
” and decided to make the main characters with our own hands! Today I present to your attention
a master
class on making
“
Mouse King ”
from the cartoon The Nutcracker
.
This is how it turned out for us!
So I’ll begin a detailed description of how to make the “ Mouse King”
“!For this we will need:
nylon tights
, padding polyester, a 5-liter plastic bottle,
brightly colored fabric
, multi-colored ribbons, eyes, a bow, a button, a belt plaque, foil for
the crown
and a yellow rope.
From nylon
Using tights and padding polyester we make faces.
First we shape the nose
We need to make three heads: don’t forget about facial expressions, because each head has its own character
Nylon
We cut the trace in half - these are the ears, sew them, stuff them with padding polyester
Heads ready
Now the torso - I took a 5 liter bottle as a basis. We cover it with nylon
and stuff it with padding polyester
Then we sew on the heads
Now let's take care of the paws - also made of nylon
Add eyes, tint noses and cover with PVA
And now all that remains is to dress up our king - ribbons go to the entrance
,
fabric
for the cloak, a belt plaque, a button and of course fantasy!
Sew a high collar
We make a belt - from a black thick ribbon and a plaque
We make cuffs from the same tape
I untied the bow in order to make " To the Mouse King
" - jabot!
From a thick red ribbon and a gold button - we make a ribbon over the shoulder
And now the crown
- I wrapped the wire with foil, a thick layer, then with yellow rope - it looks very interesting!
Sew on the collar
We put a cloak on our king
And our " Mouse King"
" - ready!
Oh, and most importantly, don’t forget about the tail! I tied it, inserted wire and stuffed it with a little padding polyester!
Thank you for your attention! And Happy New Year 2015 everyone!
Master class on making toys
Nutcracker based on box
It’s not difficult to make a Nutcracker out of a box with your own hands . For the work you will need various materials. Experienced craftsmen plan the Nutcracker out of wood, children happily assemble a paper toy, older people will enjoy knitting a fairy-tale hero, and if you have experience in needlework, you can easily contribute to the creation of a doll in the form of an interesting design solution.
First you need to figure out how to make a nutcracker with your own hands from a box.
You will need the following materials:
- The simplest version of the toy would be a cardboard Nutcracker craft. For this option you will need cardboard, but better - an empty cardboard box of any size. It all depends on what exactly you want to make: a small toy can be made from a pill bottle, a large one from a shoe box, and a very tiny one from a matchbox.
- Once the box has been selected, you can begin designing the toy. A DIY nutcracker costume can be sewn, or maybe drawn. The second option is the easiest - just draw the clothes of a fairy-tale hero on paper: a face or mask, torso, suit, shoes, hat. Hands can be drawn separately. You can color with anything: pencils, paints, felt-tip pens, gel pens. The mask will look interesting if you add multi-colored sparkles to it.
- It is recommended to laminate the drawn parts with thick tape so that the drawing does not wear out or lose its brightness. Next, parts of the Nutcracker's body are cut out and glued onto a cardboard blank - the body. If you suddenly have difficulty drawing the elements of the hero’s clothing, you can find a template on the Internet.
- After the box is covered with various elements of the craft, all that remains is to attach the string.
A movable Nutcracker can also be an excellent option for a Christmas tree. The option is more complex, but also more spectacular. Let's look at it step by step using the example of making a toy from a matchbox.
Movable Nutcracker craft
- Cut off the top of the matchbox (about a centimeter from its edge).
- Paint the inside of the box with dark gouache paint (you can use dark brown).
- Use a needle to pierce two holes on the side of the sliding part.
- Next, you can use a regular staple from a notebook (it can be replaced with thin wire). The staple is inserted into the holes made with a needle.
- Using pliers, the edges of the bracket are bent. Try to form two identical wire loops - it is through them that the rope will be threaded so that the toy can hang on the tree.
- Next, use a regular thread or thin twine, tied in a knot at the end. A bead is placed on top, which should be lowered to the knot.
- Using a gypsy needle, we thread a string with a bead from the inside of the sliding part of the box on the side opposite to the wire legs. The bead is needed to prevent the thread from slipping out.
- Now you can put on the outer part of the matchbox. The cut edge should be at the bottom, relatively speaking, there should be an empty space above the wire legs.
- The Nutcracker wears a cocked hat. Find a tricorn hat template online. For production you will need four blanks made of thin cardboard or thick paper.
- Cardboard hats are glued on both sides of the box. It is best to do this with a glue stick, this way the work will look neater.
- For the next step, you will need a piece of any fabric, which should be glued on top of the cocked hat in such a way as to close the void between them both on the sides and on the top. The edges of the fabric are cut in the shape of a triangle.
- The remaining two parts of the Nutcracker hat are glued to the front and back.
- You need to make teeth out of paper and place them in the gap above the wire legs.
- The limbs can be made from four pieces of wire. We bend the edges of the pieces and cover them with polymer clay. We try to sculpt the shape of the arms and legs. The loops remain open. When the arms and legs are ready, all that remains is to bake them in the oven. If you don't have clay on hand, you can use salt dough.
- We make a thin tube of paper. Then fix it with glue.
- Using stationery scissors, four identical pieces the length of the end of the box are cut from the tube. The tubes are installed under the cocked hat.
- Using a gypsy needle, the string is carefully threaded through the fabric in the hat. Both parts of the box are glued together so that one does not move out of the other.
- To make hands, holes are made on the sides of the box, and short wire hooks are inserted through them.
- Now you can paint the entire craft from head to toe with white gouache or watercolor. Only the mouth and the flap on top of the hat remain intact.
- When it comes to decorating the Nutcracker hat, you can use your imagination or use ready-made ideas from the Internet.
- The eyes are outlined with a simple pencil. You can make them from beads or colored paper.
- Next, the toy is painted with acrylic or gouache paints. The separately painted legs are hung on the body only after they have dried. Using a thin brush with black paint, the main elements of the face and clothing are outlined to give them clarity.
How to make a Nutcracker with your own hands. Master class and video
The angular hero with kind eyes and a noble heart is remembered by everyone who has read the fairy tale about the Nutcracker, watched a cartoon or theater productions. A master class on making crafts will introduce children and adults to the classics and create a festive atmosphere.
You can make a Nutcracker with your own hands from different materials and using different techniques. If you are a master in a certain direction, then you can safely use your skills in practice to create an exclusive toy.
Can you crochet? Great. Do you work with wood? Amazing. Do you want to make paper toys? As easy as pie. The main thing is to remember all the distinctive details that characterize the character. Crocheting a Nutcracker is a little more difficult and will require some skill. We decided to make a Nutcracker out of felt.
Preparation of materials
Felt is easy to work with, and it also has a pleasant texture and exudes warmth, which is so lacking on cold winter evenings. A felt toy, made with your own hands, wherever it is placed, on the tree, under the tree, on a New Year's wreath, gives coziness to the home. It looks harmonious next to the fireplace or with candles.
For work we will need:
- felt - more red, a little white;
- leatherette - you can take it from an old bag or wallet;
- satin ribbon - a narrow one will do;
- matchboxes - 6 pcs;
- cotton pads;
- cocktail straws;
- feathers;
- skewers;
- sequins;
- acrylic paints;
- glue gun;
- a white sheet of paper—landscape or notebook paper will do.
The working process
Our character's figure will be based on matchboxes. Therefore, we advise you to immediately decide on the size. To do this, decide where the finished toy will stand or hang.
- We take six matchboxes and connect them together. The result is a rectangle. This is the body of the Nutcracker.
- We cover the boxes with paper. The base is ready. Let's start decorating it.
- You need to make a nose from a small triangle and glue it.
- For the face, select the third part of our rectangle. Paint it with beige paint. Acrylic is better.
- We cut out clothes from red felt and dress the character. The material is also attached with glue.
- We make bangs from cotton pads and form four curls on each side.
- We glue an improvised white felt tail to the back of the head and tie it with a black cord.
- We put on the headdress and attach the feather using a hugger, which can be taken from the accessories department. This will be replaced by a regular piece of colored paper covering the tip of the pen.
- From straws we cut out handles along the entire length of the body and legs.
- We cover the parts with red felt.
- Draw a big mouth on paper and glue it onto the red uniform.
- A golden-colored satin ribbon can be tied on the body or glued again.
- This is our character's belt. The smallest buttons or sequins act as buttons. Attach the arms and legs.
- We sew shoes from black leatherette.
- Finishing touches: draw a face, decorate the costume with sparkles and insert a skewer into the satin belt.
If you plan to hang a toy made by yourself on the Christmas tree, then make a loop from a lace or thick thread. Our Nutcracker is completely ready.
Other ideas
The shape of the toy is quite simple, which allows you to come up with a lot of other ways to make a Nutcracker with your own hands. For example, you can use a small wooden block as a base. You can draw all the main details on it: face, uniform, headdress. Then buttons and ribbons are glued on, and a champagne cork, cut in half lengthwise, acts as handles. The hairstyle can be made from paper rolled onto a regular pencil.
You can use paper as a material. First you need to draw and cut out the pattern of the toy, and then glue and paint everything. Crocheted or knitted, the Nutcracker will turn out to be a real soft doll that you can play with.
Now you know how to make a Nutcracker with your own hands and can share tips. Choose the technique that suits you best. Crochet, glue from paper, make a toy from wood and invent new ways. It’s better to start work in a good mood, without rushing anywhere. Then everything will work out.
See similar master classes: DIY paper Christmas decorations.
DIY Christmas tree nutcracker - step-by-step master class
The tale of the Nutcracker is one of the most beautiful New Year's stories. To add a little fairy-tale flair to your home holiday, you can make a toy Nutcracker.
How to make a Nutcracker for the Christmas tree - see below.
Toy “Nutcracker” made of felt for a Christmas tree – master class
To make a felt Nutcracker with your own hands, we need:
- paper;
- pencil;
- felt in light beige, dark beige, red, white and black;
- padding polyester;
- black beads;
- golden beads and sequins;
- thread and needle.
Operating procedure:
- Let's make a paper pattern of the future Nutcracker from felt. Let's cut out a torso, a hat, a nose, hair, a wig, a feather, a head, teeth, a sleeve, a hand, a leg and a boot from paper.
- We will cut out all the details of the Nutcracker from felt. From beige felt we will cut out the head and four parts of the hands. From dark beige - the nose. Four parts of the boot are made of black. From red - two parts of the body, four parts of the sleeve and two parts of the hat. From white - a feather, teeth, two parts for hair, four parts for legs and six parts for a wig.
- We will sew the hands to the sleeve details.
- Sew the parts of the arms in pairs, leaving holes on the sides.
- Let's fill our hands with padding polyester.
- Sew up the holes on the sleeves.
- We will sew the details of the boots to the details of the legs.
- Sew the leg pieces together in pairs and leave the unsewn edges at the top.
- Let's fill the legs with padding polyester.
- Sew the hair to the head.
- Let's sew the head to the body.
- We will sew the details of the hat to the body parts.
- To the part of the body to which we sewed the head, we will sew a part of the teeth.
- We embroider stripes on the teeth, dividing the detail of the teeth into individual teeth. Let's sew on beaded eyes and a nose.
- Let's sew together the details of the Nutcracker's body, and leave an unsewn area at the bottom.
- Let's fill the body with padding polyester.
- We will put the legs into the lower part of the body and sew up the lower part of the body, sewing on the legs as well.
- We will sew hands on the sides of the Nutcracker’s body.
- We roll the wig parts into tubes and sew them with small stitches so that they do not unwind.
- Sew the wig details on the sides of the head.
- We will sew a feather and a golden sequin with beads to the hat. We will make buttons on the body - for this we will sew three golden sequins and three beads, placing them from top to bottom.
- The Nutcracker is ready. Now you can put him under the Christmas tree or on a spruce branch next to other toys.
Related articles:
| New Year's decor and Christmas tree decorations are made from everything - paper and wood, fabric and even thread. In our master class, we offer you step-by-step instructions for creating a New Year's snowflake from knitting threads to decorate a Christmas tree or home. | The star is one of the main symbols of the New Year and Christmas holidays. It is not surprising that on almost every New Year's tree you can find decorations in the form of stars. With the help of our master class, you will learn how to make a beautiful star from threads for a Christmas tree with your own hands. |
| Do-it-yourself “Cockerel” refrigerator magnet On the eve of the Year of the Rooster, souvenirs depicting a perky bird and cockerel figurines are extremely popular. So why not please your family and friends with cute handmade magnets with a knitted cockerel. Our master class will help you with this. | DIY Christmas tree bows Decorating a Christmas tree is a very exciting process, but not easy, and you can’t do it without imagination. This year we invite you to complement your usual toys and garlands with elegant bows made by yourself. A master class will help you learn how to make them. |
womanadvice.ru
The process of creating the Nutcracker at home
We must immediately make a reservation that it would be better to involve children in creating a nutcracker from a cardboard box, since joint creativity helps to unite the family, and it is more fun to make something colorful together.
You need to start by cutting out various parts of a cardboard toy from colored paper.
You should not be afraid of some dissimilarity between the Nutcracker and the exemplary one from the cartoon - the main thing is to attach the hair to the toy with curls made of white paper and add more red. In everything else, you can improvise, adding some elements for the Nutcracker, or subtracting them.
Do not forget that the Nutcracker was not a toy, as everyone now perceives him, but he was a special tool, beautifully decorated, which was used for cracking nuts.
The Nutcracker was dressed in the red uniform of a soldier and steadfastly carried out his work, cracking nuts for the masters.
After cutting out the eyes from colored paper, you will need to use PVA glue or hot glue to glue red colored paper to the bottom of the box - this will be the body of the Nutcracker.
Using the quilling kit, you can also create curls of hair for the Nutcracker soldier's wig. Also, using a quilling kit, you can create any decorative elements for a cardboard toy and this will make it even more beautiful.
Next, you will need to cut out a red Nutcracker tricorne from paper. With the help of glue it can be glued to each side of the box without difficulty.
Next the nose and eyes are glued on.
The Nutcracker's working tool mouth must be square. A cut out black square will easily stick to the box and white strips of paper can be glued to the top and bottom of it, drawing lines on them indicating the teeth of the toy.
Using glue, you can easily attach a button to the toy's cocked hat and a feather.
The yogurt cup will act as legs, which can be easily glued into the holes cut out in the bottom of the box.
The cups will need to be covered with blue or black paper, symbolizing the Nutcracker's boots.
Hands can be made from matchboxes by gluing several on top of each other and pushing the last one forward. The hands are covered not only with red paper, but also with yellow and blue paper, symbolizing the decorative elements of the Nutcracker’s form.
The end result should be a colorful toy that the whole family can enjoy making.
DIY nut cracker
DIY nut cracker
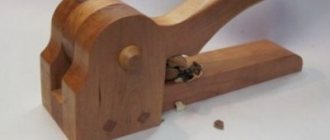
Peeling a walnut so that it remains intact is quite problematic, since most often the kernel splits into many parts. In many cases, a hammer and various devices come to the rescue, helping to greatly simplify the cleaning of walnuts.
However, it is problematic to peel many nuts with a hammer, and in this case it is also difficult to maintain the integrity of their kernels. Therefore, many people will find such a device useful on the farm as a homemade nut cracker; making it at home will not cause any serious problems.
What to make a homemade nut cracker from
You can make a nut cracker with your own hands from various materials, so the design of the nut crackers can be different. But the essence is the same: some pressure must be applied to the nut shell to crack it. There should also be a limitation so as not to crush what is behind the nut skin.
Full master class:
Want more easy and fun paper crafts? Learn to make different animals (a cat, a dog, a bunny, birds and fish, even Maya the bee), fairy-tale characters (including an astrologer, an alien, Aibolit and Barmaley, Father Frost and the Snow Maiden). All master classes either with explanations or with templates https://www.youtube.com/playlist?list=PLB3s01ry0Ine8ZaFASdSnnkyA_7x04nmg
Wonderful playlist of CRAFTS FOR THE YEAR OF THE RAT https://www.youtube.com/playlist?list=PLB3s01ry0Inea2GPRHInbG4M2PxndyBWb
PREPARATION FOR THE NEW YEAR, CRAFTS, GIFTS AND EVEN DRAWINGS https://www.youtube.com/playlist?list=PLB3s01ry0IneyATn92BIIQKdThN1LWSEU
How to make a Nutcracker from felt - master class
Such a character will not only become the main character of the puppet production, but will also decorate the Christmas tree. Then you will have it not only beautiful, but also fabulous.
Take:
- white, red, beige and black felt;
- filler;
- scissors;
- gold fittings;
- some pink felt.
See what parts you will need to cut out.
Two identical blanks must be cut out of red felt. This is the base of the back with the head and the base of the front with the head. Place a rectangle of beige fabric on this front side. Place bangs made of white material here.
Attach the eyes, nose, and pink ovals under the eyes. Then you will get rosy cheeks. Place a strip of white fabric on top and bottom of a rectangle of black felt. Topstitch it with black thread so that it looks like teeth. Decorate the front of the uniform with gold fittings.
We need to do the back too. As you can see, you will place a strip of beige felt under your head, and a blank in the form of a hairstyle with a braid made of white fabric will be placed on top.
You will also need to cut out pieces for the sides from red felt with white trim. You will stitch these elements together. Now lay out the blanks for the Nutcracker like this.
Sew them, then turn this blank right side out and stuff it with filler. Attach accessories in the form of a gold belt with a buckle down. Now start sewing the parts of the hat on your hands, at the same time attaching a finishing gold cord, a loop here, and filling this toy with filler.
Cover the seams with golden cord. Create curls. To do this, take white felt, cut out four ribbons from it and roll them into a roll. Then you will sew these blanks on the right and left to your character.
To make the Nutcracker further, cover out the arms and sleeves. To do this, you need to sew a narrower strip of beige felt to a square of red fabric. Then you will fold such a blank in half and stitch it on the side, leaving a free line at the top so that you can then turn your arms right side out.
Now sew a narrow gold braid between the palms and sleeves. And use an openwork golden ribbon to create epaulettes and attach them to the top of the sleeves.
To sew the Nutcracker further, pin the arms in place.
Now we need to make the legs for this character. To do this, take white felt and sew it with black. Then fold it in half and stitch the large and small sidewalls, turn them right side out and stuff them with filling. That is, the legs are created according to the same principle as arms with sleeves. Attach the legs in place.
All that remains is to make a saber and a hat decoration from thick gold fabric. Pin these items in place. This is the kind of Nutcracker for a New Year's fairy tale.
Preparing materials for creating a “Nutcracker” toy for the Christmas tree
Since felt is considered the most comfortable, it can be used to create details; wood is also often used. When choosing a shade, it is recommended to give preference to the red color, because it creates a New Year's mood. In addition, it is advisable to dilute the entire decor with white.
This combination is not very striking, however, it attracts the attention of people around. This is explained by the fact that the named product is pleasant to the touch, so it is most suitable for use. So, among other things, the following list of components will be useful
It includes:
So, among other things, the following list of components will be useful. It includes:
- Six packs of matchboxes;
- Several pieces of cotton pads;
- Feathers;
- Special glue gun;
- Satin ribbon (you can choose any size);
- Paints made from acrylic;
- An ordinary blank sheet of white paper;
- Sequins.
Preparation of materials
Felt is easy to work with, and it also has a pleasant texture and exudes warmth, which is so lacking on cold winter evenings. A felt toy, made with your own hands, wherever it is placed, on the tree, under the tree, on a New Year's wreath, gives coziness to the home. It looks harmonious next to the fireplace or with candles.
For work we will need:
- felt - more red, a little white;
- leatherette - you can take it from an old bag or wallet;
- satin ribbon - a narrow one will do;
- matchboxes - 6 pcs;
- cotton pads;
- cocktail straws;
- feathers;
- skewers;
- sequins;
- acrylic paints;
- glue gun;
- a white sheet of paper—landscape or notebook paper will do.
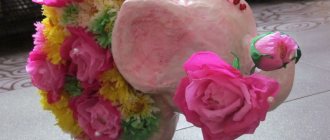
Nutcracker from a juice box. Nutcracker – gift box
Well, there are only a few days left until the New Year. But there is still time for inventions, for crafts, and for joy. A gift in a package that you can also play with is double pleasure for a child. And if it is made with love - not by the hands of a Chinese worker, but by one’s own mother or father - it brings incomparable joy. And although I made this box not for a child, but for a fully grown young lady with a hint of a meeting with an enchanted prince, I also received some special pleasure - apparently, the reason for this was the most New Year’s fairy tale character, the Nutcracker, and a cartoon from childhood, and a wonderful music, and ballet and, in general, a miracle that you want to believe in... It’s possible to build something like this in 2 evenings. And it was made literally from nothing... For this packaging, I basically used only what is usually thrown away. Well, I always have glue. 3 types of glue were used here: PVA, universal transparent and the same transparent “liquid nails”. And here’s what was used: 1. The box is the right size. (If you don’t have one, you can easily build it yourself from cardboard.) 2. Thick rolls of toilet paper and foil: the thicker ones for the legs, the thinner ones for the arms.3. Metallic candy wrappers.4. Corrugated paper from a candy box (you can use regular corrugated paper, padding polyester, thin foam rubber, etc.)5. From the same candy box, a plastic golden backing for candies (patterned squares) was very useful for decoration.6. Packing tape and rhinestones also came in handy. The fluff and feathers for the edging of the hat are former handles from a gift bag.7. In addition, during the work I needed pieces of cardboard, two champagne corks for the hands and two glass pebbles for the eyes.
Of course, you can use anything for decoration: wrapping paper, wallpaper scraps, and scraps, but my task was to use the waste material I had on hand. On the first evening, I “molded” the structure - the body of the Nutcracker, cut out the details, and then covered everything necessary with paper decor. The next day, all I had to do was collect everything and secure the small things. But first, I decided on the design - the character of a Soviet cartoon was taken as the basis - the Nutcracker is rectangular with arms, legs and a hat. Moreover, the legs can be made simpler - glue a smaller box (or boxes), but I was confused about legs made from rolls.
To do this, it was necessary to make two round holes in the bottom, and make cuts on the roll and bend it back. Then, having coated them with glue, insert them into the hole from the inside of the box, press and let the glue set. I reinforced the bottom with another piece of cardboard for strength. I covered the box and legs with crumpled candy wrappers using PVA. Then she decorated it with braid, plastic parts from a candy box and simple rhinestones.
I did the same with the hands and the hat - I pasted it over and decorated it. The face and mouth are cut out pieces of cardboard, the applique is made of self-adhesive paper, and the eyes are glass pieces and are glued with transparent universal glue. The details of the boots are made of cardboard with triangular pieces of foam glued on, and on top there is a black velvet material (a former cover from some purchase.) At this stage, the first evening of needlework ended. Oh, yes - more letters! I rolled the corrugated paper into a tube and secured the end with universal glue. Then I will cut them into pieces of the desired length.
On the second evening, assembly began - using liquid nails: we glued the face, mouth, curls, hands to the box... I also secured the face along the edge using a stapler (it won’t be visible under the hat). I covered the holes in the pipe with shoulder straps - these are cardboard circles with golden paint. And on top there are plastic patterned details (from the candy backing in the box), rhinestones and fringe. Now let's glue on the hat and the details of the boots... Yes, I wanted to trim the hat with braid, but I remembered the bag with feathers - and here it is! And varnish with glitter completed the New Year's brilliant pretentiousness)) “Hair” can be made from any material or corrugated paper by constructing a sort of rectangular bag, which must be placed inside and secured with glue to the bottom and in the corners. Well, at the top - glue it from the inside around the perimeter of the box - you will get a bag, the ends of which hang down and are tied with a ribbon. I glued the ribbon to the “back”, leaving the ends for tying. From tin from cans - you can cut a sabre, bending the ends with pliers . But for children, it’s better to cut it out of cardboard and cover it with metallic paper (or paint it with paint). I made the hands from champagne corks painted with gold paint - I inserted them into tubes with glue.
Ugh! Well, everything seems to be... even the feet of the boots are covered...
...can be loaded with gifts and placed under the Christmas tree.
DIY dress for a doll from the fairy tale about the Nutcracker
If you are planning a puppet show, then create the image of Marie by making this character out of a doll.
Then you need to sew a dress for the doll. To make it fit her figure, you can make a finish in the upper part, which is called puffs. Sew puffy puff sleeves with cuffs.
For the skirt, cut out a rectangle, sew it on the side and gather it at the top. Sew this skirt to the top of the dress.
Having sewn a fluffy petticoat, you will also put it on the doll. All that remains is to do her hair and put on her shoes. This is how Marie will turn out from the Nutcracker fairy tale.
Now look at how a negative character is created. You can even use unnecessary tights for this.
DIY Mouse King. Making the “Mouse King” toy from the fairy tale “The Nutcracker”
Irina Zimakova Making the “Mouse King” toy from the fairy tale “The Nutcracker”
Dear colleagues, I would like to present to your attention a master class on making the “Mouse King” toy from the fairy tale “The Nutcracker”. During the production of a musical based on this fairy tale, we needed the “Mouse King”. And I decided to make it myself. “The King” we needed was bright, menacing, large and mobile, since during the musical we actively used him.
For the body, I used a two-liter plastic bottle, the bottom of which was cut off (so that you could insert your hand and control the toy). I covered the body with dark fabric, and stuffed padding polyester between the fabric and the bottle - for the solidity of the “king.”
For all visible parts of the body (head, paws, ears, tail) I used thin gray wool blend fabric. To make the heads and ears, I made cardboard bases onto which I stretched fabric.
The king’s paws were stuffed with padding polyester and the folds and “fingers” were tied with thread; the tail was also stuffed with padding polyester.
Heads, ears, paws and tail were sewn to the body.
After the “figure” was ready, I started dressing the “king”. A red royal robe, a black silk cloak, a medallion hung on her chest - a sign of royal power, a crown on her head, and a “royal staff” in her paws.
The final touch was to attach eyes to each head (I bought ready-made ones in a craft store) and noses (I made them myself, all using hot glue.
This is how the fairy-tale character turned out.