Home / Ceiling design / Design solutions / How to make an imitation of a brick wall out of cardboard?
Bricks in the interior have always looked good. Especially if the design of the entire room matches a similar finish. Typically, for this design, panels with a pattern and texture of stone are selected, or the existing wall masonry is cleaned. However, both require time and money. There is another, faster and very inexpensive way to give the room an interesting look - an imitation brick wall made of cardboard. Simple and fast.
What is needed for this
Of course, it won’t be possible to make the wall look exactly like real masonry - the materials are not the same. However, the panels are also not always similar to real bricks and are nevertheless popular. Therefore, we will make the most similar design, which will require:
- Cardboard is corrugated, thick, used for boxes and durable packaging.
- PVA glue.
- Brush for applying glue.
- The napkins are of high quality, with a clearly visible texture.
- Heavy wallpaper glue or glue gun with sticks.
- Ruler, pencil and sharp knife - create bricks.
- Varnish to decorate the surface with a finishing layer.
Having prepared the necessary things from the list, you can begin to figure out how to create an imitation brick wall from cardboard.
Kinds
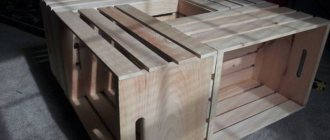
In a city apartment, where, due to the lack of chimneys and reliable heat-insulating ceilings, it is impossible to install a fully functional wood-burning fireplace, it is possible to design its decorative model. When using inexpensive materials at hand, the work will not require extensive construction skills and expensive tools. You can build a fireplace made of cardboard with your own hands in a few hours, and it looks no worse than the real thing.
You can also involve children in the work; for them this activity will be not only interesting, but also educational.
There are several models depending on their location in the room:
- wall-mounted – located near the wall and protrudes its façade for some distance;
- built-in – mounted directly into the wall;
- corner - occupies a corner of the room;
- island - does not adhere to the wall and is most often installed in the center of the room.
False fireplaces made of cardboard are most often made into wall or corner fireplaces, because they are not intended for heating a house, but have a decorative function. This dummy can also be used as furniture: shelves can be installed in a niche, and the upper tabletop will act as a shelf for small items.
According to their external design, there can be a huge number of types of false fireplaces: in English, classic, rustic style, with an arched or rectangular firebox, with a dummy wood burner or oven. When designing, it is important to consider that this detail is combined with the surrounding interior.
The simplest option that children can make is a small dummy without a chimney with a rectangular portal and firebox. Outwardly, it will resemble a large letter P. In the future, this decorative device can be supplemented with other elements and make a more complex decor.
It is possible to assemble a model of a classic English fireplace from cardboard. It is distinguished by an open firebox in the shape of a trapezoid and a straight chimney that goes into the ceiling. Inside the combustion chamber, the walls are located at a slight angle of about 20°. The English version is decorated with decor that imitates the finishing of limestone, rubble or brick.
A model imitating a stove for a bathhouse or a rural style should have an arch-shaped firebox. Making a shaped hole out of cardboard is not difficult. And it is best to decorate the outside with cardboard or foam stucco in the form of bricks or cobblestones
Main details
The most important thing in all the work is to make the “right” bricks. They must be the right size. There are many varieties of this material, but most often in masonry you can see the following dimensions: 250 by 120 by 95 millimeters and 228 by 138 by 65. There is also a dimension that is less common: 250 by 120 by 88 millimeters.
In addition to choosing the dimensions, you still have to decide which side the brick will lie in the masonry - this is also done in different ways and you need to choose the option that suits you. Having decided on this, a template is drawn on the cardboard according to which the parts will be cut. When the marking is applied, everything is cut along it and put aside for now. Some of the parts will have to be cut in half to imitate halves of stones.
Cereal box fireplace
To give your family comfort and warmth on cold winter evenings, as well as create a festive atmosphere, you can make a decorative fireplace from boxes with your own hands for the New Year. You can use empty boxes of cereal, pasta or other products as a basis. It is advisable that they be the same size, because they will be used as bricks.
Materials and tools:
- Boxes.
- Glue or double-sided tape.
- Brick wallpaper and wallpaper paste.
- Scissors.
- Ruler and pencil.
- Glue brush.
- Decorative decorations for the fireplace.
To make the design accurate, it is necessary to make a preliminary calculation. To do this, estimate the approximate width, height and depth of the fireplace. It should be in harmony with the interior, and at the same time not seem too voluminous. It is advisable to draw a diagram of the fireplace on paper. When specifying dimensions, you should focus on the dimensions of the boxes used.
First, you need to mark the dimensions of the fireplace on the wall using masking tape. Preparing the box. These could be boxes of milk, juice, cereal or cereal. It is recommended to use boxes of the same size, so start assembling them early. Seal all boxes using glue or tape.
After that, you need to lay out the fireplace from the boxes, connecting them together using good glue or double-sided tape. After which you can proceed to the most important stage - finishing. To do this, you can cover the fireplace with a self-adhesive film in the form of brickwork or use regular wallpaper and special glue. If there is no beautiful film or wallpaper, you can cover the frame with white paper or whatman paper, and then use paint to depict brickwork.
The finished fireplace must be decorated with New Year's accessories. You can put a garland in the middle and turn it on. Hang socks for gifts on top, and place a figurine of Father Frost and the Snow Maiden on the mantelpiece. You can decorate it with rain around the perimeter.
A New Year's fireplace made from boxes is an original decoration that takes only a few hours to make. You can use it not only on the eve of the winter holidays, but also on an ongoing basis.
Texture
The wall still doesn't look like brick at all. This is just cardboard glued to the wall and napkins will be useful to give it the desired texture. PVA glue is applied with a brush on top of the glued cardboard. The napkins need to be thoroughly crumpled in your hands to create many folds. Pressing them tightly onto the cardboard, PVA is coated on top of everything again. Gaps simulating mortar are pressed through with your fingers or the handle of a brush. When the PVA dries, the most creative part remains - coloring.
How to make brickwork from egg trays
So, how to make imitation brickwork from egg trays? Everything is very simple, and after getting acquainted with the master class, you will be convinced of this.
Step 1. First you need to prepare papier-mâché. To do this, take egg trays and chop them into small pieces with scissors. The less, the better - this way the paper will get wet faster.
Let's start preparing papier-mâché
Step 2. Next, fill the paper in the container with hot water. If you fill it with cold water, the paper will also get wet, but the process will take longer. It is best to leave the paper in water for several hours.
Fill the paper with water
Step 3. While the paper is soaking, draw a sample of brickwork on a piece of polyethylene using a marker and ruler. Choose the optimal brick size for you - for example 7*20 cm.
Brickwork sample
Step 4. When the paper is wet, add plaster to it. Calculating the amount is simple: for three egg trays for ten eggs, use two to three tablespoons of gypsum (heaped).
Soaked papier-mâché paper
Adding gypsum
Step 5. Mix the mixture well so that the gypsum spreads throughout the paper. Watch the consistency - if there is too much water, add a little more gypsum.
Mix the mixture well
Step 6. For the convenience of further work, secure the polyethylene on the table with tape. Then it will not move on the table, and it will be easier to form bricks.
Polyethylene is perfectly fixed with tape
Step 7. Spread the resulting mass on the surface of the polyethylene in.
Future, not yet formed bricks
Step 8. Now use a spatula to form neat bricks.
Forming bricks with a spatula
Step 9. Remove excess water that will flow out of the mass onto the polyethylene with a regular paper napkin.
Removing excess water
Step 10. Once the bricks are formed, leave them to dry.
Before further work, the bricks must be thoroughly dried.
Step 11. The dried bricks need to be covered with finishing putty. Dilute it according to the instructions.
We dilute the putty according to the instructions
Step 12: Using a regular brush, coat the outside of the bricks with putty. Leave them alone until dry.
Bricks coated with putty
Step 13. Cover the finished bricks with acrylic paint. You can just use white, or you can imitate any color of brick. When the paint layer has dried, the bricks can be fixed on the wall in the chosen location.
Finished bricks can be coated with paint
On a note! Papier-mâché can be used to imitate not only brickwork, but also rockwork. You can find out how to do this by watching the video below.
Painting and varnish
The process is more creative than complicated—be sure to use multiple shades of paint. For red bricks, brown, red and black are suitable. For white - just white paint, slightly diluted with black to a grayish tint. The solution turns gray or dark gray. The result will depend on your efforts and the talent of the artist. After the paint has dried, you can coat the surface with varnish.
Step-by-step algorithm of actions
Drawing the wall
The easiest way is along a long rail. Naturally, with exact observance of the distances between the horizontal lines (the bricks have the same dimensions). You can focus on the standard. The thickness of single – 6.5, one and a half – 8.8, double – 13.8 (cm).
Application of imitation coating
There are many techniques, so we will limit ourselves to only the most common ones, based on the fact that the work is done independently.
Using adhesive tape (masking tape)
Before starting work, the wall must be painted in the color that should be at the seams. Typically gray or white (or something in between). The fact is that depending on the components and their ratio in the mixture, the dried solution takes on a different shade. Next, horizontal seams are marked (using tape). After this, it is easy to highlight individual bricks, simulating masonry with shifting products in adjacent rows (pieces of tape are attached vertically).
Peculiarity
: Since the tape will then have to be removed, there should be free ends left, sufficient to grab them with your fingers. After this, the prepared mixture is applied to the wall.
Important
: the consistency of the solution should be such that it does not flow down the wall. And the layer should be applied minimally, no more than 2 - 3 mm.
Option #1
- based on gypsum. But this material hardens quickly. Therefore, it is necessary to introduce a so-called “moderator” into the mixture. Its use leads to the fact that the layer of gypsum mortar does not harden for 20 to 40 minutes. Otherwise, it will simply not be possible to remove the tape to mark the masonry seams.
Option No. 2
– plaster mixture + tile adhesive (1 to 1). In this case, only the smallest fractions of sand are used in the preparation process. This means that you will have to purchase it specially, since the usual one (from a river or from a quarry), even well sifted, will not work.
Flaws
: If the object is large, covering the wall with tape will take a lot of time and material. If the solution hardens too quickly, it can lead to problems in removing the tape from it in order to preserve the appearance of the design.
Stenciled
The method is more complicated, since you will have to prepare the grate. It is made from a sheet of plastic or rubber, knocking out rectangles in it.
In addition, it is advisable to create a template from thin slats, the undoubted advantages of which are:
- the ability to work with solutions that harden quickly, since they have time to “set” and dry;
- a large selection of materials and flexibility in carrying out any set of works. The shape of the structure fully repeats the elements already discussed;
- the ability to create a template directly on the wall and an image of any shape;
- naturalness and authenticity of the appearance of the resulting brickwork.
Paper bas-relief
Performed as stucco or panel.
There are two options:
- the composition is attached directly to the surface and it is given the desired shape;
- a canvas is used as a base and, together with the finished product, it is placed as a large painting
Bas-reliefs of plant themes are very popular. Previously prepared flowers and leaves are attached to a plane, and then connected with stems, etc. As a rule, plastic or live plants are used as a basis. For example, the composition is applied to the sheet, right down to the contours, and after drying it is processed and attached. Use a cutter or spatula to create the desired image.
Stucco molding on top of bricks or other material is second only to the gypsum version. But with decent performance, only the master will notice the difference.
It happens that the composition partly consists of a thick mass, and sometimes entirely of paper parts, which under the decorating layers look like a real work of art.