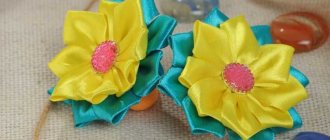
Throughout their lives, girls regularly face the need to do a festive hairstyle for September 1, graduation, wedding or New Year's corporate party. Scallops, hairpins or headbands decorated with your own hands will help you create an original styling. You can create them from beads, satin and lace, and wire. Before you start creating, you should carefully think through the idea.
What can you make jewelry from?
There are too many ideas and types of hair decorations to list. Everyone's creativity, imagination and decorative elements are different. But the main materials are:
- beads;
- beads;
- rhinestones;
- ribbons;
- laces;
- ropes;
- shells;
- buttons;
- glitter;
- decorative figures made of plywood or metal;
- polymer clay;
- foamiran;
- knitted elements.
A wire usually 0.4 mm thick, a glue gun or a thread with a needle will help to connect these materials.
Such materials are easy to find in sewing and online stores for creativity and handicrafts, or in joint purchases. If all this is already at hand, it’s worth reading the instructions on how to make the decoration.
Decorate your head in oriental style or create your own jewelry
The concept of beauty combines the harmony of the inner world and external attractiveness. In different eras, each people had their own ideas about beauty and its beauty. For example, in Africa, plumpness and a very long neck were considered the standard of female beauty. Excessive thinness told the groom about poverty and sickness.
The standard of female beauty in Africa
In Europe, the female ideal has changed noticeably at different times from curvaceous, appetizing forms, crinolines and corsets, to modern mini and graceful forms.
European beauty
In the East, the canons of beauty, as a rule, were preserved for centuries. The combination of elegance, brightness, miniature and brilliance is a traditional axiom of oriental beauty, which is necessarily embodied in jewelry.
Oriental beauty and grace
Branches made of beads and wire
This romantic accessory is suitable for the office, for a summer walk and even for a wedding.
You will need:
- white beads;
- 11 rhinestones 7x15 mm in the form of petals of the same color;
- wire;
- nippers or scissors.
Technique:
- Cut a wire 1.2 m long and bend it. Make a small loop on the bend, bending the sides of the wire crosswise. At the intersection of the wire, twist it 5 times.
- A rhinestone is strung on one end of the wire, face up. That is, the wire comes in from the top and comes out from the bottom on the other side of the wire. The rhinestone needs to be moved back to the point of twisting and left there about 0.5 mm.
- Thread the end of the wire through the first hole again (the end of the wire comes out from the top). Twist the wire around the rhinestone.
- Twist 2 sides of the wire 3 times.
- Take the other side and repeat the same with a new rhinestone.
- Scroll 2 sides 5-6 times.
- To the side where the first rhinestone was put on, take 1 bead and bend the wire 7 mm from the main branch. It is better to twist the bead with pliers, pressing lightly.
- Roll 2 sides again 5-6 times.
- Place the white bead on the other side and do the same.
- Alternate rhinestones and beads, one on each side. After putting on 11 rhinestones, scroll the base so that it becomes a straight line. On the 11th rhinestone there will be the beginning of a branch with leaves, so direct the rest of the rhinestones and beads in its direction.
Attention! To make a decoration at home according to your own design, it is better to draw it on paper.
How to make a tika on your head with your own hands?
Over the last period of time, such head decoration has almost come to the fore in terms of head accessories, second only to headbands and crowns.
Tika on the head is, of course, exclusively a spring-summer-autumn accessory. I think hardly anyone would wear a tika under a fur hat in winter.
Making your own tika is not difficult at all. Let's look at two different hair tiki options.
The first tick is classic. In order to make it we will need the following materials:
- Nylon fishing line 0.3 mm thick;
- Czech beads No. 10 (two colors);
- Lots of beads (various in color, size and texture);
- Metal caps for beads;
- Metal pendant;
- Scissors.
Let's get started! Let's measure a small piece of fishing line, about 60 cm long. First we will make the base of the tiki. Everything is very simple, we start stringing the beads in the order that you like. There should be enough beads for the string of beads to wrap around your head.
We will place the metal element in the center. After all the beads are in place, tie the fishing line into several knots. The result is a tiki base.
Now we will weave the “middle”. We will thread a fishing line into the metal element and string beads on it again. This part of the tiki will be located on the top of the head, so it will be significantly shorter than the base of the tika. Measure according to the volume of your head.
We tie the line of the main part of the tiki and the upper part into a knot.
That's all. Nothing complicated. Tika head!
Wear this accessory with a light summer dress. This type of hair tiki looks very original with a Greek hairstyle.
Let's consider another option for tiki on the head. It's even simpler.
- Metal connector;
- Beads to your taste;
- Metal tripods;
- Chain;
- One earring hook;
- Round nose pliers.
First, let's prepare our beads. Let's connect them in the required order using metal tripods. Make sure that the rings on the tripods are even and, if possible, identical.
The beads are ready. Now, using pliers, we attach the beads to the metal connector.
The tiki base is ready. All that remains is to attach a chain to keep the tik on the head on the hair. We attach one end of the chain to the connector, and attach the earring to the other.
Headband made of twine and shells
The marine theme looks unusual. Who doesn't want to be a little mermaid Ariel when coming to the sea?
You will need:
- metal rim;
- leg-split;
- shells;
- pearls;
- golden rope;
- glue gun
Technique:
- Wrap the twine around the headband, securing with glue.
- Attach pieces of twine at equal distances from each other.
- Make a loose weave from pieces of twine: throw the rope over the rim and pull it through the resulting loop. Do not tighten, pass the twines through the free rings nearby.
- Attach the largest shell to the center of the weaving. Place a little less nearby. Attach small shells along the edges.
- Decorate with pearls and wrap with golden rope.
Ribbon bow with elastic band
You will need:
- tape 2.5 cm wide and 34 cm long;
- narrow tape;
- needle and thread to match the wide ribbon;
- a narrow hair tie.
Technique:
- Bend the wide ribbon in half and find the center.
- Hold the ribbon with the wrong side facing you and bring one end over the top to the crease. It turns out to be a loop.
- Make a loop with the other end: take it and pass it through the bottom to the crease. It should look like an inverted 8.
- The edge of one side is brought to the center and placed so that the front side of the tape is facing down. Do the same with the other side. If you turn the bow, then the ribbon should go diagonally from the front side.
- Using a thread and a needle, stitch the center from bottom to top. Do not cut the thread, wrap it in a bow and tighten it.
- Attach a bow to the elastic band using a glue gun.
- Tie a bow with a narrow ribbon and connect with a glue gun.
Leather triangle headband
The look of a wild Amazon will be completed with a headband made of leather triangles. Stylish, beautiful and unusual!
You will need:
- leather in 3 colors (can be brown, beige, white);
- paper;
- scissors;
- pencil.
Note!
- Macrame: diagrams, interesting projects and detailed descriptions of making crafts
- Crochet amigurumi - examples of how to make a beautiful toy with your own hands (75 photos)
- Coffee topiary: step-by-step master class on how to make a small decorative tree from coffee beans
Technique:
- Draw templates on paper: a rhombus with sides of 5 cm and triangles of different sizes.
- Cut out triangles of 2 pieces of the same size and 1 piece with a beige rhombus.
- Place a rhombus and symmetrically place the triangles on the sides of the same color and size, overlapping each other.
- Secure them with hot glue.
- Cut 2 thin strips from light leather and 1 from brown leather, about 5 mm thick. Fasten the strips together so that the brown one is in the middle, and the light ones cross on the cross at an angle on the edge.
- Carefully braid the stripes into a reverse braid.
- Attach the end of the braid to the outer triangle at the edge.
- Make the same braid on the other side.
- Cut 1 strip at a time and attach it to the braid with glue - these will be the ties. Tie a knot at the attachment point.
If a themed party, wedding or celebration is planned, the image can be thought out in detail and effectively stand out from the crowd. The main thing is to approach this creatively.
How to make a tika on your head with your own hands?
Over the last period of time, such head decoration has almost come to the fore in terms of head accessories, second only to headbands and crowns.
Tika on the head is, of course, exclusively a spring-summer-autumn accessory. I think hardly anyone would wear a tika under a fur hat in winter.
Making your own tika is not difficult at all. Let's look at two different hair tiki options.
The first tick is classic. In order to make it we will need the following materials:
- Nylon fishing line 0.3 mm thick;
- Czech beads No. 10 (two colors);
- Lots of beads (various in color, size and texture);
- Metal caps for beads;
- Metal pendant;
- Scissors.
Let's get started! Let's measure a small piece of fishing line, about 60 cm long. First we will make the base of the tiki. Everything is very simple, we start stringing the beads in the order that you like. There should be enough beads for the string of beads to wrap around your head.
We will place the metal element in the center. After all the beads are in place, tie the fishing line into several knots. The result is a tiki base.
Now we will weave the “middle”. We will thread a fishing line into the metal element and string beads on it again. This part of the tiki will be located on the top of the head, so it will be significantly shorter than the base of the tika. Measure according to the volume of your head.
We tie the line of the main part of the tiki and the upper part into a knot.
That's all. Nothing complicated. Tika head!
Wear this accessory with a light summer dress. This type of hair tiki looks very original with a Greek hairstyle.
Let's consider another option for tiki on the head. It's even simpler.
- Metal connector;
- Beads to your taste;
- Metal tripods;
- Chain;
- One earring hook;
- Round nose pliers.
First, let's prepare our beads. Let's connect them in the required order using metal tripods. Make sure that the rings on the tripods are even and, if possible, identical.
The beads are ready. Now, using pliers, we attach the beads to the metal connector.
The tiki base is ready. All that remains is to attach a chain to keep the tik on the head on the hair. We attach one end of the chain to the connector, and attach the earring to the other.
Such a seemingly inconspicuous accessory will dilute the hairstyle and bring a holiday to everyday flowing hair.
Experiment, create! As you can see, creating even the simplest head decorations with your own hands is not at all difficult. Good luck! Ask questions and if you have not yet subscribed to blog updates, subscribe and be the first to know about all updates. Bye!
Source
