Embroidery, as a decorative element, has appeared since ancient times. Even before the advent of various prints, with the help of embroidery, craftsmen created incredible masterpieces on fabric using threads and needles.
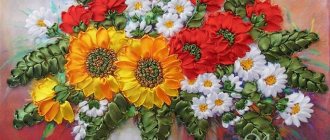
Today, embroidery is not just an element that decorates clothes. This is a masterpiece that can be used to decorate textiles in your home. Using a needle and thread, as well as the chosen embroidery technique, you can create a whole picture.
Looking through some of the works, it is difficult to imagine that they were created with a needle and thread. After all, they look so realistic.
Amazing expanse of landscape.
Looking at the diagrams and finished works of experienced craftswomen, a novice embroiderer may decide that such work is too complex. Often the desire disappears as soon as the beginner suffers his first failure. However, with patience and diligence, you can get a result that you yourself did not expect.
Main types of satin stitches
First of all, you should learn how to perform basic types of stitches. It should be taken into account that each embroidery method has a number of characteristic features.
Straight stitch
This method is most often used when making three-dimensional parts and for processing the edges of the picture. Stitches are made in sizes ranging from 1 to 10 mm. The direction is not of fundamental importance.
Split stitch
With its help, the contours of patterns are most often drawn out and the drawing is filled. When using this interesting technique, the first stitch is made from the front to the back. Then the needle is brought out in the center of the previous seam and thereby separates it.
Loop stitch
Embroidery technology involves stitching from left to right, moving the needle from top to bottom. The thread is brought to the face at the bottom of the stitch. It is sewn in with a needle and the thread is pulled until a loop is formed.
Stem seam
A seam consists of stitches that overlap one another. In the old days, it was used to mainly create plant motifs.
Video: Stem stitch
Holbein seam
As a rule, it is used in the embroidery process using the blackwork technique. The seam is named after the artist from Germany who presented it in his paintings.
Video: Master class on satin stitch embroidery
Brazilian handicraft
For this type of needlework, different stitches are used. This helps create a variety of patterns. In general, Brazilian embroidery technique is one of the most popular. A mixture of the following styles is used here:
- rococo;
- tatting;
- Romanian brid.
The main differences between this embroidery technique and similar ones are quite significant. In particular, these include the following:
For stitching, knots are made at the beginning and at the end of the thread; the tails should be left outside the knots.- For this embroidery, you can use a hoop, or you can do without it. It is important to control the knots located on the wrong side while working. This is necessary to prevent them from unraveling knots or stitching.
- For the job you will need a suitable needle - long, with a blunt end and a small eye.
Satin stitches
Regardless of whether embroidery will be done with floss, wool or silk threads, you need to understand the intricacies of the most popular options. After this, it will be possible to begin transferring simple patterns onto fabric and creating real masterpieces.
Seam “forward with a needle”
This is one of the simplest embroidery techniques. The main stitches end up looking the same on both sides. Most often, they are used to create straight contours. For example, this method is used when using satin stitch floral patterns on clothes.
With the help of this seam, the contours of the pattern are formed, moving the needle from right to left, but exclusively forward, performing several stitches at once.
Back seam with needle
They begin to embroider using the following technology:
- The needle is brought out to the front part.
- The second puncture is made a little to the right than the first one. This distance should be equal to the length of the stitch.
- After receiving the first front stroke, the needle is brought out to the wrong side.
- The thread is pulled slightly to the left of the first puncture at exactly the same distance on the face.
- Now they start playing from left to right and make a puncture in the place where the previous stitch ended.
- Again, transfer the thread to the wrong side and transfer it to the face a little to the left of where the second stroke is located.
Stem seam
The stem stitch is used to create pictures on cotton fabric and linen. In this case, the stitches fit tightly together. As a rule, small elements are embroidered using a stem stitch.
This is a fairly simple embroidery method that involves stitching from right to left.
Video: Satin embroidery for beginners
Chain seam
Chain stitches are used to embroider on various types of fabric. They can be used to create letters, straight lines and various patterns. It is recommended to use linen, cotton or silk threads.
When making seams, movements are recommended to be made from top to bottom. The needle is brought to the front side, a loop is formed and returned to the original point. There is no need to tighten this loop too much. This way it turns out to lead one loop into another.
Goat seam
Decorative goat stitches are often used when performing work. They are made by crossing long stitches. Embroidery begins from the bottom. Initially, the fabric is pierced on the left, picking up three threads on the needle. Then the needle is pulled towards itself, the thread thrown back, and a puncture is made diagonally. Most often, this seam is used when decorating the edges of a picture.
Frequent goat stitch
Also done using crossed long stitches. True, in this case they become more frequent.
French knot stitch
Seams in this technique are used to create bright accents or, for example, to decorate a flower in the center. Even novice needlewomen should try to embroider it themselves. Initially, the thread is brought to the front part and circled twice around the needle. Then, holding the previously wound thread, you should insert the needle as close as possible to the place where it came out.
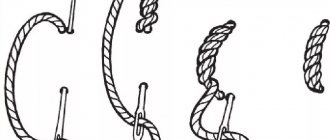
Seam - rococo stitch
In order to master this technique, you only need to study the instructions in the picture.
Embroidery highlights
It will be useful for novice needlewomen to look at an example of embroidery “from and to” in order to clearly see all the stages, what goes behind what, and how some touches that are invisible at first glance are performed. An excellent video for beginners was prepared by Malina_GM. You can see the entire process of creating embroidery (flower) from the very beginning to the end.
Creating an outline
The general look of embroidery begins with an outline and is often used on clothing. To do this, use a back stitch with a needle. It is also called backstitch. If the embroidered fabric has blurry contours, then the seam will give it a clear outline and the picture will “appear.”
Important : When creating the outline of elements, it is advisable to make short stitches so that the embroidery does not spoil the appearance of the item.
Stitches that are not securely fixed may become deformed during ironing and washing.
Using Small Circuits
When taking your first steps in work, you need to remember, so as not to reduce your efforts to zero, you need to move towards large-scale work gradually. Small diagrams with clear explanations of scale and indicating colors and shades will be useful experience on the way to larger works.
Combination of shades
Even well-executed embroidery will not look beautiful if the embroiderer chooses the wrong shades of colors. Painstaking work will not be crowned with success.
Even monochromatic work can look impressive.
In artistic embroidery, color is very important. For a winning color combination, it is important to know that all natural colors are divided into:
- achromatic - white, gray, black;
- chromatic, which included all other colors and the entire spectrum of existing shades.
As in many ways, one’s own artistic taste and natural flair play the most important role in the choice of colors and shades.
Interesting : The gray scale, when calculated, amounted to 256 shades.
Types of surface
There are many varieties of smooth surface. Each embroidery method has a number of distinctive features. Regardless of whether such work is embroidered with colored or plain threads, in the photo they look excellent in any case.
Simple stitch
It is embroidered with dense strokes that lie separately from one another. A distinctive feature of this technique is that the pattern when used looks the same on both the back and the outside. Even a novice needlewoman can decorate the product in this way.
Flat surface
Floral ornaments, narrow and even wide patterns are most often embroidered in this way. Initially, the needle is drawn from the inside out across the entire width of the element, and then brought out onto the face. A flat stitch is made by overlapping stitches one on top of the other. They can be either oblique or straight.
Russian (Vladimir) smooth surface
In the case of the Vladimir smooth surface, the work should be carried out following certain rules. Using a thin needle, the ornament or design is embroidered only strictly along the contour. Small stitches are made exclusively on the inside, and long stitches are made on the front side. When choosing threads, preference is given to only one color.
Chinese smooth surface
Chinese embroidery has become extremely popular lately. True, during the work you also need to take into account a number of nuances. For example, in the case of Chinese satin stitch, transparent silk or black satin fabric is used.
Exclusively Chinese natural and plant motifs should be used. For example, sakura, birds or fish. True, only experienced craftswomen will be able to work on the finest material in such a complex technique. Beginner embroiderers should first understand in the smallest detail the simpler variations of needlework.
Artistic colored surface
To create smooth transitions of colors and obtain an extraordinary shadow effect, artistic satin stitch is used. This technique also has a number of features.
To embroider with a smooth transition of colors, to set shadows and shades, a tonal satin stitch technique is used, called artistic colored satin stitch. When using colored artistic embroidery, the stitches are made without covering and exclusively oblique. To perform the shadow technique, only silk threads or floss are used.
Artistic color embroidery involves using dark colors in the center and lighter colors towards the edge. This way it is possible to provide a beautiful transition and give the image volume.
When performing each row of a separate tone, alternating long and short stitches are performed.
Choosing colors and additional tips
Another point is the combination of colors in the created picture. There are white and colored surfaces. The choice of color significantly affects a person’s well-being, emotions and mood. Even psychologists note the effect of certain color shades on people. Therefore, it is important to first decide what emotions the embroidered picture should evoke and whether the selected colors will be appropriate for the plot. 1. To obtain a pattern with a smooth surface, it is important to apply the stitches in parallel.
2.If you need to complete the work in a short time, it is better to choose a thicker thread or fold it 2-3 times.
3. It is advisable not to use too long seams. Otherwise, the work will turn out sloppy. Therefore, it is better to divide the details of the design into sectors and embroider each one separately or direct it in different directions.
4. It is also allowed to use similar color shades. The ideal way to fill a large detail is with artistic satin stitch. Line and stem stitches are best suited for emphasizing the edges of the design. It should be noted that the process of embroidery itself has a calming effect on a person. Tactile sensations contribute to the mood for harmonious relationships with the outside world. Therefore, this is not only useful, but also an enjoyable activity.
Ways to secure a thread
Embroidery always begins by securing the working thread. These actions are also performed upon completion of the work. Regardless of the thickness of the threads, such manipulations can be performed in several ways.
Method 1, at the beginning of embroidery
From the inside out, one seam is made in such a way that a small tip of woolen threads or others that are used during the work remains. Then make a movement across it and hide the remaining tip. This way the surface will be smooth and the tip will be securely fixed.
On the wrong side, make a stitch so that a small tail remains,
Method 2, fastening in embroidery with two threads
If the needlewoman prefers to take two threads of floss at once, then in this case the following instructions will help her:
- A thread folded in half is threaded into the eye of the needle.
- Several threads of fabric are caught on the same needle. Just 2 or 3 is enough.
- Pull out the thread and thread the resulting loop through the needle.
- Tighten it as tightly as possible.
After completing these steps, the main pattern can be executed.
Method 3, finishing the job and securing the thread
When working with special or ordinary threads, at the final stage you need to perform the following steps:
- Pull the thread under the already made seams.
- Trim the tip with scissors.
If the thread of the desired color runs out, it can be closed with a regular seam. The main thing is to do it repeatedly.
Technique for transferring patterns to fabric
If the pattern is selected from a magazine, it can be transferred to fabric using carbon paper or transparent paper - tracing paper. If tracing paper is used for this, it must be placed on top of the drawing, then traced around the outline.
You can use carbon paper. It is placed on a clean sheet with the painted side, then the selected design is placed on top. The outline of the drawing is outlined with a pencil. This must be done very carefully so that the paper does not move, as this may distort the image.
Transferring a drawing using carbon paper
Schemes of patterns for satin stitch embroidery
Regardless of whether the images are embroidered with small or large elements, to successfully complete this work you will need diagrams. This way you will be able to understand exactly how a flower petal or the chosen ornament should look.
Embroidery in Italian style
This method of embroidery is called Trampunto and looks very extravagant. Here there is a mixture of embroidery elements and stitches. This technique is used to finish products made from scraps that have two layers. This type of embroidery is done with a thin thread, which has a color close to the main shade of the fabric.
For this type of needlework, two layers of fabric are used, in some cases they are insulated with batting. This will help make the creation three-dimensional. Using a “forward needle” stitch with a small step, an outline of the future pattern is made. This technique is suitable for creating bedspreads, pillowcases, and napkins. In other words, you can use it to decorate any home textile.
In general, volumetric embroidery is an opportunity to unleash your creative potential and decorate your own interior. Finished paintings and products can be given to friends and family; they will certainly appreciate the created decoration. Mastering the technique is simple and anyone can do it. Even a beginner in embroidery, if he follows the algorithm and tips, will be able to create a real masterpiece.
Satin stitch for beginners step by step
The following recommendations will help novice needlewomen perform delicate work that requires special care:
- To keep thread consumption to a minimum, regardless of the thickness of the fabric, a new row should be started as close as possible to the previous one. In this case, you need to stretch the thread across the already made element.
- If, at the end of the process of decorating the garment, the fabric was tightened in certain areas, the base was over-tightened or lay too loose on the hoop.
- It is unacceptable for the base to peek beyond the edges of the motif. To do this, lay out the threads in as dense a layer as possible.
- To create a shadow effect, it is recommended to use several tones of threads.
Also, beginning embroiderers should take care of the availability of ready-made needlework kits and patterns.
Frog embroidery
A diagram will help you embroider individual elements of the picture. Just transfer it to the fabric and you can start working.
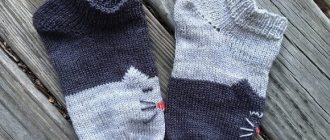
Stitch embroidery of a poodle dog
When completing the work, simply transfer the pattern onto the canvas and begin the embroidery itself. Even a beginner can cope with the task.
Stitch embroidery pink flamingos
Thanks to extraordinary color transitions, you can create an incredibly beautiful drawing. You just have to study the stencil.
Stitch embroidery animals: sheep
On a white canvas such an image will look amazing.
Insect satin stitch embroidery: ant
If you carefully draw all the small elements on the canvas, the work will exceed all expectations.
Insect satin stitch embroidery: butterfly
Even with ordinary floss, using this pattern you can create a real masterpiece.
Anyone can master the technique of embroidery on thin and thick fabrics. Such extraordinary designs decorate clothes, interior items, and create paintings. The main thing is to understand the features of the technology, choose the appropriate thread tones and choose a successful stencil. At the same time, the resulting products will certainly decorate any room.
What you need to know about warp and threads in embroidery
Can be applied to different substrates. First of all, you need to select a canvas. It must correspond to the future product. If you need to decorate the rug, it is better to give preference to burlap or cloth. Linen is best suited for a tablecloth. And for clothes it is advisable to choose silk or cotton.
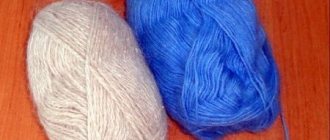
When using a hoop, you can stretch the fabric more significantly, which will greatly add convenience when working. The shade, composition, and fiber weave do not matter at all. The workflow depends on the thread used. For example, cotton fabric is more suitable for floss:
- cotton
- linen
- sackcloth
Please note that the embroidery threads must match the type of fabric. Cotton, wool and bulky synthetic threads are mainly used for embroidery.
For silk threads it is used:
- satin fabric
- cambric fabric
- silk base
Suitable for iris threads:
- denser material such as linen
Working material:
- schematic drawing of the ornament
- fabric base
- darning needles
- threads
- carbon copy
- thimble
- wooden hoops or frames
- scissors
Needles are selected according to the fabric and threads, taking into account the embroidered pattern. Using a thin needle, we get neat embroidered work. The use of a hoop is desirable, since the fabric stretches well on them, which is necessary for making ornaments and more convenient embroidery.
The drawing is applied with a special marker to the base. If you lack drawing skills, use carbon paper. To do this, a carbon copy is placed on the canvas under the ornament borrowed from the computer. All materials are pinned together and traced along the outline. Having figured out the pattern, we begin the embroidery creative process.
Experienced needlewomen have had an embroidery kit in stock for a long time. And beginning craftswomen need to purchase a standard kit. It can include not only needles, but also canvas, hoops, threads, as well as embroidery patterns. It's no secret that the thinner the needle, the more elegant the design will be. Of course, small scissors and a thimble will not be superfluous. If applying a design to fabric is not a problem, then you can draw it yourself. And if there are difficulties with drawing, then you will have to use carbon paper. The design you like must be printed on a printer, and then, together with carbon paper, attached to the fabric with pins and all the contours drawn.
Features of this embroidery technique
To create relief embroidery you will need quite a lot of different materials for needlework:
1. Embroidery threads:
- floss;
- silk;
- iris;
- wool or acrylic threads.
2. Additional elements for embroidery:
- beads;
- sequins;
- tapes.
3. Fabric, clothing, furniture and decorative items - this is what you can do volumetric embroidery on.
4. Sketch or embroidery pattern.
5. Embroidery needles, scissors, ruler, marker, hoop or —embroidery machine—.
For such embroidery today many different techniques are used that allow you to realize any creative ideas:
- English volumetric satin stitch embroidery;
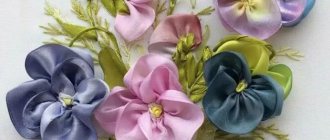
- —Brazilian embroidery—;
- Rococo embroidery;
- —French knot in embroidery—;
- embroidery with beads and sequins;
- embroidery ribbons.