Traditionally, everyone gives each other gifts on Easter. I suggest making them yourself. Knitted eggs can be used to decorate the interior of your home for the holiday, make a composition out of them, or put them in a basket or vase. Such a gift will definitely be remembered and appreciated. Based on a knitted egg, you can knit other quite interesting gifts.
Notations used in the article:
RLS - single crochet,
VP - air loop,
СС - connecting post,
PR = increase - knit 2 sc in one loop,
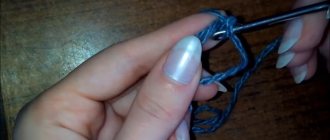
UB = decrease - instead of two sc, you need to knit 1 sc. (You can simply skip one sc of the previous row and knit in the next one, then a hole will form.) I found a way to knit decreases so that they are not noticeable. I am sharing with you.
Chickens.
These wonderful chicks are knitted from white acrylic (50 g 133 m), the remnants of yellow grass-stretch yarn from Kamtex, hooks No. 2 and No. 3. You will also need: filler, 2 beads with a diameter of 6 mm or black threads for the eyes, red floss threads for the beak.
We knit the same way as an egg (see text above) with yellow yarn with pile. As you knit, if it suddenly seems that the chicken is fluffier on the wrong side, you can turn this unknitted egg inside out. Knit eggshells with white thread in the other direction, along the new front side. We knit a white hat on top separately (just like the place where it will lie). It will be held in a bow on the top of the head. We pierce the top of the head with a needle and thread, make one stitch, and tie the ends of the thread with a bow.
How to knit a chicken beak.
Take red floss and hook No. 2. We collect 6 sc in the amigurumi ring. SS close them in a circle.
1 row. *PR, 2 RLS* 2 times. Total 8 sc.
2nd row. *PR, 3 RLS* 2 times. Total 10 sc.
Sew the beak to the body. Sew button eyes or embroider eyes with black thread.
The chicken is ready!
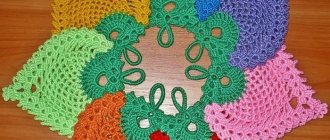
Decorative Easter napkin
Have you ever met such a beauty? Again, everything is quite simple!
I don’t know how to knit the ducks next to the photo. But there is a description of similar and even better baskets with bunnies.
So, for the napkin, first we knit a circle with double crochets.
Separately, we make an openwork border and sew it to the round blank at some distance from the edge.
Now the edges of the frill need to be folded and attached to the base of the circle using knitted flowers.
Decorative or boiled colored eggs can be placed in the resulting pockets.
Gift for Easter. Hen.
To crochet an Easter chicken we will need:
- a little acrylic or woolen yarn of white or beige color (I used Schachenmayr Idena Plus yarn, 100% acrylic, 50 g. = 133 m.); - some brown yarn (for the nest) (I used the remains of Gjestal Superwash Sport yarn, 100% wool, 50 g = 100 m.) - the remains of red and yellow yarn (I used for the comb - Schachenmayr Idena Plus, 100% acrylic , 50 g = 133 m, for the beak - “Lotus” from the Kamtex factory, 100% acrylic, 50 g = 150 m in 2 threads); - hook No. 4; — filler (sintepon is best); - cardboard for the base of the nest (you don’t have to use it); - black threads.
Knitting description:
Chicken body:
Row 1: cast on 2 ch. and close it in a ring. Knit 6 tbsp. b/n. [= 6 tbsp. b/n]. Next knit in the round;
2nd row: *increase*. Repeat * 6 times [= 12 tbsp. b/n].
3rd row: * increase, 1 tbsp. b/n *. Repeat * 6 times [= 18 tbsp. b/n].
4th row: knit the entire row of st. b/n [= 18 tbsp. b/n];
Row 5: * increase, 2 tbsp. b/n *. Repeat * 6 times [= 24 tbsp. b/n].
Rows 6-7 (2 rows): knit st. b/n [= 24 tbsp. b/n];
Row 8: * increase, 3 tbsp. b/n*. Repeat * 6 times [= 30 tbsp. b/n].
Rows 9-11 (3 rows): knit st. b/n [= 30 tbsp. b/n];
Row 12: * increase, 4 tbsp. b/n*. Repeat * 6 times [= 36 tbsp. b/n].
Rows 13-18 (6 rows): knit st. b/n [= 36 tbsp. b/n];
Row 19: * decrease, 4 tbsp. b/n *. Repeat * 6 times [= 30 tbsp. b/n];
Row 20: * decrease, 3 tbsp. b/n *. Repeat * 6 times [= 24 tbsp. b/n];
Row 21: * decrease, 2 tbsp. b/n *. Repeat * 6 times [= 18 tbsp. b/n]. Fill the body with padding polyester;
Row 22: * decrease, 1 tbsp. b/n *. Repeat * 6 times [= 12 tbsp. b/n]; If necessary, add a little more filler.
Rows 23-24: repeat decreases until the hole is completely closed. Break the thread and hide the end inside.
Beak:
Row 1: cast on 2 ch. and close it in a ring. Knit 6 tbsp. b/n. [= 6 tbsp. b/n]. Next knit in the round;
2nd row: *increase, 1 tbsp. b/n *. Repeat * 3 times [= 9 tbsp. b/n].
3rd row: * increase, 2 tbsp. b/n *. Repeat * 3 times [= 12 tbsp. b/n].
4th row: knit the entire row of st. b/n [= 12 tbsp. b/n]. Break the thread
Wings (2 parts):
Row 1: cast on 2 ch. and close it in a ring. Knit 6 tbsp. b/n. [= 6 tbsp. b/n]. Next knit in the round;
2nd row: *increase*. Repeat * 6 times [= 12 tbsp. b/n].
3rd row: * increase, 5 tbsp. b/n *. Repeat * 2 times [= 14 tbsp. b/n].
Rows 4-6 (3 rows): knit st. b/n [= 14 tbsp. b/n];
Row 7 (incomplete): 7 tbsp. b/n, 1 tbsp, break the thread.
Scallop:
1st row (persons): on the top of the chicken, knit 7 tbsp directly along the knitted fabric. b/n. It is best to start with the loops of the 2nd row, and then move through the crown towards the back of the chicken. At the same time, you must try to knit all the stitches in one straight line [= 7 tbsp. b/n]. Turn knitting over;
Row 2 (purl): ch 1 rise, 1 vp, skip 1 tbsp. b/n of the previous row and knit 1 tbsp. b/n, 1 vp, skip 1 tbsp. b/n of the previous row and knit 1 tbsp. b/n. Thus, in the second row we have formed 3 arches (holes). Turn the knitting over.
Row 3 (knit): - ch 2 lifting, 3 tbsp. s/n in the first arch, 2 vp, 1 s. Art. in the first arch (the first petal of the comb) - 1 s. Art. to go to the second arch, 2 ch. lifting, 1 tbsp. s/n, 1 tbsp. with 2n, 1 tbsp. s/n, 2 vp, 1 s. Art. in the second arch (second petal of the comb) - 1 s. Art. to move to the third arch, 2 ch. lifting, 3 tbsp. s/n, 2 vp, 1 s. Art. into the third arch (third petal of the comb) Break the thread and tuck it inside.
The tail is knitted according to the same principle as the comb.
1st row (persons): at the level of the 15-16th row of the body, knit 7 tbsp directly along the knitted fabric. b/n. thread of the same color as the body (try to place the tail strictly in the middle of the back of the chicken) [= 7 tbsp. b/n]. Turn knitting over;
Row 2 (purl): ch 1 rise, 1 vp, skip 1 tbsp. b/n of the previous row and knit 1 tbsp. b/n, 1 vp, skip 1 tbsp. b/n of the previous row and knit 1 tbsp. b/n. Thus, in the second row we have formed 3 arches (holes). Turn the knitting over.
3rd row (knit): - 2 ch. lifting, 3 tbsp. s/n in the first arch, 2 vp, 1 s. Art. in the first arch (first petal of the tail) - 1 s. Art. to go to the second arch, 2 ch. lifting, 1 tbsp. s/n, 2 tbsp. with 2n, 1 tbsp. s/n, 2 vp, 1 s. Art. in the second arch (second petal of the tail) - 1 s. Art. to move to the third arch, 2 ch. lifting, 3 tbsp. s/n, 2 vp, 1 s. Art. into the third arch (third petal of the ponytail) Break the thread and tuck it inside.
Advice:
If you are unable to cast on stitches directly from the knitted fabric or cast on does not form a straight line, you can knit the comb and tail separately and then sew them to the body. To do this, you need to cast on 7 chain stitches in the first row, and then knit according to the description, knitting double stitches of the first row into chain stitches.
Nest.
1 row. Knit 6 tbsp into an amigurumi ring. b/n. [= 6 tbsp. b/n]. Next knit in the round;
2nd row: *increase*. Repeat * 6 times [= 12 tbsp. b/n].
3rd row: * increase, 1 tbsp. b/n *. Repeat * 6 times [= 18 tbsp. b/n].
4th row: * increase, 2 tbsp. b/n *. Repeat * 6 times [= 24 tbsp. b/n].
Row 5: * increase, 3 tbsp. b/n*. Repeat * 6 times [= 30 tbsp. b/n].
Row 6: * increase, 4 tbsp. b/n*. Repeat * 6 times [= 36 tbsp. b/n].
Row 7: * increase, 5 tbsp. b/n*. Repeat * 6 times [= 42 tbsp. b/n].
Row 8: knit st. s/n, capturing only the back half-loop of the columns of the previous row [= 42 st. b/n].
Note!
When switching to double crochet, the bottom can expand greatly, but later, after 9-11 rows are knitted, it should take the shape of a “cup” with vertical walls. If this does not happen and the bottom is more reminiscent of a flat plate than a glass, I recommend reducing the number of loops in the 8th row, for example, in those places where increases were made in the 7th row, skip 1 stitch of the previous row or, even more preferably, knit 2 stitches together as described above.
Rows 9-11 (3 rows): knit st. s/n [= 42 st. b/n];
Row 12: knit the entire circular row in a crawfish step. Break the thread.
For greater stability, you can place a circle of cardboard at the bottom of the nest, the diameter of which matches the diameter of the bottom.
Tips for making a nest:
I recommend doing the transition from single crochets to double crochets gradually, i.e. in the 8th row knit 1 tbsp. b/n, then 1 half double crochet, and then continue knitting with double crochets, capturing only the back half loop of the previous row. In the next circular row, at the transition point, I also recommend knitting 1 half double crochet, and then continue knitting with double crochets. This will make the transition look smoother and smoother.
If a knitted chicken is an Easter gift,
then it is better to hide the cardboard disk between two knitted layers, in other words, make the bottom double. To do this, you need to knit the inner bottom according to the description of 1-7 rows and break the thread, then knit the outer bottom, also according to the description of 1-7 rows, but do not break the thread.
Next, attach the bottoms with the wrong sides to each other, put a cardboard base between them and knit the 8th row of double crochets, hooking the outer bottom only to the back half-loop, and the inner bottom to both half-loops.
Please note that a double bottom with cardboard inside is higher than a single bottom, so the height of 4 rows of double crochets may not be enough. In this case, knit another circular row with double crochets (i.e. the height of the nest will be 5 rows of double crochets, not 4), and then tie the nest in a crawfish step.
Assembly:
1. Put a little filler into the beak and sew it to the body;
2. Sew on the wings;
3. Design the face;
4. Place the chicken in the nest.
Here's a gift for you for Easter. Knitted Easter chicken is ready!
Easter bunny, gift for Easter.
Author katty toys msk Instagram
EASTER CAKE IN A BASKET
Description of the author. When using Children's New yarn and a 1.75 hook, the size of the cake = 4 cm, the basket is 4.5 cm in diameter. The work took about 2 hours.
Author Svetlana Kholmanskikh Yarn will be needed: - for the Easter cake Alize Cotton Gold - Alize Lana Gold for the basket - for the napkin Alize Bambo Fine or any thin yarn
You can tie an egg. Gift for Easter
Easter crochet decor with description and amigurumi patterns
Amigurumi is a common hobby that is gaining more and more momentum. Keep up with fashion and handicrafts. Learn to knit and create unique decor with your own hands. This type of activity is useful for creating coziness, crafts for the garden or school, and can bring not only a good mood, but also income to the family budget.
Gorgeous Easter master class from: Nina Sukhina. All photos belong to the author, as well as a detailed description of the work.
author: Nina Sukhina @nina_sukhina
Materials 1. Yarn (semi-cotton 270-330m/100g). I have YarnArt jeans. Basket color 60-65g, white color (rabbit) - 20-25g, leftovers of different colors for eggs. 2. Any filler (synthetic fluff, holofiber). 3. Eyes D=8mm, needle, wire (for the handle), satin ribbon 25-30cm. mm., needle, wire (for the handle), satin ribbon 25-30cm. We will add rigidity to the basket using a sugar solution. Two containers (I have a diameter of 12.5 cm, the second is 1-1.5 cm larger). Blush. Glue gun Symbols KA - amigurumi ring Ch - air loop Sc - single crochet Inc - increase Decrease SS - connecting stitch
Basket 1p-8mm, needle, wire (for handle), satin ribbon 25-30cm. sc in KA (8mm, needle, wire (for handle), satin ribbon 25-30cm.) 2p-(pr)*8mm, needle, wire (for handle), satin ribbon 25-30cm. times (16) 3p-(1sc, inc)*8mm., needle, wire (for the handle), satin ribbon 25-30cm. times (24) 4p-(2sc, inc)*8mm., needle, wire (for the handle), satin ribbon 25-30cm. times (32) 5p-(3sc, inc)*8mm., needle, wire (for the handle), satin ribbon 25-30cm. times (40) 6p-(4sc, inc)*8mm., needle, wire (for the handle), satin ribbon 25-30cm. times (48mm., needle, wire (for a handle), satin ribbon 25-30cm.) 7p-(5sc, inc) * 8mm., needle, wire (for a handle), satin ribbon 25-30cm. times (56) 8mm, needle, wire (for the handle), satin ribbon 25-30cm. r-(6sc, inc)*8mm, needle, wire (for handle), satin ribbon 25-30cm. times (64) 9p-(7sc, inc)*8mm., needle, wire (for the handle), satin ribbon 25-30cm. times (72) 10p-(8mm, needle, wire (for handle), satin ribbon 25-30cm. sc, inc) * 8mm, needle, wire (for handle), satin ribbon 25-30cm. times (8mm, needle, wire (for handle), satin ribbon 25-30cm. 0) 11p-(9sc, inc)*8mm, needle, wire (for handle), satin ribbon 25-30cm. times (8mm., needle, wire (for a handle), satin ribbon 25-30cm. 8mm., needle, wire (for a handle), satin ribbon 25-30cm.) 12p-(10sc, inc)*8mm., needle, wire (for the handle), satin ribbon 25-30cm. times (96) 13r-(11sc, inc)*8mm., needle, wire (for handle), satin ribbon 25-30cm. times (104) 14p - for the back wall 104sc (104) 15-21r-104sc (104) 22p - for the back wall, we make increases in each loop (208mm, needle, wire (for the handle), satin ribbon 25-30cm. ) 23r-(1sbn, inc) to the end (312) 24-29r-312sbn (312), ss. Making a sugar solution. 0.5 liters of warm water, 7-9 tablespoons with a slide of sugar. Lower the basket and leave for 5-10 minutes. Squeeze out. Do not pour out the solution, you will need it for the handle. We take a container of suitable size (I have a plastic container), turn it over, stretch the basket (the front side is inside), and secure it with an elastic band. Turn it over.
You will need another container, the diameter of which is 1-1.5 cm larger and the depth is 10 cm. We insert our basket into it and form beautiful waves. Let it dry. To make it dry faster, you can periodically dry it with a hairdryer. The most important thing is to dry the waves well. Once the waves have dried, the basket can be pulled out of the second container, turned over and the bottom dried. While the basket dries, knit a handle.
Easter basket from Nina Sukhina
Handle 1r-10sbn in KA (10) 2r-104r-10 sbn (10), ss. We take the wire, make a small loop, insert it into the handle. We also make a loop on the other edge. Using a needle, tighten the loops. Forming a handle. The distance from one end of the handle to the other is equal to the diameter of the bottom of our basket. Dip it into the solution for 10-15 minutes, squeeze it out a little, shape it again, the handle should be round, leave it to dry. Let's move on to knitting a rabbit.
Head 1p-6sc in KA (6) 2p-(inc)*6 times (12) 3p-(1 sc, inc)*6 times (18mm, needle, wire (for handle), satin ribbon 25-30cm) 4p -(2sc, inc)*6 times (24) 5r-(3sc, inc)*6 times (30) 6-12r- 30 sc(30) 13r-(dec, 3sc)*6 times (24) We insert the eyes between 7-8mm, needle, wire (for the handle), satin ribbon 25-30cm. in rows, distance between eyes -11 sc.
Let's start filling. 14r-(dec, 2sc)*6 times (18mm, needle, wire (for handle), satin ribbon 25-30cm.) 15r-(dec, 1sc)*6times (12) 16r-(dec)*6times (6) ,ss. We tighten the loops. Ears (2pcs) 1r-6sc in KA (6) 2r-6sc (6) 3r-(sp)*6 times (12) 4r- 12sc (12) 5r-(1sc, pr)*6 times (18mm, needle, wire (for the handle), satin ribbon 25-30cm.) 6-13r-18mm., needle, wire (for the handle), satin ribbon 25-30cm. sc (18mm, needle, wire (for handle), satin ribbon 25-30cm), ss. Fold in half and sew. Body 1p- 6 sc in KA (6) 2p-(inc)*6 times (12) 3p-(1sc, inc)*6 times (18mm, needle, wire (for handle), satin ribbon 25-30 cm.) 4p- (2 sc, inc)*6 times (24) 5r-(3 sc, inc)*6 times (30) 6r-(4 sc, inc)*6 times (36) 7r-(5 sc, inc)*6 times (42) 8mm, needle , wire (for the handle), satin ribbon 25-30cm. -14r-42sbn (42) 15r-(dec, 5sbn)*6 times (36)
16-18mm., needle, wire (for the handle), satin ribbon 25-30cm. r- 36sc (36) We begin to fill. 19r-(dec, 4sc)*6 times (30) 20r-(dec, 3sc)*6 times (24) 21r-(dec, 2sc)*6 times (18mm, needle, wire (for handle), satin ribbon 25-30cm .) 22r-(dec, 1sbn)*6 times (12) 23r-(dec)*6 times (6), ss. We tighten the loops. Paws 4pcs 1p-6sc in KA (6) 2p-(pr)*6 times (12) 3-7p-12sc (12) 8mm, needle, wire (for handle), satin ribbon 25-30cm. p-(dec)*6 times (6),ss. Tail 1p-8mm, needle, wire (for the handle), satin ribbon 25-30cm. sc in KA (8mm, needle, wire (for handle), satin ribbon 25-30cm.) 2p-(pr)*8mm, needle, wire (for handle), satin ribbon 25-30cm. times (16) 3p-(1sc, inc)*8mm., needle, wire (for the handle), satin ribbon 25-30cm. times (24) 4-6r-24sbn (24) 7r-(dec)*12 times (12), ss. Let's fill it up. We make a small tightening of the muzzle. We insert the needle near the inside of one eye and bring it to the inside of the other, tightening it a little. And so on several times. Using pink yarn we embroider the nose.
Sew on the ears at the level of 12-13 rows. Sew on the head. The paws and tail can be glued on.
Easter Bunny from Nina Sukhina
Eggs 10pcs 1p-6sc in KA (6) 2p-(inc)*6 times (12) 3p-(1sc, inc)*6 times (18mm, needle, wire (for handle), satin ribbon 25-30cm) 4p- 18mm, needle, wire (for handle), satin ribbon 25-30cm. sc (18mm, needle, wire (for handle), satin ribbon 25-30cm) 5r-(2sc, inc)*6 times (24) 7-11r-24sc (24) 12r-(dec,2sc)*6 times( 18mm, needle, wire (for the handle), satin ribbon 25-30cm.) Fill.
13r-(dec, 1sc)*6 times (12) 14r-(dec)*6 times (6), ss. We tighten the loops. The eggs look neater if you make invisible decreases: insert the hook into the front wall of one loop and immediately insert the hook into the front wall of the second loop, pull a loop through them, two loops on the hook, knit one of them. Glue the handle to the basket. We put a rabbit there and put eggs on the sides.
Easter decor from Nina Sukhina
Thanks to the author for such a detailed and understandable master class. Now there is a lot of information available for inspiration, if you don’t have time to search, then be sure to check us out.
Knitted Easter cake. Gift for Easter.
Gift for Easter. Kulich box.
Easter gift. Chick.
Author Tatyana Lysenko You will need: 1. Yarn of yellow, white, brown, orange Kamtex lotus stretch 2. Hook No. 2.5 3. Filling 4. Needle, thread, scissors 5. Buttons for decoration, beads or eyes 6. Ribbon for a ponytail
Torso:
1 row. Knit 6 sc into an amigurumi ring, [6 sc in a row] 2nd row. PR, repeat 6 times [12 sc] 3rd row. PR, 1 sc, repeat 6 times [18 sc] 4th row. PR, 2 sc, repeat 6 times [24 sc] 5th row. PR, 3 sbn, repeat 6 times [30 sbn] 6th row. PR, 4 sc, repeat 6 times [36 sc] 7th row. PR, 5 sc, repeat 6 times [42 sc] rows 8-10. 42 sc 11 row. UB, 5 sc, repeat 6 times (36 sc) rows 12-14. 36 sc 15 row. UB, 4 sc, repeat 6 times (30 sc) rows 16-18. 30 sc 19 row. UB, 3 sc, repeat 6 times (24 sc) 20-22 rows. 24 sc 24-25 rows. 18 sc 26 row. UB, 1 sc, repeat 6 times (12 sc) row 27. 6 ST 28 row. close.
Wings. 2 details.
1 row. Knit 6 sc into the amigurumi ring, [6 sc in a row] 2nd row. PR, repeat 6 times [12 sc] 3rd row. PR, 5 sbn, increase, 5 sbn (14 sbn) 4th row. 14 sc 5th row. UB, 5 sbn, decrease, 5 sbn (12 sbn) 6th row. UB, 4 sbn, decrease, 4 sbn (10 sbn) 7th row. UB, 3 sbn, decrease, 3 sbn (8 sbn) 8th row. UB, 2 sbn, decrease, 2 sbn (6 sbn) 9th row. UB, 1 sbn, decrease, 1 sbn (4 sbn) Row 10: 2 decreases, close the row, cut and hide the thread
Eyes. 2 parts
1 row. In the amigurumi ring we will knit 6 sc, [in a row 6 sc] Row 2: increase, repeat 6 times [12 sc] Row 3: increase, 1 sc, repeat 6 times [18 sc] Row 4: increase, 2 sc, repeat 6 times [24 sc] Fingers 8 pcs: 1 row: cast on 2 ch with brown thread. and close it in a ring. Knit 6 sbn, then knit in a circle [6 sbn] 2-6 rows: 6 sbn 7th row: 3 decreases, close the row, hide the thread.
The finished product can always be decorated
There are many ways to decorate Easter eggs. Here you can let your imagination run wild. For example, if you knit an egg from melange yarn, it will look fun in itself. Instead of a monochromatic egg, you will get a motley one . Some decoration methods:
if you crochet several small multi-colored flowers and sew them to the egg, it will look very elegant;- The decoration will look good if you embroider any pattern on it;
- you can cut out various decorations from felt and fix them with PVA glue;
- Crocheted cherries, berries, and fruits will look unpretentious;
- the egg can be tied with a braid of a suitable color;
- The egg will look cute if you decorate it with fluffy yarn bows;
- you can decorate the egg with rhinestones or beads;
- An egg embroidered with beads of different sizes will look gorgeous.
There are many ways to decorate Easter eggs. You can experiment with jewelry endlessly. You can make various stands and bags for the testicles. They can be crocheted or made from a variety of materials. On a stand the egg will look much more solid. In addition to chicken and eggs, you can crochet any animals, berries, fruits, Easter cakes and many other interesting decorations for the holiday table. An openwork chicken and egg, made by yourself, will definitely bring happiness and prosperity to your home this year.
Originally posted 2018-03-19 09:27:20.
Assembly of the toy:
We start with the paws: you need to sew the front three fingers and sew the back one to them. The legs are ready, let's sew them to the body.
We make a comb (like a fringe).
Let's sew on the eyes and beak. We sew on the wings last.
The chicken can be tied like this:
And like this:
Easter gift egg stand.
How to knit such a hen-egg stand?
See the article
Crochet Easter chicken. Description, photo.
Easter bunny egg stand.
How to crochet it, see the article Easter chicken and crochet rabbit. Description, photo.
Knitting an original egg for Easter – video master class
We also have a lot of Easter eggs: both dense and openwork. But pay attention to the craft with a hole where you can place a chicken and other decorative items. We have already made something similar from threads and a balloon. Now let’s try to crochet together with Tatyana Leshchenko, it’s so beautiful and original!
So, there is a lot of work to be done on crocheting for Easter, I hope you liked the ideas presented on the blog. Good luck with your crafting!
Ideas from the Internet without description.
How to knit toys in articles:
Crochet toys and knitting toys. Description, photo.
Crochet flowers large and small.
Crochet heart. Schemes, description.
Hearts crocheted and knitted. Present.
Crochet basket. Description, video master class
Crochet goldfish toys
Learning to crochet. For beginners.
Crochet toys in 2-3 hours. For beginners
Toy cat. Knitting. Details.
Crochet bunny toy. Description for beginners.
Findus. Findus cat knitted with knitting needles.
We create the New Year with our own hands.
Crochet Easter chicken and bunny. Description, photo.
Owl crocheted and knitted. Description and diagram.
Crochet butterflies. Schemes, description, video MK.
Crochet and knitting mice. Description and diagrams.