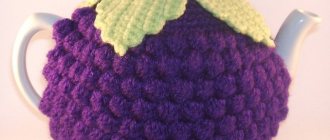
Owl
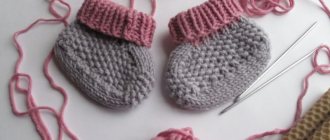
In the photo above we see a rug in the shape of an owl. It knits quite simply. We needed “Grass” yarn for the base of the rug, white, black and brown yarn to make the rug look like an owl, that is, for finishing. And a hook, or rather, two hooks, No. 4 and No. 9: with one they knitted the eyes, beak and wings, with the second - the rug itself.
First, with crochet number 9 we knit a circle with double crochets. We tie ears on it in the same way as in the description below. That’s it, we don’t use “Grass” anymore.
Eyes
Separately, we knit the eyes with white yarn in single crochets, and another row of single crochets with black yarn.
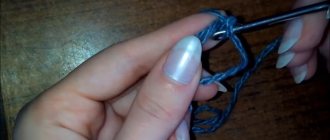
We knit the black pupils on top. I did this: insert the hook into the center of the eye from the front side, leaving the skein on the wrong side. We pick up the black thread, pull it out to the length of one row, insert the hook from top to bottom, pull out the black thread, ch. *Insert the hook into the middle of the eye again, pull out the black thread, move the hook behind the first white row, pull out the thread, ch, ch along the circle* and so on 6 times, connecting loop. We bring the thread to the wrong side, fasten it, and cut it.
You can embroider the eyes differently. To make a sleeping owl , you need to embroider eyelashes along the lower white part of the eye.
owl eyes can be like this
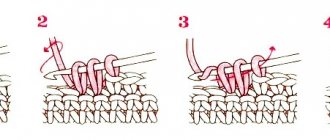
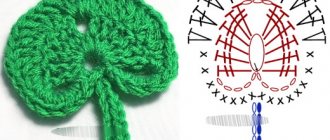
The beak and wings are triangles connected with single crochets. We knit, starting with 3 sc from one loop, adding one loop on each side in each row to the desired length.
Knitting an owl from plush yarn: patterns for beginners
Toys made from plush yarn are especially pleasant to the tactile sensation, which is why it is often used to make gifts for children. However, when working with this material, you need to take into account some of its features:
- You won't be able to knit an amigurumi ring from plush threads. The circle will not come out even, the loops will be too stretched, and the thread itself will fray while knitting it.
- Experienced needlewomen advise cauterizing the tip of the thread. This is necessary so that the yarn does not fray during operation.
- There is no need to pull the thread to unravel the loops, otherwise the entire row will unravel.
- For crocheting, it is better to use a simple knitting technique: double crochet and single crochet, because complex openwork patterns will be difficult to complete and they will not look as beautiful as with other types of yarn.
Plush toys are hypoallergenic, so this material is often chosen for knitting. The peculiarity of the work is that the body is not knitted according to the amigurumi type. You can knit two separate parts, the edges of which are then sewn together, stuffed with filler, and the plush toy is ready.
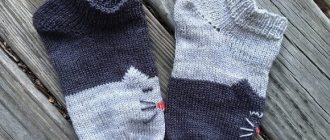
An owl with wings is an easy model for beginners
The pattern and description of crocheting an owl from plush yarn are similar to those described above. You can diversify it by knitting clothes for the bird. Or instead of ears with tassels, make them in the form of a hairstyle - two tails of spirals. To make the product original, you can sew or glue an applique. Some complement them with sneakers or a hat.
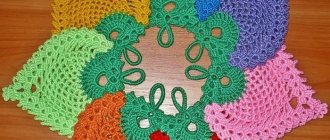
The image of an owl is very popular now. Therefore, it is not surprising that there are many schemes on how to make a cute toy or an original pendant. If the needlewoman has “grass” threads, she will get a wonderful panel with the image of this bird.
Aunt Owl.
You will need: gray, white, black, brown yarn. Hook No. 4.
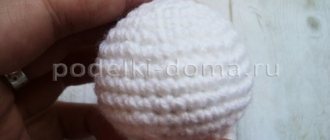
Description. We knit a circle with single crochets. We start with 6 columns from the amigurumi ring. We will knit in a spiral. In the first row, from each loop we knit 2 single crochets (sc). In the next one in one. Then *2 sc in each loop, 2 sc from 1 loop*, and so on. So we knit 7 rows. We close the row with a connecting column. The result was a bun.
We knit ears.
We cast on 5 air loops (ch) instead of a double crochet stitch (ss3n), in the same loop we knit a double crochet stitch (ss2n), in each next loop: dc2n, dc, dc, dc, ps (half-dc), sc. Next we knit the second ear in the reverse order: mon, dc, dc, dc, dc2n, dc2n, dc3n.
Cut the thread. Here you can leave the tip of the thread the same length as the tassels or a little longer, then you can cut it.
Tassels on the ears.
Take a long thread and insert it into a gypsy needle. We make about 10 long stitches (you can use a ruler) in one loop at the tip of the ear. We wrap it several times around the tassel, secure it with a knot and cut the thread. We cut the loops and trim the tassels evenly.
Eyes.
There will be 2 identical parts. We knit 6 sc into the amigurumi ring. We will knit in rows, not in spirals. That is, we will close each row with a connecting loop. We will immediately hide the tip of the thread by placing it inside the loops. In the second row from each loop we make 2 sc.
In the third - *1 sc, 2 sc from one loop*
Fourth row - *2 sc, 2 sc from one loop*. Connecting post. Cut the thread longer and then use it to sew the eye to the body.
The pupils can be made from half beads (glued with glue) or, like ours, embroidered. To do this, take a needle and thread and tie a knot. We insert it from the wrong side to the front side, wind the thread around the needle about 10 turns and pull the needle out. Sew on the resulting structure. We tie a knot from the inside out.
Wings
Each wing consists of 7 parts of different lengths.
We insert the hook into the edge of the body approximately at the level where the eye ends. We hide the end of the thread again as we work. Knit 6 ch, then sc in the next loop. Then ch 9, sc, ch 12, sc, ch 20, sc, ch 12, sc, ch 9, sc, ch 6, sc. One wing is ready. We also knit the second wing.
We embroider the beak and paws using stitches using a needle and thread in the form of triangles. To make the owl more elegant, we embroider its feathers in the form of white spots with stitches or glue half beads, at your discretion.
Necessary materials
Patterns and descriptions of crocheting an owl can be found on websites, and you can also find ideas for creating products on the Internet. When the final result and the sequence of work have been thought out, it is necessary to prepare the necessary materials. If the product is small in size, then it is quite possible to create a toy from leftover yarn.
https://youtube.com/watch?v=sfWqjHmrhcc
Necessary materials:
- Yarn of different colors used in knitting. For small elements, it is recommended to use the thinnest thread, then the product will be easier to knit and it will turn out more neat.
- A crochet hook suitable for the selected yarn. Different parts of the toy may require several hooks of different sizes.
- Decorative elements: eyes, beak, tassels, ribbons or cords for decorating seams.
- Materials for stuffing, for example, holofiber or synthetic winterizer.
After the materials are prepared, you can begin knitting.
Knitting owl. Here's some inspiration for you!
Hat with owls. Knitted with knitting needles.
The hat is knitted from the bottom up. The eyes and beak are sewn on top of the finished product.
First, rib *knit 1, purl 1* 5 rows. Then we knit the owls in stockinette stitch, and around there will be a pattern in which knits and purls alternate, shifting by 1 stitch in each row.
We knit the “Owl” pattern according to the pattern. The pattern is very simple. Circular knitting pattern. The number of owls is at your discretion.
If you need a taller hat, knit several rows, alternating knit and purl stitches, like between owls.
We will decrease loops through a row in six places. The pimpochka is knitted with a hollow cord.
Another very simple hat with an owl.
This hat is knitted from the bottom up. You can knit in the round, or you can sew a back seam. First, 3-5 rows of the front stitch (lapel), then we move to the purl stitch, knitting the “Owl” pattern according to the pattern.
Cast off all stitches in one row. Sew. Make tassels at the ends of the seam.
How to crochet an owl toy from plush yarn: master class
We crochet an owl toy from plush yarn
Plush yarn is very soft and delicate. The toys made from it are beautiful and cute. How to crochet an owl toy from plush yarn? Here is the master class:
Description of crocheting an owl toy from plush yarn Description of crocheting an owl toy from plush yarn Description of crocheting an owl toy from plush yarn Description of crocheting an owl toy from plush yarn Description of crocheting an owl toy from plush yarn
Sew all the details and make a beak. To sew the pieces into place, first pin them in place and then sew them on. Ready.
Owl
How to knit ears? And the ears are an integral part of the head. Having knitted the last row (36 st.b.n.), we install a fastening for the mobility of the head, stuff it and sew it up. The seam is made across the entire head, corners are formed at the edges of the seam, these will be the ears. It is enough just to stitch, stepping back from the tip of the corner about 2-3 cm.
How is the tail knitted? Everything is simple with him too. We begin to knit the tail at the hole formed in the body, between the 15th and 16th rows. The first 2 rows are knitted in the round, then we stuff the body to the desired density, fold the tail hole in half, and knit the 3rd row over the edge, thus closing the hole. Next, row 4 according to the pattern is an imitation of feathers.
To make your head spin. We use a mount, 2 discs and a cotter pin, as for teddy bears. For the large owl, I cut out disks from cardboard. You can also use a homemade fastening: 2 buttons, 2 disks made of cardboard (thick), tie it together with a strong thread, or you can use a hairpin.
A little history about the symbol and mascot OWL
The owl bird, thanks to its large, motionless eyes, round head and hooting vocal sounds, has always been associated in European culture with wisdom and intelligence. But in Chinese culture, the owl has been associated with the teachings of Feng Shui since ancient times. According to Feng Shui, this night bird has several meanings:
- wisdom;
- attracting wealth;
- caution;
- protection of the family hearth.
It probably makes sense to try to make an Owl with your own hands.
Crochet owl.
Source: https://vk.com/wall349114442_583
Body
1. Cast on 15 ch, sc in the second loop from the hook, 12 sc, 3 sc in the last loop, on the other side of the chain - 12 sc, 2 sc in the last loop. (30) 2. inc, 12 inc, 3 inc, 12 inc, 2 inc (36) 3. inc, inc, 12 inc, (sc, inc) x3, 12 inc, (inc, inc) x2 (42) 4. 2 sc, inc, 12 sc, (2 sc, inc)x3, 12 sc, (2 sc, inc)x2 (48) 5. 3 sc, inc, 12 sc, (3 sc, inc)x3, 12 sc, ( 3 sbn, inc)x2 (54) 6. 4 sbn, inc, 12 sbn, (4 sbn, inc)x3, 12 sbn, (4 sbn, inc)x2 (60) 7. unchanged (60) 8. 5 sbn, inc, 12 sbn, (5 sbn, inc)x3, 12 sbn, (5 sbn, inc)x2 (66) 9-17. 9 rows without changes (66) 18. 5sc, dec, 12 sc, (5sc, dec) x3, 12sc, (5 sc, dec)x2 (60) 19-22. 4 rows without changes (60) 23. 4 sbn, dec, 12 sbn, (4 sbn, dec)x3, 12 sbn, (4 sbn, dec)x2 (54) 24-27. 4 rows unchanged (54)
Changing the color
28-29. 2 rows without changes (54) 30. 3sbn, dec, 17sbn, dec, 6sbn, dec, 17sbn, dec, 3 sbn. (50) 31-39. 9 rows without changes (50) Stuff the part tightly. Place the edges together and sew them together. We do not stuff the corners; they can be bent to form an eyelet and secured by stitching right through. Eyes 2 details 1. 6 sc in KA 2. 6 increases (12) 3. (sc, inc) x6 (18) 4. (2 sc, inc) x6 (24) 5. (3 sc, inc) x6 in a circle . (30) Embroider beak
Paws
The foot consists of 2 toes, the 1st toe. 1. 5 sc in KA 2. 5 inc (10) 3-5. 3 rows (10) finish knitting. The 2nd finger is similar. We connect together, knitting: 6. 5 sc, attach 1 part on the right and knit 10 sc along these loops, 5 sc remaining from the second part. (20) 7. 4 sbn, dec, 8 sbn, dec, 4 sbn. (18) 8. unchanged (18) 9. (4 sc, dec)x3 (15) 10. (3 sc, dec)x3 (12) 11. unchanged (12) 12. (dec, 4 sc)x2 . (10) 13. no changes 14. 5 dec (5) Leave a long tail, tighten the loops and hide the thread.
Wings (2 parts)
We knit 3 feathers per wing. Short feather. 1. 6 sc in amigurumi ring. (6) 2. 6pr (12) 3-4. 2 rows (12) Fasten off and cut the thread. Medium feather. 1. 6 sc in amigurumi ring. (6) 2. 6pr (12) 3-5. 3 rows (12) Fasten off and cut thread
Long feather.
1. 6 sc in amigurumi ring. (6) 2. 6pr (12) 3-6. 4 rows (12) We connect the feather blanks together, knitting: 7. along the long one - 6 sc, along the middle - 6 sc, along the short - 12 sc, along the middle - 6 sc and 6 sc along the long one. (36) 8. row without changes (36) 9. (4 sc, dec)x6 (30) 10. without changes (30) 11. (3 sc, dec)x6 (24) 12. without changes (24) 13. (2 sc, dec)x6 (18) 14. (sc, dec)x6 (12) 15. 6 dec (6) We do not stuff the part.
Tail
1. 6 sbn in KA (6) 2. 6 inc (12) 3. (3 sbn, inc) x3 (15) 4. (4 sbn, inc) x3 (18) 5-7. 3 rows (18) 8. (sc, dec)x6 (12) 9-10. 2 rows (12)
Transferring the design to plywood
The drawing must be translated accurately and accurately. The drawing in A4 format is ready to be transferred to plywood; to do this, simply print it out and use an iron to transfer it to the plywood. You can read about how to do this in the article on transferring a sketch to a workpiece: transferring the drawing to plywood.
Sawing an Owl
When cutting, do not forget about the position of the jigsaw in your hand. Watch your posture. If you want the craft to look beautiful, take your time. After cutting, clean each part first with “Medium” sandpaper and then with “Fine” sandpaper; some parts should be cleaned with needle files.
Assembling the elements of the Owl's head
You can download the assembly instructions from the following link: Instruktsiya-po-sborke-sovyi.pdf (2665 Downloads) Assembling the Owl is not very difficult. Assemble the craft according to the rule: part number 1 must be attached to another part number 1, part number 2 to 2 parts, and so on. First, assemble the craft on the table, then if all the parts fit well into the required grooves, start gluing. You need to glue it using PVA glue. Be careful and do not allow any leaks, because... at the final stages of processing, for example with stain, areas with glue smudges will remain whitish and will not absorb the dye. To make the craft more beautiful, you can coat it with spray paint of any color, or coat it with wood varnish.
Owl backpacks.
Amigurumi toy “Owl Owl in sneakers”
Required materials and tools:
1. Yarn Areola 50g/235m, color pink (girls, don’t take thick yarn, take a thickness close to mine if you can’t find exactly the same. Otherwise, your owl’s sneakers will be incredibly huge) 2. Yarn YarnArt JEANS, color 07 (beige) half a skein about 3. YarnArt JEANS, color 01 (white) just a little bit 4. Children's novelty yarn pekhorka color yolk. Just a little for the beak 5. White felt 6. Blue safety eyes 18 mm. 7. false eyelashes 8. A little pink tulle for a bow 9. Filling 10. Crochet hook 1.5 and 2.0 and stocking needles 2.0 11. glue, scissors 12 marker for knitting (the toy is knitted in a spiral) 13. Pastel, shadows or pencil. Something you can use to tint your eyes in a circle of felt
"Without a single nail"
The Russian instructions say nothing about using glue. The beauty of such designs is that they do not use glue at all. But the manufacturers apparently decided to save on the thickness of the plywood (and did not change the stamping), as a result, many parts fall out of the grooves. So it is proposed to connect all poorly fitting parts with a drop of glue. This is ******, I thought, and there’s no time! Therefore, I decided to carefully, practically without breathing, collect the entire owl, and then treat it entirely with a weak solution of PVA glue:
This idea is not new: before leafing through ancient, worn-out books, their pages are sprayed with a special strengthening compound so that they do not crumble.
In the morning, the owl dried out and was 17 grams lighter; only a little glue remained just at the joints of the parts (the force of surface tension in action). There is no glue visible, but the child has already dropped the owl on the floor - at least it’s okay.
Legend:
Ch-chain loop sc-single crochet ss-connecting loop hdc-half double crochet dc-dc single crochet pr-increase dec-decrease p/p-half loop
Sneakers (start with pink thread)
1 row - 8 ch, in the 2nd loop from the hook we knit inc, 5 sc (1 sc in each loop), 4 sc in the last loop of the chain, on the reverse side 5 sc, inc (18); 2nd row - 2 inc, 5 inc, 4 inc, 5 inc, 2 inc. (26) 3rd row - 2 inc, 2 inc inc, 2 inc, 2 hdc, 3 dc, 5 inc from dc, 3 dc, 2 hdc , 2 sbn, 2 inc from sbn, 1 sbn. (35) 4 row - 3 ch, 2 dc, 2 inc from ssn, 10 dc, 6 inc from ssn, 10 dc, 1 inc from ssn, 4 dc, ss (44) Cut out the insole .
5th row - 44 sbn for the back row 6 - 8th row - 44 sbn. Finish, cut the thread and hide.
Knitting a toe (white thread)
1- Fold the sneaker in half and count 10 sc from the middle (opposite side from the marker), insert a hook and knit 20 sc for the back half loop, turn (knit the middle 20 sc)
Change the thread to pink
2- Next in turning rows: 2 ch, in the 2nd loop from the hook 1 dc, 9 dec from dc, turn 3- 2 ch, in the 2nd loop from the hook 1 dc, 4 dec from dc, turn 4- 2 ch, We knit 4 dc in one decrease, finish with Owl in sneakers online. 5- We attach the thread where we attached it when we started knitting the toe of the sneaker, (the beginning of the white thread) we tie the toe along the edge of 12 sc, ss into the side of the sneaker.
We turn the knitting and then knit the tongue in turning rows: 1 row - 3 ch, from 2 loops from the hook 11 dc for the back p/p, turn 2 row - 3 ch, from 2 loops from the hook 11 dc. Finish, cut the thread and hide.
Next we knit the owl’s leg itself,
attaching the beige thread inside the sneaker to the remaining 12 stitches of the binding (as the binding was knitted in the same direction), and knitting in a circle.
1 row - (sc, dec) x 12 (24) for the back row 2 row - 24 sc 3 row - 12 dec (12) 4-20 row - 12 sc. Cut the thread at the first leg. We tie the top of the sneaker. We attach the pink thread to the remaining half-loops of the side of the sneaker and knit in turning rows (we find the place where the toe joins the side of the sneaker, count the third loop towards the toe and stick in the hook): 1 row - 30 sc, turn 2 row - ch, dec, 26 sc, dec, turn (28) 3 row-ch, 28 sc, turn 4 row-ch, dec, 24 sb, dec, turn (26) 5 row-ch, 26 sb. Finish. Cut the thread and hide it. Embroider the laces with white thread. We knit the second leg in the same way, but do not cut the beige thread.
Torso
1st row - We do not cut the beige thread on the second leg, but immediately begin to connect it. We put a marker and knit 4 sc along the leg, cast on a chain of 12 ch, make a small clubfoot on the legs and attach the chain to the second leg (in the place where we finished knitting the leg). 12 sbn on the leg, 12 sbn in the air chain, 8 sbn on the leg (reached the marker) 2nd row - 4 sbn on the leg, 12 sbn in the air chain, 32 sbn (48) 3rd row - 3 sbn, inc, 12 sbn, ( 3 sbn, inc)x3, 12 sbn, (3 sbn, inc)x2 (54) 4-13 row - 54 sbn 14th row - (25 sbn, dec) x2 (52) 15th row - 52 sbn
Change the thread to white
16 row - (24 sc, dec)x2 (50) 17 row - 50 sc 18 row - (8 sc, dec)x5 (45) 19 row - 45 sc 20 row - (7 sc, dec)x5 (40) 21 row - 40 sc Next we cut the white thread without finishing the knitting (leave the tail without making a knot). After putting on the dress, change the thread to beige and continue knitting the head.
Wings
1 row - 6 sc in KA 2 row - 6 sc 3 row - (sc, inc) x3 (9) 4 row - 9 sc 5 row - (2 sc, inc) x3 (12) 6 row - (3 sc, inc) x3( 15) 7-14 row-15 sc
Change the thread to white
15 row - 15 sbn 16 row - 15 sbn for the back p/n 17 -19 row - 15 sbn 20 row - (3 sbn, dec)x3 (12) 21 row - 12 sbn 22 row - (2 sbn, dec)x3 (9) Fold the wing in half, knit 4 sc on both walls. We do not stuff the wings. Tie row 16 with 15 sc using the remaining half-loops. Sew the wings on the owl at row 20 of the body.
Dress
We knit with the same yarn as the sneakers.
We cast on 64 loops and distribute them onto 4 knitting needles: 12 sts (sleeve), 20 sts (front), 12 sts (sleeve), 20 sts (back) Row 1-5 - knit 64; in the 3rd row I made “holes”, knit 2, yarn over, two together, etc.
Row 6 - k20, bind off 12 sleeve loops, knit 20, bind off 12 sleeve loops. We transfer the last loop to the adjacent knitting needle.
Next, we knit each back and front needle separately. (We knit a row with knits, a row with purls) Row 7 - remove the edge loop, knit 19. 8 row - edge, 19 purl. Row 9 - remove the edge, (2 knits, inc)x6, k1, (26) Row 10 - remove the edge, purl 25.
Similarly, we knit the loops of the other knitting needle.
Fasten the thread on one knitting needle and cut (52) Row 11 - Knit all 52 loops, connecting them into a circle. And immediately distribute it onto 4 knitting needles. 11-18 row (8 rows) - knit 52 row 19 - make 1 increase on each knitting needle row 20 - knit 56 row 21 - make 1 increase on each knitting needle row 22 - knit 60 row 23 - make 1 increase on each knitting needle row 24 - K64 25-31 rows (7p) - knit with an elastic band 1x1 (k/p). 32nd row - close the loops without tightening the fabric. We cut the thread and hide it.
Let's try on the dress! The number of increases can be reduced... look at your toy.
We take a needle with the same yarn and along the neck we sew a seam “forward with the needle”, but do not tighten it, do it very loosely. We put the dress on the owl and tighten the neckline. We cut the thread and hide it.
Crochet dress from Vasilisa Vasiliev
First we knit the skirt: 1. Cast on 72 stitches. p. and at 8 from the hook we knit a loop (this will be a loop for a button), then we knit a sc to the end of the row. 2. Next, in rotating rows. We do 2 v. p. lifting and again the whole row of sc. 3. 2nd century p. rise further sbn. 4. 2 c. sc to the end of the row we close the fabric in a circle and knit another 1 row of sc. 5. Next row We knit 2 sc in each loop. 6. Change the color of the thread and make 3 in. n rise and knit 5 dc 2 loops, skip into the next one, make 2 dc 1 in. p. 2 dc 2 loops skip 5 dc, thus knitting to the end of the row. Similarly, we knit the next rows to the desired length of the skirt.
Next we knit the top of the dress and sleeves:
1. Attach the thread to the top of the skirt and knit (try the dress on your owl and, depending on where you sewed the wings, we make armholes like this) Two ch, then skip 12 sc 15 ch 9 loops then skip 20 sc 15 ch 9 loops further sc to the end of the row. 2. 2nd century p. row sbn. 3. Two ch and sc to the end of the row at the end of the row we make 8 ins. p. we form another loop under the button.
Sleeves:
Where we made 15 ch for the armhole, attach a thread of a different color to the first loop and knit 3 ch in the 3rd loop from the hook, make dc 1 ch 2 dc, skip 2 ch into the next loop (2 dc 1 ch. p 2 dc skip 2 ch ) repeat until the end of the armhole, fasten the thread. We knit the second sleeve in the same way.
Features of the national assembly
Something interesting was discovered after assembly. Compare Russian and English versions of the instructions:
RUS:
squeeze out the parts as you assemble (1, 2, 3.),
ENG:
squeeze out
all the parts
, and then assemble, relying on the photo of the finished owl and the instructions.
Go crazy! And they also say “stupid Americans”