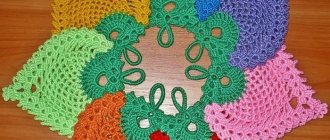
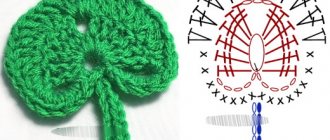
At all times, flowers have been recognized as the best decorative element in clothing and interior design; unfortunately, the beauty of living bouquets is short-lived. Knitted flowers can be an excellent alternative to fresh flowers, because with the help of a hook, thread and skillful hands you can create almost exact copies of them. Crocheting flowers is not that difficult, so novice needlewomen can quickly master simple patterns and begin creating the most beautiful buds.
Can you crochet? Publish your work on kru4ok.ru
Where can you use knitted flowers?
Homemade flowers can be used as decoration in a variety of areas:
- decorate hats and hats.
- decorate sofa cushions;
- add as jewelry elements;
- design homemade bags;
- Use as bookmarks or napkin clips;
- create wall panels;
- use when creating cards or gift wrapping;
- collect bouquets to decorate your home interior.
The thread for creating flowers must be chosen that does not break up into individual fibers; it can be cotton, synthetics, silk, darning, wool or a mixed thread.
Crochet tulip flowers
The video should load here, please wait or refresh the page.
The crochet technique involves making flowers of various shapes and sizes. Volumetric flowers can be knitted from several tiers of different diameters. From the semicircular petals located around the center, you can knit simple flowers with five petals.
Petals with sharp corners make daffodils, elongated petals make daisies or lilies, and narrow petals make carnations. Small cups are suitable for making lily of the valley or bells, and wide petals make orchids and poppies. You can make tulips from oval petals.
Flowers knitted like a ruffle look beautiful, when in each row the number of loops is significantly increased and the petal goes in a wave; if you gather such petals tightly from below, you will get a real carnation; it’s easy to assemble a rose from straight lace.
Video tutorial on how to crochet the simplest flower
The video should load here, please wait or refresh the page.
Flowers made from cotton pads
Many people do not even suspect that cotton pads can be used not only as a hygiene product, but also as a universal material for creating all kinds of inflorescences.
The surface of the cotton pads can be smooth, or maybe with a pattern applied. Depending on the type of flower, choose the one that suits you best.
Even a child can make a spring card with a primrose using cotton pads, scissors, glue, colored paper, paint or simple felt-tip pens.
If you fluff the cotton pads a little around the edges, you will get these airy roses. It looks very gentle and original!
Using cotton pads, a cotton swab and a drinking straw, you can create an elegant calla lily.
Cotton pads and a stationery stapler will help you make an original daisy) If desired, you can use glue instead of stationery staples and paint the daisy with gouache or acrylic paint.
Cotton pads are often used to make a very popular flower – roses. The roses will be decorated with pearls, which will add nobility to the resulting flower arrangement.
SunduchOK113 will reveal the secrets of creating flowers from cotton pads with his own hands in a video master class:
From a large number of roses you can create such a festive Christmas one. To do this, you will need a round blank, glue, cotton pads and various elements for decoration (ribbons, beads, rhinestones, sequins, etc.)
Crochet decorative flowers
Flowers in pots and for interior decoration.
Panel Terry rose with a flower, master class!
Master class on creating a panel “Terry Rose”. Author's work by Efimiya Andreevskikh. Knitted panel from maxi threads, several green tones. Violet - 280 m. per 50 g. A little melange for tying roses. Hook 0.75. To give volume to the leaves I used wire with
Read more…
Knitted flowers - snowdrops
Knitted flowers - snowdrops. Description by Tutt. You will need: Iris threads in 2 layers, 1.1 mm hook. Petal: Dial 5 v. p. and knit in the round. 1st row: 1 v.p. lifting, 4 tbsp., 2 tbsp. b/n in
Read more…
Beautiful three-dimensional crochet flower
The video should load here, please wait or refresh the page.
Knitted cactus flower
Hello! My name is Nadezhda. I live in the Chelyabinsk region. I want to share with you my knitted cactus. Description and diagrams are taken from the book Crocheted Flowers. Authors: Natalya Kovpak, Olga Chernomorskaya. A cactus consists of a trunk and two separate
Read more…
Crochet flowering cactus. MK from Anna Kasyanova
Once they asked me to knit a couple of cacti. Having searched the Internet for options for cacti, I found MK, but with knitting needles, I tried it and I didn’t like it, there were a lot of holes, I didn’t like the appearance. And then I decided to crochet it.
Read more…
Flowers in a pot, master class!
Flowers in a pot - the work of Yulia Ostanina. For work you will need: The remains of thin threads (like Iris) A plastic flower pot (≈ 8 cm in diameter) Cocktail straws A piece of wire A piece of foam rubber (a dish sponge will do) A hook of a suitable size and a little patience Legend: st.
Read more…
Beautiful crochet tulip flowers
I wanted to knit tulips. But the existing MKs did not suit me. What to do in this case? Of course, come up with it yourself! You can prepare several bouquets for March 8th. The flower is entirely knitted (I don’t really like sewing on details).
Used:
- hook - 1.75
- yarn - 385 m per 100 g
- Tulip size is about 16 cm
Description author @
Description of crochet flowers
Knitted flowers - meadow lumbago
To knit flowers you will need: Iris threads in 2 layers, a 1.3 mm hook and a flower pot. Knit petals according to pattern 1 - 6 pcs. Center of the flower: Knit in the round 1 row: 2 ch, from the first ch. knit {art.b/n,
Read more…
Crochet Celosia flowers in a pot
Crocheted flowers in a pot. Celosia flower. Author Olga. Flowers and leaves are knitted from KARTOPU acrylic yarn, and the pot is made from wool blend yarn. Hook No. 1.75, product weight 230 g. I used: 200g yarn, 90cm wire, padding polyester. Flowers 7 pcs., leaves
Read more…
Sunflower flower in a pot
Very good afternoon everyone. I knitted another toy for kindergarten. They ordered any flower at my discretion. For some reason, a sunflower immediately came to mind. The threads I used were acrylic and a #4 hook. There are no schemes as such, everything is from my head. Sunflower toy
Read more…
Crochet flowers from Irina
Good day everyone! I want to share with you a pattern for such wonderful sunny flowers. You will need yellow, green and black (or dark brown) yarn. The amount of yarn depends on the number of flowers in the bouquet. I drew this diagram for the petals: After
Read more…
Crocheted panel with POPPIES flowers
Knitted panel with poppies - the work of Elvira Aleeva. A little bit about yourself. I am already on a well-deserved rest. I devote all my free time to what I love: crocheting. The panel is knitted from “narcissus” in red, crimson and green colors. Hook
Read more…
Basket with tulip flowers, master class!
The color of the buds can be completely different. Just remember the natural color scheme or take your favorite colors! You can make all the flowers different colors!
Flowers made from cotton swabs
Cotton buds are also an affordable and excellent material for creating beautiful flowers.
Using cotton swabs, plasticine and colored paper you can create cute daisies.
Willow branches from the tips of cotton swabs look very natural on an Easter card)
Using the tips of cotton swabs, paints and colored paper, you can make bright and fluffy dandelions.
You can make creative ones from colored cotton swabs and round foam blanks. For example, such a mischievous daisy.
When you make flowers from cotton swabs with your own hands, you can choose any paint (gouache, watercolor, acrylic):
You can make mini flower beds with carnations from the colored tips of cotton swabs.
Simple crochet flowers for beginners
In this part of our selection, we want to collect the simplest color schemes that are not difficult to knit. Sometimes they are very useful for decorating booties, hats and other small items.
The whole point of knitting a simple flower is this:
- we knit the middle from a ch, if you want there to be no hole in the center - the number of loops should be 3-4-5, if you need a hole for a bead, then 6-8.
- 2 rub. from st b/n, the number of columns should be 2 times greater than ch.
- 3 rubles from petals - 4,5,6 pcs. The petal is knitted in a combination of large and small stitches. For example, Art. b/n, 2-3 st. s/n, st. b/n. - this is the simplest petal.
- the smallest flowers have 2 rubles. It’s better to skip it and immediately crochet the flower petals.
Crocheted Campanula flowers, master class!
Master class from Efimiya Andreevskikh “Flower “Campanula”. Knitted from white cotton threads “Romana”, crocheted No. 0.6; from pink cotton threads “Maxi”, crochet no. 0.75 and from melange cotton threads “Lily”, crochet no. 0.75.
Read more…
Five simple crochet flower patterns
Crochet or knitting needles
You cannot knit a perfect copy of a living plant on knitting needles. But funny crafts knitted with knitting needles look piquant.
Therefore, the choice of tool depends on what they want to get as a result: cute decorations for children’s clothes, gift crafts, or the perfect bouquet and imitation of living plants for a living room panel. The choice of tool also depends on the knitter’s skills.
Although small flowers are a handy thing to practice crochet with. Sometimes petals and leaves are knitted and the edges are crocheted.
Crochet flowers for decoration
Small and large specimens that serve to decorate clothing and accessories.
Master class Rosebud (crocheted flowers)
M.-K. "Rosebud." Author's work by Efimiya Andreevskikh. Knitted from Romanian threads “Romana” - 100% cotton, crocheted 0.6. For tying you will need some Tulip threads. A few more “Maxi” threads for the tail, as well as a hook No. 1.1. This is a voluminous motif that can be
Read more…
Master class Pansy flowers (crocheted flowers)
M.-K. "Pansies". Author's motifs by Efimiya Andreevskikh. Knitted from 100% cotton, 220 m thick, 50 g, crocheted No. 1.25. These motifs can be used to decorate knitted items, as well as to create compositions in
Read more…
Knitting a two-tier violet flower, master class!
Knitting a two-tier violet. Master class from Olga Krivenko. Collect a chain of 8 VPs and enclose them in a ring with a connecting post (photo 1). Tie the ring 12 sc, inserting the hook into the center of the ring. Complete the row of connections. with the first loop
Read more…
Pansy flowers, master class!
Master class by Valentina Litvinova “Pansy Flower”. 1. Make a sliding loop. 2. Cast on 5 single crochets. 3. One chain stitch, 2 single crochets in the single crochet of the previous row, 6 chain stitches,
Read more…
Blue poppy flower, master class!
Blue poppies are not exactly poppies, but their relatives, meconopsis. I hit the color scheme pretty accurately, but with the leaves I was very wrong. They shouldn't be so cut up. I didn't bandage it. For the stamens, this time instead of semolina I used glitter powder purchased at a nail design store. It turned out well, but according to the idea, the stamen filaments should have been lighter than the pollen. However, impregnation of the thread with PVA changed its color exactly to the shade that the powder has.
Crochet flowers - Maria's work
To knit flowers you need yarn of three colors (three any shades), a hook according to the size of the yarn. You need to knit according to the pattern presented below: row 1 - 3 knit in blue, row 4 - 5 knit in blue, row 6 - change to
Read more…
Volumetric crochet flowers from NewNameNata
For a children's jacket I knitted a flower like this as a decoration. This flower is considered a classic motif in Irish lace. But, in my opinion, it looks good on its own! I found a description of knitting such a flower on the Internet, a video tutorial: It’s easier for me
Read more…
Crocheted flowers May roses
Several patterns of crocheted flowers for your piggy bank. They can be used to decorate a hat, dress, panama hat or make a brooch. MATERIALS Remains of yarn of various colors. HOOK Select the size according to the thickness of your yarn. Types of loops: Chain loop (chain loop): insert a hook into the stitch, throw over
Read more…
How to knit a multi-layer flower step by step
Knitting patterns for violets, crochet pansy flowers
Multi-layer rose, flower knitting patterns
Volumetric flowers, crochet patterns
Red poppy, crocheted flower, master class!
Materials and tools: red yarn for the petals (in this case YarnArt Tulip, 100% microfiber, 250 m by 50 g) and green yarn for the leaves (YarnArt Violet sectional dyed, 100% cotton, 282 m by 50 g). Hooks of the appropriate size: in this case 0.9 for petals and 0.7 for leaves. The wire is red, green and black; black beads, scissors, wide eye needle (tapestry); a little filler for stuffing the box and bud (in this case, toy filler was used; you can get by with padding polyester); platform brooch pin with three holes.
Poppy, ordinary, wild flower, master class!
Master class on knitting a flower “Common poppy, field poppy” from Elena - koluchka.
Description and diagrams at the link
Flowers, 4 poppy crochet patterns
Set of flowers Red poppy crochet
My name is Svetlana Usova. I live in Kamensk-Uralsky. In my free time I love to knit, mostly crocheting. I present my work, the “Red Poppy” kit, to the knitting competition! The set consists of an airy necklace, a ring with poppies and
Read more…
How to decorate any product with poppies - see the link
How to crochet tulip flowers
Crochet Daisy flower, master class!
You will need “Iris” threads in white, yellow and green colors, a hook No. 0.7, green wire, a base for a brooch, and a needle with a wide eye.
Flowers, 6 daisy crochet patterns
How to crochet a daisy
Crochet a daisy flower, video tutorial
The video should load here, please wait or refresh the page.
Carnation
The most spectacular flower for beginners. It is impossible to make a mistake in the scheme.
- Cast on a chain of 8 chain stitches and close them into a ring.
- Then 3 chain stitches and 15-20 double crochet stitches in the central ring.
- Close the row into a ring with a half loop.
- Then 3 chain stitches and 3 double crochets in each loop of the previous row, close the row with half loops.
- Repeat the second row several times until you get a lush flower of the desired size.
- Tie the last row: in each loop st. single crochet, then 3 chain stitches, etc.
- Insert a finished stem or wire covered with green thread into the center, with a curved tip (so that the bud does not slip off).
- That's it - the carnation is ready!
Crochet a bouquet of flowers
If you collect all the color schemes presented in our selection, then you should already have a rich bouquet of knitted flowers. But sometimes the bouquet is knitted in a very small size in the form of a brooch or decoration for a dress/hat. Such bouquets require special designs. For example, a bouquet with roses:
Mini - crochet flower bouquet
Flowers from egg trays
Egg trays are one of the waste materials for handicrafts. Usually, egg containers are thrown into the trash, not knowing what beauty can be created from them! Hand-made flowers from egg trays will decorate your home interior, photo frames, wreaths, mirrors, etc.
To make these flowers you will need:
- egg trays (cardboard and plastic can be used);
- brush and paint (gouache, acrylic);
- scissors;
- glue;
- wire.
We cut the egg tray into separate sections, after which we form each section with scissors. The height of such blanks may vary. We paint the resulting petals with paint, preferably in two layers. Further, depending on the type of flower you are making, one blank can be inserted into another, forming a bud. We fix the elements of the resulting flower with glue.
The materials and process of creating flowers from egg trays are discussed in detail in MK Handicraft Masterpieces:
We bring to your attention the most common types of flowers from egg trays. But remember that you can come up with the flower shape yourself!
The frame of the summer wreath is also made from egg trays. A similar one can be decorated with daisies, cornflowers or pansies.
You can even make a small floral masterpiece from plastic egg trays!
For example, snow-white roses from plastic containers in combination with pearls and decorative gypsophila form such a delicate bouquet.
Decorative moss or fern, as well as red ribbons and beads will add brightness and festiveness to a Christmas wreath made of plastic roses.
A personalized flower on the table will please a colleague or your loved ones:
Let's see how you can turn a simple photo frame into an exclusive one:
A simple mirror decorated with flowers from trays will look more interesting and sophisticated.
Chic mirror decorated with lush peonies
Crochet leaves for flowers
It is almost impossible to imagine our flowers without leaves, so we decided to add a few diagrams, we hope that they will also be useful.
Author's crochet motif Trefoil. Master Class!
Author's motif “Shamrock” - master class from Efimiya Andreevskikh. The motif is crocheted from melange threads 220 m thick, 50 g, with a 0.75 crochet hook. The motif consists of 3 leaves knitted without breaking the thread. Can be used to decorate knitted items,
Read more…
Dandelions made of threads on wire
And here are the sunny dandelions. First, wind the yellow yarn around the fork. Using a large needle and strong thread, make two lines down the middle to secure the threads. Apply glue along the line to secure the yarn. We wind the roller tightly using additional thread, fix it with glue again and cut it.
We cut the top, take the green threads and string/glue them onto the thread, wrap the dandelion in the green blank, and tighten the thread. Glue the bottom cut. The photo shows a detailed master class on dandelions.
Video tutorials on crocheting flowers
Crochet cactus from plush yarn
The plush amigurumi cactus is not just a toy, but a useful pincushion for any needlewoman.
To knit a cactus you will need:
- — Himalaya Dolphin baby plush yarn in green, coral, white and brown colors;
- - coral-colored cotton yarn for cheeks and black for embroidering eyes;
- - hooks No. 4 and 2 mm;
- - filler;
- - cardboard;
- - weighting material or stones.
The video should load here, please wait or refresh the page.
Flowers from disposable spoons
Disposable plastic spoons can also be used to create flowers.
You can make something like this from simple white spoons
Spoons can be used not only in white, but also in bright colors, this is especially true when creating.
When creating flowers from, you can use spoons of different sizes and colors:
To create these decorative water lilies, some of the spoons were painted with gold spray paint. White and gold water lilies next to each other look very stylish!
In addition to all kinds of paints, you can decorate spoons using decorative glitter and glue:
DIY Gifts and Crafts Ideas offers a tutorial on how to create a bright spring one from disposable spoons:
You can create a spring flowerbed from white spoons, drinking straws, plasticine and colored paper. We connect the petals (white spoons) and stems (drink tubes) of snowdrops to each other using ordinary green plasticine. We cut out snowdrop leaves from colored paper. We make yellow ones from plasticine.
Using thermal treatment (lighter flame, candle), spoons can be melted and deformed into a petal of the desired shape. After this, paint the petals in a suitable color and assemble. It is convenient to use spray paint. Such flowers can even be used in making.
Using the same principle, you can make one like this. You can learn all the secrets of its manufacture in the master class.
In the basket
A DIY bouquet made from knitting threads is placed in a small basket.
To make this craft you will need the following materials:
- 5 short knitting needles;
- green “grass” threads;
- universal glue;
- pink and yellow “Iris” yarn;
- flowerpot or large plastic glass;
- foil;
- brown threads;
- decorative braided braid;
- polyurethane foam;
- 2-sided tape;
- 2 pins and needles;
- stationery knife;
- scissors;
- crochet hook.
Bouquet of threads for knitting in a basket step by step
The beginning of a flower
To make a medium flower, you need to use a wool thread about 45 cm long. The length may vary depending on the desired size of the finished flower. Start the spiral by placing the yarn between two fingers as shown in the photo.
Coiling the spiral
Using a felting needle, carefully insert it into the inside of the spiral. Carefully! Do not bend the needle, otherwise it may break. Take care of your fingers!
Try to roll the spiral tightly as you insert and remove the felting needle. All the time you will hear a specific sound when you remove the needle. That's how it should be. These fibers will adhere to each other. That is, you need to ensure that the spiral arcs hold tightly to each other and do not unravel, even if you do not hold the spiral with your hands.
Continue in this manner, holding the spiral with your fingers and fastening it with a needle until the flower reaches the desired size.
Completing the spiral
When you have a flower of the required size, use the needle in the same way as in the previous steps, the only difference being that you will need to thread the entire flower to the center, holding the fibers together. Pass the needle around the entire spiral again. Do not allow the needle to go through, this will leave a mark on the outside of the flower. To secure the tail of the thread, bring it to the back of the product and secure with a felt needle. Be careful not to pierce the flower through. Use a needle to give the flower a neat shape. When you complete the work, you will get a spiral that will not unravel and will look like a single whole.
Decorations using a flower
- Hair accessory: Sew the flower securely onto the elastic.
- Hair Clip: Use glue to stick the flower to the bobby pin.
- Brooch: thread a flower made of wool thread onto a pin.
- Button: Use green felt to make a button. Place a flower on top of the leaf and sew it on.
- Can be used as a button or sewn onto clothing as a decoration.
Our amazing flowers made of woolen threads are ready! We hope that you liked our idea and you will be happy to use such flowers to decorate your clothes or hair. Or maybe you’ll find a completely different use for them.
If you liked the master class, then leave a couple of lines of gratitude to the author of the article in the comments. The simplest “Thank you” will give the author a desire to please us with new articles.
Yarn bouquet
Bouquets made from balls of yarn are a new fashionable type of needlework. Girls make such souvenirs for photo shoots, as gifts for friends, and some needlewomen even get married with such an original bouquet in their hands.
Let's look at how to make a bouquet of yarn with your own hands. Such a cute and original gift will be a real surprise for the New Year, March 8, or the birthday of your needlewoman friend.
Master class No. 1: Bouquet of yarn “Mimosa”
To make a bouquet of skeins that resembles a spring mimosa, you will need:
- Yellow acrylic yarn;
- Thin wire for beads;
- Floor tape;
- A coarse-tooth fork and a little patience.
We wind the thread onto the fork (10-15 turns), and secure the winding exactly in the middle with wire. We remove the workpiece, cut the threads along the edges and get a small fluffy pompom. We carefully twist the wire into a thin stem.
We collect the finished stamens (15-20 pieces) into a composition. We start with three balls, collect them in a bouquet and secure them with floral tape.
Gradually adding stamens, we create a long fluffy twig. If you make such a bouquet of multi-colored mimosas, you will get a gorgeous gift for your mother or grandmother.
Any novice craftsman can handle creating a spring bouquet “Mimosa” from yarn and wire.
Master class No. 2: Bouquet of yarn “Ladybug”
This is a festive and at the same time practical gift for a knitting lover. To make such a cute bouquet, you need simple details - multi-colored balls of woolen threads, linen fabric or burlap, plastic fasteners for balloons, compressed paper for leaves.
Let's assemble a bouquet in three steps:
- We cut the flax or bag into strips 5-7 cm wide, pass a needle and thread along the edge of the strip to tighten the fabric and create a soft cup. The edges of the materials are terry, creating the effect of a real flower.
- We place the balls in plastic balloon funnels and secure them with our own thread. We insert the plastic stem into the fastener, place the structure in a fabric cup, and secure it again with thread.
- We collect ready-made “flowers” into a bouquet, add leaves from compressed paper, decorate with any wrapper and place the main accent on the leaf - a cute ladybug.
A bright bouquet of multi-colored yarn is ready. For greater practicality, you can insert knitting needles or a crochet hook into the composition.
Master class No. 3: Bouquet of yarn “New Year’s boom”
In the winter cold, warm bouquets made of wool are especially relevant. Here is a short list of what you can use to assemble a gift composition for the New Year:
- Balls in pleasant New Year's colors;
- Spruce branches;
- Multi-colored balls;
- Artificial cotton;
- Beads on legs, fluffy stamens;
- Basket as a base.
It is better to decorate the bouquet basket in advance with knitted fabric or corrugated paper, and place polystyrene foam cut to shape inside.
Next, place the skeins on skewers. To prevent wooden sticks from jumping out of the balls, there is one little secret. First, you need to put a ball of foil on the tip of the skewer.
After placing all the balls in the basket, we begin to fill the empty space. Here you can use your imagination and tastefully decorate the bouquet. The same skewers or plastic tubes help; it’s easy to put New Year’s balls on them. Next come smaller details - twigs, cotton, stamens and beads.
A New Year's bouquet can be assembled in literally half an hour and is quite inexpensive. Such a gift will please both a man and a woman. It exudes warmth, festive mood and home comfort.
Tips for using yarn bouquets
Gift compositions made from threads delight the eye with aesthetics and never fade. These timeless bouquets can be stored on a shelf for a long time, and then used to create handicrafts.
How to use yarn bouquets? Here are some practical tips:
- Give such a basket to a novice craftswoman; together with a knitting kit, you will get a very practical gift.
- Create a large bouquet of yarn and present it to your mother, sister, or colleague on March 8th.
- Please your grandmother on her anniversary, let her have a supply of yarn for new creative ideas.
- Yarn bouquets will decorate any room and become a bright accent during a holiday photo shoot.
Almost all types of yarn are used to create compositions. Lint-free acrylic balls give clear lines and regular shapes, angora skeins form soft inflorescences, and fluffy chrysanthemums are easy to make from shaggy mohair wool.
Fantasy is limitless! Take notes and create your own creative bouquets with your own hands!
Winter bouquet Happy
I am accepting orders for paniculate hydrangeas; the seedlings are of excellent quality and will delight you with lush blooms this summer. Reservation without prepayment. Issue in May. There are other varieties of hydrangeas, a good selection of conifers and perennials, consultation on creating compositions, write in private messages. 1. Hydrangea paniculata 'Diamant Rouge' Compact bush, no more than 1.3–1.5 m tall. Blooms in VII–IX. At first the flowers are greenish-white, then quickly turn pink and after two weeks they acquire a rich red color. Heavy pruning is recommended. Pot 3l - 990 RUR 2. Hydrangea paniculata 'Fraise Melba' Tall variety, bush up to 1.7–2.1 m. The color of the flowers when blooming is greenish, later milky white, then soft pink, towards the end of flowering rich wine red colors. Blooms in VII–IX. Large inflorescences are obtained only with annual heavy pruning. It overwinters without shelter, a hardy and unpretentious variety. Pot 5l - 1490 RUR 3. Hydrangea paniculata 'Magiсal Moonlight' Bush with a height and diameter of up to 2 m with strictly vertical shoots. It blooms in July, does not lose its decorative effect even after flowering in the fall, and is suitable as a dried flower for winter bouquets. At the beginning of flowering, shades of creamy yellow and lime green predominate, turning into white. In severe winters, freezing of shoots is noted; open, windy areas are not recommended. 3L pot - 990 RUR 4. Hydrangea paniculata 'Magiсal Starlight' Bush 1.6–1.8 m high with a symmetrical, regular rounded crown shape. The inflorescence is loose, cone-shaped and consists of two types of flowers: sterile and fertile, of which the majority are. Sterile flowers are located unevenly in the inflorescence, large, consisting of four round-oval elongated sepals of dazzling white color. Blooms in VI–IX. Prefers moist, well-drained, fertile soils with acidic and slightly acidic reactions. Light-loving, but feels better in shade. Winter hardiness is high. Zone 4, down to -35°C. Pot 5l - 1490 RUR 5. Hydrangea paniculata 'Phantom' Bush height from 2.1 to 2.5 m with a round spreading crown. The shoots are strong, strong, weakly branched, and grow vertically. The inflorescence consists of white sterile flowers, which acquire a lilac-pink hue by autumn. Blooms in VII–X. Annual early spring pruning is required. The shorter the pruning, the larger the inflorescence. An unpretentious variety, resistant to diseases and pests, has high winter hardiness. 3L pot - 990 RUR 6. Hydrangea paniculata 'Polar Bear' Bush with a height and diameter of about 2 m. The inflorescences consist mainly of sterile white flowers, turning slightly pink in the fall. Blooms in VII–IX. Requires short annual pruning and does not like overhead watering of flowers. It has high frost resistance down to -35°C. 3L pot - 990 RUR 7. Hydrangea paniculata 'Skyfall' Forms a bush 1.2 m high and 1 m wide. The inflorescence of this variety is large and filled with unusual, sterile flowers, similar to hyacinths. This variety is popularly called hyacinth hydrangea. It blooms greenish, then turns white and later acquires pinkish hues. It winters well in the middle zone, but we recommend mulching and planting in a place protected from the wind. Prefers sunny places for planting, but can tolerate partial shade. Pot 3l - 990 RUR 8. Hydrangea paniculata 'Sundae Fraise' A low-growing variety with a dense, compact, symmetrical rounded crown of about 1 m. The flowers are sterile, white, towards the end of flowering they become pink, the color of strawberry ice cream. Flowering is long and abundant from VII to IX. An unpretentious, stable and winter-hardy variety. 3L pot - 990 RUR 9. Hydrangea paniculata 'Vanille Fraise' One of the most popular varieties. It has a bush of 2–2.3 m, with erect, hard shoots. The flowers are sterile, at first milky white, then a delicate pink hue, towards the end of flowering a rich wine red color. It is very responsive to fertilizing: in a good agricultural background it produces maximum decorativeness and clean, bright tones in the color of flowers. A very hardy and unpretentious variety, resistant to diseases and pests. Has high winter hardiness. Pot 3l - 990 RUR, pot 5L - 1490 RUR
How to make packaging for a bouquet
There is a wide range of wrapping materials, varying in texture and color, the most common of which are:
- multi-colored corrugated paper is ideal for decorating yarn compositions;
- thin transparent film is a classic packaging option. It is used as a component of a more complex wrapper, involving several tiers of different materials;
- the floral mesh retains its shape well, gives the bouquet elegance and tenderness, and in appearance resembles material with “holes”;
- craft paper is suitable for any craft and also adds brevity;
- translucent organza will create a luxurious and rich look.
A bouquet of threads - a gift for grandma on her birthday
For additional decoration the following materials are used:
Burlap flowers
Anyone can create flowers from an unusual material - burlap. This is a very popular pastime that people are born after!
For beginners, you can start with the simplest thing, making a rose from burlap.
To do this, you will need the material itself - burlap, matching threads and a needle.
If you can use it carefully, you can replace the needle and thread with hot glue.
We cut the burlap 4-5 cm wide, approximately 1 m long. Fold the resulting strip in half along the entire length and begin to twist the rosette.
YOU WILL NEED IT
For a step-by-step process of folding a rose using this method, see the “Cross” master classes:
Burlap roses look very stylish! They can be used to decorate various things in your home, for example, to make such designer lamps...
...or make this wreath decoration for the door:
There is a universal technique for creating flowers from burlap. In this case, the burlap is glued onto the finished frame of wire petals.
First, the burlap is coated with PVA glue.
After drying, the fabric will become harder and more convenient to take any shape.
We prepare a frame of flower petals from wire, wrap the wire with colored adhesive tape.
The resulting petals are placed on glued pieces of fabric and once again treated with glue on top.
The workpiece must be allowed to dry in this form for 1 day. Next, we cut out the resulting petals along the contour of the wire so that the edges are perfectly even. We bend the cut out elements of the flower in the desired direction and form a flower.
Snowflake
In winter, on New Year's Eve, a snowflake made using the contour technique will decorate and transform the room. This means that you do not need to completely fill the space, but only the contours.
Having examined various photos of appliqués made from threads, you can see that this method visually highlights individual parts and emphasizes special elements.
Progress:
- A template of a large, clearly drawn snowflake is used. If it is not there, then you can draw it yourself.
- Tracing paper is placed on top and secured with pins.
- The tracing paper is lubricated with a thin layer of vegetable oil.
- White threads are cut into pieces of 10-12 centimeters.
- Each one is moistened in liquid glue and drawn from the edge of the snowflake to its middle according to the drawn sketch. In this case, several loops are made around the pins.
- In this way all the rays are covered.
- When the image is completely hidden under the threads, the craft remains in a dry place until it dries completely.
- After secure fastening, the pins and then the snowflake itself are removed.
- Such a product can be hung on a Christmas tree, decorated with a doorway, or decorated with a New Year's card or applique.
We use cardboard
Such beautiful thread flowers are made using the same principle as crafts created with a fork. At the same time, the process of creating buds is completely safe for children, since no sharp objects are used in the work. Making such a flower is very simple.
- The first step is to select a piece of cardboard of suitable length and width.
- Red yarn is wound on it. The more threads are used, the more voluminous the finished bud looks.
- After this, all the coils must be removed from the cardboard base.
- Next, this skein needs to be pulled in the middle with thread.
- After this, you can begin to form the bud. The edges of the skein on both sides must be cut with sharp scissors.
- To create a stem, you need to select several sticks of suitable length.
- The buds should be slightly fluffed and attached to the branches. The best way to do this is to use a glue gun. The base of the stem can be decorated with green thread if desired.
You need to assemble a beautiful bouquet from ready-made flowers. You can decorate it with branches of living plants. The composition will turn out beautiful and realistic.
Read also: TOP 70 gifts for a business partner
deciduous tree
Autumn designs for children often include nature with colorful leaves. After all, at this time it is especially beautiful, precisely thanks to the abundance of colors.
Therefore, a tree on a craft looks more interesting not only with green leaves, but also with yellow and red ones.
Process of creation:
- The trunk of the future tree is drawn on a brown sheet of paper, cut out and glued to a cardboard base.
- Yarn of various shades of red, yellow and green is cut into small pieces and mixed.
- The branches of the tree are smeared with PVA glue and the workpieces are evenly distributed onto it.
- In addition to the picture, you can glue the sun, clouds, grass, birds and animals cut out of cardboard.
Application – dandelion
One of the most common themes for children's crafts is flowers. After all, any Women’s Day is accompanied by them. But it doesn’t have to be roses or orchids; it can also be the most common weed - dandelion. Outwardly, he looks like a small radiant sun.
In the following master class you can learn how to make it yourself:
- A thick white sheet is used as a basis. For an unusual background, spraying is used. To do this, you need an ordinary toothbrush, which is dipped into watercolor paint of any color and, by running your finger over the bristles, sprays.
- Dandelion leaves are required. It’s good if you have a herbarium in stock, but if not, it doesn’t matter. They can be drawn on green paper and cut out.
- Green woolen threads are cut into pieces up to a centimeter each.
- Cut threads are glued to the prepared leaves.
- Strips that will serve as stems are cut out of green paper and glued to the prepared background.
- The resulting leaves are glued to the lower part of the stems, and the bases of the buds are formed from previously cut green threads at the upper part.
- To make buds, you need to take a piece of paper, fold it several times and wind a yellow woolen thread on top in one direction. Then carefully remove from the paper and tie tightly with the tip of the thread in the middle. The rounded threads on the sides are cut in the middle and fluffed.
- You need to create as many such buds as there are glued stems.
- Finally, all that remains is to attach the buds in place.
- Beautiful application is ready!
