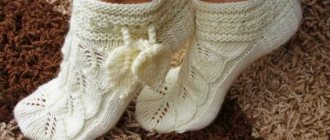
The purpose of hair clips is not only to secure curls, but also to give the image completeness and a special “zest”. It is clear that not every accessory is capable of attracting attention. Factory versions, or goods on Aliexpress, are most often shiny, beautiful, but “soulless” products. It is much more interesting to create a hairpin yourself.
If you don’t know what hairpins are made of, or don’t know all the details of this process, then we suggest you read this article. Here we have collected several wonderful master classes, thanks to which you can easily make beautiful hairpins with your own hands, for school for every day, or for a special occasion - for example, on September 1st.
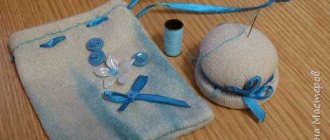
Take out ribbons, foamiran, beads and tools from your supplies - let's start creating!
What paper should I use?
First of all, you need to choose the right quality and type of paper, otherwise the product may be hopelessly damaged, and your time and nerves will be wasted.
There are several types of paper that are used in making things:
To create a base or give shape to an object, the following are suitable:
- Whatman paper – the structure is dense and retains its shape well.
- Cardboard – varies in composition and density.
For registration:
- Newsprint has a soft, pliable structure.
- Rice.
- Napkins.
- Packaging.
You can also purchase designer types of paper in specialized stores.
Features of the image and tips
In each image you can create a twist that will add individuality. A red silk bandana worn around the neck will fit into the image of a pirate as a distinctive sign.
If you don’t have a ready-made bandana, you can make it like this:
- Cut a square from red fabric.
- Fold in half to form a triangle.
- Attach the triangular scarf to your neck, tying the ends at the back.
- The corner in front is directed downwards.
For makeup, pirates, especially girls acting in this role, will need dark eye shadow. If the image represents the pirate as evil, then there should be a lot of makeup, and dark tones should be used. Shadows are applied to the corners of the eyes to add depth to the look.
Jewelry makes a pirate costume look like reality. Pirates, like crows, love shiny objects, which fit perfectly into the look.
The parrot on the pirate's shoulder is an interesting attribute. You can buy a toy bird and attach it to your shoulder, or you can take a live parrot. Then victory in the competition for the best costume will be in your pocket.
There is nothing difficult about making a wonderful outfit for yourself or your child. A pirate party will lift your spirits and leave an unforgettable impression. To do this, it’s worth imagining a little and being creative.
Cylinder
Suitable for the costume of Abraham Lincoln, Pushkin, or a magician.
One of the most popular hat shapes, there are many variations. Detailed instructions for making:
- Using a measuring tape over the ears and above the eyebrows, measure the circumference of the head.
- On whatman paper or thick cardboard a strip is marked that is as long as the girth plus another two centimeters for the glue. The area intended for applying glue must be marked separately. The width of the strip is the future height of the cylinder, the size is selected as desired plus 1 - 2 cm for glue.
- The marked strip is cut out with utility scissors.
- The marking for the glue is treated with an adhesive and the strip is rolled into a cylinder so that part of the strip with glue overlaps the seam.
- Then the gluing area must be dried. To make the seam less noticeable, it is better to press it while drying from the inside of the cylinder with a round object - a plastic bottle filled with warm water will do.
- From an unnecessary box of suitable sizes, using a compass, a circle is marked - the future brim of the hat. The size can also be chosen as desired, the only condition is that the diameter of the circle must exceed the diameter of the cylinder by at least 5 centimeters.
- The circle is cut out.
- A cylinder is placed on the cut out circle exactly in the center and traced with a simple pencil along the entire circumference.
- A small circle - the future cylinder cover is also cut out using a stationery knife and nail scissors.
- On the part of the cylinder where the margins will be located, vertical cuts of the same size are made, but within the range of 1 to 2 cm.
- The cut parts are bent outward and generously smeared with glue, and a large circle with a hole is put on top and pressed tightly for better adhesion of the glue.
- The cylinder cover can be fixed in the same way, but the cut parts in this case are bent inward, however, the height of the cylinder is reduced; another way is to glue a small circle using strips cut from thin paper on top.
- After completing the preparation of the base, the resulting form is decorated and designed as desired, depending on your imagination.
The brim can be replaced with a visor or, by reducing the height of the cylinder, you can make a student’s confederate card with a tassel (making a tassel is shown below). Photos of paper hats are freely available.
Homemade cap
An origami cap is a universal thing. Its role assignment depends solely on how it is decorated (painted, painted) by you. Let's figure out how to make a cap out of paper. Look at the figure below - a detailed analysis of the circuit will tell you about the process in detail. In Fig. 2 specifically shows how to make a cap from a newspaper, since its standard spread sets a sufficient size of headdress for an average head. So:
- An origami cap is folded from a rectangular sheet. Fold it in half, and then bend the upper “closed” corners of the fold inward, bringing them together corner to corner, face to face (see figure);
- Fold the top “side” up twice, then turn the workpiece over. Bend the planes on both sides towards you, setting the desired size (we are making a cap for ourselves, a teenager, a small child);
- Fold the bottom edge of the workpiece towards you without overlapping the protruding folds, unfold the edge and bend its corners along the intended line of the new fold;
- Bend the bottom plane upward twice, covering all previously made folds. Essentially, the paper cap is ready;
- Turning the workpiece over, bend the top of the roll downwards, aligning it with the base of the workpiece. Then tuck this fold over the side of the package, straighten the product - you have a pioneer cap in your hands. I managed to make a paper cap with my own hands in just a couple of minutes.
Vietnamese wide-brimmed hat
Suitable for Oriental, fungus, fancy dress costumes.
The Vietnamese hat looks like a cone, but still has a slight difference, including in the manufacturing method, and although simple hat templates for beginners are freely available, there is still a much simpler method:
- On thick cardboard or whatman paper, use a compass to mark a circle with a diameter 3 to 4 times greater than the circumference of the head.
- The circle is cut out.
- On the cut out circle, draw a straight line from the center to the edge of the circle with a simple pencil.
- A cut is made along the line.
- Stationery glue is applied to one side along the edge of the cut, and the other is overlapped and pressed.
- After the glue has dried, the form is decorated and decor is added.
A step-by-step story of how I made a felt three-cornered hat for a doll
Hello girls. I finished sewing a luxurious 18th century suit for my handsome man. The suit was sewn, but the cocked hat was missing. I searched on different sites, stores, but it was all wrong. And after reading various articles on the Internet, I took the risk of making a felt cocked hat myself. Today I want to show you the “production process”, everything turned out to be not so difficult, and I am very pleased with the result! So let's get started: Here's what we need:
1. Pieces of felt of the appropriate size (I bought three black pieces at a craft store) 2. A suitable blank for the hat. It is necessary to take a diameter slightly larger than the head. I didn’t have anything that was suitable, I ran all over the apartment and eventually found it. You won't believe it - a lamp with light and music!!! (Hereinafter referred to as a blank.) 3. Scissors 4. Thread, needle 5. PVA glue 6. A circle of suitable size - I used a regular lid from a large saucepan. 7. Pins 8. Rubber bands (I made do with a couple of regular hair ties) 9. Hairdryer
1.
First, I soaked the felt in hot water for a few minutes to make it pliable. They recommend holding it over steam, but I didn’t bother.
2.
We stretch the felt onto the blank and gently pull it down until we give it the desired shape. Secure at the bottom with an elastic band and leave to dry. I used a hairdryer to make the process go faster.
3.
I trimmed off the excess fabric at the bottom.
4.
Then we need PVA glue. I used an aerosol, very convenient!
5.
Cover the felt piece with a good layer of glue.
6.
Apply another layer of felt on top using the same method. Secure at the bottom with an elastic band. We wait until it dries. Let's trim.
7.
Now let's move on to the brim of the hat. We choose the width of the fields and build a circle of a suitable size.
8.
I didn’t take a photo of the next step, but it’s clear. We build a circle inside with the diameter of the head volume, minus a couple of centimeters.
9.
Now let's move on to the fields. We put a felt circle on an empty blank. On top is our double cap, which has already dried and holds its shape perfectly. We carefully pin the junction of the brim and the cap with pins.
10.
We remove the cap from the blank, sew up the joint with threads tightly. Now we put the cap back on the blank. From the remaining felt, cut out a strip the size of the head. Glue the strip onto the joint to cover the seam.
11.
We admire it. Now we remove this entire structure from the blank, hem the margins on three sides and decorate it to the best of our imagination.
And this is what I ended up with. Gold border, some feathers, diamonds, and voila! How do you like it, huh?
babiki.ru
Ski hat
Additionally, you will need a lace or a small piece of twine.
Note!
- Macrame: diagrams, interesting projects and detailed descriptions of making crafts
- Crochet amigurumi - examples of how to make a beautiful toy with your own hands (75 photos)
Coffee topiary: step-by-step master class on how to make a small decorative tree from coffee beans
- Using a measuring tape over the ears and above the eyebrows, measure the circumference of the head.
- A strip of length equal to the girth plus one centimeter for glue is marked on whatman paper.
- Band width – the height of the hat is equal to the size from the earlobe to the crown of the head.
- The strip is cut out, rolled into a cylinder and glued together.
- After the glue has dried on the cylinder, vertical cuts are made every 1.5 cm with a length equal to half the width of the strip.
- The cut parts are glued to the cut parts on the opposite side, so that an “arc” is formed.
- After the upper part is completely closed, a lace is threaded into the center and secured from the inside with a small paper disk with a diameter of 2-3 cm with glue applied to it.
- At the second end of the lace, 2 disks with a diameter of 4 cm are pinned in the center.
- A knot is tied at the tip of the lace, which will prevent the paper discs from moving arbitrarily.
- Numerous cuts are made on the disks towards the center, 1.5 cm long.
- The resulting strips are bent in the opposite direction to form a tassel.
The same method can be used to make a baseball cap, however, a tassel is not required, but a visor is required.
A headdress is an element of clothing that effectively complements any chosen style. In some cases its presence is simply necessary. However, with all the variety of offers, it is not always possible to purchase the right model that suits a particular image.
This is especially difficult to do when you want to achieve a certain originality, in this case it’s worth trying your hand and the suggested recommendations...
Necessary materials
In order to make this product, you do not need many materials. The main thing is to find a suitable base in the form of a clip or any other on which you can attach the hat. For the hat itself, a material is used that is sure to be found in any home - a toilet paper or paper towel roll.
All other necessary materials can be easily found in the craft box; there will definitely be a piece of velor or satin. It is these fabrics that look best on a hair clip.
So, to create a hairpin-cap
you need to prepare:
- a roll of baking foil or toilet paper;
- thick cardboard;
- satin, velor or velvet for pasting;
- for decorating sequins, beads and feathers.
- a small piece of satin ribbon 2.5 cm wide;
- hairpin clip;
- knife with teeth;
- glue;
- scissors;
- threads with a needle.
Important! When choosing fabric for a schoolgirl, it is better to opt for white and black colors. For example, black satin and white satin ribbon. If you need to create interesting images for a celebration, you can use purple, green, pink, etc. as the main color for decorating the hat.
Photo of a paper hat
Paper cocked hat
The choice of this type of hat is based on reducing the time spent working on the product. The paper accessory is quite unreliable, but if treated with care it can last more than once.
To work you will need:
- Black paper (A3 or glued A4 sheets);
- White paper A4 (thin) – 2 sheets;
- Scissors;
- Glue;
- Thin elastic band for hats;
- Helium pen with black ink;
- Awl.
The resulting square is converted into a circle by cutting off the corners on all sides.
The circle should be decorated with paper fringe. Take a sheet of white paper. Divided into four parts by repeated folding along the long side of the sheet.
The paper is cut along the folds into strips. Frequent cuts are made across each strip. The result should be four fringed stripes. The fringe is twisted with longitudinal pressing movements of the scissors. Or you can use a pencil to do this and curl the paper with it.
Glue is applied to the uncut portion of each fringed strip.
The strips are fixed along the edge of the black circle with the fringe facing up.
Three points are laid along the slices of the circle at approximately equal distances from each other.
Related article: Beautiful pictures for decoupage: trying vintage style, flowers, Provence, retro and Provençal herbs for the kitchen and nursery
Between the points, lines are visually drawn along which the fold should be made. This should create three raised sides of the hat.
The center of the circle is manually extruded from the inside of the headdress, and the edges of the hat are slightly bent down. This is necessary so that the accessory fits comfortably on the head.
The second white sheet is cut in half along the long side. Each strip is folded in half again, and the corners are sharpened.
Frequent cuts are made along the edges of the strips, imitating feathers. It is advisable to twist the paper slightly for plausibility.
A skull and bones are drawn and cut out from the paper scraps.
The skull is decorated with a piece of red paper (kerchief).
The prepared parts are drawn with a helium pen.
The skull and crossbones are glued to one part of the cocked hat, and paper feathers are fixed to the other side.
Using an awl, small holes are pierced on the decorated parts of the hat into which the hat elastic is inserted. It is fixed by means of nodes on the inside of the product.
It all depends on the volume
As you can see, there is nothing complicated in making hats; it is quite possible to do it yourself. Any of the above methods will help in this matter. The main criterion is the size of the head of the object for which the future product is intended. It could be:
- a hat on a bottle of champagne;
- children's;
- cowboy;
- for a doll;
- like Dunno;
- sombrero and many other types.
The decorative elements and materials used to make a hat mainly depend on availability, capabilities and preferences.
The most important thing when doing needlework is to have the desire. Articles on this topic, video lessons, master classes and other sources can serve as an assistant. It is also important to correctly measure the volume of the future headdress.
If you are not lazy, experiment and strive for the desired result, you will create beautiful, neat crafts, and you may even enjoy this activity.