The shower in the bathroom is present regardless of whether a conventional bathtub or a modern shower cabin is installed. The shower fixture is also an integral part of the room. It must be made of high-quality materials that ensure normal operation of the system, be functional and convenient. The manufacturer of shower heads equips them with holders that differ in their characteristics. Fastenings do not always satisfy the buyer’s requirements, then you have to purchase them separately.
Types of shower holders
High-quality shower brackets appeared in plumbing stores relatively recently, but gradually the offerings of this type of plumbing are expanding. With more and more new types and designs appearing on the market, choosing the best model is becoming increasingly difficult. Below are the most popular and practical types of shower cabins.
By mounting method
The do-it-yourself stand is made with different methods of mounting on a vertical base:
- models with suction cups - such products represent an elegant and versatile solution with which you can easily install shower supports on the wall in a matter of seconds;
- supports with fixed fixation using dowels. Hanging such structures on the wall surface is somewhat more difficult, but the fastening is more reliable and durable. Also, aesthetically, the options on the fittings look much more attractive due to the presence of decorative overlays in their set. Please note that installation can be done both on vertical walls and on the ceiling. The wall version is more common, but ceiling mounts look original, unusual, and catchy.
Sucker
Stationary
Installing a shower holder on a wall surface is not easy. However, this is a very real task even for a person without special construction knowledge. But using such plumbing fixtures is incredibly convenient, because a person’s hands remain completely free, and there is no need to fear that the spout will fall on the head, as sometimes happens with models with suction cups.
We also note that it is durable, wear-resistant and very reliable. And the design of modern wall-mounted shower brackets amazes even the “spoiled choice” of buyers with its beauty and originality.
When choosing plumbing for your home, it is important to evaluate the specifics of its installation and assess whether you can do it yourself. If you don't want to drill into the walls, choose a product with suction cups. These are inexpensive and practical plumbing fixtures that have become very popular recently.
The suction cup holder is often used for shower stalls, because in this case there is no need to drill the walls. Another advantage of such models is their affordable cost over wall-mounted alternatives.
According to the method of position regulation
A modern shower holder may differ from a similar alternative in how the position of the shower head is adjusted, as well as the ability or impossibility of changing its height. Models with connecting loops allow you to rotate the shower head horizontally and vertically and ensure it is securely fixed in the chosen position. Manufacturers offer a variety of stand designs that determine the method of attaching the watering can and provide the ability to rotate vertically and horizontally.
It is convenient to use a swivel holder with the ability to change the rotation of the spout.
When it comes to adjusting the height of the shower head, some wall supports remain stationary. But there are models that allow you to turn the watering can in different directions or raise it to a certain height. Therefore, they are considered comfortable, practical and durable. They are divided into two more subtypes of holders, which are described in the table.
| Bracket type | Shower Holder Options | Professionals | Against |
| Car | You can pull out the watering can by grasping the hose, after which it will lock at the current height. | High comfort of use | Risk of rapid wear due to frequent use |
| Personal | The actual height of the shower cabin can be selected only once, after which it is attached to the bracket using a special screw. | Reliability, durability of fastening | High price |
Car
Personal
Rain shower: types and manufacturing features
The simplest water supply device in the style of equatorial rain is a wide nozzle on a shower hose measuring 15 cm or more. Manufacturers provide many options to suit every taste and budget; the most complex and expensive models are equipped with a mechanism for regulating the water supply, but such watering cans can only be called a tropical shower conditionally. More expensive rain effect systems, in addition to the watering can, include a durable wall stand, the quality of the parts of such products is slightly higher, and some companies produce real works of plumbing art.
Many manufacturers offer a prefabricated system with a mixer; the latter, however, is not very different from standard models for bathtubs. For those who want to fully experience the effect of the “tropical shower” system in the bathroom, and the types of simple transformations of the shower head do not suit them, they produce shower wall panels or special installations with mounting to the ceiling. Such options look very impressive if they are built flush with the ceiling and equipped with additional LED lighting, which in some models is mounted directly into the shower head.
Shower stands
A shower tray is a convenient and relatively inexpensive way to create a shower stall in the bathroom. At the same time, the holder can have completely different properties: a tropical shower, a convenient mixer, a thermostat and even holders for hydromassage.
What is a shower stand
A cramped bathroom is a very common design flaw in Russian homes. Sometimes it can be difficult to insert into the bathroom not only a full-fledged bathtub, but also a shower stall, which was actually created specifically for small spaces. But you also need to place cabinets, shelves and holders for small items in the room.
A shower stand is the ideal solution for such cases. A wall-mounted shower rail allows you to maximize space and leave as little space as possible for the shower head.
It should be noted that shower doors are used not only in cramped bathrooms, but also as a forced option. They are also installed in spacious rooms, where everything you want to see in the bathroom can easily fit.
The fact is that the design of shower doors is very convenient and ergonomic - it’s comfortable to be in the shower, you don’t need to occupy your hands with a watering can, and if desired, additional shelves and supports can be attached to the bar. You can even integrate a technological device such as a thermostat into the shower holder. In addition, installing a shower door with your own hands is not at all difficult, and anyone can do it, that is, there is no need to spend extra money on paying professionals.
Advantages and disadvantages
Firstly, a shower tray should not be confused with a regular shower set - they are completely different things. As a rule, the kit separately includes a hose with a watering can, a wall holder and sometimes a soap dish. These devices allow you to secure the tubing to just a specific location, so you don't have to throw it in the bottom of the bathtub or hang it on the mixer. In addition, the now popular rain shower option is available in every second copy.
As for the shower tray, it is a much more convenient and multifunctional device.
- First, the shower rail does not force the hand shower to be fixed at a certain height, at least in most models. The shower head can be moved up and down the bar, which is very convenient if the shower is used by people of different heights. With such a device, no one will have to bend their shoulders when washing or painfully reach the ceiling to remove the shower stall from the holder.
- Secondly, you can attach a soap dish, a towel hook, a container for brushes, razors and other accessories to the shower tray with a shower head. All hygiene items will be at hand - no need to reach for them somewhere in the sink or cabinets, pull back the curtain and disturb the atmosphere in the bathroom.
- Thirdly, the shower column is easy to install according to the instructions, even without special skills. The main thing is to follow the basic rules, so you can quickly complete the installation yourself, even if you haven’t done it before.
Modern shower holders even allow you to equip them with a thermostat - a device that measures and regulates the temperature of the water. More advanced shower trays have a rain shower function, which is very beneficial for health and also for chromotherapy. In short, in terms of functionality, the rack will not be much inferior to a shower stall, but it will cost much less and take up very little space.
Of the disadvantages of a shower tray, only one can be noted: if you do not install it as an addition to a full-fledged bathroom, but equip a very small shower corner, then, of course, you will have to forget about the pleasure of relaxing in hot foam.
Construction of a shower room
The thorough construction of a “tropical shower” type shower requires hidden wiring of water-bearing pipes, especially since installing a nozzle at ceiling level will also bring additional labor and material costs. Such bathroom equipment is very dependent on construction experience and the availability of plumbing skills; experts recommend entrusting the design and execution to professionals. If you feel able to handle all the steps of installing a rain shower yourself, the following are step-by-step instructions.
Construction stages
One of the main steps to bringing an idea to life is purchasing the necessary equipment and planning. You shouldn’t skimp on plumbing; once the work is completed, making changes will be problematic; you need to be confident in the equipment. The ideal purchase option would be models from well-known brands; manufacturers value their reputation and check the quality of their products. Smart design can also eliminate potential problems in the future; you should consider accessing major components to replace them if they fail without dismantling the wall and ceiling coverings. Another condition for obtaining the maximum effect from a rain shower is a ceiling height of at least 2.3 m.
The next step is to clean the old wall coverings and, if necessary, the ceiling and floor.
Having transferred the drawings from the paper directly to the walls and ceiling, you can begin laying the pipes. The ideal option is to cut a groove for the pipes; this installation method will save as much space as possible in the room. You can equip a separate shower area with moisture-resistant plasterboard, so the pipes can be “hidden” directly in the partition. Let's consider entrance doors, for example, when installing models on wheels, it is necessary to strengthen the floor under the lower guides.
Installation of special lighting may require additional power lines and installation of associated electrical equipment. It is necessary to ensure that direct currents of water do not reach the connection points and, in general, non-conductive parts of the electrical system. The ideal would be hidden installation in the ceiling, which can be made specifically for this purpose in a suspended or tensioned version. Apartment owners must anticipate possible losses from neighbors above and protect them from neighbors below. To do this, it is necessary to waterproof the electrical equipment covering in the ceiling and completely waterproof the floor.
The next step is to install and test all hydraulic elements of the system.
After making sure that it is in good condition and correctly connected, you can begin decorating the ceiling and lining the walls and floor.
DIY shower tray - its types
Showers are equipped in three ways:
- buy a ready-made container and install it on legs or a pedestal;
- a concrete podium is made on the floor with a water drain, lined with ceramic or polymer tiles, mosaics;
- Before construction begins, a lower floor level in the bathtub is provided so that the tray bowl is located on the same horizontal level with it.
The first two options are more suitable for apartments. Additional filling of the floor over the entire area of the bathtub is impractical. The load on the floor increases and a step is formed at the entrance to the room.
When building private houses, you can draw up a project that involves laying sewer pipes below the floor level in the bathroom. This way the shower tray will not protrude to the surface and create a barrier.
Friends, we also recommend that you read the article about laying tiles with your own hands, it will certainly be useful to you, and in addition, a post about grouting, how to do it correctly and what types exist. Write your comments and like if you liked our article.
Factory containers are made from stainless steel, coated metal, acrylic, polyurethane foam, and ceramics. For individual orders, we produce exclusive products from cast marble and artificial stone, which are distinguished by their massiveness.
Ready-made polystyrene pallet
Installation of standard pallets does not require specific knowledge and skills. The light weight of the containers allows you to install them yourself or with an assistant. Some designs are simply placed on the floor. Their shape is designed so that the drain can be easily connected through the outlet pipe to the sewer. If supports are not provided, brick, blocks or stone are laid around the perimeter, and welded metal frames are used. The outside is lined with finishing materials or a screen is attached.
The main task when installing any shower tray is the correct connection to the sewer. The drain ladder or siphon should be located at the lowest point of the container. This ensures free flow of water along the inclined plane of the bowl.
To connect a shower tray with your own hands to a sewer branch, create a slope of the outlet pipe of at least 2-3 cm per linear meter. The angle of contact with the collector should not exceed 45°. With these parameters, the risk of contamination by solid particles is minimal, and cleaning manually or using a cable is not difficult.
If the pan is mounted on legs or stands, and access to the sewer is free, the drain is equipped with a regular siphon. It is inexpensive, but repairs require disassembling the device. The minimum outlet height is 100 mm. If the bowl is monolithic, and it is not possible to penetrate under it, it is optimal to install a ladder.
No. 1. Shower head material
The shower head has a simple design and allows you to divide one stream of water into hundreds of small jets, making hygiene procedures more comfortable, enjoyable and relaxing. It would seem like an elementary product. What problems might there be with his choice? Manufacturers are trying to make our lives more comfortable, so watering cans of various shapes and sizes, with interesting and useful additional functions, appear on sale. Products also differ in material, which determines not only the appearance of the product, but also its durability, strength and reliability.
Experts call shower heads made of steel and copper the best option for a modern shower. In terms of price/quality, looks, durability and variety, this is the best you can find.
Shower drains
The drains ensure the collection and removal of wastewater and prevent the penetration of odors from the sewer into the premises. They differ from a siphon in the ability to disassemble and clean without dismantling the device. Some designs are equipped with a check valve that prevents waste from returning when the collector pipe becomes clogged.
The design of a plumbing device is more complex than that of a siphon. Consists of several parts:
- housings;
- neck;
- water seal;
- insulating collar;
- clamping flange;
- grilles that protect against large debris.
Water flows through the drain at a speed of 40-90 l/min, clearing large particles or hair. The removable glass can be easily pulled out and dirt removed.
Types of ladders
The water seal is made in two versions - “dry” without water or “wet” with liquid. Some ladders are equipped with two barriers at once. For connection to the sewer network, the device is equipped with a drain pipe.
To equip a shower tray with your own hands, the drain is selected according to the following characteristics:
- Device height. When connected to a pipe, this parameter is used to calculate the required slope of the drain to the sewer.
- Number of pins. If the shower is the last in a row of plumbing fixtures, it is connected to the line with one outlet pipe. With an intermediate arrangement - two.
- Presence of a check valve. It is desirable that the ladder be protected from flooding by sewer water in emergency situations. Especially if the tray is located below floor level, or the shower room is in the basement.
- Decorative. The visible part of the ladder is the grate. Its function is to protect the device from clogging. However, it can decorate the shower tray. There are many options. Manufacturers even produce completely invisible designs that create the effect of water that has disappeared “to nowhere.”
To equip showers, standard drains are used that collect water at one point, or trays extended along the tray. Such devices are characterized by high throughput.
Selection rules
When choosing a bracket for a shower stall, it is important to understand that the low cost of plumbing fixtures is most likely an indicator of its low quality. It is better to refuse such products immediately so as not to overpay twice in a short period of time.
Other factors to consider when purchasing:
- how the product is attached to the surface of a wall, ceiling or shower stall. Options with suction cups in this regard are considered simple, and the most durable and reliable are those that are attached to the base using fittings;
- Is it possible to change the rotation or angle of the shower head? In this case, it will be more convenient to use the template. Otherwise it will be cheaper;
- if the height of the shower can vary. If you need it, choose an adjustable stand.
Built-in pallet designs
Before installing the bottom under the shower structure, you need to understand its structure. The configuration of the built-in tray is simple:
- base made of concrete mixture and a layer of polystyrene foam;
- sewer drain placed in a polystyrene foam layer;
- drain connected to the sewer riser;
- concrete screed consisting of 2 layers, between which there is waterproofing;
- decor from floor tiles.
When making a shower tray with your own hands, the ladder is arranged before or after pouring the cement mixture. In the first case, the pipes are laid below the surface. It is very difficult to hide the pipeline on a finished screed; when laying a sewerage system, you must observe the slope angle.
To meet these requirements, before making a shower podium yourself, you need to perform calculations and draw a sketch on a piece of paper. The pipeline can be laid on top of the ladder or hidden in the gasket.
Benefits of use
There are fasteners on the market that differ in shape, design properties and method of adjusting the slope. Movable shower wall brackets have a swivel mechanism. There are also options with a fixed head position. Both options are aesthetically pleasing and fit harmoniously into the interior of any bathroom. You need to know that the design mechanism is due to the presence of a hinge that allows you to tilt the frame at any angle.
In addition, the shape of the product does not affect the function of the fastener, and this makes it possible, when choosing a model, to buy the product you like, which will fit perfectly into the stylistic design of the room and will delight its owner. But regardless of the tone, material of manufacture and overall dimensions, all height-adjustable wall shower brackets have the following operational and design advantages:
- the shower head can be fixed at a convenient height;
- reliable and high-quality mechanisms;
Robust and damage-resistant mechanisms: easy to use and long service life
- made of high quality materials that are resistant to corrosion processes. This allows them to be used in places with high humidity;
- resistance to mechanical damage and abrasion of the sprayed surface;
- It is possible to change the angle of the watering can.
Shower with holder - indispensable in the bathroom
What materials are they made from?
An important point in the manufacture of holders is the raw material for production, the main feature of which should be high resistance to moisture. Before making a choice in favor of a particular product, you should familiarize yourself with the advantages and disadvantages of the materials from which it is made:
Plastic holder - a budget option for home
The chrome finish provides an aesthetically pleasing appearance to the bathroom. Externally, it cannot be distinguished from its brass or metal counterpart
Metal alloy holder with gold plated finish
The option with a metal alloy will fit into the luxurious interior of a marble bathroom
A brass shower holder looks expensive and can last for decades
How to make a suction cup holder with your own hands
For those who do not want to “ruin” the tiles on the walls by making holes, you can use a wall-mounted shower holder with a suction cup. It can be fixed anywhere on a smooth tile surface.
At the same time, instead of a factory product, you can make a homemade one. There is only one condition: you must have a reliable suction cup for an unusable knife or an unnecessary cell phone holder on the glass.
you need to cut off the unnecessary part from the suction cup, glue or screw on a plastic adapter plate or screw it on with self-tapping screws, and in turn screw on a regular holder for a watering can. The result is a convenient and useful product!
Manufacturing materials
Shower stall holders and rods for them are made from materials that are resistant to moisture:
- plastic with chrome plating - such shower elements look very attractive, but their level of reliability is not the highest. The plastic is practical and resistant to wear, but the chromium coating on its surface is quickly erased. The main advantage of such models is their low cost;
- metal alloys - superior in quality to plastic options, easy to use, attractive, but have an average service life;
- Brass or steel are the best inexpensive holders on the market, but they will scratch and rust over time.
Metal Plastic Plastic chromed Steel
Holder that is attached with a suction cup
The wall mounted shower holder with suction cup is a versatile solution that allows you to mount your shower to the wall in minutes. It is not easy to hang a shower holder on a wall surface in the classic way. However, this is a feasible task that can be completed by a person who does not have tremendous construction skills. When purchasing plumbing fixtures, you should evaluate the features of its installation and see if you can do it yourself. If you don't know how to do this or simply don't want to drill holes in the walls, choose products with suction cups. Cheap and practical products have become popular lately. Such options are often used for shower cabins, because in this case there is no need to drill the walls. The main advantages of the suction cup mount include the following:
- it is not necessary to drill the walls;
- allows you to easily move from place to place;
- if necessary, the shower can be removed;
- it is possible to turn the watering can in any direction;
- low price compared to wall-mounted options.
Advice! If you don't want to ruin your tiled floor, choose the option with a suction cup.
Types of holders by location and method of fixation
The holders can be installed on the walls of rooms or the sides of bathtubs.
Modern faucet with shower holder
Shower holder on board the bath
Shower head installation options
The holders can be attached with dowels or suction cups. The first option is reliable and safe to use. The problem is that you need to drill holes, and this can pose significant difficulties, which we will discuss below.
Shower head holder with suction cup
Easy to install, adults and children will love it
The second type of fixation (suction cups) is characterized by mobility and ease of fixation. Each user can adjust the height as desired.
Most modern shower holders allow you to adjust the shower head in one plane according to the height of the jet. Some adjust, in addition to this parameter, the tilt angle from left to right.
Chrome Wall Hinged Shower Holder
Older models do not have such capabilities; they hold the watering can in one position. There are holders with a shower hose connection, some have a hook that allows you to hang additional equipment.
Two-handle shower mixer with hoses in separate holes, wall-mounted with shower mesh on a flexible hose
Common mixer for bathtub and washbasin, two-handle with hoses in separate holes, wall-mounted with shower screen on a rod
Bracket options and features of their installation
Let us immediately note that fasteners of this type are more often used in wall structures, since with a ceiling shower it is rigidly reinforced, and with a manual version, the support is initially present in the structure. Again, there are showers, but these are also included, although sometimes you have to choose the location yourself.
Design Features
If for some reason there is no support or the standard drive is broken or lost, you will need to select that drive separately, and the tips below will help you choose the best option:
- Material of manufacture... There may be several options: plastic, which, despite all its advantages, is still not very reliable, powder metal, which is more reliable, but there are still questions regarding quality, brass - this material is not afraid of moisture and is very durable, and steel - the most reliable metal, but if the coating is damaged, it will corrode.
- Type of installation... There are two main options here: classic, where the assembly consists of two parts, one of which is attached directly to the wall using dowels of a suitable size (surface drilling required). The second method is a suction cup, it is easy to install because there is no need to drill the wall and you can change the position of the support if you did not place it very well in the first place.
- The wall mount can be fixed, but can also have a rotating mechanism, which also increases the comfort of use. The system is simple and reliable, but it is worth noting one nuance - the price of such units is much higher than that of classic ones.
Now let's figure out how to properly attach the bracket so that it holds as tightly as possible:
- First of all, you should study all the recommendations that the installation instructions prescribe. There should be any necessary diagrams or procedures for proper operation and a list of tools required for the work. Most often you will need a screwdriver and an electric drill with a drill bit for tiles and concrete.
Advice! If you do not want to damage the tiles, choose the option with a suction cup. As a last resort, you can always buy the classic version.
- When carrying out DIY work, it is very important to carry out careful planning and not get confused with where to drill the holes, since it is unlikely that they will be able to be sealed. After cutting, you must first drill into the ceramic with a suitable drill, then put the drill on the concrete and drill a hole to the depth of the dowel plus half a centimeter of broth.
- After this, the first part of the holder is attached to the wall, which is often threaded and secured using dowels, supplied or purchased separately.
- The stand itself is attached last - the system is ready for use.
If you are worried that when assembling a shower cabin you can confuse the fasteners, do not worry: firstly, everything is described in detail in the diagrams, and secondly, the support for the shower tray or for the doors cannot be confused with blocks for the shower head.
Installation recommendations
Work on installing fasteners must be carried out in a certain sequence. Before starting work, you should carefully read the instructions from the manufacturer. It should contain the required diagrams, a description of the procedure for carrying out the work, and a list of tools that may be needed.
Classification of shower holders by type of material
The main requirement for all plumbing elements is increased moisture resistance. The material used to make fasteners directly affects their service life. The following types of materials are distinguished:
- plastic;
- alloys of non-ferrous metals;
- brass;
- become.
Plastic coasters are the cheapest. They are usually equipped with a shower system. Standard plastic brackets for watering cans have a chrome-plated surface and should be attached to the wall. An improved plastic holder can be purchased upon request.
Clamps can be of different shapes, colors and have a movable mechanism. Their disadvantage is low resistance.
On the plumbing market you can find clamps for shower heads made of various alloys of non-ferrous metals. Each of them has its own positive and negative sides. Bronze clamps have good wear resistance and are not subject to corrosion, but require periodic polishing.
Silumin models are inexpensive, but they wear out quickly. Over time, cracks form on them.
Clamps made of brass and steel are the most durable, their cost is much higher. The disadvantage of such products is their susceptibility to corrosion.
Manufacturers of tropical shower systems
The leading positions among manufacturers of rain shower panels are occupied by Novellini, Bossini, Hansgrohe, which have many years of experience and have long earned a good reputation in the plumbing market. The products produced by these companies are, as a rule, in different price categories, but always of high quality.
Otler Amber rain shower model
Luxury plumbing is quite expensive. In addition, when installing it, it is often necessary to lay additional water pipes that will supply water to provide the rainfall effect, which further increases its cost. But at the same time, models belonging to the elite class have many advantages: a large nozzle that sprays water, several shades of backlight that can be switched, and a number of additional rather pleasant options, for example, several irrigation options, remote control.
Today, some of the manufacturers, still less well-known, often offer relatively inexpensive shower systems that they advertise as tropical. In fact, these are the most ordinary spray nozzles of slightly larger sizes, and the water from them is supplied in a simple stream, without mixing with air, so they cannot create the effect of rain.
Design options
We will analyze two options for systems: solid and with a hose, they differ in the method of assembly, according to this, a separate chapter will be devoted to each of the solutions. You just need to choose the mixer that best suits your application.
Fixed watering can
The operating procedure is as follows:
- First of all, you need to calculate what the unspecified length of the system should be from the point of attachment to the barrel to the edge of the watering can, while it is extremely important not to forget to take into account the fact that when fastening, part of the hose falls inside the container. Too large a size will cause the rain to move below, and tall people will wash by bending down and invariably hitting their heads, which is, of course, undesirable, since comfort is significantly reduced.
Advice! If the height is not enough to accommodate a watering can or the outlet in the container is located on the side, then you have the opportunity to use a trick: weld a small protrusion on the surface and place the system at an angle, this saves on height and allows you to direct the flow to the center of the shower area.
- Then you need to make a pipe or buy a ready-made squeegee. The manufacturing option is relevant when the length of the element must be large and it is unlikely that it will be possible to buy a ready-made structure. The work is carried out as follows: first, a pipe of the required diameter is selected, after which a piece of the required length is cut and a thread is cut on both sides, the stroke of which must coincide with all other elements.
- Assembly is carried out in the following sequence: first, screw the nozzle through the connecting nut or directly into the valve; do not forget to wrap the thread with sealing material. Then a squeegee of the required length is connected to the tap; it can be either small or very long, it all depends on the highlight of the design.
Flexible hose system
Now let's look at how to make a shower head with your own hands, if it is necessary to ensure its mobility and mobility, the work is carried out as follows:
- First of all, you need to prepare a flexible element, the length of which should be calculated so that you feel comfortable using the system. For these purposes, both a ready-made version and other available elements made of PVC or other polymer materials are suitable.
- Special threaded adapters are useful for fastening, but for reliability, the pipe must be additionally secured with steel or galvanized clamps.
- Then it is necessary to make the connection in a container, possibly either in a design with a hose or rigidly attached to the barrel. It is fundamentally important that the water inlet is 20-30 millimeters above the lower level to prevent sediment from getting into the watering can, as this is not very hygienic and causes the holes to clog.
- Then all the elements are connected to each other, special attention should be paid to the threaded connections, they must be well sealed to prevent any leaks.
- Once assembly is complete, be sure to check the system for leaks to ensure that all components are securely fastened. As you can see, the instructions are quite simple and almost anyone can do them.
Of course, if problems arise, you will not have questions about how to disassemble the shower head for cleaning or troubleshooting. In general, if all work is done carefully and using high-quality materials, the service life of the system is quite long - the design will last for many years without any maintenance.
Mounting methods for holders
We will not consider options with a suction cup, everything is clear here. Surfaces must be level, smooth and clean.
Shower holder with suction cup
Let's talk about methods of fastening with dowels to the wall and about fastening to the side of the bathroom. Initial data: the wall is covered with tiles on a cement screed, on plasterboard, lined with plastic panels or painted with oil paints.
How to attach a holder to ceramic tiles on a concrete or brick wall
Smooth ceramic tiles on a concrete wall
For builders this is the simplest option. To work, you need a drill with a hammer drill and a drill bit with pobeditovy tipped. The diameter of the drill must correspond to the diameter of the dowel.
Tools for work
Step 1. Decide on the installation height. If the holder does not have vertical adjustment capabilities, its location should be suitable for adult users. The height should be sufficient for washing your hair, while your hands should not touch the watering can. Children will have to hold the watering can in their hands.
Step 2. Mark where to drill the holes.
It is better to do this with a felt-tip pen; pencil marks on the surface of the ceramic tile are invisible. Try to accurately mark the drilling locations; the fact is that they are located at a short distance; in case of an error, it will not be possible to drill another hole nearby; the drill will constantly slide into the existing one.
Step 3: Start drilling holes.
How to drill correctly
Practical advice. What to do if the holes are drilled in the wrong place? There are two options to solve the problem.
Step 4. Check again that the holes and the supporting element match. Everything is fine - fix it in place. Secure the decorative parts and the holder itself. Check its stability with light pressure. The structure should not wobble.
Shower holder: installation
Double-handle central onboard sink mixer with wall-mounted brush, spout with aerator
Now you can move on to more complex options.
Ceramic tiles on plasterboard
Tile on plasterboard wall. This is where the holder will be attached
We have said more than once that drywall has only two advantages: low cost and ease of installation. These advantages are negated by the main disadvantage - low physical strength. Many construction companies use plasterboard when decorating bathroom walls - there is no need to level the walls with cement-sand mixtures, all work can be completed within one day. And then tiles are laid on this surface. Fast, cheap (but not for the customer) and beautiful (but not for long). So we are faced with the problem of how to drill holes in such a wall.
Ceramic tiles are a hard material. Drilling holes requires considerable effort; the drill must operate in hammer drill mode. As you might guess, plasterboard sheets cannot withstand such forces, much less vibration. The material bends and the tiles fall off. What to do?
The best option is to provide places for fixing the holder before finishing the walls. At this point, make holes in the drywall and fasten a piece of board to the wall under the drywall. Only after this should you lay ceramic tiles. Now it will have a stop, which will make it possible to drill holes without fear.
An example of installing an embedded beam before gypsum board sheathing
What if the walls are already finished? The work becomes much more complicated.
Step 1. Mark the position of the shower holder, find the centers of the holes for fixing, and mark them with a marker.
Step 2: Prepare your tools. They must be in perfect condition, pay special attention to the drills. Factory sharpening is not enough, correct it yourself. The cutting edges must be very sharp.
Step 3. You need to remove the top layer of glaze. This is the most difficult stage. The hardness of high-quality glaze reaches the hardness of glass. The drill glides over the surface without damaging it. If the tiles are laid on a solid base, the drill switches to hammer drill mode, the drill breaks the glaze with sharp blows and drilling is possible. We don’t have the option to work with a hammer drill. Remove the glaze using a special diamond-coated drill. It drills holes with slight pressure.
Diamond coated drill 3-20 mm
The second option is to use a spear drill. This method is somewhat more dangerous and requires practical skills to use.
Important. Do not allow the tiles to crack after pressing hard with the drill. Such sounds indicate that the tiles have begun to fall off from the adhesive.
The length of the drill must be at least 10 cm.
Bosch. Ceramic tile drill bit sets CYL-9 Ceramic
You need to make allowance for the thickness of the drywall, the distance between it and the wall and the thickness of the tiles. The dowels that come with each holder will not fit, they are too short.
One more thing. A small drill can drill a hole the length of a dowel, but will never completely clear it of construction dust. As a result, the dowel will not fit to its full length; you will have to remove it and deepen the hole.
Do not press the drill too hard
Step 4. After drilling all the holes, check the strength of the tiles to the base. If it is loose, you should take it out, carefully knock off the old glue and lay the tiles on the new one.
The process of removing tiles from the wall
Next, the cracks are filled. You will have to work for a long time and very carefully. But even after such conditions are met, there is no guarantee that the repair will go unnoticed. It will be especially difficult to do identical grouting. So much for the “advantages” of drywall.
You can glue the tiles using liquid nails
Drywall dowels
GROHE Relexa Wall Shower Holder Adjustable
Problems with drilling holes in plastic are, fortunately, much easier to solve. You need an ordinary drill and a drill of the appropriate diameter. Set the drill to maximum speed, lightly press the drill onto the surface of the plastic. Due to friction, the temperature will increase and the plastic will melt. A pobedit drill is inserted into the hole formed, the drill switches to hammer drill mode, and the hole is drilled in the usual way. Again, the dowels need to be long.
Dowel Nail Size Chart
Plastic panels in the bathroom and fixed shower holders
There are cases when, in order to save money, very thin plastic was used to cover the walls of the bathroom. It bends under the weight of the holder, watering can and hose. Let’s say right away that this finish is the worst option of all possible. But in this case there is a solution.
Step 1. Place the decorative cover of the holder on the panel and trace the outline with a thin pencil.
Step 2: Using a carpenter's knife, carefully cut out the hole. The hole dimensions should be 3–4 mm smaller than the contour. It will take a long time to cut, it all depends on the strength of the panels.
How and with what to drill a plastic panel for a spotlight, watch the video.
Step 3. Prepare a lining from the cutting board according to the dimensions of the cut hole. The thickness of the lining should be equal to the distance from the wall to the front surface of the panel. Make the lining with maximum precision.
Step 4. Secure it to the wall with dowels.
Important. Pay attention to the location of the holes for fixing the supporting part of the holder and attaching the lining to the wall; they should not coincide. If this is impossible to achieve due to its small size, then both the lining and the holder element will have to be fixed to the same dowels.
It's not as difficult as it seems. The main thing is to accurately measure the position of the holes and drill them in the wall and lining. To make the process easier, you can first fix the lining to the wall in the center. The holder is not fixed in this place; it is always free. When the lining is fixed, it is much easier to simultaneously drill holes in it and the wall. To prevent it from moving during operation, insert a dowel into the first drilled hole; it will not allow it to rotate.
Step 5. All that remains is to seal the gap between the plastic panel and the holder. Use bactericidal putty or silicone for this.
This material is used to seal the gap between the bathtub and the wall. Before applying silicone, thoroughly clean and degrease the surface. Otherwise, peeling will quickly appear and water will get under the wall finishing.
PVC panels with tile effect and fixed shower holder
Installation diagram of a static holder without hinges
There are cases when the holes in the load-bearing elements of the holder are so small that it is impossible to find long dowels with the same diameters. What to do?
Important. Use caution when attaching holders with dowels to tiles or fragile surfaces of plastic panels. Do not tighten with great force, the main thing is to eliminate the gap between the elements.
If the wall in the bathroom is painted with oil paints, then there are no problems with drilling at all.
Attaching the holder to the side of the bathtub
Two-handle central on-board mixer with brush and on-board mounting
The ideal option is that the bathtub already has special technological holes for the holder. If not, you will have to drill it out. The bathtub can be metal or plastic. There are no problems with the second one, the hole is drilled with an ordinary drill. The only condition is not to overheat it, do not allow the plastic to melt. Reduce the speed of the drill and cool the rubbing surfaces with water from time to time.
There are more difficulties with a metal bathtub. How to drill holes in them?
Step 1. Decide on where to install the holder on the bathroom. Prepare your tools: glass and ceramic drill bit and drill.
Step 2. The drilling site must be constantly cooled. Think about how you can do this, there are several options. From the simplest - adapting an ordinary dropper to supply water under the cutting edges to the more exotic - making a bead out of plasticine and pouring water into it. To prevent it from leaking out after forming a small hole, attach a plasticine cup to the bottom.
Step 3. Increase the diameter of the hole in stages. At first, use a small diameter drill, gradually increase it by 2-3 mm.
Initial drilling stage
Step 4. Remove metal shavings and dust, remove burrs from the bottom of the bath using a cylindrical grinder or manually.
Step 5. Reinstall the holder, making sure that the flexible hose to the watering can does not have too sharp bends.
Installation of the mixer and holder on the side of the bathtub
This installation option is time-consuming and has little effect. The watering can only be on the side of the bathtub when it is not working; you will have to hold it in your hand while taking a shower.
Onboard bathroom faucet
On-board mixer with shower
Installing a shower head holder yourself
Installing a shower holder with your own hands is quite simple if you familiarize yourself with the design features. For example, a product with a suction cup does not require the use of special tools for installation, but the surface must be prepared. It should be smooth, clean, the fastening will not stick to the joints of the tiles.
In case of installing a fixed element, it is necessary to mark it correctly: remove the shower holder from the wall, it will not be possible to move it.
Steps to install the holder on the wall with your own hands
To install a shower holder with your own hands, you need to prepare the tools. If the wall is concrete, tiled, you will need:
- drill;
- spear drill;
- concrete drill;
- diamond point;
- pins.
The location of the fastener must be chosen so that the pipe is not too tight or hangs too far. Then a hole is first drilled in the slab using a spear drill with a diamond bit, then in the concrete wall using a concrete drill. When the hole is ready, install a stopper and secure it with dowels. Finally, place the lid on the fastener. The system is ready for use.
Attention! When installing the holder on the faucet, you need to ensure that the shower head is easily inserted and does not interfere with the movement of the faucet handles.
The shower counter is not only attached to the concrete wall, but also on a base consisting of five-block block, drywall, tile or plastic panels.
Practical advice
- Do not rush to fix the holder right away. Study the manufacturer's instructions, assemble/disassemble it on the table several times, find out problem areas.
- To reduce dust getting into the bathtub or onto the floor, call an assistant. Let him hold the hose from the vacuum cleaner directly under the drill bit, all the dust will be removed.
- If you have a vertical holder, then it is better to attach it one by one. First, mark and secure the upper support element. Then use a plumb line and use it to determine the exact vertical position of the lower one. There is no factory plumb line - make it yourself. Tie a small weight to a piece of thread; the most accurate vertical plumb line is ready for use. Only the marks will have to be made not according to the spout, but according to the position of the thread.
- The hole for the dowel is caught in a seam of the brickwork, the dowel is wobbly and cannot support the weight of the mixer. There is nothing wrong. Drive as many matches as possible around the plastic part and sharpen the lower ends. This method will ensure sufficient reliability of fastening.
- The centers of the holes in the wall and on the fixing element do not coincide slightly. If the difference is no more than three millimeters, then there is no need to redo anything. Insert all the dowels into the holes and fastener at the same time. In order to get into the holes, lift the elements to the maximum height from the wall (limited by the length of the dowels), and push in the dowel-nails one at a time. The main thing is that they get to their place. Next, gradually and one by one hammer in the hardware; in most cases, they will align and fit into the holes. The caps, of course, will remain inclined, but this does not affect the quality of fastening.
- Never apply tape to the surface of the tile to prevent chipping. Firstly, it will not prevent their formation, but will only keep small fragments in one place. Secondly, a vain hope for adhesive tape reduces the care and accuracy of the work and the tiles will definitely crack.
- To avoid accidentally breaking the tile while driving the dowel, use a wooden spacer.
That's all, follow the recommendations and you will not have problems installing holders of various types and on any surface.
Instructions for installing a shower rod. PDF file for download
Instructions
How to make a wall-mounted shower holder with your own hands: master class
The choice of modern types of shower head clamps today is very wide and, thanks to the design simplicity of such a device, you can easily manually make a convenient and practical wall-mounted shower support using a domestic set of tools and from the cheapest and most commonly available materials.
The simplest plastic design is not susceptible to the negative effects of moisture, acids and alkalis, and can also easily withstand reusable installation, so it is very important to make a product from a plastic bottle.
Required materials and tools:
- a plastic bottle having a linearly tapering section;
- a hacksaw or a sharp shoe knife;
- punch;
- a pair of dowels D-6 mm and 40-60 mm long.
When creating the simplest support for plumbing yourself, you need to follow a few simple rules that make it easy to get the desired result with minimal effort and money.
Progress:
- To form a funnel for a watering can with a handle, cut an oval section from the workpiece (Fig. 1b), then use a torch or hacksaw to make cuts and a groove in the neck of a plastic bottle (Fig. 1c). Thanks to the cut-out neck segment, a kind of “socket” is easily formed to accommodate a shower head with a small section of the handle.
- The stand, based on a plastic bottle, is attached to at least a couple of points, so the holes for fixation can be positioned both along the axis of the artifact and in the horizontal plane. The second layout option is more preferable from a design point of view, allowing the upper edge of the plastic to be bent during the fastening process (Fig. 2a), which ensures reliable protection of the dowel head from the negative effects of moisture.
- An improvised version of the shower door design can be attached not only to the wall, but also, for example, to a corner shelf or soap dish (Fig. 3a and 3b) using ordinary plastic rivets or using a screw connection. A less popular and in demand option is to use copper and highly bendable wire for this purpose, as well as construction tape, cable ties or other types of temporary fastenings.
Universal homemade stand designs allow you to adjust the device both vertically and horizontally, which makes it easier for people with large differences in height to carry out water procedures, and thanks to special fasteners, the position of the watering can will be as stable as possible.
Shower tank
Tanks made of metal or plastic are in great demand. Water in plastic barrels heats up slowly, which is why many summer residents use metal tanks. Among the latter, there are barrels made of plain metal and stainless steel. To improve heating, they are painted black on the outside. Metal tanks are susceptible to rust: within 1.5-2 months after installing the tank, its inner wall becomes covered with rust. Therefore, if finances allow, it is recommended to use stainless steel tanks.
Technological process for assembling a tropical shower with your own hands
It is worth noting that of all the plumbing fixtures that you can assemble yourself, the easiest way is to make a rain shower with your own hands. The assembly process is quite simple, and most importantly, nothing special is required. To work, you need to prepare a large watering can, a mixer and a water hose.
Of course, you can do an open installation of the system, but it is better to prefer a hidden installation, in which the mixer will be built into the wall. It is recommended to combine installation of the system with subsequent repairs, but carry it out before laying the covering, since grooves will need to be dug in the wall. The implementation of the idea of installing a tropical shower house should be carried out in several stages:
The first step is to arrange the pipes. Because a system of several flashes is built.
In the middle there is a recess for the mixer. And from the niche you will need to take 4 flashes into which pipes will be laid, supplying water to the mixer, filling the bath and directing it directly into the watering can. At the next stage, prepared pipes of the required length are laid in the grooves (for hidden installation it is better to choose products made of copper or polypropylene). The shower head tube runs along the wall and slightly along the ceiling to the location of the washing console.
On the ceiling, it can be laid in a gutter or secured with metal brackets. If you plan to install a suspended ceiling in the future, then the pipe is not connected to the main ceiling. Suspended ceiling designs allow you to hide the pipe, leaving only a watering can on the surface.
Homemade options
Home craftsmen are ready to use their skills wherever possible, and can build a rain shower from scrap materials. A DIY watering can to achieve the effect of a rain stream is easily made from an optical disc container designed for 10 pieces. A plastic adapter to the shower hose is installed in the center of the base, the central axis of the discs is removed, and holes are marked and pierced on the upper surface of the cover: from 20 to 40 pieces. All joints and fastenings must be sealed, and a piece of rigid tube or a bracket with thick wire can be used as a holder.
Depending on your resourcefulness and availability of materials, you can implement other options for the “tropical shower” system with your own hands. What can it be made from, if not from standard plastic pipes completely and even backlit? This design involves a complete replacement of the watering can with several adjacent pipes with holes for water. The manufacture of such a structure will require at a minimum pipe connection skills, as well as other construction skills and knowledge in the field of electricity. It is difficult to judge how profitable it is to use several pipes instead of a common collector for all nozzles, and the setup of home-made systems is limited by the capabilities of the mixer.
Position adjustment
Adjusting the cup holders does not require any special description. If necessary, they can be easily removed and moved to the desired location in a minute.
To adjust the height of the fixed supports, the structure is fixed on a vertical bar using hinges, which are fixed with self-tapping screws or a spacer mechanism. The latter can be automatic, semi-automatic or manual. To adjust the holder level using the automatic mechanism, simply grasp the hose attached to the shower holder and adjust the shower head to the desired height.
With the semi-automatic method, the shower is lowered by pulling a cord. However, you will have to manually return the shower to its original position.
Manual mechanisms for changing the height involve pressing a special button when the shower is in motion. The position of the watering can in the lowered state is securely fixed.
Sources
- https://RostovMetall.ru/uchastok/derzhatel-dlya-dusha-svoimi-rukami-2.html
- https://krepmaster-ufa.ru/uchastok/derzhatel-dlya-dusha-svoimi-rukami.html
- https://yapomoshnik.ru/dom/kak-sdelat-podstavku-dlya-dusha.html
- https://VeseloInteresno.su/v-dome/derzhatel-dlya-dusha-svoimi-rukami-2.html
- https://SamoDelino.ru/sam-elektrik-i-santehnik/derzhatel-dlya-dusha-svoimi-rukami.html
- https://stroitelniportal.ru/stati/santehnika/kak-ustanovit-derzhatel-dlya-dusha/
- https://ProPodelky.ru/uchastok/derzhatel-dlya-dusha-svoimi-rukami-2.html
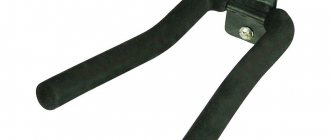
Shower head holder. Why did you choose this one, how did you install it?
Since the original shower mount from the mixer cannot be called useful or reliable, I had to look for a replacement.
The complete mount is made of plastic and does not provide for adjustment of the position of the watering can. In the position suggested by the manufacturer, the watering can only hang empty, and when water is released, all of it flies out of the pan.
Photo 2. This unnecessary thing.
Photo 2. This unnecessary thing.
What's good about the new sample?
- The new mount is made of brass - it is difficult to break.
- The position of the watering can can be changed at your discretion: from horizontal to almost vertical, and also rotates to the sides.
- The holder is collapsible and is attached with just one self-tapping screw.
How does a brass holder work?
The largest part is a cup-shaped body with a pipe for installing a movable lever with a ball head. A non-removable nut is put on the lever. A spring is placed under the ball, which, when tightening the nut, creates rigidity and ensures a stable position of the watering can in any position.
There is also a washer, which I tried to place both under the spring and above it, but I didn’t see any difference, so in the end I placed it on top under the ball itself.
Plastic bottle holder for shower | Let's create after work
Operative restoration of showering…
A shower head is an indispensable attribute of almost every bathroom or shower stall. In the vast majority of cases, the shower head is attached to the wall at a level just above the head of the shower taker, in order to free his hands for thorough soaping. By the way, in the bathroom it is slippery and often, in order to maintain balance, they grab onto this same bracket - the holder, several of these grips and the holder breaks off. If it is not possible to restore the old wall-mounted shower head holder, then you can create a new one from a plastic bottle within a few minutes...
Idea
The version of a plastic bottle holder can be called “dormitory”, because a dorm is exactly the place where various brackets most often break, and such restoration of the functionality of the shower is very relevant, and, as practice has shown, durable.
The tensile strength of PET plastic is high, it can withstand mechanical loads very well, which is confirmed by practice, for example, here, in this case, and thus. A plastic bottle does not rot, is not corroded by acids and alkalis, which are often used for cleaning the bathroom, so it can easily hold a shower head and withstand repeated installation and removal of it, which has already been confirmed by more than a year of practice in using a similar design.
Materials and tools
1. Plastic bottle with a linear conical part at the neck with a volume of 0.5...2 l, as in the case (https://www.afterwork.com.ua/?p=2159).
2. The burner (optional) can be replaced with a hacksaw or a sharp shoe knife. For example, it is convenient to use a folding multifunctional Swiss knife, which is easy to sharpen in this way.
3. Two dowels with a diameter of 6 mm and a length of 40...60 mm with caps.
4. A hammer drill or rotary impact drill will be needed only if you need to install a similar holder in a new location. As a rule, holes remain in the wall from the old holder and it is possible to reuse them to install a new shower head holder from the neck of a plastic bottle.
Job
It is not difficult to select a blank for a shower head holder (Fig. 1a) from plastic bottles, but you should try to choose a bottle made of thicker plastic (for example, a plastic bottle from Coca-Cola) and with a linear conical part at the neck.
The color of the PET plastic bottle is not particularly important, but it is better to match it to the color of the tile, but colorless plastic is suitable for all occasions. To form a funnel for a watering can catcher with a handle, you should cut out a kind of oval cross-section from the workpiece (Fig. 1b), and then, using a burner (fastest) or a hacksaw for metal (most messy), make cuts along the generatrices in the neck of a plastic bottle at a distance of the thickness of the hose (about 1.3 cm) from each other (Fig. 1c). By the way, on the threaded part of the neck of a plastic bottle, as if specifically for this purpose, there are grooves along the generatrices. It’s the two closest neighbors that need to be cut.
After cutting out a segment of the neck, a kind of improvised grip is formed, and the inner diameter of the neck of the plastic bottle is such that the shower head hose with part of the handle passes there and is held in the claws of the “holder” under its weight (Fig. 2b).
The plastic bottle holder must be secured at at least two points. Therefore, there is no need to rush to make holes for fastening in it in advance. It is better to try the location according to the existing holes in the wall from the old holder. The holes can be located both along the axis of the plastic bottle (vertically) and across (horizontally). A horizontal arrangement is even preferable, since in this case it is possible to bend the upper edge of the plastic (Fig. 2a) and it will protect the dowel heads from moisture.
If you don’t really want to hammer the walls or don’t have anything special to use, then you can find the attachment point for a shower head holder made of plastic bottles on something already fixed in the shower area. Most often this is a corner shelf (Fig. 3a) or a soap dish. In this case, such an improvised shower holder is secured (Fig. 3b) with plastic rivets (https://www.afterwork.com.ua/?p=2326) or screws, in extreme cases, copper wire, tape, cable ties or similar temporary fastenings. This way an additional holder can be installed to the existing one.
The need for such quickly manufactured holders (Fig. 4a) has already arisen more than once.
Application
1. If the shower is used by several people of different heights and builds, then it is reasonable to install several similar wall holders (Fig. 4b) made of plastic bottles, at different heights, one under one (Fig. 4a). Fortunately, it takes no more than 5 minutes to make them after work.
2. Operative shower head holders made from plastic bottles are easy to install in the countryside for a summer shower, simply by nailing them to the board.
3. The technology of such holders can be used for storing garden tools, blank parts and any other folk rubbish, and if the holder is damaged, it can be simply restored in the shortest possible time.
4. If the holder is made from transparent PET plastic, then it is hardly noticeable and practically does not spoil the appearance of the shelf, or the bathtub as a whole.
Keep it up! Including a shower head!
Related Posts
www.afterwork.com.ua
Purpose and benefits
In addition to the aesthetic task, the accessory in question must also fulfill another task - to provide comfort and high-quality water supply. Today, shower elements and designs amaze with their variety, so choosing the right model is not so easy.
Modern manufacturers offer designs of various designs.
The question arises about how to choose the right shower fittings and not make mistakes with the quality of the products. Before purchasing, you should understand what types of shower holders there are, get acquainted with the highest quality materials, and study practical tips for installing them.
No. 2. Shower head mounting type
Based on the type of fastening, shower heads can be divided into the following types:
- stationary watering cans;
- watering cans with a flexible hose, or hand-held watering cans.
Those who have a full-fledged one installed, and not one, know about another method of attaching a watering can. We are talking about a special plug on
, in which the watering can is fixed. During water procedures you have to hold it with one hand, which is very inconvenient. In this case, it is better to retrofit the bath with a small wall bracket, into which a watering can can be installed if necessary.
Stationary watering cans
Can be ceiling or wall mounted
depending on the surface to which the installation is made.
Such products are usually used to organize shower cabins and boxes. Stationary watering cans, as the name suggests, are non-removable; they are connected to a device hidden in the wall and mounted using a special holder. The water pressure and temperature are adjusted using a mixer located at a convenient height on the wall. Most models of wall-mounted stationary showers
provide the ability to adjust the angle of inclination due to the hinged fastening of the product to the surface. A similar function in ceiling stationary watering cans is much less common - only in expensive models.
Ceiling watering cans
They perfectly imitate tropical rain or a waterfall, but require relatively high water pressure. Such products are often made from chrome-plated brass. Wall watering cans are usually made from it.
Stationary models are convenient because your hands are completely free and the water supply area is maximum. These are functional products that can vary significantly in shape and size. On the other hand, if the shower is used by people with disabilities, for washing children or animals, then it is better to refuse stationary shower heads.
It’s difficult to imagine a bathroom without a shower, and it doesn’t matter whether it has a walk-in shower or just a traditional bathtub. A shower in a bathroom is always an essential element of plumbing. Shower fittings, whether a hand-held head or a complex high-tech system, must somehow be attached to the wall of the bathroom or stall. Therefore, such a seemingly insignificant issue as choosing a shower holder should be given special attention. It is impossible to do without this attribute in a modern bathroom, so its features and varieties are discussed in detail below.