Alambiki Samodel.ru, Pivovarnya.ru, Alambis
Portuguese devices called alambics are considered elite equipment.
which is entirely made of copper. Most often they are given as souvenirs (with a cube volume of 5 liters), but there are also much more serious things for 20, 30, 60 and even 100 liters of mash. Approximate prices from the official website Samodel.ru for Alambiki Lux-plus:
Classic alambic.
- For 5 liters - 17 thousand rubles.
- For 10 liters - 24 thousand rubles.
- For 20 liters - 30 thousand rubles.
- For 30 liters - 38 thousand rubles.
- For 60 liters - 88.5 thousand rubles.
- For 100 liters - 140 thousand rubles.
As you can see, the cost of these devices is noticeably higher than classic stainless steel distillers, so not everyone can afford such luxury.
You can read about the difference between copper and stainless steel here -.
If you have little idea what an alambik is, you can watch the video on the Bondarnaya Lavka Youtube channel. The author spoke in detail about the design of this device and its differences from the classics.
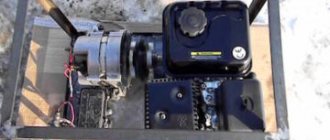
Making a distiller with your own hands
In order for the drink to be tasty, it is necessary to use water that is well purified from impurities and microelements. An ordinary water filter will not cope with this task, so you can use a homemade distiller. The quality of water purification of such a device is in no way inferior to the characteristics of the liquid obtained as a result of purification with an industrial distiller.
To make a device at home, you will need a brass or copper tube for cooling steam, a sealed metal container for boiling water, a container for collecting purified liquid, silicone or rubber hoses, wire, clamps and pliers.
A tube is inserted into a hermetically sealed container with water through the hole made, through which the vapor will pass and cool. Next, this outlet tube is inserted into a container to collect purified water.
Alembic
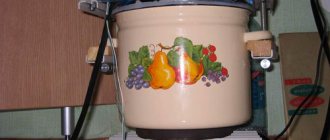
Experienced home brewing professionals often choose a container in favor of a distillation cube. This container is very convenient and can be bought in specialized stores. Such cubes are made of copper, aluminum and other high-quality metals. They differ in the volume of liquid placed and the diameter of the inserted tube. On the market you can find containers from 12 to 51 liters. The price of such products varies depending on the material, manufacturer, volume and ease of use. A small stainless steel distillation cube can be purchased for an average of 3,000 rubles.
Sukhoparnik
A steam steamer (reflux condenser) is a device that separates steam from water droplets and scale particles. It allows you to make moonshine taste better, separate it from fusel oils that inevitably get into it during cooking, and prevents mash from getting into the finished moonshine if it splashes out of the tank. The steamer reduces the production time of the drink. It is a hermetically sealed vessel placed inside the moonshine still between the coil and the distillation tank. The reflux condenser is connected to the last special tubes through which the steam moves outward. First, the mixture of all vapors is condensed in it, and then the ethyl alcohol re-boils due to the continuous supply of heat. Most fusel oils are retained in the steam tank.
If the moonshine still does not include a reflux condenser, to obtain a good quality drink you will need to distill the resulting product again.
Fridge
In moonshine brewing, a refrigerator is used to condense alcohol-containing vapor. This element is required for the process of producing an alcoholic drink. It is best to connect the refrigerator to a water supply so that cooling occurs most intensively. This option is not acceptable for everyone; there are others: immersing the refrigerator in a container of water or ice; cooling due to ambient temperature. To connect the cooler, you need hoses, a tripod for mounting and a faucet attachment. It is advisable to make the connection in a vertical position or at a slight angle.
You can buy a refrigerator in a store or use a homemade device. There are three types of commercial cooling element depending on the material: plastic, glass and metal. Glass refrigerators have proven to be the best. In turn, they are divided into direct and reverse. And straight lines have another classification - ball, coil and straight. The most powerful is the coil refrigerator, which will provide the necessary operating parameters even under cooling conditions through the environment.
Coil
A coil is a tube wound on a cylindrical surface (plastic or metal pipe, rolling pin) in the form of a spiral. The material for the coil must be safe for humans, not react chemically with alcohol, have good thermal conductivity and sufficient flexibility.
Stainless steel, copper and brass have these qualities. The longer the coil, the better its cooling properties, but the distillation speed will be lower. Before curling the tube, it is necessary to give it the greatest strength to prevent creasing. For these purposes, you can fill it with gravel or water and then freeze it. The ends of the tube must be soldered. When winding the tube, you need to ensure a distance between the turns of approximately 1 cm. After receiving the finished form, you need to remove the contents from the tube and rinse well. The finished coil is lowered into a reservoir with coolant, the volume of which should be 5–6 times larger than the coil itself.
Second step
Very often, beginners wonder how to seal the lid of a flask for a moonshine still? This aspect is very important, since alcohol vapors will escape from a poorly sealed can, which will negatively affect the volume of finished products. You can seal the structure after the holes for the hose and temperature sensor are ready. Special rubber layers are provided for food tanks. When converting such a container into a moonshine still, home craftsmen remove this gum and wrap it with FUM tape. Afterwards the product is placed in a container with water and boiled. Afterwards the layer is installed back. At the connection points of the hoses and thermometer, it is more advisable to use silicone gaskets, which are tightened with nuts. Experts recommend excluding rubber, as it will begin to melt under the influence of high temperatures, and the alcohol will have a specific aroma. In the absence of silicone, it is best to coat problem areas with dough. If it accidentally gets into the drink, then the distiller does not have to worry about its quality.
Operating principle of a distillation cube
To understand how to avoid mistakes, you need to understand the very principle of operation of the distillation cube, because it is a whole system. What is the significance of this capacity in the entire moonshine still and what is required for normal operation?
The still is the most voluminous and simplest part of moonshine stills. The cube can be connected to the other parts by tubes or have the form of a combined structure.
What happens inside the still:
- The cube is the place where the mash is kept throughout the distillation. It is poured there immediately after fermentation and purification are completed.
- When exposed to high temperatures, heating occurs. There are two development options: heating using external elements or as a result of integrating a heating element. When the temperature reaches certain values (from 80 degrees), evaporation begins.
- The mash begins to boil. Not only the temperature in the container increases, but also the pressure. Because of this, the vapors do not remain in the cube, but move through the tubes. Gradually the liquid boils away, but by the end of the distillation a certain amount remains at the bottom and is not suitable for consumption.
Despite the fact that the design seems lightweight, there are many nuances that ensure a normal evaporation process. And failure to comply with these conditions can lead to a deterioration in the quality of the alcoholic drink.
4) Installation of instrumentation and automation
Autoclave instrumentation and automation: pump valve, thermometer, pressure gauge, safety valve with a ring for forced pressure release.
To pump up back pressure at the beginning and end of autoclaving using a pump, a valve must be installed. Here we use a wheel extension from a Gazelle, which is attracted by the cut off upper part of a conventional tubeless valve. You can also take a long brass valve from any load wheel and cut an M8 thread on it to secure it with nuts to the body of the autoclave.
The thermometer, since the operating temperature range of the autoclave is 0 - 120 degrees, is used with a scale of up to 160 degrees.
The pressure gauge, since the operating pressure range is 0 - 3.5 bar, is used with a scale of up to 6 bar.
To release air from the autoclave when the pressure is exceeded, a safety valve is needed. The valve is used from the pneumatic brake system of a ZIL-130 car (the driver’s name for the valve, sorry, “fart” - that’s what you should ask in the store) with minor modifications: - replacing the rod spring with a weaker one, since the valve is designed for pressures in the region of 10 bar, and we need to limit it to somewhere around 4 bars. – flatten the tip of the movable valve stem, drill a hole in it for a ring, by which you can manually pull the stem and forcefully release the pressure from the autoclave.
– grind the valve ball more tightly, because in a car it is not required to have a perfect fit, but here it is necessary for the valve to be securely locked at low pressures.
Grinding in the valve ball: by gently squeezing the ball against the fitting in a vice, it is necessary to achieve the appearance of a mirror strip at the contact point.
Ready autoclave
Now I am in your ranks!
Thank you very much to the community for the master lessons, for your imagination and wonderful work! I read and looked through you for a long time and finally decided
How to make a simple distiller from a saucepan?
To assemble the device you will need a minimum of parts, which will allow you to start manufacturing:
- Pan, volume can be from 7 to 40 liters. A lid is required.
- For the coil you will need a stainless steel or copper tube. Length – 2 m.
- Plumbing pipe with a diameter of 45 mm.
- A thermometer to make it easier to separate harmful fractions.
- Fitting, coupling, fum tape, epoxy glue.
- Parts for attaching the lid. They are chosen according to their capabilities, based on the situation.
Assembling the device begins with the refrigerator. First, make the coil itself. A copper or stainless steel pipe is prepared. You need to find a round blank in advance, which will then allow the coil to fit into the plumbing pipe. There should be up to 1 centimeter of gap left on both sides. The tube is closed on one side, and sand is poured on the other. The second side is also closed. Next, make a spiral; the distance between its branches should be no more than half a centimeter. There is no need to curl the entire length of the pipe. Leave about 4 centimeters on both sides so that you can connect the tubes later. Next, the sand is removed and the pipe is cleaned. Filling the pipe is necessary so that it does not lose its shape during bending.
Next, the coolant is collected. To do this, take a plumbing pipe; this is a more affordable choice. The length must be determined so that it matches the coil, it must fit. And a few more centimeters need to be left on top of this. You need to put fittings on the ends of the tube, but the pipe is cut off from them, leaving only a smooth surface. It is easier to put the fittings on by heating them over a fire. They are fixed with epoxy glue.
When the glue has hardened well, the pipe is drilled in the place where the fitting is located. Holes are made in both plugs. The tubes are pulled into them, then the plugs are glued with epoxy resin.
A steamer is not a necessary part of a home moonshine still. But its benefits are difficult to overestimate. It cleanses the distillate from harmful impurities and fusel. It's very easy to make. Take a jar with a lid. The lid should have two holes for tubes that supply and remove steam. In the container, the vapors are cooled and purified. The place of the steamer is between the distillation cube and the refrigerator.
How to make a parrot for a moonshine still?
The design is simple, not to say primitive; no “engineering thought” or precise calculations are needed here. Therefore, feel free to start making it and get a wonderful parrot for your home distillation needs for pennies.
Made from corrugated stainless steel
The simplest design is made from half a meter of stainless steel corrugated pipe. To make a parrot, you just need to bend the tube. To drain the moonshine and insert the thermometer, cut one part of the tube halfway and bend it so that the liquid can drain.
This structure must be secured. As an option - in a piece of board, in which a groove has been selected in the middle for a bent tube. You can also take any unnecessary container from a tin can and fill it with diluted plaster. “Down” the structure evenly in it and wait a little while for the plaster to set. The parrot with the stand is ready.
The big disadvantage of this design is the use of non-food grade stainless steel. Because of this, the finished moonshine may have an unpleasant aftertaste due to compounds that are clearly not healthy.
From two syringes from the pharmacy
Large disposable syringes are needed - preferably 5 ml, but 2 are possible. Depending on the planned height of the parrot - 2 or 3. You will also need:
- IV tube;
- glue gun;
- lighter or mini-burner;
- gypsum;
- screw cap from a glass jar or small tin can.
Having collected the necessary parts, start creating the device:
- Remove the plungers from the syringes.
- Place a piece of IV tube 10-12 centimeters long on the ends where the needles are inserted.
- Cut the tip off the needle cap to make a tube.
- In the upper part (where the piston is inserted) of one of the syringes, make a hole for the resulting tube.
- Insert the tube and melt the connection with a lighter (burner) and additionally treat it with a glue gun so that it does not leak.
- Glue the solid syringe above the one with the inserted tube.
- Cut off the rubber bands from the pistons and glue them into the syringe above. These are the legs.
- Place the legs in plaster and let them harden.
Place the alcohol meter in the lower syringe, and place the upper one against the tube through which the distillate flows. As the lower syringe fills, the alcohol meter will float, indicating the strength, and the moonshine will flow through the spout into a substitute container.
From copper tube
For “advanced” distillers – jacks of all trades – the best solution is a copper parrot that is safe in terms of product purity and reliable in operation.
You will need:
- copper tube with a diameter of 25 mm and a height of 22-25 cm;
- the same tube, but with a diameter of about 10 mm (on the spout of the receiving tube) up to half a meter long;
- copper adapter from 25 to 35 (for intake funnel);
- plug for the main tube;
- drill;
- soldering iron
The design of such a parrot can be seen from the picture.
When selecting heads, it is not only unnecessary, but a hindrance, since the heads are mixed with the body and the whole selection becomes meaningless. Many harmful components of distillation will get into the main part.
Look at what ready-made offers are on the market:
It is quite possible that to begin with you will make a parrot according to the simplest scheme. But for venerable distillers, a copper design will be the best. Be creative, distill moonshine correctly and consume it in moderation.
What is a flask and where did it come from?
The word “flask” itself is German, derived from “Flachmann”, which in translation means just “flask”. “Flyakhmans” were used mainly by soldiers - during World War I they were made of glass and covered in a fabric cover. They fought, as if they were running - just imagine how much schnapps was spilled on the battlefields by the Kaiser’s troops!
But, of course, containers for alcoholic substances appeared long before the Imperialist era. Leather, mended stomachs of livestock, wood, the shells of some fruits (for example, coconut) - portable “bottles” for wine and other drinks have been made from all of this since their appearance.
The flask began to acquire its modern appearance, presumably, in the eighteenth century, in good old France. It was at this time that the flask left the category of a practical everyday item and moved into the plane of a design element, even luxury. Silver, gold, luxurious ornaments, inlays with gems, family coats of arms, engravings, icons are proof of this.
And only in the last century the flask began to be widely used not only by noble loafers, but also by ordinary people.
The main surge in the popularity of this device occurred in the States, in the 1920s. During this time, alcohol could only be sold under the counter. Some future Al Capone came up with a special type of liqueur known as a "gas station." The meaning is simple - a worker eager to wet his throat enters a certain establishment. Drinking on the spot was not allowed for reasons of secrecy - the bootlegger poured only “to-go”.
Anyone who wanted to refuel needed a “gas tank,” or rather a “tank,” which could be hidden in a pocket or behind the boot and carefully transported to a safe place.
After the repeal of the dubious Eighteenth Amendment, flasks remained a part of the everyday life of ordinary Americans. For example, they were often found on the bodies of US soldiers who died on the fronts of World War II. They were taken to both Korea and Vietnam. It must have been from there that a convenient and useful item penetrated the vast expanses of the USSR.
Making a moonshine still from a beer keg
What modification is needed?
Kegs are used to store beer; the manufacturer is concerned about the safety of the material. In addition, the containers are designed for high pressure inside. These are some of the advantages. However, rework is still needed. What does it consist of:
- Installing a thermometer in a keg or other container is important for any moonshiner. The device helps to accurately determine the temperature and separate fractions during distillation. They use bimetallic, electronic, digital. But a glass thermometer is not suitable, as it is quite fragile.
- The coil is a part of the distiller that cannot be replaced by anything. The copper tube is located inside the refrigerator and turns the vapor into a liquid.
- In any case, you will also have to make a flow-through or non-flow-through refrigerator. Each type has its own advantages, but it is still recommended to ensure a flow of water.
- The heating element is built into the distillation container if the container is large, or simply for convenience. Its high price is fully justified by the large number of advantages.
- A steamer or bubbler is not a mandatory part, but cleaning cannot be avoided in any case. Therefore, it is better to install a device to automate this process.
Installation
Installation of all parts of the moonshine still occurs in the same way as with a distillation cube from a can. There are no special features. At the same time, a steamer and a refrigerator with a coil are connected. A thermometer and heating element need to be built in. It is recommended to start with the heater as it will take longer.
heating element
To install a heating element, it will take time and preparation. Usually the heater is sold complete with parts (nuts, washers), but if they are not there, you will have to work hard. It is worth making sure that there is enough power to heat the existing volume of the keg.
To attach the heater, you need to make holes. There should be two of them, of the appropriate volume. It is advisable to do this closer to the bottom, about 5 cm from it. There is another option for ensuring tightness: wrap plumbing tape around the thread
It is very important that no lye remains. Before connecting the heater, the connections are insulated.
Thermometer
Installing a thermometer usually takes even less time. Specialized stores sell devices that are designed to be built into a distillation cube. Such a thermometer must have a capsule and a fitting for attaching to moonshine stills, including those made from beer kegs, made by yourself. The fastening should be at the top of the pipe. Fum tape is most suitable for sealing.
Care secrets and flask etiquette
There are several unspoken rules that flask owners follow. For example:
- Cocktails are not carried in a flask.
Only pure alcohol, only hardcore! Do you like ""? Carry rum with you and mix the rest in a glass. Agree, “Bloody Mary” in a flask is not entirely aesthetically pleasing, and it’s also unhygienic.
- Only you and your closest friends can drink from the bottle.
It’s in bad taste to serve unfamiliar characters from your own flask. An alternative is portable glasses.
- Do not touch the neck with your hands.
And in general, the flask must be kept clean, thoroughly washed every time after it is emptied.
When not carrying alcohol, the flask should be kept clean and dry. The inside cannot be washed with soap or detergent - only plain warm water.
As a last resort, if some very aromatic or sweet, fatty drink was stored inside, you can use citric acid or a weak solution of vinegar, after which the container must be rinsed again several times and dried well with the lid unscrewed.
You can also wash your flask... with rice! Rice is a good adsorbent; it perfectly absorbs odors and tastes. You need to pour some grains inside, add warm water and let it sit for half an hour, then rinse the vessel thoroughly.
The outside of a simple metal or wood-encrusted flask can be washed with soap or a neutral dish soap. For leather, regular shoe products will do, only those that don’t smell. You can rub the tin with a mixture of vinegar, flour and salt, let the mixture dry on the surface and rinse with warm water.
It is also necessary to rinse the new flask several times immediately after purchase, then dry it and fill it with vodka or other alcohol that you don’t mind. If within a couple of days the drink has not changed its taste and smell, then you have purchased a good vessel!
That's all!
The article partially used materials from the furfur website.
An original leather flask, made with your own hands according to this master class, is suitable as a gift to your beloved husband, boyfriend, son or father.
The manufacturing technique is simple and accessible to beginners. Without using special materials, tools and skills, you will get not only a beautiful and stylish, but also a practical thing. It is convenient to store strong drinks, balms, herbal infusions, and water in a flask. You can use an unnecessary leather jacket or bag as a basis, then the cost of the craft will be significantly reduced.
Decoration materials
To make a leather flask with your own hands you will need the following materials and tools:
- a flat glass bottle with a volume of 200-250 ml, the shape of which resembles a classic flask;
- thick skin;
- clasp for a small strap;
- strong thick thread in skin color;
- a sheet of thin cardboard;
- transparent all-purpose craft glue;
- ruler;
- ball pen;
- scissors;
- awl.
you pay attention immediately
on the other, which is ideal not only for a gift for a man, but also for a woman. Another one involves working with polymer clay. Choose what you like best or do everything!
How to make a leather flask case
Thoroughly remove labels from the bottle by soaking it in water. If there are indelible traces of glue left, remove them with cotton wool soaked in acetone.
Measure the length of the bottle from neck to neck through the bottom. For convenience, use a rope; it is easier to measure with a ruler.
Measure the width of the flat part of the container. Draw a rectangle of the obtained dimensions on the cardboard. On the cardboard separately, draw a figure similar to a kite.
The width of the diamond should be 1 cm less than the previously measured width of the bottle. The length of the diamond and the “tail” of the kite is equal to the height of the future flask in a leather case. The length of the “nose” of the kite is 3-4 cm. The width of the stripes is 1 centimeter. Cut out cardboard patterns.
Using a ballpoint pen, draw the outlines of the patterns on the pieces of leather. If there are not two relatively large pieces, then the second figure can be assembled from leather strips 1 cm wide, sewing them accordingly. Cut out the pieces.
Sew a fastener to the tail of the second piece.
Then sew the second part along the line of symmetry of the rectangle.
On the wrong side of the leather, draw and cut out a rectangle 3 cm wide and 12 cm long. Fold it in half and sew on the side of the sewn part of the diamond. This way you will get a loop with which a man can hang a hand-made leather flask on his trouser belt.
Using an awl and ruler, make holes along the long sides. Find the middle of the main rectangle, measure 5 mm from it in both directions, and punch holes. The next ones - after 2 cm. Next, symmetrically with respect to the central point, pierce repeating holes at intervals of 15 mm, 7 mm.
Lace the sides of the case with strong waxed thread, starting from the middle of the sides.
Insert the glass bottle into the leather case and tighten the threads on both sides.
Tie the threads in a nice knot. To decorate the flask, you can string a copper bead.
Punch holes along the center line in several places on the unsewn strip of the second part.
Measure the circumference and height of the lid for a leather flask. Cut out the corresponding parts from the leather, adding a height allowance of 10-5 mm. Apply clear glue to the surface of the lid and leather parts, let it soak in a little. Cover the lid with leather.
This is such a beautiful flask! Give it to your man on New Year, February 23 or any other day.
If the bottle accidentally breaks, then by loosening the lacing, you can insert another one of the same shape into the case. Look
, which is also quick and simple.
A master class on making a gift flask in a leather case was prepared specifically for the “Women’s Hobbies” website. Share the link on social networks to show the transformation idea to your friends.
Having re-watched Pirates of the Caribbean once again, I was inspired to make a leather flask again. I have several Spanish flasks in my collection and I decided to make a small one. It never crossed my mind until my wife told me we were going to dress up as pirates for Halloween. We were also going to Disneyland and I decided that these flasks would be a great accessory for our costumes. So here I go.
3) Re-equipment of the lid clamp
Remove the standard aluminum clamp with a latch. We roll the round lid of the flask and tap it around the perimeter so that the rubber gasket from under it is not squeezed out by high pressure. We make a hexagonal or round pressure plate from a fairly strong metal with six holes Ф10 mm with a diameter of 24 cm. (The circle is divided into six parts by laying out a radius of 12 cm on it).
We make hooks from loop screws, cutting off the excess so that they fit freely on the handles of the flask.
The upper hoop of the flask, made of a cast alloy similar to silumin, contains two handles and supports for the clamping mechanism. The 4 exit points of the flask handles, as well as the two points of the clamping mechanism, form a regular hexagon. We insert a bolt into one support and sharpen the other a little so that the hook screw fits freely into the hook. As a result, the pressure plate with freely hung hook screws and wing nuts should fit freely onto the flask.
Pressure cover with six screws and wing nuts
Moonshine technology
Now I will quickly tell you the entire sequence of the process, and then we will talk in more detail about each stage. So, how is moonshine prepared?
- First, prepare a special solution consisting of water and sugar. Sugar can be used either in its pure form, or any sugar-containing raw materials (berries, fruits, etc.) can be used. This solution is called wort.
- The wort is then processed into mash using yeast. During fermentation, yeast eats sugar and produces ethyl alcohol and carbon dioxide (there are other fermentation products, but not about that now).
- The mash already contains alcohol, but the percentage of it there is very low. Typically 8-12%. To extract alcohol from the mash, it is distilled using a moonshine still. The distillation process is also called distillation.
There is nothing complicated in this process. The whole point is that the mash is heated to a boil, and the steam that evaporates is cooled to a liquid state and poured into a separate container. This condensed liquid is our moonshine.
- Then comes the purification of the moonshine. During the fermentation process, in addition to ethyl alcohol, yeast by-products are also formed. It is necessary to get rid of these impurities, because... they are harmful to health. Some even very much so. And these impurities greatly spoil the taste of the drink. We will talk about types and methods of cleaning in the section below.
- The final and completely optional step is flavoring and tinting the moonshine. Moonshine is infused with various herbs and spices, which give it a rich color and smell.
I have listed the main stages of making moonshine. Nothing complicated, right? Now let's look at each point in more detail.
But before that, I want to note that all the stages mentioned are equally important. If the technology is not followed or low-quality raw materials are used, the output can result in a foul-smelling and even hazardous liquid.
What to do with the products?
In fact, moonshine brewing in our country was initially seen as an opportunity to earn extra money against the backdrop of a general shortage of alcohol.
And today, many lovers of “hot drinks” prefer to buy a homemade product. For production, many additional elements are used that change the taste of the drink. Older men prefer the “natural” option. This allows professionals in this craft to quickly find a client base and recoup their efforts. However, the legislation imposes some restrictions. Obviously, the right to conduct business is enshrined in the Constitution, so it is extremely difficult to challenge it. However, you will have to follow established rules and procedures in order to receive income, and not problems with the law. For example, it is quite possible to produce alcohol for sale, but this is a business activity that, according to the law, must be licensed and be subject to a different taxation procedure. Accordingly, you will have to register as an individual entrepreneur, prepare all documents for government agencies and obtain the appropriate permission (by paying tax).
Firstly, alcohol is brewed in specially equipped premises and must eliminate risks to human life and health. Therefore, it will not be possible to do such procedures at home, and the room can only be used in one direction.
Secondly, there are requirements for equipment - technical standards have been established that the distillation apparatus must comply with. If the inspection authorities find a discrepancy, you can forget about the license until the deficiencies are corrected. Accordingly, a homemade device will not meet the established criteria.
Of course, most people interested in this issue will not deal with paperwork and obtain a license
We only draw attention to the fact that such a possibility exists, and administrative and criminal liability is provided for non-compliance with the law. Further actions are the decision of each person. Considering that sales to neighbors and acquaintances are not large supplies, supervisory authorities, in the absence of incidents, will not pay attention to your activities
Considering that sales to neighbors and acquaintances are not large supplies, supervisory authorities, in the absence of incidents, will not pay attention to your activities.
Capacity and material
Many years ago, having bought my very first flask, I was still surprised that the capacity on it was indicated not in milliliters, but in some mysterious “OZ”. In fact, there is nothing surprising here - Americans measure the volume of alcohol in ounces, equal to 29 ml - just a small shot. The minimum volume is usually 3 ounces, the maximum is 12.
But there are also exceptions. For example, miniature flasks-keychains. My friend’s uncle worked at some mysterious flask production - so he kept everything, from vegetable oil to moonshine, in Mastadont 3-5-liter flasks.
The choice of volume is a personal matter for everyone. I like 9 OZ - 255 grams. Just enough cognac to relax a little and treat a friend. A smaller, 6-ounce flask will come in handy on a hike - you can pour 98% alcohol into it, which is good for starting a fire in the damp, disinfecting a wound, and getting a group of 2-3 adult men drunk.
Just keep in mind that alcohol, especially strong alcohol (alcohol, absinthe, undiluted liqueurs) should not be stored in a metal container for a long time - there is a risk that the drink will change its taste and become “iron.”
And, by the way, another life hack - “for warming”, not brandy or vodka is much better suited, but strong wine - port, Cahors. Tested in practice - at one time I had to work a lot in the cold. Wine makes you feel warmer without compromising your intelligence. And to relieve stress, it is recommended to take no more than 50 ml, especially in extreme conditions - on a hike, etc., where it is important to maintain dexterity and clarity of thought.
Now about the material. As already mentioned, flasks are made from just about anything - even glass and polymers. We will focus on metals.
- Stainless steel
is the most common material. Beautiful, suitable for engraving, corrosion-resistant. The character is flexible. Flasks made of soldered stainless steel are most often found on sale. If you want to completely protect yourself from tin, lead, acid and other elements of solder, it is better to look for one welded with argon. Aerobatics - seamless stainless steel. But you will have to pay accordingly for the exclusive. - Aluminum
is also not susceptible to corrosion, it is lighter than stainless steel, but it is prone to deformation, which is why the caps begin to tighten worse and precious moisture begins to leak. But I don’t recommend aluminum for other reasons - it noticeably spoils the taste of alcohol, and not just strong alcohol. - Regular steel
. There are no options here - straight into trash. - And finally, silver
. This, of course, is chic - silver not only does not spoil the taste, but, according to many reviews, can slightly improve it. Of course, I can’t imagine an adequate person who would spend over 15,000 rubles on such a trifle. But as a gift to your boss or business partner, it’s just right.
And one more thing – it’s worth paying attention to the accessories for the flasks. For some flasks they make glass stoppers - maybe it’s more convenient for you to drink, but I think that the stopper should be attached to the body on a hinge - otherwise it will be 100% lost. If you don’t like to effectively drink from your throat, it is better to purchase a set of metal shot glasses in a separate case. Take thicker ones - they bend quickly.
But a watering can is a very useful thing, especially when you pour the remains of booze into a flask in the morning after drinking. I personally don’t see the point in special cases - unless, in addition to a flask, it can hold, for example, a tobacco pouch or a cigarette case.
How to make a steamer?
The steamer is an indispensable element of every moonshine design. To make it you will need a glass jar. Its volume does not matter, the main condition is the presence of a tightly closing lid in which two holes must be made. The purpose of the first is to place a can pipe; in the second, a channel is installed that supplies liquid to the refrigerating chamber.
In order not to make mistakes in the calculations and make your own high-quality steamer, you need to take a pencil and draw on the lid the exact size and shape of the intended holes. It should not be forgotten that the slots must exactly match the dimensions of the pipes.
After this, you need to cut holes along the resulting contours, insert channels, and tighten the nuts. For more reliable fastening of the pipes, you can apply varnish or leftover dough to the joints.
The last stage of making a steamer is to close the can and ensure the tightness of the structure. Having completed these manipulations, you can connect the steamer to the refrigerator compartment
An important condition for a successful result is the correct position of the refrigerator. It is best if the camera is at an angle not exceeding 45 degrees
Methods for heating a moonshine still
1. Open fire. In most cases, this means heating on a gas stove or burner, but there are also coal and firewood. The advantages of this method: simplicity, accessibility and often cost-effectiveness.
Flaws:
- high inertia - it will not be possible to quickly reduce or increase power, as a result, it is difficult to control the temperature in the cube; experience is required;
- it is very difficult to insulate the distillation cube to reduce heat loss in order to save money;
- installation of automation is practically useless;
- high fire hazard of open fire.
Distillation in the fresh air with wood.
What kind of device, what color of moonshine 2. Built-in electric heating elements. Devices (one or several at once) are mounted directly into the cube. Heating elements made of stainless steel or brass are suitable.
Advantages:
- quick temperature change (high controllability);
- possibility to install automation and insulate the cube.
Flaws:
- solid particles can burn to the working surface of the heating elements; careful filtration of the mash is required before distillation;
- Electric heating is often more expensive than gas heating;
- From time to time the heating elements burn out.
3. Induction cooker. It runs on electricity and can be stationary or portable (used more often in moonshine).
Advantages:
- low inertia – quick change of heating intensity;
- good temperature control - induction cookers are equipped with automation, no need to install separate units;
- in comparison with heating elements, the entire surface of the bottom of the cube is evenly heated; burning of the mash occurs in rare cases.
Flaws:
- the cost of an induction cooker is quite high;
- You can only use distillation cubes made from materials containing a magnet (stainless steel, cast iron), while aluminum and copper containers without magnetic inserts welded to the bottom are not suitable for heating.
Only stainless steel and cast iron cubes can be heated on an induction hob
4. Heating using steam (steam generator). First, the water is brought to a boil and served directly into the container or onto the outer walls. The system allows you to control (automate) the entire process and eliminate the risk of burning, therefore it is suitable for distilling thick mash. But due to the complexity of implementing the design and the need to purchase (manufacture) special equipment (steam generator), it will not be considered further here.
Safer with valve
One of the main reasons is blockage of the steam pipe with foam or even solid particles contained in the mash. At the same time, the pressure inside the cube increases and when the material of the tank cannot withstand the pressure, an explosion occurs. Sometimes the force is so strong that the windows in the house fly out, the moonshiner receives serious injuries and may lose consciousness. At this time, a fire breaks out due to alcohol vapors escaping.
Therefore, under no circumstances should we leave the device unattended during the haul and take additional safety measures. The main one is the installation of a safety valve
.
Attention.
Many moonshiners explain their reluctance to equip the distillation cube with a valve by the fact that in this way, they say, some of the alcohol vapor will “fly” into the atmosphere.
Will not be!
With proper distillation, excess pressure does not arise in the still, alcohol vapor rises through the outlet tube, and the valve “does not work.”
Remember how a pressure cooker works (and a multicooker too). Steam begins to come out only when the liquid inside boils. During distillation, the mash never reaches the boiling point and no steam is released through the valve. But the presence of a valve saves in case of unforeseen situations.
You can choose from the following options:
- valve for a compressor that operates at a pressure of about 10 atm. This is a bit much; the material of the flask may not withstand it, especially if it is far from new. Price from 140 rubles;
- Chinese-made safety valve that “turns on” at 1.6 atm. Price – 500 rub. and higher;
- pressure cooker valve. Its price on Chinese online sales sites is 70 rubles;
- thermometer in an open (not sealed) capsule.
To do this, drill a 10 mm hole in the wall of the flask at the top or in the lid, into which a stainless steel tube is hermetically secured. A conical rubber band from a dropper is inserted into it, and then a bimetallic thermometer is inserted.
Its probe is inside the cube, and the round scale is outside. In distillation or rectification mode, the thermometer informs about the temperature inside the cube. But if an emergency suddenly occurs and the pressure jumps sharply, it will simply push the thermometer out and be released through the tube.
How does the device work?
The operation of the device is based on the principle of squeezing and releasing the udder teat. This process occurs due to the negative pressure created in the glasses. It is maintained at 48 kPa, and the contraction frequency is regulated by a pulsator.
The device is connected to the mains and the switching mode is activated using the button. The manufacturer recommends letting the unit run idle for a few minutes. Then the milk hoses are clamped with special clamps. Now you need to open the valve on the manifold by pressing the button.
Next, aluminum cups are applied to the udder nipples one by one. Having securely fixed all the containers, remove the ring from the milk tube. Thanks to the operation of the vacuum pump, which is driven by the engine, negative pressure is created in the glasses. The milk begins to flow into the milk collector, connected by a tube to the glasses.
The operating principle of the milking machine "Doyushka"
When you turn on the device, the pump starts working, the piston in it moves up and down. Due to the movement of the piston and the valve placed on the pump cover, a vacuum is created. When rarefied, milk is sucked from the nipples into glasses, from which it flows into the can. When the container is completely filled, the device can be turned off.
In order for the Doyushka cow machine to work properly and for a long time, you need to take care of it: rinse the equipment of milk liquid and lubricate the piston and cylinder every week. You can clean it with special brushes that are included with the unit.
At what age does a cow begin to produce milk and how is it produced? Read
Which flask should you choose?
In Europe and China, stainless steel flasks are mainly used. Probably the main reason is that medical studies interpret the use of aluminum ambiguously. Allegedly, when interacting with an aggressive environment (which is mash), especially when heated, it oxidizes. This releases substances harmful to humans.
Even today we continue to produce aluminum flasks and pots.
However, for those who are worried about the material, there is an alternative - buy a stainless steel flask. They are produced in China and European countries and sold here.
Making a moonshine still from a 40-liter flask with your own hands is a creative activity.
Can selection
If you have an old Soviet can in stock, then the question of choosing a container is immediately resolved
But if you still plan to purchase a container, you should pay attention to the following important aspects:
- Material. Milking flasks made of aluminum and stainless steel are suitable for making moonshine.
- Capacity. A huge range of flasks is presented in different volumes, ranging from 10 to 100 liters. Usually moonshiners stop at 20-50 liters - the most optimal size for a still. When making moonshine in large quantities, there is no point in buying a small flask. But many experimenters prefer to have in stock a distillation cube from a small flask for testing.
- The neck should be as wide as possible. Often after distillation you have to scrape the burnt mash from the walls and bottom, and through a small neck it is almost impossible to do this.
- Tightness. If the can is supported, there is a possibility that the lid or rubber band may be deformed.
Having selected the required can, you should make a hole of the required diameter in the lid. First, you should purchase or build attachments yourself and orient the hole under it using a feather drill. Insert the fitting and tighten it with a nut from the inside, to make sure that the container is sealed, it is worth laying a silicone lining into the connection.
In the side of the vessel, slightly below the lid, you need to make a second hole for a special thermometer, secure the device again using a nut and a silicone lining. You can install a thermometer in the upper part of the can, but then the indicators will be less accurate.
Hoses
Connect the attached fitting to a special stainless steel gas hose and attach a steamer; you can make it yourself or purchase it in a store. Also attach a hose to the steamer and connect it to the refrigerator.
When choosing hoses you need to be guided by the power of the system itself
This will determine their length and diameter, which is important for maintaining pressure
Fridge
The device is used to condense steam. This is an essential element of a homemade moonshine still, thanks to which an alcoholic drink is obtained. There are 3 options for running the refrigerator:
- immersing the device in a container with cold water and ice;
- cooling due to ambient temperature;
- connection to the water supply.
The last option is not considered acceptable for everyone, so the first two methods are most often preferred.
There are several types of commercial refrigerators; the best ones are glass coils, which provide all the necessary processes even when cooling in ambient conditions. More details about this are written here.
It is recommended to connect a steamer or bubbler to the distillation unit, and it is best to use these two options together. The first device is responsible for rough cleaning, and the second one performs soft cleaning.
A steam steamer or reflux condenser is a special device that can separate steam from liquid compounds and solid scale particles. Thanks to this device, the taste of moonshine improves, the volume of fusel oils decreases, and accidental penetration of mash into the finished distillate is prevented. This is a hermetically sealed vessel where vapors are collected and compacted, and then the ethyl alcohol re-boils due to the continuous supply of heat.
There are two options for heating a multicomponent mixture in a flask, since smooth heating and careful temperature control are important in this matter:
- Installation of heating elements. The heating device features smooth temperature control, but there is no exact guarantee that the mash will not burn.
- Steam generator. The best solution, which is rarely used because it is quite expensive.
How to embed heating element into a milk flask
Do-it-yourself moonshine still from a flask is quite popular among moonshiners, as it is easy to make from scrap materials. A milk can is perfect as a still. Using a drill, make a hole in the container for the thermometer. The fitting is inserted into the lid by drilling it, then attach a stainless steel gas hose. Both devices are secured on the inside of the can with a nut, sealing the connection with a silicone gasket. The hose is connected to the steam tank. A hose or tube is attached to the latter and connected to the refrigerator. An additional valve is installed on the lid of the flask for safety.
In order for a moonshine still from a flask to be conveniently used from electricity, it is necessary to equip it. This is quite easy to do. It is necessary to drill two holes in the lid of the can, line them and hermetically install the purchased heating element. If the flask has a volume of 40 liters, it is better to take a heater with a power of at least 2 kW. To ensure a good seal, it is necessary to wrap a thick layer of plumbing tape around the threads. After successfully connecting the TEN, they begin to connect it. Multi-core cables are attached to the plug on one side and to the TEN washers on the other, reliably insulated and checked for breakdowns, and connect the new invention to the outlet.
conclusions
Copper is, of course, an important component of distilling and it is unlikely that in the near future, despite its obvious shortcomings, large producers and home enthusiasts who are not indifferent to grain and fruit distillates will completely abandon it. However, you need to use it wisely:
It is advisable to use copper only in the steam zone of the moonshine still - the main refrigerator, where the condensation of alcohols occurs, it is better to tin or replace the copper elements with stainless steel. To minimize sulfur compounds (DMTS) and improve the organoleptics of the drink, it is most effective to use copper elements (copper helmet, drawer with copper nozzles, plate column with copper caps, etc.) in the steam zone during the first distillation of the mash
During the second distillation, it is most effective to use a copper still. Regular cleaning of the external and internal surfaces of copper products is the key to high-quality and tasty moonshine.
- It is advisable to use copper only in the steam zone of the moonshine still - the main refrigerator, where the condensation of alcohols occurs, it is better to tin or replace the copper elements with stainless steel.
- To minimize sulfur compounds (DMTS) and improve the organoleptics of the drink, it is most effective to use copper elements (copper helmet, drawer with copper nozzles, plate column with copper caps, etc.) in the steam zone during the first distillation of the mash. During the second distillation, it is most effective to use a copper still.
- Regular cleaning of the external and internal surfaces of copper products is the key to high-quality and tasty moonshine.
You can buy copper products for distillation in our online store “MirBir”. In the assortment you will find the best Portuguese copper alambics and components for them, modern Desstill distillers with a copper helmet and a stainless steel refrigerator, as well as Panchenkov (RPN) and Selivanenko nozzles, and much, much more. You can contact them for a consultation by calling their toll-free number or using the feedback form on the website.