Despite the attempts of city administrations to solve the problem, there are stray aggressive dogs running on the streets, from which serious troubles can be expected. They can not only scare a child and even an adult, but also bite and cause serious injuries as a result; this is a very important problem that must be resolved immediately by the city leadership. But it’s not the mayors who want to spend money on this. Therefore, it’s a good idea to buy or make your own circuit and use a powerful dog repeller. Look through the article and choose which scheme you will use to work with your own hands or order it from a master.
How to make a dog repeller with your own hands: several simple options
Stray dogs can cause a lot of trouble: seriously frighten a child, bite a passerby and tear his clothes, cause severe injuries if the pack is large and aggressive.
Dogs especially do not like cyclists, barking with hatred at people riding this type of transport. Sometimes it’s not easy for both postmen and ordinary passers-by walking through a wasteland favored by animals. Therefore, it’s a good idea to have protection with you that can scare away four-legged aggressors. By the way, you can build this protection with your own hands. Read on to learn how you can make a chemical or electronic dog repeller with your own hands, look at the diagrams, and create masterpieces!
Making a simple chemical device
What you will need
For chemical repeller:
The second option for a chemical repeller:
- ground black pepper;
- shag;
- mustard powder.
This video will show you how to make a low-power dog repeller with your own hands:
Manufacturing technologies
- The easiest way to make an imitation of pepper spray is to take a plastic bottle with a capacity of up to 0.5 liters, fill it with vinegar and pour in a teaspoon of pepper. Then shake and put on the spray bottle. However, it is not very convenient to carry this with you.
- In another option, they buy the most “vigorous” cheap shag, finely grind it together with black pepper in a coffee grinder and get a very pungent cayenne mixture. To enhance the effect, add mustard powder. Place everything in a small plastic container that is easy to open. in case of threat, apply to the dog (nose, eyes, mouth). You can also stuff a firecracker with this and shoot from afar.
Below we will tell you how to make, although not the most powerful, homemade ultrasonic dog repeller with your own hands, with a useful diagram.
Methods of protection
To scare away wild and feral animals, various means are used. For example, a stationary ultrasonic dog repeller is used to protect houses and areas. The device allows you to leave your cottage or garden plot unattended while the owners are away. The operation scheme is similar to a portable device. Power is supplied from the network, and it starts working when the motion sensor is triggered. In addition to dogs, the device works as a repeller for cats, foxes, and rodents. The frequency of the sound changes so that the animals do not get used to it and continue to be afraid to enter the territory.
Most devices do not have a noticeable effect on humans. The most powerful models can cause headaches and ringing in the ears.
Electric shock is effectively used as a repeller. The sharp sound of the discharge and flash with the release of a large amount of ozone scare animals already at a distance of 10-20 m. It is often installed on a bicycle so as not to reach it while moving.
In addition to electronic ones, more traditional means of repelling dogs are also used, in particular, repellents and mixtures. The way they work is simple - they emit an unpleasant odor. After treating the area around the perimeter, animals will stop entering it. There is also a dog and cat version.
For tourists and athletes, it may be important to make a homemade dog repeller. It is an analogue of a gas cylinder. Consists of a container into which a mixture of vinegar and pepper is placed. This option is inhumane, but very effective. Other mixtures are also used, in particular, based on shag.
You can make a homemade ultrasonic repeller if you don’t trust the effectiveness of the devices being sold. This will require some knowledge of electrical engineering.
Sometimes the best defense is an attack. If you don’t have the device at hand, and you are surrounded by an angry flock, you can simply bend down to the ground and pretend that you are picking up and throwing a stone. This technique will scare away the dogs. Dogs are animals, they are devoid of reason, and instinct makes them afraid of such gestures.
Why do strawberries, strawberries and berries dry out and die during the fruiting period: reasons, what to do, what to spray with? Why do the leaves, leaf edges, buds, berries of recently planted strawberries and strawberries in the garden turn yellow, blacken, and dry out: diseases, pests, improper care
How to make an ultrasonic dog repeller with your own hands
Such devices are also called dogchasers - taken from the English language. The operation of the device is based on ultrasonic radiation, which people do not feel, but dogs react to it by backing away and running away.
What you will need
Option 1
Ultrasonic device diagram one:
- piezo emitter (can be pulled out of a speaker, speaker, music box, calculator);
- battery type “Krona” with a voltage of 9 volts or type “L1028” with 12 volts, you can take two batteries from a mobile phone (lithium-ion);
- microcircuit K5 61LA7 or K176LA7, K1561LA7, 564LA7;
- three silicon small-sized diodes;
- five capacitors;
- five resistors per 100 kilo-ohms;
- 33 kilo-ohm resistor;
- 2 kilo-ohm resistor;
- four transistors from the KT3102 or KT3107 series;
- one silicon transistor with a base current gain of at least 30;
- switch;
- textolite;
- solder and soldering iron.
A good device for scaring dogs can be made using this video:
Option 2
Ultrasonic device diagram two:
- constant resistors with a power of 0.25 W - five pieces;
- variable resistor;
- piezo emitter (for example, ZP-1, ZP-18, ZP-25);
- two transistors (type KT361B or 2T3307A, 2T3307V, KT3107);
- two ordinary ceramic capacitors;
- diode KD503A (protective);
- toggle switch;
- textolite;
- solder and soldering iron;
- a 9-volt Krona battery, a battery or a power supply with a voltage of 1.5 to 15 volts.
Let's look further at a simple do-it-yourself dog repeller, and then at a more powerful manufacturing option.
Another version of a homemade dog repeller is discussed in this video:
Production technology of the first version
For such a device you will only need one electrical circuit for a dog repeller and 5 transistors. For the resistor and at the same time for the capacitors, a multivibrator is made from orthogonal pulses that have a frequency of 1.5 hertz. The second multivibrator, which includes two more resistors and one capacitor, as well as the remaining logical parts, will have pulses of 20 kilohertz. The output sound is greatly increased due to the transistor bridge, which loads the device in the form of speakers. They can also be replaced with machine speakers to increase the operating range of the device.
How to scare dogs away
Using special dog repellers (daisers) is a real chance to protect yourself and your loved ones. These devices easily fit into a jacket pocket, backpack or handbag, and are just as quickly removed from there if necessary. It is important to understand the operating principles of different diffusers in order to choose the most powerful one. Among those available on the market, the most effective is considered to be an ultrasonic repeller . Its action is enough for 13 m, which means that the dogs will not have time to get close.
The cost of factory-made diffusers is quite high, so people often use homemade devices. Real craftsmen will be able to make any repeller with their own hands: chemical, ultrasonic or electric. Why buy an expensive device if the one you make yourself is no less effective?
High impedance devices
High impedance ultrasound emitters are well suited for short wavelength receivers. You can assemble the device yourself only using transition capacitors. In this case, the terminals are selected for high conductivity. Quite often the magnet is mounted on a stand.
The stand for the emitter is used at a low height. It should also be noted that one rod is used to assemble the device. To insulate its base, regular electrical tape is suitable. There should be a ring at the top of the emitter.
Do-it-yourself chemical dog repeller: what and how to make it from
Chemical dispensers are devices filled with a composition that is toxic to animals and humans. The principle of operation of the repeller is to spray a caustic liquid onto the mucous membranes of the dog’s eyes, nose, and mouth. It is difficult to assess the effectiveness of such a diffuser. Firstly, its use involves close contact with angry animals, which in itself is very dangerous. Secondly, if a large number of dogs attack, there is simply not enough time to spray a can of “chemicals” on everyone.
For your information! Making a chemical repeller is easy. The work will require ingredients that can be found in any kitchen: ground black pepper, vinegar, mustard powder. Some people use shag instead of vinegar when making such a diffuser. The result is cans with different compositions.
How to make a chemical disperser at home?
- Preparing the container for the chemical composition. As a rule, this is a 0.5 liter plastic bottle without a cap onto which a sprayer is placed.
- Mixing the composition: add pepper to the vinegar, shake everything together.
- The liquid is poured into the bottle and closed tightly. Not very convenient, but you need to carry it with you.
- Preparing a container for a chemical mixture. It is convenient if it is a 0.25 liter jar with a tightly screwed lid.
- Preparation of the caustic mixture: finely chop the shag, add pepper and mustard powder. Mix.
- Transfer everything into a jar and close the lid. Carry with you, when an aggressive dog attacks, pour the contents onto the animal.
Do-it-yourself ultrasonic dog repeller: diagram, powerful diffuser
The ultrasonic dissipator, which produces a sound that is unpleasant to the dog's ear, is highly effective. The advantages of this device are that it is absolutely harmless to people and works even over long distances. Stray dogs immediately pay attention to the ultrasound signal, quickly leaving the meeting place with a person. By using the device in a critical situation, you will be able to immediately disperse the entire pack, rather than fighting off each dog separately.
Dog repeller circuit
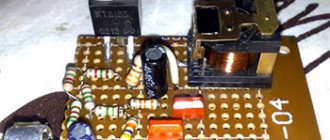
You can make an ultrasonic dog repeller with your own hands using various designs of powerful detectors taken from the Internet. They can be remade if technical skills allow, or used in finished form. The universal circuit of an ultrasonic dog repeller requires the presence of a microcircuit, transistors, resistors, and diodes. At the stage of assembling the ultrasonic repellent device, it is important to follow the recommendations of specialists:
- use a piezoceramic emitter during the manufacture of the diffuser, which will evenly distribute the load;
- To turn on the light, select LEDs D3. Their installation is carried out in the farthest part of the device;
- In order for the repeller to work at a frequency of 25 kHz, you need to take a resistor P35, but you should not experiment with frequency parameters. In this regard, it is better to stick to the settings of factory models;
- The power of the ultrasonic diffuser should not exceed 130 dB. Otherwise, the device will not only scare away the animal, but will also cause significant harm to it;
- for long-term operation of the ultrasonic device, it should be equipped with slots for 8 9V batteries;
- checking ultrasound pulses is the final touch in the work. This can be done using an oscilloscope or a sound card compatible with a computer;
- if the device was prepared for stationary use (for example, for a summer residence), then it must be enclosed in a moisture-resistant case and equipped with clamps.
What are they?
Next we will talk about what types of whistles there are.
Designs and manufacturers
Today, dog breeders use one of two types of whistles with different designs:
- The first type and the simplest is standard. Standard accessories are not fundamentally different from those used by the police or a referee on a football field. The cost of such an attribute is minimal, but it has practically no capabilities. The standard accessory allows you to emit only one signal, and you can only change it by volume level. Today, such accessories are considered obsolete.
- Models with adjustable tone. Such devices allow you to transmit a variety of signals to your dog with adjustable tones.
Sorry, there are no surveys available at this time.
As for manufacturers, the most popular products today are:
- Kamon;
- Sprenger;
- SportDog;
- Phoenix;
- Trixie;
- Nightcore;
- Elless;
- BizTis;
- Triol;
- Ferplast.
Ultrasonic whistle
The ultrasonic accessory is considered one of the innovative developments. It allows you to produce high-frequency sounds that can only be heard by four-legged pets. In this case, your signals will not distract people, and they will help the dog even more, since for him they stand out against the background of other sounds.
Electric dog repeller: components and assembly rules
An example of a homemade dog repeller
Due to ignorance of the principles of operation of an electric disperser, it is often confused with a conventional stun gun. Many people immediately refuse to purchase such a repeller, since it contradicts their ideas about humane treatment of animals.
Important! The electrodisser is not intended for close contact with the dog's body. The device only creates a loud intermittent noise effect that scares away aggressive animals.
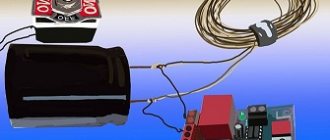
To make an electric dog repeller at home, you will need the following elements: a plastic bottle, a high-voltage module, a micro button and a AA battery. The technology for creating a homemade device is simple:
- Secure the AA battery and module using electrical tape.
- Solder the button and wires to the surface of the battery.
- After making the base for the repeller, you should cut the electrical wires.
- Cut off the neck of a plastic bottle to create a diffuser to enhance the sound signal and protect against voltage.
- Place the diffuser on the electrical module, making small cuts on the neck.
- It is good to glue the junction of the neck and the module.
Visual information about making an electric dog repeller can be obtained from YouTube videos made by people with special technical skills. There, the electrodisser is shown in action: the sudden crackle of electrical discharges has a depressing effect on dogs, and they hide. No matter how many stray animals you encounter, the loud blasts of an electric repeller will send everyone running.
Note! Despite the tolerant attitude of most people towards homeless animals, it is unacceptable to be careless about one’s own safety. A dog is truly a man's friend, but only if it is cared for from puppyhood and kept in decent conditions.
Stray dogs live by different laws, and it is difficult to predict their behavior in a given situation. Due to the trials that street animals have to endure every day, they become embittered and increasingly attack passers-by.
General information about whistles
The design of the first whistle was developed by the British Francis Galton back in 1883. Hamilton was a trainer and used whistles in the circus. Today's whistles can be used for any breed of pet. As you know, a dog, unlike a person, can pick up the sounds that a dog whistle makes. In practice, it is clear that dogs pay much more attention to such sounds than to human commands.
The high-frequency sound given to the dog indicates what the animal needs to do, in contrast to the owner's voice, the tone of which can vary. In such cases, the animal may not understand what the person wants from her, and accordingly, she will not feel so confident. Experts recommend training dogs to use a whistle from puppyhood.
Read also Abscess in a cow video
Operating principle
Let's move on to the principle of operation of these attributes. It's no secret that a whistle emits acoustic vibrations. To make the principle of its operation more clear to you, let’s consider it using the example of an ordinary kitchen knife, which cuts through the air with the movement of the hand. In this case, its blade is a cylindrical attribute cavity. Instead of air, gas is supplied under pressure, which is necessary for the appearance of sound vibrations.
In the case of the example, the frequency of sound vibrations is characterized by the size of the nozzle. Today, almost all models of accessories sold on the domestic market operate at a frequency of 170 kHz. This figure is too high for humans, since the human ear is capable of perceiving signals whose frequency does not exceed 20 kHz. Accordingly, the sound produced by the whistle cannot be heard by humans. The pet, in turn, is able to recognize such sounds at a distance of up to 450 meters.
As you can see from the photo, the dimensions of the whistle are very small, this size is quite compact. With the help of this attribute, training a four-legged pet is much easier. Since dog whistles are usually made from brass alloy, this design is more than durable. According to the principle of operation, the ultrasonic dog whistle can be used to scare away stray dogs, which allows you to ensure the safety of not only yourself, but also your animal.
How to use?
To develop a conditioned reflex, training is necessary over a certain period of time, as well as regular repetitions. In any case, the whistle is an irritant for the animal, so we recommend that in any case, when working with it, you periodically reward your animal with treats. Think about what your dog likes (processed cheese, for example) and stock up on it before training.
To train an animal, it is necessary to alternate signals of different lengths. For example, if you want to tell your dog to come to you, it is better to use a long signal. If you want her to follow the "down" command, train her to do so with a short burst of sound. In this regard, everything depends on your desires. When you walk your pet outside, the leash must be extended to its full length.
In practice, experienced breeders recommend using a triple whistle to call your pet. When you have whistled three times while walking your dog on a leash, stop and pull the leash towards you. This way you let the animal know that you want it to come to you. The corresponding actions must be repeated at least three times, the more the better. The tone of the signal can be changed until you understand which one is the animal’s favorite.
When the dog has fixed the commands, you should remove the leash and try calling him with one whistle.
To scare away stray dogs, you can switch the mode of the accessory and point it at the necessary objects. In this case, it is recommended to hold the button down for two to four seconds. Most likely, if the dog is not, as they say, “sick in the head,” he will run away with his tail between his legs, or he will whine and back away. Of course, a whistle does not always help scare away an animal. In such cases, usually either the batteries of the accessory run out (if it is electronic), or the dog simply has poor hearing or is completely deaf.
Foreign dog repeller circuit
The circuit (full size circuit here) uses a standard 555 timer on IC1 as the oscillator, running at 40kHz (an annoying frequency for dogs and cats).
To increase the signal power, an amplifier using transistors TR1-TR4 is used. The second similar timer 555 IC2 generates an antiphase signal. The circuit is optimized for high output power at ultrasonic frequencies. An ultrasonic transducer is used as an emitter. You can use a 556 dual timer.
The effectiveness of the circuit was tested by reducing the frequency of the oscillator to an audible level and replacing the ultrasonic transducer with a loudspeaker. The device was powered from an external source and with a current consumption of 4 A, the signal power reached 110 dB!
The circuit consumes quite a lot of current. Therefore, for manual operation, it is better to design the power switch as a button for short-term activation. When using the device in stationary mode, in order to prevent, for example, unwanted damage to the garden or flower bed, it is better to use lead-acid batteries, and it is advisable to control the device with some kind of motion sensors. (D. Stringwell, Scunthorpe, North Lines, "Everyday Practical Electronics", December 2003)
Scheme of the magazine "RadioConstructor" No. 4/1999
The circuit solution is shown in the figure. There are two multivibrators operating here - an infrasonic one on elements D1.1 and D1.2, generating pulses with a frequency of 2 Hz, and an ultrasonic one on D1.3 and D1.4, generating pulses with a varying frequency from 20 kHz to 60 kHz.
The scheme works like this. The multivibrator on D1.1 D1.2 generates pulses. As soon as one is set at output D1.1, the multivibrator is allowed to operate on D1.3 and D1.4 (one is supplied to their pins 8 and 12). The multivibrator begins to produce a certain frequency (about 20 kHz). At the same time, the voltage on C2 begins to increase (charge through R2) and transistor VT5 opens, turning on an additional resistance R4 + RK3 in parallel with the frequency-setting resistor R5. As a result, the total resistance decreases and the pulse frequency at the outputs of the multivibrator D1.3 D1.4 quickly increases to 60 kHz. When a low level appears again at output D1.1, the ultrasonic multivibrator is temporarily turned off (for the duration of the negative half-cycle at output D1.1). This produces pulses with a period of 0.5 seconds, simulating the barking of a much larger dog.
This is followed by a push-pull output stage on transistors VT1-VT4 with a high-frequency dynamic head at the output.
As for the details, the microcircuit can be K176LA7, any high-frequency head sufficiently powerful and miniature, or an SP-1 piezo emitter.
Reviews about the scheme are contradictory: for some it works right away without setup, for others it doesn’t.
Models with unijunction capacitors
Emitters of this type produce conductivity at the level of 5 microns. At the same time, their wave impedance indicator reaches a maximum of 45 Ohms. In order to make the emitter yourself, a small stand is prepared. There must be a rubber pad at the top of the stand. It should also be noted that the magnet is prepared of the neodymium type.
Experts advise installing it with glue. The terminals for the device are selected for 20 W. The capacitor is installed directly above the pad. The rod is used with a diameter of 3.3 cm. There should be a ring at the bottom of the winding. If we consider models with two capacitors, then the rod can be used with a diameter of 3.5 cm. The winding must be wound to the very base of the emitter. Electrical tape is placed at the bottom of the drain. The magnet is installed in the middle of the stand. The terminals should be on the sides.
Scheme of the Forum site of the mountains. Solntsevo (https://fopum.ru/).
The circuit of this dog repeller is assembled on just one digital chip (DD1) and five transistors (VT1-VT5). On logical elements DD1.1. and DD1.2., resistors R1, R2 and capacitors C1, C2 make an infrasonic generator (it is a symmetrical multivibrator that generates rectangular pulses with a frequency of about 1.5 Hz).
The second symmetrical multivibrator is built on elements DD1.3., DD1.4., resistors R6, R7, capacitors C5, C6 and is an ultrasonic generator, the frequency of rectangular pulses of which is 20 kHz and periodically (every 0.66 s) increases approximately 4 times. A relatively smooth periodic “shift” of the ultrasonic frequency upward is performed by a unit containing resistors R3-R5, capacitor SZ, transistor VT1 and diodes VD1, VD2.
The rectangular ultrasonic vibrations generated at output pins 10 and 11 of the DD1 microcircuit have low power. Therefore, they are amplified in power by a push-pull bridge amplifier assembled on transistors VT2-VT5. The emitter load of this amplifier is a piezoceramic emitter BF1; ultrasonic oscillations, modulated by infrasonic ones, are excited in it after pressing the SB1 button, which acts as a regular power switch. The power circuit of the DD1 microcircuit is protected from accidental “reversal of polarity” of the GB1 battery by the VD3 diode, and filter capacitors C4 and C7 ensure that high-frequency and low-frequency oscillations are passed through the power circuit, respectively.
The GB1 battery can be composed of six to ten galvanic cells (316). batteries D-0.25 or use a ready-made 12-volt battery L1028 or a 9-zolt “Krona” or “Corundum”. The K561LA7 microcircuit can be replaced with K176LA7, K1561LA7 or 564LA7. Diodes VD1-VD3 - any small-sized silicon, transistor VT1 - any low-power silicon with a base current gain of at least 30. Transistors VT2. VT4 and VT3, VT5 are interchangeable with any of the KT3102 and KT3107 series, respectively.


