A gasoline trimmer is a unit with sufficient power and autonomy. It is convenient when performing various agricultural work. However, it needs different types of attachments to enhance its functionality. One of them is the cultivator attachment. What is it, what are the advantages and disadvantages of this equipment?
How to make homemade trimmer protection with your own hands
In the summer, to keep your summer cottage looking neat, you have to mow the grass regularly.
A trimmer, a light hand-held lawn mower in the form of a cane, helps you cope with this quickly with a regular scythe. A kind of electric scythe, but instead of a blade it has a fishing line.
A well-known disadvantage of trimmers is that you cannot work with them without special protection (mask and glasses): the grass scatters at high speed in different directions, getting into your face and eyes.
The reason for this is the small shield above the rotating line.
To solve this problem, I trimmed the “original” plastic shield, leaving only the third part attached to the rod.
Then I made a new one from an aluminum sheet 0.2 mm thick and 250x250 mm in size, and attached it with two screws from above to the remaining part of the former shield.
Instead of aluminum, you can use a plate made of rubber or linoleum, but then the shields made of these materials will have to be secured with steel wire so that the edges do not accidentally get caught under the rotating fishing line.
Types of reels according to their correspondence with lawn mowers
In addition to the methods of charging and feeding the cutting cord, mowing sets are divided among themselves according to their compliance with different models of trimmers. The following reels are available for sale:
- original - suitable only for certain models of lawn mowers. It will not be possible to use them for installation with other trimmers due to mismatched threaded connections;
Most often you can find original coils from the brands Stihl, Husqvarna, Oleo-Mac, and Echo on sale. In turn, universal mowing sets are produced by Champion, Shindaiwa, and Partner.
Upgrading the trimmer guard
During the operation of any electric trimmer, one major drawback appears: the resulting grass juice and haylage scatter far to the sides and upwards, covering the mower from head to toe with greenery. You have to use special clothing and a mask to protect your face and eyes, but dust gets into your boots and settles on your headgear. After just an hour of work, the mower turns out to be “all covered with greenery, absolutely all”! You have to spend a lot of time on subsequent “sanitation”.
The reason is that trimmers have an excessively small guard over the rotating line. In mine, for example, the shield occupies only a sector, which on the watch dial corresponds to the numbers from 4 to 8, which is clearly not enough.
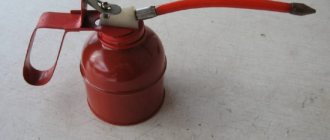
To eliminate this drawback, I cut off the plastic shield in my trimmer and left only the third (central) part attached to the rod. Then I made an enlarged shield from an aluminum sheet 0.2 mm thick and 250x250 mm in size, which I attached with two screws from above to the remaining part of the former shield (see figure).
As a result, the resulting new shield began to cover the entire semicircle of rotation of the line facing the mower, protecting him from flying greenery. The effect of this modernization was remarkable! Now even boots don’t get dirty above half the tops.
If there is no aluminum sheet, you can use a rubber or linoleum plate. To prevent the edges of such material from drooping, they will have to be reinforced on top along the perimeter with steel wire. In this case, the peripheral parts of the material must be held in a raised state by the wire. The shield material must be attached to the wire precisely in these places, inaccessible to the rotating fishing line.
Source
Cultivator
Using this attachment, you can easily cultivate small areas of land, loosening them and preparing them for further sowing. The drum design is designed in such a way that it allows you to plow the ground next to trees and all kinds of plantings without damaging them. The nozzle is suitable for digging up flower beds and hilling up root crops.
What can you use to make protection for a trimmer? How to install a protective cover on a trimmer
All owners of personal plots are faced with the problem of mowing grass, which grows literally before our eyes, and during the season it is necessary to improve their plot several times. The usual hand scythe has long been replaced by gas trimmers and electric trimmers. But the price for them does not decrease and is quite significant for many owners of dachas and private houses. Craftsmen nevertheless found a way out of this situation and learned to make trimmers with their own hands literally from improvised means, using gas and electric tools not intended for these purposes.
Most often, a homemade electric trimmer is made on the basis of an ordinary grinder, which is available to every home craftsman. This tool is almost ideal for converting into a trimmer. It has more power and a higher number of revolutions per minute than store-bought machines. In addition, the standard nut used in the grinder to secure the discs already has holes through which it is easy to insert a fishing line (cord).
To ensure safe operation of a homemade device, you can improve it by making a protective casing (how to do this will be discussed later).
For advanced craftsmen who have a welding machine, we can recommend a more advanced design for securing the grinder and protective casing. It is made from aluminum tube
(serves as a holder) and a metal square profile. Looking at the figure below, you can understand the principle of making the holder.
The grinder is secured to the holder with bolts inserted into the holes that are intended for attaching the handle to the device.
The following photo shows what this design looks like from below.
By the way, you can also screw the holder (bar) to the holes for attaching the handle when you want to make a simple trimmer that is easy to assemble and just as easy to disassemble if you need to use the grinder for its intended purpose.
Types of semi-automatic heads
A semi-automatic mowing head usually consists of a housing, inside of which there are several springs and a spool. Spools, according to their design, are divided into:
- single-section – in devices of this type, the cutting line used is wound evenly;
- two-section – in these spools, each end of the cord must be wound separately, onto the part intended for this. Two-section spools differ from single-section spools in durability and ease of operation. In addition, the fishing line inside them never bends or gets tangled.
Many owners of household trimmers convert single-section spools to two-section ones. To do this, you will need to find a durable metal plate and apply a contour with the diameter of the spool on it. After this, the plate is cut along the contour so that the thickness is near the place where the cord is wound. As a result, the resulting circle should move freely around its axis. Next, you will need to make a cut on the resulting ring and insert the spool inside the ring. Both parts must be connected to each other using tape or quick-drying glue. As a result, the manufacturer will have a spool in which the line can be wound into two sections.
From a vacuum cleaner
A trimmer from a vacuum cleaner engine is made according to the same principle as from an angle grinder. The motor must be mounted on a rod, and either knives or a plastic or metal disk must be attached to the motor shaft, into which the fishing line must be inserted. The top of the cutting tool is covered with a protective casing.
To secure the fishing line, you can also use either a pulley with a suitable mounting hole or a plastic wheel from a cart.
Types and uses of trimmer knives
The systematization you will like is carried out according to the following characteristics:
- Based on the material of the knife: iron and plastic knives are known. The choice is often limited not so much by the user’s desire as by the power of the drive - iron blades are heavier, and the trimmer shaft equipped with them develops more slowly, which adversely affects the durability of the motor. But the cutting ability and durability of iron knives is much higher than that of plastic ones.
- For making cutting edges. They are distinguished by significant diversity, and as a rule they come with 4 or more teeth, single or different heights, and also solid or with technological holes.
- According to the shape of the knife itself, which has a solid disk blade, or is made in the form of several blades with a similar distance between them.
The choice of the size and design of the trimmer blade depends on the intended purposes, the type of rod and the power of the motor. If the trimmer rod is bent in the shape of a letter J, then there is no need to use a metal knife, since if it comes into contact with a powerful obstacle, nettles, stones, the trimmer
will be sharply thrown back, towards the mower. Then even the highest restrictive casing will not save the worker from a leg injury. On trimmers with a straight shaft, the rebound distance will increase.
Plastic trimmer blades, although less durable, are quite capable of cutting most types of grass. In addition, their increased elasticity does not create additional loads on the flexible shafts of electric trimmers.
The configuration of the cutting edges determines the quality of the cut. For hard grass, dead wood, woody shoots, disc blades with the largest number of teeth are better: then, regardless of the rotation speed of the flexible shaft
, the cut will be clean and even. The inertia of perforated knives is significantly less than solid ones, and this does not particularly affect the durability of the tool, taking into account the fact that the tool is made of high-quality tool steel. The exception is cheap Chinese-made products: knives there are made from any steel.
From a drill
Since a drill with this attachment does not have a protective casing, such a tool is quite dangerous for the user. To protect yourself, you can place the drill, like a grinder (discussed above), on the handle of a shovel or on an aluminum pipe.
Also, to protect the user of the mower from knives, a casing can be attached to the drill (attached to a plastic pipe and placed on the body of the device).
The drill is attached to the rod using clamps.
From a chainsaw
Therefore, the trolley is made first. It can be welded from a 25x25 mm corner. The frame dimensions should be 500x600 mm. The wheels are attached to the corners of the frame.
When installing the trolley handle, make sure that it does not block the winder (starter).
The gasoline engine is installed (screwed through the holes to secure the tire) onto the frame so that the gearbox is rotated 90 degrees and the shaft is at the bottom.
Several holes need to be made in the telescopic pipes so that the height of the knives above the ground can be adjusted.
It is better to make a knife of such a design as in the following figure.
The rivets that hold the knives to the disk must be metal.
The diameter of the disk (made from 4 mm sheet steel) should be 180 mm. The knives are made from strips 30 mm wide and 120 mm long, cut with a grinder from a hacksaw blade for wood.
Homemade protective casing
If you are making a homemade mower, then you will definitely need a protective cover. It will protect your eyes, body and legs from injury from small pebbles and knife fragments if they break.
In this way, you can make and install a protective cover on a trimmer purchased in a store if the shield has cracked for some reason. The shields in factory devices are made of plastic and often break if you unsuccessfully hit the trimmer head on the ground to lengthen the fishing line.
What knives to put on electric and lawn mowers
Before you take a knife and put it on a lawn mower, let’s find out what they are and in what cases they are used. Now manufacturers offer consumers a huge number of types of these consumables. In general, all cutting tools intended for mowing grass can be systematized:
The main material for the production of trimmer knives can be plastic or metal. The implementation of such consumable parts almost entirely depends on two characteristics:
Trimmer belt
For more comfortable work with the trimmer, if you intend to process a large area covered with grass, it is advisable to use a special belt. This device relieves fatigue from the hands and back of the mower operator and greatly facilitates the process when compared with the same work, but without a belt.
The shoulder strap is usually used with lightweight trimmers weighing 3-4 kg. For heavier units it is more convenient to use a backpack belt.
A trimmer belt can be easily ordered online or purchased at a specialized store that sells these devices and their accessories.
The price of backpack belts starts from 250 rubles and above.
If you want to make it yourself, then any housewife, looking at this device, can easily sew it from improvised materials (old belts and belts). You may have to buy buckles and carabiners. But we still recommend buying a ready-made backpack suspension and not wasting time and money on making a device of worse quality than the ready-made one.
I immediately thought that it wouldn’t hurt to buy a simple lawn mower, which was not easy to buy at that time. Therefore, I decided to experiment with a homemade design.
As a result, I gained practical experience in mowing grass, thanks to which I was able to buy a trimmer that is well suited for my purposes.
Based on the knowledge gained, I give advice to the home craftsman on how to make an electric trimmer with his own hands from used equipment based on an electric motor from a vacuum cleaner, drill or grinder with pictures, diagrams and photographs that allow him to repeat a similar design.
Please note that my lawn mower was assembled in haste using the most readily available materials. Its fastening was made for reliable operation without complying with any design conditions, but ensuring basic safety requirements. So do not judge strictly for the unpresentable appearance of the structure.
Support wheel
Indispensable for a neat and even cut of the lawn. With its help, you can set the desired height and not worry about changing the level during work. It also provides additional support, reducing strain on the operator's hands. Some support wheels are compatible with edgers and other useful trimmer attachments.
Safety regulations
I’ll start with this section to remind you: any homemade lawn mower design can cause harm to health. This requirement is especially relevant for:
Let's look briefly at these two factors.
Electrical hazard of trimmer
Electricity doesn't care about your health. It creates a current path where the best conditions and lower electrical resistance are provided for it. : clothes, surrounding objects, a parked car. There is nothing strange about this. You need to take care of yourself and use protective equipment.
When creating an electric trimmer with your own hands, immediately pay attention to the strength and quality of the insulation of all current-carrying parts, both inside the engine and on the external circuit. Its installation must be carried out by a qualified worker.
When working with a homemade trimmer you need to:
All three devices listed should be checked. They must meet safety requirements for technical characteristics, settings, and be properly adjusted.
Mechanical circuit hazards
Commutator motors develop very high rotation speeds. For vacuum cleaners, they can range from 11,000 to 30,000 rpm. This is quite enough for a small pebble, piece of wire or wood chips to fly out from under the cutting head, like a bullet from a rifle.
How to choose?
When buying a cultivator attachment for a gas trimmer, in addition to the power of the gas trimmer engine, they rely on several factors. These are the processing width, weight, cutter diameter and number of revolutions per minute. On average, the diameter of the cutters can be 20 cm, the number of revolutions can be 180.
Considering that cultivation attachments for gasoline trimmers do not work well with compacted soil, you need to choose an option with a disk-type shield. At the same time, it is important to take into account the maintenance factor, because it is better to loosen the soil after weeding it. It is important that the handle is T-shaped, in this case the direction will be as reliable and correct as possible.
As for the design of the boom, it is useless to buy a cultivation attachment for a flexible shaft ; it will damage the unit quite quickly. The ideal option would be to purchase a product with a multi-slotted rod paired with a cardan drive. Such a unit will perform more efficiently and be reliable. To prevent the engine from overheating, it is important that the power be at least 1000 W, otherwise labor productivity will decrease.
Lawn mower made from an electric motor from a vacuum cleaner
My design consists of:
Electric motor
The design of the lawnmower is based on a collector motor from an old Soviet-era 300-watt Buran vacuum cleaner. Its intended use had to be abandoned after, as a result of long-term use, various gaskets began to wear out and air movement was disrupted. I was tired of eliminating emerging fistulas that affected pressure and suction, so I bought a replacement.
The appearance of the assembled trimmer from the engine side is shown in the photograph. Since it is no longer in use, it is covered with rust, and the remains of the mown grass have long since dried out and remained stuck to all the parts. I find it much more convenient to work with a factory design.
For greater clarity, I lifted the protective cover with my finger and showed a close-up of the engine from the brush side. Here, all factory parts remain in working order.
On the opposite side, a factory-mounted capacitor works.
Barbell
All parts of the homemade trimmer are attached to a dried wooden stick without any processing. I drilled mounting holes in it, and screwed some parts, for example, the handle bracket, with a piece of wire.
All these connections are visible in different pictures.
It is noteworthy that when I removed the fan impeller, I saw that the free space on the rotor shaft was ideal for attaching a homemade knife. I didn't even have to select the nut and gaskets.
Bad experience
At first I tried attaching wires of different diameters to the shaft. She started to mow the grass normally, but stopped very quickly. Its structure cannot withstand the mechanical tensile and bending loads developed by high engine speeds and oncoming grass. Therefore, trimmer manufacturers produce different types of fishing line.
Method of making a lawn mower
Support wheel
The main disadvantage of this lawn mower design, like all trimmers with a bottom-mounted electric motor, is the need to exert great physical effort to keep the blade in the desired plane when mowing. At the same time, the worker’s muscles tense, and he himself quickly gets tired. Need emphasis on the ground.
Trimmer from a drill or grinder
The principle of creating a homemade design based on this tool is exactly the same as in my case.
The principle of fastening the knife
For a drill, you can screw two nuts onto a regular stud, tightening them with keys, and use the plane of the created stop to install the knife.
The knife hole must be drilled in the center, and the assembled attachment must be well balanced. Otherwise, lateral runout will occur, for which the drill bearings are not designed.
Trimmer line attachment
You can make a reel for attaching fishing line with your own hands, but I don’t see much point in this matter. It’s easier to buy it in a store or use it from a broken trimmer.
The fact is that during operation, when the fishing line is shortened, its cutting length can be restored by simply hitting the rotating head on the ground. This function works by maintaining the exact dimensions of the nozzle after complex mechanical adjustments. And disposable fastening of the fishing line requires frequent switching off of the trimmer to replace it.
Take care of your safety first. For this:
A homemade lawn mower helps you experience all the advantages and disadvantages of electric grass mowing, the operating features of such devices, and the need to balance the center of mass. After gaining a little experience in using it, it is easier to choose a factory model that is professionally prepared for long-term use.
In the summer, in order for the dacha plot to look neat, you have to mow the grass often. A trimmer, a lightweight hand-held lawn mower in the shape of a cane, helps to cope with this speed of an ordinary scythe.
A sort of electric scythe, but instead of a blade it has a fishing line.
The reason for this is the small shield above the rotating line.
To solve this problem, I trimmed the “original” plastic shield, leaving only the third part attached to the rod.
Then I made a new one from a duralumin sheet 0.2.4 mm wide and 250x250 mm in size, and attached it with 2 screws from above to the remaining part of the former shield.
Instead of aluminum, they use a plate made of rubber or linoleum, but then the shields made of these materials will have to be secured with metal wire so that the edges do not accidentally get under the spinning fishing line.
While using any electronic trimmer
One big drawback appears: the resulting grass juice and haylage scatter far to the sides and up, covering the mower with greenery from head to toe. You have to use special clothing and a mask to protect your face and eyes; unfortunately, the dust gets into your boots and settles on your headdress. After just an hour of work, the mower turns out to be “all covered with greenery, completely covered”! We have to waste extra time on the next “sanitation”.
Best models
Attachments for trimmers can be the simplest (a head with a fishing line), the cost of which hardly reaches 300 rubles, but there are options that combine several functions. Their cost is much higher, but their efficiency is also higher.
Makita KR400MP
The cutting element consists of cutters made of high-quality metal with a diameter of 23.2 cm. The main advantage is the relatively low weight, which allows you to work on the site for more than an hour without stopping to rest.
Advantages:
- Reliability and warranty.
- Suitable for working on all types of soil.
- Good productivity.
Flaws:
- Relatively high cost.
The brand has proven itself well, so this cultivator type attachment is of the highest quality and most comfortable to use.
Oleo-Mac Cult
The attachment has a subsoiler, thanks to which you can set the desired plowing depth. Weed rhizomes cling to the knives and are pulled to the soil surface. Suitable for weeding between rows, greenhouses and large vegetable gardens.
Advantages:
- Can be used on any type of soil and is not afraid of stones.
- Durable knives and wide cutters.
- Good quality metal, no corrosion.
Flaws:
- Relatively large dimensions, which increases the weight of the trimmer several times.
The cost of an Italian nozzle is around 13,000 rubles. The average service life is 5 years.
Srac-2500 ECHO
An attachment for a trimmer that simultaneously removes weeds and loosens the soil. It is one of the most affordable options among its kind. The average cost is around 7,000 rubles.
Advantages:
- Compact, easily passes near plantings without damaging their underground part.
- High quality components.
- Long service life.
Flaws:
- You need to independently adjust the cultivation depth at 1-2 cm
According to customer reviews, this particular attachment showed itself well in the front garden, in the greenhouse, and in the open field.
Increasing protection on your trimmer at home. Additional protection for the trimmer / Protection trimmer
The reason for this cut is that trimmers have an extremely small shield over the rotating line. In mine, for example, the shield occupies only the sector that on the watch dial corresponds to the numbers from 4 to 8, which is obviously not enough.
To eliminate this defect, I cut off the plastic shield in my own trimmer, leaving only the third (central) part attached to the rod. Then I made an enlarged shield from a duralumin sheet with a width of 0.3.2 mm and a size of 250x250 mm, which I attached with 2 screws from above to the remaining part of the former shield (see figure).
In the process, the resulting new shield began to cover the entire semicircle of rotation of the fishing line facing the mower, protecting him from flying greenery. The effect of such modernization was excellent! Nowadays even boots don’t get dirty above half the tops.
If there is no duralumin sheet, use a rubber plate, or linoleum. To prevent the edges of such material from drooping, they will have to be reinforced on top along the perimeter with metal wire. At the same time, the peripheral parts of the material must be held in a raised state by the wire. The shield material is attached to the wire specifically in these places that are inaccessible to a rotating fishing line.
How to correctly wind the fishing line onto the trimmer reel if you have not done this before. Find out from the article how to correctly wind the fishing line on a trimmer reel. How to correctly wind the fishing line on a trimmer reel. Many, having used up the factory fishing line recently received it.
Lubricant for gear trimmer. What and how to lubricate? Sometimes, in the midst of an intense grass-cutting job, your trimmer starts making unpleasant, grinding noises. This complains about the lack of lubrication of the gearbox. the busiest device. AND.
In order to protect equipment from early wear and tear, manufacturers have provided the possibility of installing special knives on trimmers. The design and shape of the existing cutting parts allows you to easily handle not only coarsened and overgrown grass, but also successfully fight with young bushes.
Coil specifics
In the modern world (both in the city and in the countryside), it is practically impossible to do without such a modern and useful tool as a trimmer. It is widely used by employees of public utility services in large cities; such devices are also in demand on farms; they are used to improve summer cottages, vegetable gardens, orchards, etc.
Photo of the garden trimmer coil configuration.
However, it should be remembered that the main working element is the head for the trimmer - a spool of fishing line. For ease of use, the user can choose just the right lawn trimmer. It is this element that most often fails and requires maintenance. The price of the coils has a wide range (from 10 to 150 dollars), which makes such a tool even more expensive. Any manufacturer (even a branded one) usually equips their product with an inexpensive and low-quality reel. However, you can work with a primitive coil for quite a long time, provided that maintenance work is carried out in a timely manner.
Like any other mechanical element, the reel requires cleaning from clogged grass, cooling when overheating, and filling with lubricant. However, coils often fail for various reasons, and buying new ones or having broken ones repaired is quite expensive. In this case, almost all faults can be eliminated independently. Disassembling the coil is not difficult, especially if you use the instructions.
The first part that often fails on a trimmer is the fishing line. The fishing line is a consumable material for which the manufacturer is not responsible. At the same time, on many reel models, replacing line is a complex procedure (and for some brands, impossible). An attempt to replace the fishing line with a material different from the parameters of the original fishing line may lead to destruction of the reel.
The reel itself (the part of the element on which the fishing line is wound) rarely fails, while the grooves through which the working part of the fishing line is threaded and which hold it can collapse (wear off), since they are almost always made of plastic.
Video about lubricating the cable, replacing the shank, installing the protective casing and trimmer coil:
Despite the abundance of spare parts for trimmers on sale, not everyone can afford to purchase them; in addition, there are often restrictions on the available products. For example, mounts for a trimmer, a universal reel will not fit on such a mount. This often makes it impossible to purchase an affordable reel. Some manufacturers make reels designed for thin fishing line (up to 3 mm in diameter), which significantly limits the capabilities of the trimmer. Therefore, there is the option of making a coil yourself.
How to properly place a knife on a trimmer
The algorithm for installing the knife on the trimmer is as follows:
General structure of the lawn mower
If the motor is flanged, it can be attached directly to the sheet by drilling holes in the latter that coincide with the holes in the flange. If the engine is of a conventional design, it is necessary to weld or screw two perpendicular corner posts to the sheet so that they coincide with the engine feet.
Homemade lawn mower. Fastening the electric motor to the corners.
Holes are drilled in the corners for mounting the engine. If the holes are made in the form of grooves, this will allow the engine to be shifted relative to the frame when mounting, thus changing the distance from the knives to the ground. This design feature will be useful when selecting the optimal grass cutting height. But it’s easier to make holes for different engine height positions.
The central place of the lawn mower is the cutting unit, consisting of a mandrel with two short (or one long) knives attached to it.
Engine
To connect a three-phase motor to a single-phase network, it is necessary to use a circuit with working and starting capacitors. There is plenty of information on connecting three-phase motors to a single-phase network on the Internet. It is not difficult to find formulas for calculating the required capacitance of capacitors. In practice, they take approximately 200 uF for a motor with a power of about 2 kW. For a power of 500-600 W, 60-80 uF is sufficient.
When making a casing for the engine, you need to provide holes for cooling the engine.
You can make a lawn mower with your own hands using a conventional electric drill with a speed of up to 3000 rpm. Coming up with a way to attach a drill to a frame is not that difficult. However, you need to understand that in terms of reliability and duration of continuous operation, the drill cannot be compared with an asynchronous motor, so if you have to mow a relatively large area, preference should be given to the latter.
A drill is more suitable for making a homemade trimmer.
Mandrel
The mandrel must be securely fastened to the motor shaft. This is usually done using bolts screwed into the flange perpendicular to the shaft axis.
You can use a stone holder for a sharpener as a mandrel.
To prevent grass from wrapping around the shaft, it can be covered with a tin can.
If a suitable pulley or other suitable parts are not found, you will have to order the manufacture of a mandrel from a turner or make it yourself from a pipe of a suitable diameter and a strip or circle welded to it. There are three problems here: finding a pipe of suitable diameter, ensuring the perpendicularity of the welded strip or circle with respect to the pipe, and centering the mandrel after its manufacture. With some effort, all these problems can be solved.
If drilling holes is problematic, then you can place the blade on a metal surface with a hole slightly larger in diameter than the hole in the blade should be and hit it with a punch. The protrusion formed after the impact is removed with a file (if the metal is soft enough) or with a sharpener. If the hole does not meet the required diameter, the process is repeated.
In essence, there are many options for making functional knives, as well as materials for making them. The main thing is to sharpen them well, center them (so that there is no vibration) and securely fasten them. When attaching knives to the mandrel, you need to use lock washers and locknuts. Without this, the mounting bolts will unscrew due to vibration.
Wheels
If a two-wheeled lawn mower is selected, there must be protection against the rotating blade touching the ground.
If you choose a three-wheeled lawn mower, then two wheels should be on the handle side so that you can lift the front of the mower for a turn by pressing on the handle.
The larger the wheel diameter, the better. A lawn mower with small wheels is more difficult to push through grass.
If the edge opposite the cutting edge of the knives is bent upward (or blades are riveted to them), they will work like a fan, lifting and rotating the cut grass with a stream of air. At the same time, if you make a cut in the casing (in the quadrant where the knives run) and pull a mesh bag or box over it, then the cut grass will be collected in it.
At the end of the article there is a video demonstrating the operation of the second lawn mower.
Without a bag, the grass will be laid in the direction specified by the cutout. Without a hole in the casing, the grass will be crushed, this will be mulching. But for all this you need a fairly powerful engine, and in order to avoid cutting grass from stuffing into the engine, the space between the engine and the knives must be covered with a disk.
Working with the mower will be safer if one of the handles is equipped with a lever that, when released, turns off the power supply to the engine.