A laser target designator is a good thing that allows you to clearly identify the target. A bright red (less often purple or green) dot is clearly visible even in poor lighting. Pneumatic weapons equipped with a laser target shoot more accurately and accurately.
However, this device, even the simplest plastic one, costs more than 1000 rubles. It doesn’t matter - the craftsmen have figured out how to save many times over by making their own laser device to mark the target. Next we will tell you how to do this yourself.
What do we need
Let's stock up on the necessary materials - it will be easy to get them, since they are sold at every step. This:
- Laser pointer - regular or in the form of a keychain. It’s just better to take not a Chinese one in a fragile plastic case, but a domestic one - they are more reliable, and they have better lasers.
- Batteries – “tablets” (you can take those that are in the pointer) or two mini-AAA type fingers.
- A thin wire (preferably silicone acoustic or in a fluoroplastic sheath) - a little more than a meter.
- A piece of sheet metal or aluminum for clamps, bolts and nuts.
- Drill, soldering iron, pliers, tape, file.
How to repair
If the laser mechanism fails, it may display the wrong level or not work at all.
Homemade device requires repair:
- in case of diode failures;
- when buttons and switches stick or fail;
- when the emitter malfunctions, when the laser does not glow or the beam is very dim.
Most often, repair of laser levels is required after the device has been dropped.
In this case, the settings are lost, which leads to the device producing incorrect indicators.
If you need to repair a homemade laser, you need to disassemble the device and reassemble it. If the problem is in the pointer, it is easier to replace it with a new one.
In order to avoid repairing a homemade laser level, it is important to be careful when working with it, especially outdoors.
To build level planes on large-scale construction sites, industrial levels with a large operating range have been created. For minor repairs, you can make a laser level yourself.
Sometimes you can make something truly incredible and useful from unnecessary things stored at home. Do you have an old DVD-RW (burner) drive lying around at home? We will tell you how to make a powerful laser at home, borrowing elements from it.
Disassembling a laser pointer
Disassembled laser pointer and battery
Important: Where the case is described below, a method is proposed that involves leaving the laser pointer intact (called “Option 2”). If you like it more, you can skip this section. Otherwise we do this:
- We unscrew the back part, take the pliers and gently pull, pulling the laser head out. However, you can do it simpler: take a hacksaw and carefully cut the pointer lengthwise.
- As a result, we get a board with an LED, which is located in a metal (brass or silumin) case. On the board we have a power button, which will still be useful, a resistor, and also a spring that closes the negative contact.
- The board needs to be cut to the maximum length (to the resistor), and the button must be desoldered.
Briefly about the device
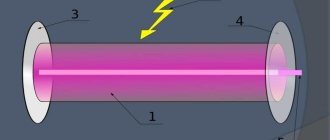
The laser was invented as a result of testing the theoretical assumptions of scientists involved in quantum physics, which was then just beginning to emerge. The principle underlying the laser pointer was predicted by Einstein at the beginning of the 20th century. It’s not for nothing that this device is called a “pointer.”
More powerful lasers are used for burning. A pointer allows you to realize your creative potential
, for example, with their help you can engrave a beautiful high-quality pattern on wood or plexiglass. The most powerful lasers can cut metal, which is why they are used in construction and repair work.
Making a power supply
This process depends on what kind of weapon is supposed to be equipped with a laser target - with a shotgun it is easier than with a pistol. Therefore, first we will select the location for installing the power supply.
“Tablets” take up less space, they can simply be secured with tape, not forgetting to make the correct electrical connection and soldering the wires: “plus” and “minus”. For fingers and mini-fingers, you can adapt some kind of housing (for example, a pencil case for brushes, cutting it off). The arrangement of metal contacts is similar to that found on any remote control.
What is a holographic sight, its operating principle can be seen in the video at this link. Aiming mark and design features of the sight.
Main stages of laser hair removal
Laser hair removal is divided into several stages: the preparatory stage, the hair removal procedure itself and the subsequent period of skin care. Since laser hair removal is a delicate process, one procedure is not enough to obtain a 100% result.
How many procedures will it take to remove
If the principle of laser hair removal is the same for all skin types, then its result is not. The duration of procedures and their number depend on skin type, hair color and structure, as well as on the area of the body that is being treated. The number of sessions for complete removal varies from four to eight.
Laser hair removal is an intervention in the natural processes of the body; let us clarify what you need to know to avoid unpleasant consequences.
There must be a certain interval between procedures. Cosmetologist specialists insist on increasing the interval between procedures by two weeks after each, that is, we get the following:
- after the first session – from 4 to 6 weeks;
- after the second – from 6 to 8 weeks;
- the interval after the third is from 8 to 10 weeks.
Preparing for laser hair removal
Before laser hair removal is performed, it is necessary. For two to four months, it is not advisable to use tweezers or hot wax; you can use a razor or depilatory cream.
It is necessary to avoid sunbathing and solariums a month before hair removal; at the same time, you need to use a cream that protects the skin from UV rays.
You must stop using lotions containing alcohol within seven days. The day before hair removal, it is not recommended to use cosmetics: cream, deodorant, or any decorative cosmetics. Important
! The length of the hairs in the area to be treated must be at least one millimeter.
Laser hair removal
The result of laser hair removal, as stated in the description of the procedure, depends on the phototype of the patient’s skin. Before starting the procedure, a test is performed on a small area of skin to determine sensitivity to the laser. If the patient has a high pain sensitivity threshold, he is offered an anesthetic cream.
Now let's talk about how laser hair removal works. Both the patient and the doctor wear protective glasses during the process. The hair removal session is carried out on clean and dry skin. The device is directed to the desired area of skin, and when it operates, laser pulses, so-called flashes, are generated.
Between flashes, the cooling system is turned on, ensuring a painless process. There may be a tingling sensation that causes mild discomfort, but not pain.
Working on the body
Target designator ready for installation on a weapon
Option 1. We need to cut the pointer body by attaching a shortened module to it. We remember that we will also have a backdrop and a laser head. Now we connect it all together: the laser head, a cut piece of the body and its back part (in which we first drill a hole for the wire).
The “minus” wire will go to the resistor, and the “plus” wire will go to the head of the laser module. We put the button that we desoldered from the board on the handle - this will be most convenient. To do this, drill a suitable hole.
Option 2. A very ingenious method in which you do not need to disassemble the pointer. We take an empty twelve-gram CO2 canister, cut off the neck from it, and make a hole in the back that is slightly larger than our pointer. From the cut edge of the can we make two more perpendicular holes with M4 threads for the adjusting screws.
The switch will be a bolt screwed into another threaded hole (it is made where the pointer button is located). We screwed the bolt in and turned on the device, unscrewed it a little and turned it off.
Then we wrap the back of our pointer with electrical tape or tape, ensuring that it fits snugly into the body of the can. In the front part, we will place a piece of porous rubber between the body wall and the pointer (thanks to this, the screwed-in bolts will move the beam horizontally and vertically).
Advantages and disadvantages of the procedure
The main advantages of laser hair removal:
- problem areas are cleared of vegetation for years;
- ingrown hairs and blackheads (consequences of shaving) are removed;
- the skin is noticeably rejuvenated after the laser hair removal procedure, it remains pleasant and smooth to the touch, there is no feeling of roughness, like after shaving;
- the procedure is possible in hard-to-reach, atypical places (intimate areas);
- In comparison with other methods of combating excess vegetation, laser hair removal is the most painless and safe method.
Disadvantages of the procedure:
- not all lasers are suitable for dark skin and light hair;
- repetition of procedures, due to the nuances of hair structure and growth;
- long waits between procedures;
- duration of the procedure itself (up to one and a half hours in some areas);
- high price.
The disadvantages include pain in some areas. Since laser hair removal is performed on a small area, bikini or armpit hair removal can be very painful. Especially for patients with a high pain threshold.
However, if the patient informs the specialist, anesthesia with a special gel is possible, which freezes the skin, depriving it of sensitivity.
How to attach a ready-made laser target to a weapon
The easiest way to do this is with clamps made of tin or aluminum with a thickness of 0.8-1 mm. You will also need two bolts and nuts for them. To make it neat, we grind off the caps of the bolts. We will fuse the nuts into plastic blanks - this will help to quickly adjust the laser pointer.
There are also options for finding a mate for a weaver or picatinny rail, but they are more labor-intensive. For example, you can take a cable channel strip for a red dot sight. But it still needs to be attached to the laser center itself - accordingly, tinkering with the body. And then it makes sense to make it rectangular.
Homemade products from a washing machine engine:
1. How to connect a motor from an old washing machine through a capacitor or without it 2. Homemade emery from a washing machine engine 3. Homemade generator from a washing machine engine 4. Connecting and adjusting the speed of a commutator motor from an automatic washing machine 5. Potter's wheel from a washing machine machines 6. Lathe from an automatic washing machine 7. Wood splitter with an engine from a washing machine 8. Homemade concrete mixer
Laser "target designator" for a shotgun
The idea to build this thing came while hunting, when I was trying to explain to my partner where a wounded animal lay:
— The third bunch of wormwood to the right of the bush... You see.
To which I received an answer with a phrase from an anecdote:
- Don't be smart - point your finger!
I made the first version in the evening. It looks like it took me longer to describe it than to do it. All this was done precisely as a “pointer”, but upon first testing it in the field, it turned out that it could well work as a laser sight for a shotgun (but not for a bird). The spot is quite noticeable at shotgun range (of course not in sunny weather) and reduces the time required for aiming. Remaking a laser pointer.
I bought a Chinese laser pointer in a store, the axis of the beam and the geometric axis of the body more or less coincided. I removed the cap covering the battery compartment. No batteries needed yet either. Fixed the switch in the on position. To do this, insert a piece of thin rubber into the hole for the button in the case so that the button is pressed and the rubber does not protrude from the case.
Rice. 1. Layout diagram of the switch in the additional part of the housing.
The next step is to install the latching switch. I pulled out all the internals from the second laser pointer (fortunately, they cost pennies) - you only need the aluminum body. A “slider” microswitch was built into the housing (see Fig. 1). One of its contacts was connected to the body. I cut a hole for the button. The excess part of the body was cut off.
As it turned out in practice, such a switch is not very convenient to use. It is difficult to feel it blindly with gloves. Something like a toggle switch is better, which is what I used in the second option.
For the coupling connecting the two parts of the case (main and additional, with the switch), I used the battery compartment cap. I drilled a through hole with a diameter of 3.5-4 mm in the cap along the axis and secured an M3 screw with a nut through dielectric centering washers (see Fig. 1). There should be no electrical contact between the screw and the cap. We connect the screw to the free contact of the switch. An additional housing was fixed on the side of the cap that does not have a thread. In this case, you need to make sure that there is good electrical contact. In the factory design, the cap rests on the “plus” of the battery and ensures its contact with the body. We don't need this. It is necessary to file the central contact so that it protrudes 1-2 mm from the bushing. The bushing flange protruding beyond the body dimensions was removed with a file.
We insert the batteries, connect both parts of the body and check the operation of the converted pointer. "Target designator" housing.
Do-it-yourself powerful laser in one evening
Briefly.
Hello ladies and gentlemen. Today I am opening a series of articles devoted to high-power lasers, because Habrasearch says that people are looking for such articles. I want to tell you how you can make a fairly powerful laser at home, and also teach you how to use this power not just for the sake of “shine on the clouds.”
Warning!
The article describes the production of a powerful laser ( 300mW ~ power of 500 Chinese pointers
), which can harm your health and the health of others!
Be extremely careful! Use special safety glasses and do not point the laser beam at people or animals
!
Let's find out.
On Habré, articles about portable Dragon Lasers, such as Hulk, appeared only a couple of times. In this article I will tell you how you can make a laser that is not inferior in power to most models sold in this store.
Let's cook.
First you need to prepare all the components: - a non-working (or working) DVD-RW drive with a write speed of 16x or higher;
— capacitors 100 pF and 100 mF; — resistor 2-5 Ohm; — three AAA batteries; - soldering iron and wires; — collimator (or Chinese pointer); — steel LED lamp. This is the minimum required for making a simple driver model. The driver is, in fact, a board that will output our laser diode to the required power. You should not connect the power source directly to the laser diode - it will break down. The laser diode must be powered with current, not voltage.
A collimator is, in fact, a module with a lens that reduces all radiation into a narrow beam. Ready-made collimators can be purchased at radio stores. These immediately have a convenient place to install a laser diode, and the cost is 200-500 rubles.
You can also use a collimator from a Chinese pointer, however, the laser diode will be difficult to attach, and the collimator body itself will most likely be made of metallized plastic. This means our diode will not cool well. But this is also possible. This option can be found at the end of the article.
Let's do it.
First you need to get the laser diode itself.
This is a very fragile and small part of our DVD-RW drive - be careful. A powerful red laser diode is located in the carriage of our drive. You can distinguish it from a weak one by its larger radiator than that of a conventional IR diode. It is recommended to use an antistatic wrist strap as the laser diode is very sensitive to static voltage. If there is no bracelet, then you can wrap the diode leads with thin wire while it waits for installation in the case.
According to this scheme, you need to solder the driver. Don't mix up the polarity! The laser diode will also fail instantly if the polarity of the supplied power is incorrect.
The diagram shows a 200 mF capacitor, however, for portability, 50-100 mF is quite enough.
Let's try.
Before installing the laser diode and assembling everything into the housing, check the functionality of the driver. Connect another laser diode (non-working or the second one from the drive) and measure the current with a multimeter. Depending on the speed characteristics, the current strength must be chosen correctly. For 16 models, 300-350mA is quite suitable. For the fastest 22x, you can even supply 500mA, but with a completely different driver, the manufacture of which I plan to describe in another article.
Looks terrible, but it works!
Aesthetics.
A laser assembled by weight can only be boasted of in front of the same crazy techno-maniacs, but for beauty and convenience it is better to assemble it in a convenient case.
Here it’s better to choose for yourself how you like it. I mounted the entire circuit into a regular LED flashlight. Its dimensions do not exceed 10x4cm. However, I do not recommend carrying it with you: you never know what claims the relevant authorities may make. It is better to store it in a special case so that the sensitive lens does not become dusty. This is an option with minimal costs - a collimator from a Chinese pointer is used:
Using a factory-made module will allow you to get the following results:
The laser beam is visible in the evening:
And, of course, in the dark:
Maybe.
Yes, in the following articles I want to tell and show how such lasers can be used. How to make much more powerful specimens, capable of cutting metal and wood, and not just lighting matches and melting plastic. How to make holograms and scan objects to create 3D Studio Max models. How to make powerful green or blue lasers. The scope of application of lasers is quite wide, and one article cannot do it here.
We need to remember.
Don't forget about safety precautions! Lasers are not a toy! Take care of your eyes!
What is the problem?
It’s no secret that the most modest tactical flashlight, mounted on a Weaver rail, like a laser laser, costs at least two to three thousand of original wooden ones, and devices of advanced models are even more expensive. The Weaver bar itself, attached to the barrel, is another one and a half to two thousand. However, in my experience, neither laser lasers nor TFs are widely used in hardball.
However, situations happen when you need to break into a darkened room, basement, etc., where there is nothing to do without a flashlight, besides, tripping over something in the dark is not good for your health and a weapon, for example Drozd, can be damaged, and it’s easier to shoot at the enemy. In addition, such flashlights have three modes - bright, dim and flashing (strobe). When such a strobe is pointed at an enemy in the dark, he becomes somewhat disorientated, which can be used to advantage. And the laser target, for example, can be used to simulate cover, so as not to waste bullets, for zeroing sights, for target designation, and directly for aiming a weapon at a target at medium distances. In addition, these canopies add ambiance to the weapon. But buying expensive devices for the sake of it personally was a bummer for me. Moreover, this idea came to my mind long before hardball - they were shooting rats in the basement. Opponents of such a body kit loudly shout about the unmasking qualities of both the laser target and the TF. So we need to use it wisely, then we will get more positive qualities.
Laser hair removal: contraindications
The laser hair removal procedure has two types of contraindications: absolute and relative. The second type refers to temporary contraindications that can be eliminated.
The procedure is prohibited in the following cases:
- for diabetes mellitus in decompression form;
- oncology;
- period of pregnancy and lactation;
- herpes;
- purulent inflammation of the skin;
- acute infections;
- strong tan;
- somatic skin diseases.
Laser hair removal should be postponed in the following cases:
- phlebeurysm;
- abrasions or cuts;
- respiratory or viral diseases;
- exacerbation of allergies;
- hormonal disorders;
- critical days.
For many people, preparing for summer, for the beach season, is a responsible matter, especially for those who have problem areas with excess, hard and overly abundant vegetation. The solution in such a situation is laser hair removal; the fact of its effectiveness is confirmed by many patients who have undergone the procedure.
Let's start making a tactical flashlight
In general, to do or not to do is up to the fighter. So what's the point? Piss in the toilet, and here's what you need.
To produce a tactical flashlight we will need:
- A whale light with or without an adjustable point width, but definitely not a lamp, not a diode, but a semiconductor one (if you’re in a tank, instead of a light bulb, there’s a small square that burns very brightly and also uses batteries much more economically). For some models, the beam hits 150 - 200 meters (200 - 800 rubles);
- Epoxy plasticine cold welding (70 - 150 rubles).
- Well, for final fixation you will need two clamps or a screw if we are attaching it to the body.
First of all, we zero the sight, unless it is zeroed, of course. After this, we make a pad out of plasticine and place it in the place where the flashlight comes into contact with the weapon. We stick a flashlight on this pad and constantly, until the plasticine hardens, keep the flashlight point on the crosshair of the sight, this is the most crucial moment, if you miss it, you will have to do it again. In my opinion, the optimal distance to the wall where we combine the flashlight point and the crosshair of the sight is 7-10 meters. When the plasticine has completely hardened (for different brands the time ranges from 5 to 20 minutes), we check it again and preferably leave it overnight so that the lantern does not touch anything. Clamps are needed because the plasticine will come off over time; in this design it has the role of a position stabilizer. By the way, in the morning you can tear it off yourself and use a file (how can you do without a file in Russia) to cut off all the excess, after which we attach the structure to the weapon and use a regular marker of the appropriate color to even out the color.
Ready tactical flashlight
What is a laser level
The body of this instrument contains LEDs, which are sources of laser radiation. Using a bright luminous line, you can mark any object in both the horizontal and vertical planes. Moreover, one person can easily cope with this work.
There are three types of lasers:
- prismatic;
- rotary;
- point.
Prism devices create a linear beam projection.
When the luminous line collides with an obstacle, the device records the data and displays the required markings. Such levels are equipped with an auto-leveling system necessary to compensate for errors of up to 6°. The laser beam projection angle does not exceed 120°.
A prism laser level has a short beam range - on average from 10 to 50 m.
The prism laser level allows you to obtain horizontal and vertical planes intersecting at right angles
Rotary devices are classified as professional instruments.
They are equipped with point laser devices, but not fixed ones, but rotating with an adjustable frequency. Designed for marking very large areas, for example, on a construction site. The rotary level can project a plane 360°.
Rotary levels have a longer laser beam range - from 200 to 500 m.
By installing a rotary level in the middle of the room, you can mark all the necessary points along the entire perimeter
The point level is the simplest: the laser device is clearly fixed, and behind it there is only a focusing lens. It directs the light flux to one point. Set up the device manually. Such levels are equipped with one or more lasers. In the latter case, they are directed in different directions, which makes it possible to transfer markings from several planes - walls, floors and ceilings of a large area. The laser beam projection angle does not exceed 160°.
The operating range of the point level is from 15 to 50 m, depending on the model.
Compact and universal point laser level is designed for any leveling work at short distances
What about the laser center?
The situation with LCC is similar. We choose any laser keychain, pointer or some other crap with a laser (thanks to the whales, the choice is huge). Of course, it will be better if it is in a metal case, but a plastic one will last a long time. Then everything is the same as with the lantern. The difference is that there is no need for rigid fastening such as clamps or screws. The keychain has a negligible weight and is small in size, so it holds up well. Well, if you fix it at all. By the way, these key fobs are of two types, where you need to hold the button so that the laser shines and where you press the button - it lights up, press it - it goes out. I prefer the first option, the batteries last longer. The second option is no, no, but you’ll forget to turn it off.
The principle and mechanism of operation of a laser epilator
Operating principle: a laser light pulse affects melanin (coloring pigment), which, in turn, absorbs thermal energy that destroys the follicle. In this case, hair removal occurs due to strong heating of the hair follicle.
The laser hair removal technology of other devices operating at longer wavelengths is somewhat different. Penetrating into the skin up to 4 mm, the laser beam destroys not only the hair follicle, but also affects the vessel that feeds it.
The safety of the laser procedure is due to the fact that any effect on the hair does not affect the skin that is being treated.
The action of laser hair removal is aimed at melanin, this is how it happens:
- melanin is a pigment that gives color to our eyes, hair and skin;
- when a laser pulse acts on melanin, heating it, the skin receives only residual heat, since there is not enough melanin in the epidermis for strong heating;
- Since the skin is not susceptible to strong heat, there will be no burn on the skin.
To minimize possible irritation, since the skin is still being treated, a special gel or cream is applied to the skin before and after the procedure.
Question of price?
In total, we’ll match the grandma. A tactical flashlight will cost 300-350 rubles, a laser target designator is even cheaper than 150-200 rubles. Now try to equip a weapon with factory gadgets for that kind of money!?
In principle, it is also possible to install these body kits on pistols, but here a problem immediately arises with the holster.
Well, in short, what I wanted to write. Go for it. I'll be happy to see the comments.
Cats love them!
Another fun activity to do with a laser pointer is to play with your cat and drive her crazy! They especially love more powerful pointers, for example, with a green beam.
When cats see a small dot jumping across the floor, their predatory instincts awaken. It must remind them of a bug or some other insect, but either way, most cats just love chasing the beam from a laser pointer around the room. You can even make them tumble in the air.
I've heard people think it's cruel because cats can't catch the laser, but all the cats I've seen just love it and will pester you until you play with them. Just don't point the beam at their eyes, it's just as harmful to them as it is to people.
Lots of dogs will love playing with lasers too!